Gather Your Tools
Learning Objectives
After completing this unit, you’ll be able to:
- Enter SQL into Marketing Cloud Engagement.
- Create specialized data extensions for Journey Builder.
- Insert AMPscript into Journey Builder messages.
Introduction
If you look at a typical journey in Journey Builder, you’ll likely see many splits in the journey’s path. These splits are based on contact attributes, contact behavior, decisions from Einstein, or just random distribution. They’re an important part of guiding contacts along the journey to get them where they need to be. Journey Builder splits give you the ability to create the right experience based on individuals' behavior. And while some scenarios can be achieved using the splits as-is, others require additional configuration.
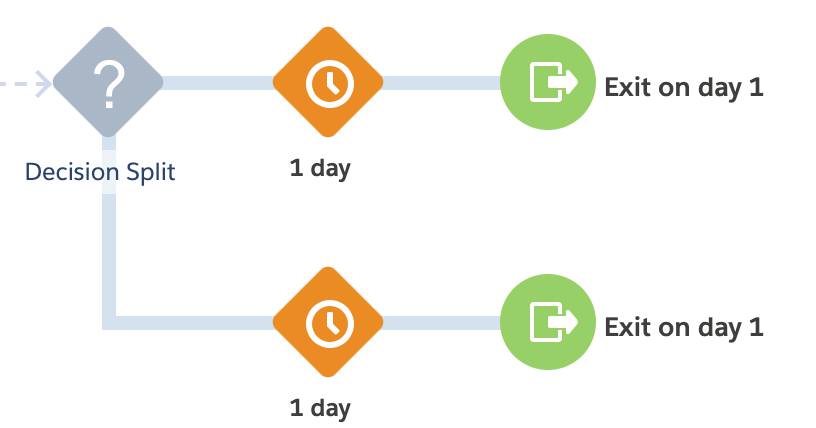
For example, the standard engagement splits in Journey Builder (which are based on contact behavior) don’t work well with links that use AMPscript for personalization. If your contact opens or clicks an email link that uses AMPscript, a standard engagement split can’t make use of that data to guide the next step in the journey. But there is a way! And we cover everything you need to know in this module. With a combination of AMPscript and SQL, you can make a decision split (which uses contact information) perform like an engagement split. In other words, your journey can respond to customer engagement—regardless of the link type (as shown in this example).

Let’s take a look at the tools you need to create this solution.
Data Extensions
No surprise that in order to use data, you need a place to put it. This solution requires you to create a data extension that contains three fields.
- SubscriberKey: The key used to identify the subscriber.
- ClickDate: The date the click (or other behavior) occurred.
- LinkName: The name that identifies the link in the email message, known as the tracking alias.
From there, put this data extension into an attribute group and relate the information to your account’s contact data via the SubscriberKey value. This connection makes sure you can access all of the relevant information as you create your engagement splits.

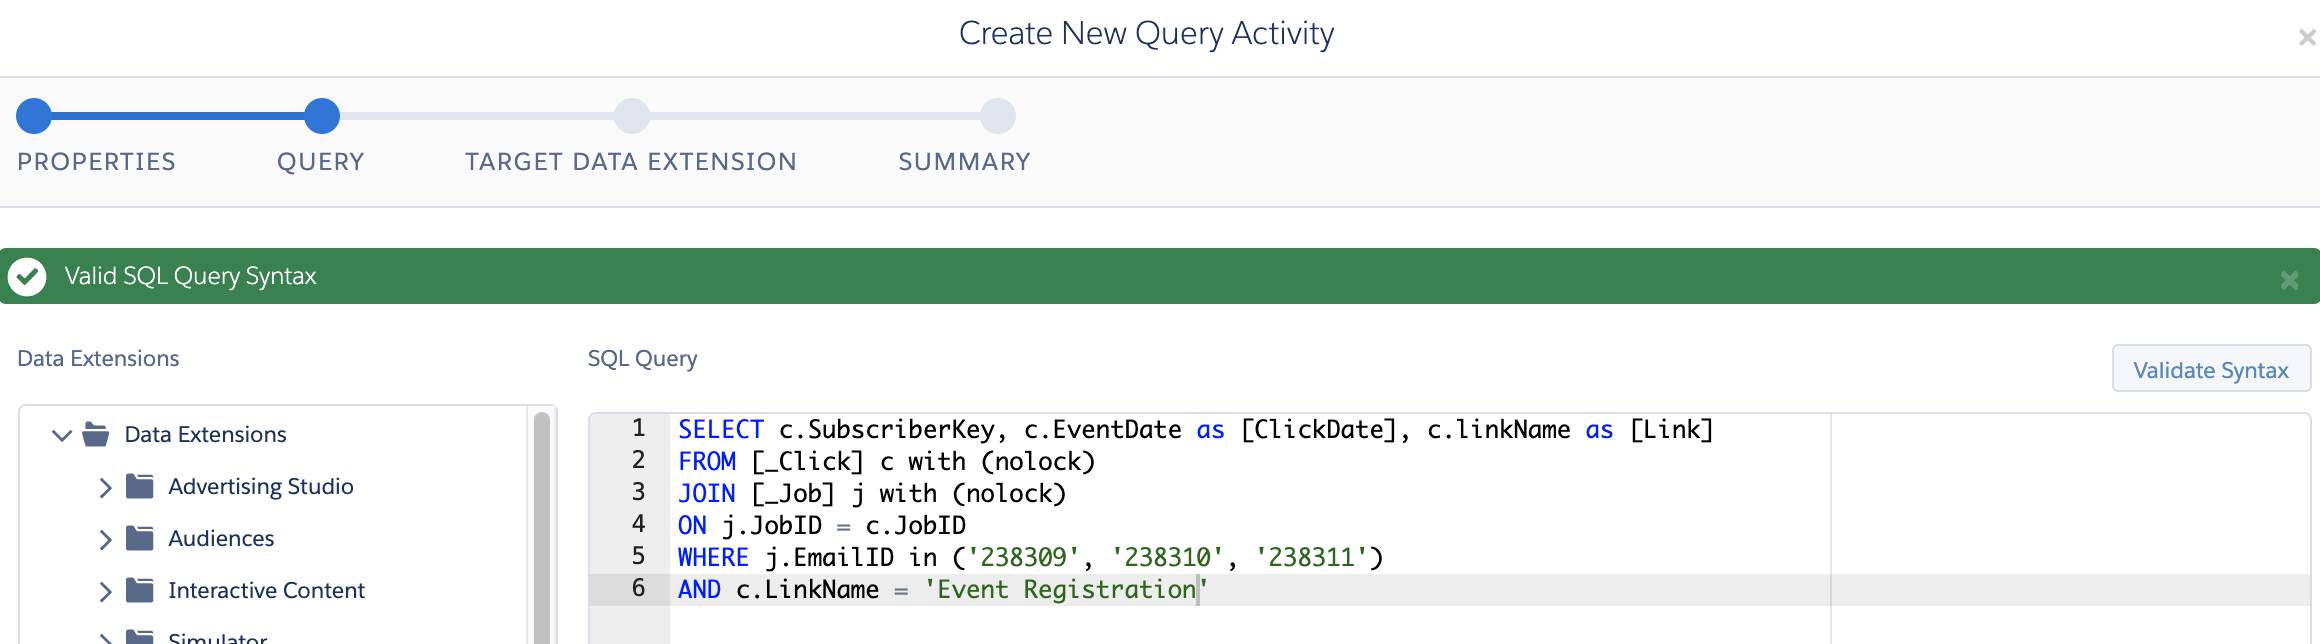
SQL
This solution uses a query activity containing Structured Query Language (SQL) to collect the journey’s contact records from the data extension you create. We show you the actual SQL query in the next unit—for now, just know that SQL helps you identify the contacts who received a specific email and clicked the desired links. We recommend that you make the values that identify your links (that is, the tracking alias) unique. SQL queries tend to run faster and more efficiently when you reduce the amount of data they have to consider during the process.
Query Activity
You don’t want to go in and manually find all of these values every day, right? That’s why you also set up an automation that contains the SQL query, and run it for the duration of your campaign. We show you how in the next unit.
Decision Splits
The decision splits in your journey control who receives further messaging and what types of messages they receive. For example, you could send a follow-up email to contacts who didn’t click an offer they received. And, with a decision split, you could skip the reminder for contacts who already took advantage of the deal. These decision splits look at the behavioral information stored in your data extension and move your contacts in the right direction.
Put Your Toolbox Together
Journey Builder lets you customize your contact interactions, and you can always find different ways to make your interactions more specific and detailed. But this unit identifies the basic tools you need to put the entire solution together and accomplish your goal. In the next unit, we join digital marketing manager Isabelle as she works in the Northern Trail Outfitters account to make it happen.