Set Up Web Chats for Your Console
Follow Along with Trail Together
Want to follow along with an expert as you work through this step? Take a look at this video, part of the Trail Together series.
(This clip starts at the 25:08 minute mark, in case you want to rewind and watch the beginning of the step again.)

Introduction
To further raise the level of Ursa Major Solar’s customer service, Ada would like her team to be able to chat with customers directly from the company’s website. Make this happen for her by setting up Chat with a Guided Setup Flow. Chat provides another channel for customers to access the customer support team—and get their questions answered and problems solved on the spot.
Start by creating a chat queue, then select your chat reps, and get the snap-ins code snippet to add chat to your website, all through one setup flow.
- Click the gear icon
 and select Service Setup.
- Under Recommended Setup click View All.
- Click Chat with Customers.
- Click Start.
- For Queue Name enter
Ursa Major Solar Chat.
- In the Name This Group, enter
Chat Desk.
- Click the checkbox next to Ada Balewa and next to your name in the list of users, and click Next.
- If you see a page that says "Prioritize chats with your other work" type
1in the Priority box next to your Ursa Major Solar Chat queue and click Next.
- Leave the defaults for the Work Item Size field and Agent Capacity field.
- Click Next.
- Enter
https://*.force.comfor the Website URL. For the Salesforce Site Domain field, typeyour initials + today’s date (MMDDYY).
Note: if you've already set up Chat in another project, you will not see this option, and you can move to the next step.
- If you see the Salesforce Terms of Use checkbox, select the I have read and accepted the Salesforce site Terms of Use box, then click Next.
- Otherwise, click Next.
- On the What's your type screen, select Service, and click Next.
- Turn Offline support on, select the Required box next to the subject field, and click Next.
- Do not copy the code from this Chat Code Snippet box, just click Next.
- Click Done.
Copy the Embedded Service Code Snippet
- From Service Setup, enter
Embedded Service Deploymentsin the Quick Find box and select Embedded Service Deployments.
- Click the down arrow next to Chat Desk and select View.
- Click Get Code in the Embedded Service Code Snippets section.
- In the Chat Code Snippet section, click Copy to Clipboard to copy the provided code snippet. Paste it somewhere safe. You'll need it shortly.
Tip: Paste your code snippet into a plain text editor or HTML editor to make sure everything stays in the right format when you paste it into your Visualforce page later.
- Close the Embedded Service Code Snippets window.
Add the Omni-Channel Utility
The Omni-Channel utility lets your Lightning console users receive work requests routed through Omni-Channel. Now that you have everything in place for your Omni-Channel utility, add it to the Ursa Major Solar Service Console so Ada and her team can access it.
- If you’re not already there, click the gear icon
 and select Service Setup.
- Enter
App Managerin the Quick Find box, and select App Manager.
- Click the dropdown next to Ursa Major Solar’s Service Console, and select Edit.
- Click Utility Items from the menu on the left side of the screen.
- Click the Add Utility Item button and select Omni-Channel.
- Click Save, then click
 .
.
- Click the App Launcher
 and select Ursa Major Solar Service Console.
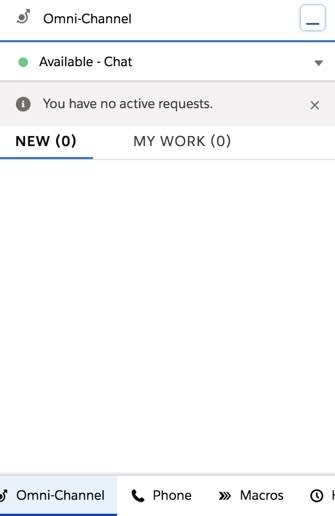
- Click Omni-Channel from the utility bar at the bottom of the console.
- Click the dropdown next to Offline, and select Available - Chat as your status.
Get an Inside View with Conversation Monitoring
- Click the gear icon
 and select Setup.
- Enter
Supervisor Settingsin the Quick Find box, and select Supervisor Settings.
- Enable all four options under the Conversation Monitoring section:
-
Conversation monitoring
-
Agent sneak peek
-
Customer sneak peek
-
Whisper messaging
- Select Save.
- Click the App Launcher
 and select Ursa Major Solar Service Console.
- Click the dropdown next to the object (Accounts, Cases, etc.) at the top of the console, and click Edit.
- Click Add More Items.
- Click the plus
 next to Command Center, and click the Add 1 Nav Item button.
- Click Save.
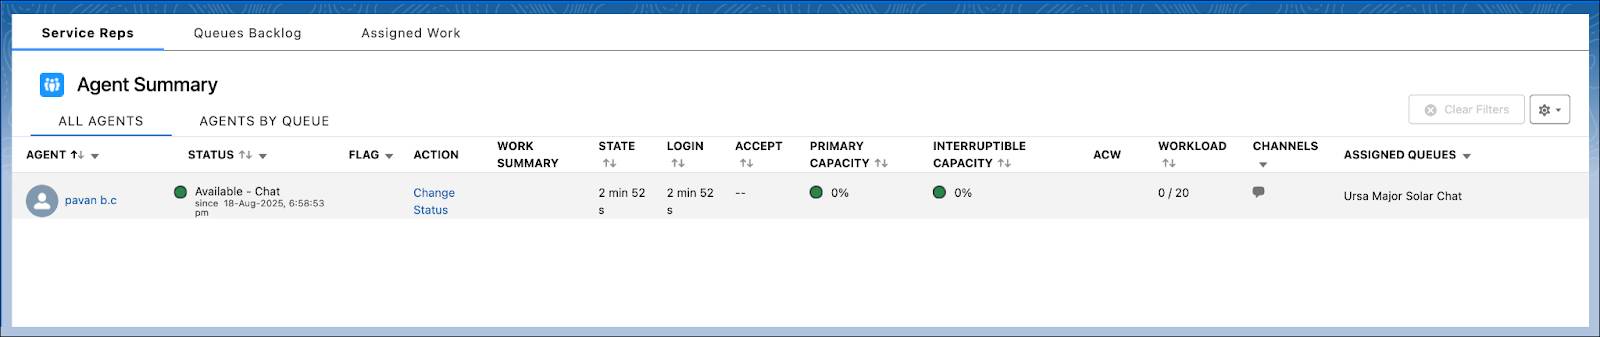
- Choose Omni Supervisor from the Navigation Items dropdown in the Console.
- Note all the features available to managers when viewing Omni-Channel support information, divided up into three tabs: Service Reps, Queues Backlog, and Assigned Work.
Set Yourself Up to Test
Congratulations! You have your console set up for omni-channel support. Test the web chat by experiencing what a live chat session is like from Ada’s perspective and from a customer’s perspective.
Note: In order to test the web chat, you use Visualforce pages and your snap-ins code. The steps you take are specific to the testing stage of this project and may differ in real-life implementations.
- Click the gear icon
 and select Service Setup.
- Enter
Visualforcein the Quick Find box, and select Visualforce Pages.
- Click New.
- For Label, enter
Web Chat.
- For Name, enter
Web_Chat.
- For description, enter
Ursa Major Solar’s test website for using web chat.
- Replace the existing code with the following code:
<apex:page>
 <h1>Let’s start chatting...</h1>
 <br />
 Click the button to start a chat.
 <br />
 [PASTE YOUR SNAP-INS CODE SNIPPET HERE]
</apex:page>
- Replace [PASTE YOUR SNAP-INS CODE SNIPPET HERE] with the snap-ins code snippet you saved earlier. If you want to remember where the snippet starts, you can leave the code comment in the code.
- Click Save.
Allowlist Your Visualforce Page URL
Allowlisting your Visualforce page URL allows web browsers to access resources from origins other than their own. That way Ursa Major Solar can easily allow customers to access snap-in chats. Use CORS to set this up for Ursa Major Solar’s page.
- Enter
CORSin the Quick Find box, and select CORS.
- Click the New button.
- Enter
https://*.vf.force.com - Click Save.
Test, Test, Test!
- Click the App Launcher
 and select Ursa Major Solar Service Console.
- Click the gear icon
 and select Service Setup, which opens another browser tab.
- Enter
Visualforcein the Quick Find box, and select Visualforce Pages.
- Click
 next to the Web Chat page to open it in a new tab or window.
- Click the snap-in button (chat button) at the bottom of the page to request a chat.
- In Subject field enter
Solar Panel Warranty.
- Click Submit.
- Go back to your other tab/window displaying the Ursa Major Solar Service Console.
- Accept the chat request in the Omni-Channel utility by clicking the check mark.
- Chat back and forth to test.
- End the chat from either the rep or the customer chat window.
Congratulations! You’ve set up Ursa Major Solar’s Service Console to help Ada Balewa and her team optimize their case management experience. You created and customized Ursa Major Solar’s service console, added utility items, and enabled access for Ada and her team. They’re ready to handle any case that comes their way, through any channel.
Resources
- Salesforce Help: Chat with Customers on Your Website
- Salesforce Help: Set Up Omni-Channel Routing for Chats
- Salesforce Help: Command Center for Service