Add the Softphone Utility to Your App
Follow Along with Trail Together
Want to follow along with an expert as you work through this step? Take a look at this video, part of the Trail Together series.
(This clip starts at the 18:45 minute mark, in case you want to rewind and watch the beginning of the step again.)
Introduction
Ada wants her team to have quick access to productivity tools, like softphones and History. Using the utility bar in the console is a great way to do this. The utility bar functions in the same way as shortcuts or bookmarks, where you can access various tools with one click. It appears as a fixed footer in your Lightning console app and opens utilities in docked panels. Some utilities support pop-out, which lets them open in a new browser window. Softphone utilities let your Lightning console users make calls directly from Salesforce. Before you add the softphone utility to your Lightning console app, first set up and configure the softphone and Open CTI.
Install the Open CTI Demo Package
To set up the softphone utility for Ada, install an Open CTI Demo package in your Trailhead Playground. First, scroll to the bottom of this page and click Launch. If you see a tab in your org labeled Install a Package, great! Follow the steps below.
If not, click the App Launcher  then click Playground Starter and follow the steps. If you don’t see the Playground Starter app, copy this package installation link and check out Install a Package or App to Complete a Trailhead Challenge on Salesforce Help.
- Click the Install a Package tab.
- Paste
04t41000000bSXhinto the field.
- Click Install.
- Select Install for All Users, then click Install.
When the package is finished installing, you see a confirmation page and get an email to the address associated with your playground.
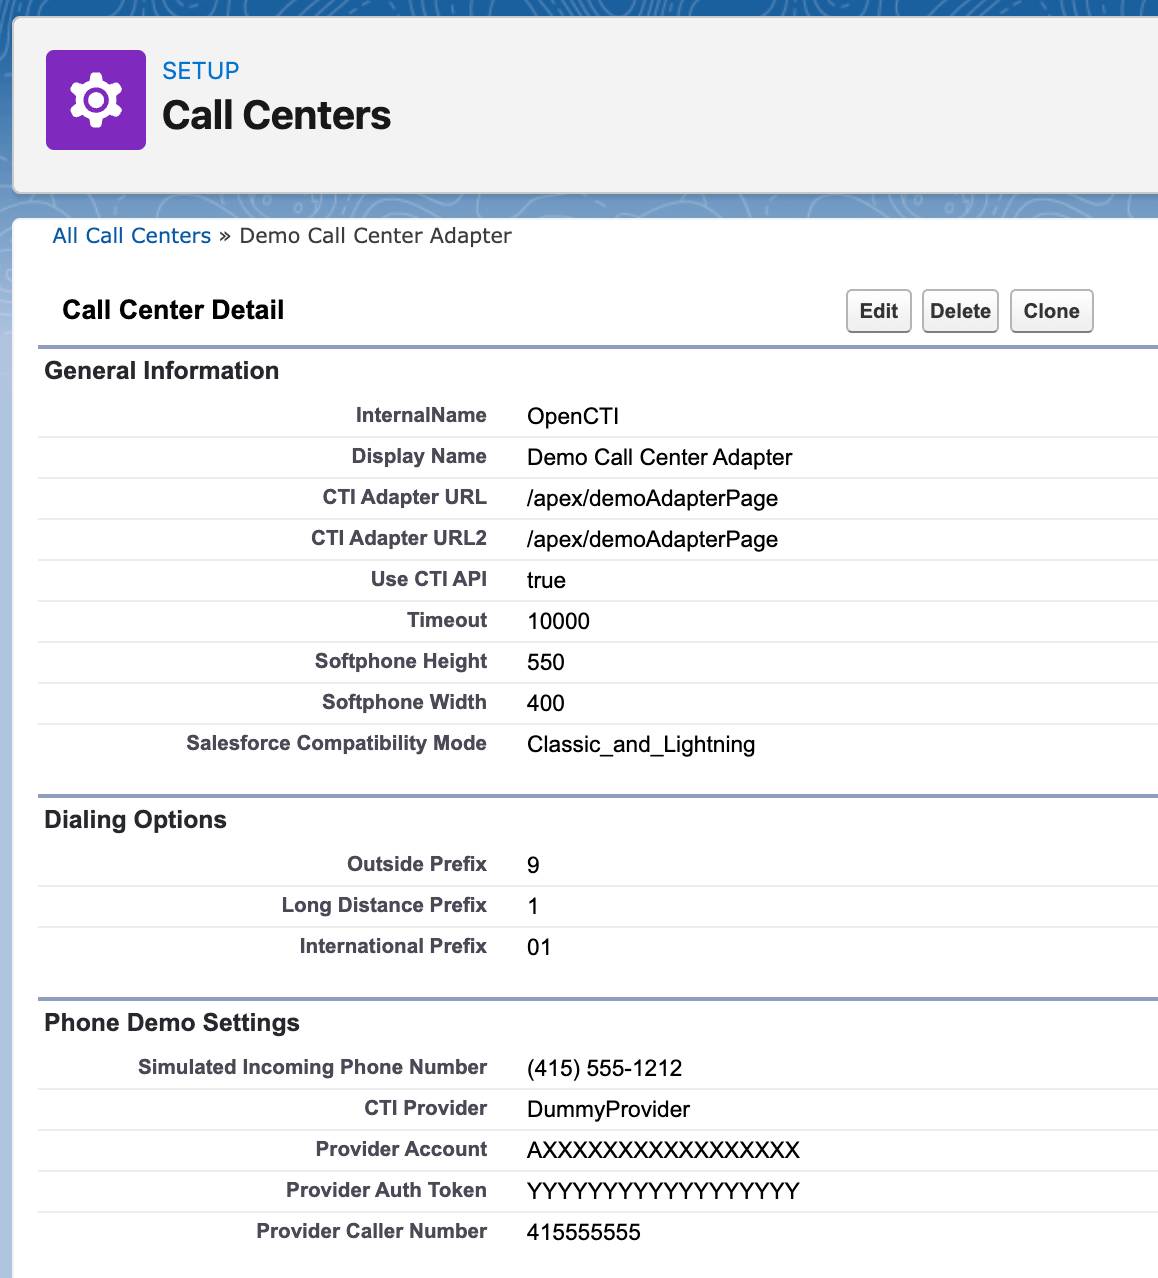
Configure Call Center
Next, configure the call center for Ursa Major Solar. Once it’s set up, anyone who’s a call center user can use the softphone utility to help customers with their cases.
- Click Setup.
- Enter
Call Centersin the Quick Find box, and select Call Centers.
- Click Continue if prompted.
- Click Del next to Demo Call Center Adaptor, and click OK on the pop-up box. This deletes the empty call center record.
- Right-click and select Save Link As on this callcenter.xml file and save it to place on your device you'll remember.
- From within Call Centers, click Import.
- Click Choose File, select the callcenter.xml file you just downloaded, click Open, and click Import.
- Once the imported Demo Call Center Adapter record appears, ensure CTI Adaptor URL and CTI Adaptor URL2 are set to /apex/demoAdapterPage.
- Scroll down to Call Center Users and click Manage Call Center Users.
- Click Add More Users.
- Click Find.
- Select yourself and Ada Balewa from the list of names that appears, and click Add to Call Center.
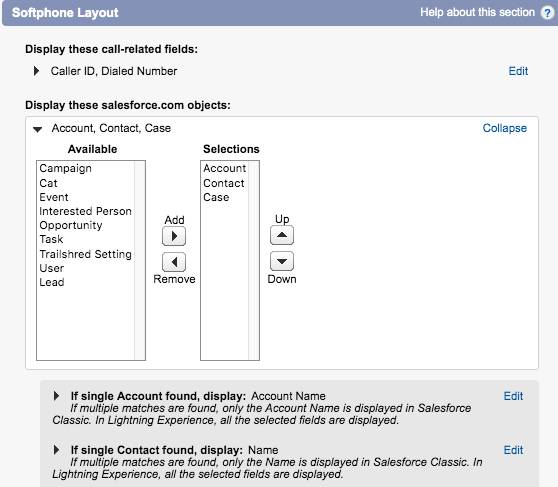
Configure Softphone Layouts
Now that you’ve installed the softphone, review the layout settings and assign which profiles see the layout you customized.
- Click the Home tab for Service Setup Home.
- Enter
Softphone Layoutsin the Quick Find box, and select Softphone Layouts.
- Click Continue if prompted.
- Click New and fill in the details.
- Enter Softphone Layout Assignment in the Name field.
- In the section Display these salesforce.com objects, click Add/Remove Objects.
- Replace Lead with Case.
- Review the remaining softphone settings to see customization options, but leave the rest as default.
- Click Save.
- Click Softphone Layout Assignment.
- Assign the Ursa Major Softphone layout (Softphone Layout Assignment) to the Custom: Support Profile and the System Administrator profile.
- Click Save.
Test It!
- Click the App Launcher
 and select Ursa Major Solar Service Console.
- Click the Phone in the bottom left on the utility bar. (If you don't see the Phone on the utility bar, refresh the page.)
- If you see a pop-up, close out of it.
- Log in with any username and any password. (Note: if you don't see the full username and password page, and have trouble logging in, please click the pop-out icon in the top right corner of the softphone utility to view full-screen.)
- In Enter a Name or Number type
Jackand press Enter on your keyboard.
- Click Jack Rogers. Note that the Contact record opens while calling the contact.
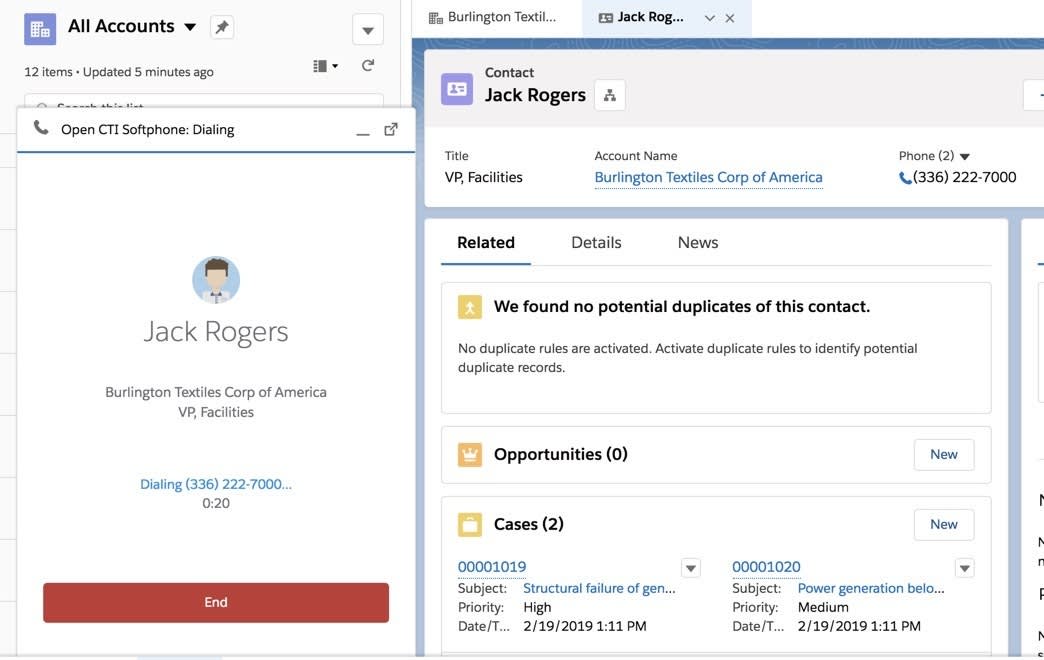
- Click End to end the call.
- Click the phone icon on the top-right of the softphone to simulate an incoming call.
- Click Decline.
Awesome! The softphone utility is ready to go. You have one more communication tool, Live Agent, to enable and customize so that Ada and team can access it in the Service Console. Move to the next step to complete the Live Agent setup and customization for Ada and her team.
Resources
- Salesforce Help: Softphones for Lightning Console Apps
- Salesforce Help: Salesforce Open CTI
- Salesforce Help: Assigning a Softphone Layout to a User Profile
- Salesforce Help: Customizing Softphone Layouts