Configure Salesforce Knowledge
Learning Objectives
In this project, you’ll:
- Enable Lightning Knowledge and assign appropriate user licenses.
- Customize page layouts and record types to support knowledge article management.
- Customize access to, permissions for, and visibility of knowledge tools and processes.
- Create and manage articles to ensure quality of information.
- Manage and close cases more efficiently using knowledge articles.
Looking to gain some knowledge about Salesforce Knowledge? You came to the right place! Learn all about Salesforce Knowledge by helping Ursa Major Solar, Inc., a Southwest-based supplier of solar components and systems, get set up with all of the amazing features Knowledge has to offer. You’re acting as Ursa Major Solar’s admin today, helping product support specialist Ada Balewa. She needs Knowledge-specific permissions and settings enabled to help her successfully create and manage knowledge articles and use those articles to close cases and navigate customer service responsibilities.
Follow Along with Trail Together
Want to follow along with an expert as you work through this step? Take a look at this video, part of the Trail Together series.
Assign the Knowledge User License
By default, all internal users with read permissions, can read knowledge articles. But in order to publish, archive, delete, and manage articles, you need additional permissions. Start by giving Ada Balewa Lightning Experience User permissions so she’s able to access Knowledge in the Lightning Experience interface.
- Click the Setup gear
 and select Service Setup.
- From the Recommended Setup flows, on the Add Your Users tile, click the Get Started button.
- Fill in the information:
- Email (Username):
ada.balewa@ursamajorsolar+your initials+today’s date (DDMMYY).com - First Name:
Ada - Last Name:
Balewa - Profile:
Custom:Support Profile
- Click Add User, then Finish. (Note: If you have already added Ada Balewa in another project you do not need to complete steps 2–4.)
Next, to prepare Ursa Major Solar’s org for testing, grant administrators access to log in to other users’ accounts. This lets you test anything you set up for Ada from her perspective.
- From Service Setup, enter
Usersin the Quick Find box and select Users.
- Click Ada Balewa.
- Click Ada’s profile Custom: Support Profile.
- Click Edit. Note: Don't see the Edit button? You may have the Enhanced Profile User Interface on; turn it off for this section of instructions.
- Under Administrative Permissions, select Lightning Experience User.
- Click Save.
- Enter
Login Access Policiesin the Quick find box and select Login Access Policies.
- Enable Administrators Can Log in as Any User.
- Click Save.
- Enter
Session Settingsin the Quick Find box and select Session Settings.
- Disable Force relogin after Login-As-User. (You may need to scroll up in order to find this setting.)
- Click Save.
Use the Knowledge Setup Flow
The Knowledge setup flow is designed to be a quick start for getting completely set up with Knowledge. Once you add users, you’re able to create data categories and articles all within one easy workflow!
- Click the Service Setup Home tab.
- To open the Lightning Knowledge Setup flow, under Recommended Setup, click the Knowledge Setup tile. If you do not see Knowledge Setup click View All.
- Click Start.
Click the check all checkbox next to Full Name to select yourself and Ada Balewa as Lightning Knowledge Authors (may show a minus sign in checkbox to start; ensure "2 items selected" is listed above the check all checkbox), then click Next, Next, Finish. Note: Hold off on creating data categories and articles; you do this shortly.

Check That Lightning Knowledge Is Enabled
After completing the Knowledge setup flow, Knowledge is automatically enabled. You can double-check this in your org by following these steps.
- Enter
Knowledge Settingsin the Quick Find box and select Knowledge Settings.
- Verify that Enable Lightning Knowledge is checked.
- Click the Object Manager tab.
- Verify that the Knowledge object is now visible in the list of objects.
- Click the Home tab.
- Enter
Usersin the Quick Find box and select Users.
- Click Ada Balewa.
- Verify that the Knowledge User license is enabled; you see a check next to Knowledge User.
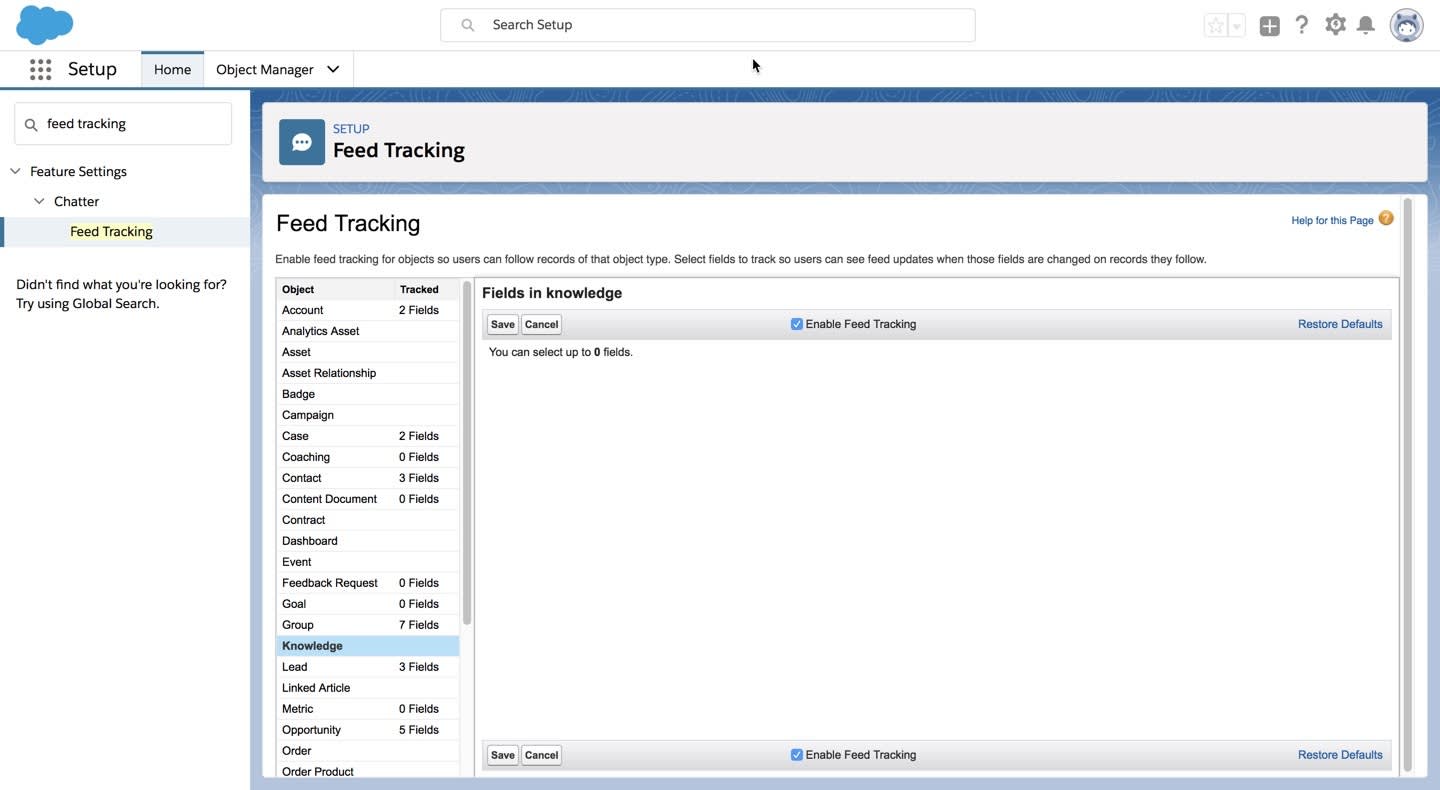
Enable Feed Tracking for Knowledge
Enabling feed tracking allows for collaboration on articles using Chatter and ensures that Ada is aware of all updates or changes within Knowledge. Go ahead and enable this feature.
- Click the Setup gear
 and select Service Setup.
- Enter
Feed Trackingin the Quick Find box and select Feed Tracking.
- From the list of objects, select Knowledge.
- Select the Enable Feed Tracking checkbox.
- Click Save.

Now that Ada is in the system and Lightning Knowledge is enabled, head to the next step, and configure record types and page layouts in preparation for creating Knowledge Articles.
Resources