Build a Flex Prompt Template
Learning Objectives
In this project, you’ll:
- Create a Flex prompt template using Prompt Builder.
- Create a Template-Triggered Prompt Flow to use in a Flex prompt template.
Before You Start
Before you start this module, consider completing the following recommended content.
Introduction
Flex prompt templates in Prompt Builder offer a versatile and efficient way to automate the creation of text for PDFs, social media posts, newsletters, emails, record fields, and more with Einstein generative AI and the LLM (large language model). Unlike the Sales Email or Field Generation prompt templates in Prompt Builder, Flex templates don’t have predefined entry points. What does this mean? You can select any object in your organization to use in the template and apply the completed prompt wherever you see fit. Whether you're using Apex, Flow, REST API, or Agentforce, Flex templates are designed to fit your needs.
In this project, you learn how to create and test a Flex prompt template in Prompt Builder. You also discover how to use a flow to improve prompt responses and handle large data sets effectively. Your task is to design a newsletter for a popular vacation destination, Coral Cloud Resorts, highlighting the events happening on the property during the guest’s stay.
Sign Up for a Custom Playground with Einstein AI
To complete this project, you need a special, limited-time custom playground that contains Einstein AI and our sample data.
- Click Create Playground.
- Your new org is automatically attached to your Trailhead account!
- Make note of your org's expiration date and complete this badge before then.

Enable Einstein in Setup
- If you don’t already have your Einstein AI-enabled trial org open, scroll down to the Challenge section and click Launch to open it.
- Click
 and click Setup. The Setup page opens in a new tab.
- In the Setup Quick Find box, search for and select Einstein Setup.
- Ensure the Turn on Einstein toggle is set to On. It may already be on if you’ve completed the Quick Start: Agentforce project.

- Refresh your browser window. This reveals new admin settings now that Einstein is enabled.
Add Experience Data
Before you get started with Prompt Builder, let’s create two new resort events to use as test data.
First, you create a karaoke night event.
- In your custom playground, click the App Launcher
 and enter
 Experiencein the search bar.
- Click Experiences.
- Click New.
- For Experience Name, enter
Family Karaoke Night.
- For Activity Level, select Low.
- For Capacity, enter
50.
- For Default Start Time, select 6:00 PM.
- For Description, paste the following text:
Join us for Family Karaoke Night and sing your heart out with your loved ones! It's a fun-filled evening where you can showcase your talent, laugh together, and create unforgettable memories.
- For Duration, enter
2.
- For Location, enter
Melody Lounge.
- For Type, select Family & Kids’ Activities.
- Click Save & New.
Next, you create a yoga event.
- For Experience Name, enter
Sunrise Yoga.
- For Activity Level, select Medium.
- For Capacity, enter
35.
- For Default Start Time, select 7:00 AM.
-
For Description, paste the following text:
Start your day with Sunrise Yoga on the beach, where you can stretch under the warm morning sun and listen to the soothing sound of the waves. It's the perfect way to feel refreshed and ready for a fun day ahead!
- For Duration, enter
1.
- For Location, enter
Cocoa Shore.
- For Type, select Fitness & Exercise.
- Click Save.
Create a Flex Template
With the data ready, it’s time to create a new Flex prompt template. This step establishes the foundation for your prompt. As you set up Flex templates in your own projects, choose your API names carefully because they will be used in templates that use Apex or Flow.
- Click
 and click Setup.
- In the Quick Find box, enter
prompt, then click Prompt Builder.
- Click New Prompt Template.
- Complete the template setup by selecting:
- Prompt Template Type: Flex
- Prompt Template Name:
New Guest Newsletter
- API Name:
New_Guest_Newsletter
- Template Description:
Newsletter for incoming resort guests.
- Prompt Template Type: Flex
- For Flex templates, you can add up to five resources. Under Inputs (Optional), add two resources with the object type. For the first one, enter:
- Name:
Reservation
- API Name:
Reservation
- Source Type: Object
- Object: External Reservation
- Name:
- To add the second one, click Add, then enter:
- Name:
Experience
- API Name:
Experience
- Source Type: Object
- Object: Experience
- Name:
- Click Next. The Prompt workspace opens.
Create a Prompt
Excellent. For this scenario, we’ve provided a prompt to help get you started with creating the resort newsletter. You’ll notice it includes merge fields for the guest reservation information and the resort experience details. If you’re interested in learning about what makes a great prompt, check out the Prompt Fundamentals badge.
Paste the following text into the Prompt workspace:
You're the Director of Fun at Coral Cloud Resorts writing a newsletter to welcome {the new guest} and inform them of upcoming activities during their stay. The purpose of the newsletter is to get guests excited about staying at the resort. When I ask you to create the newsletter, you must strictly follow my instructions below.
Instructions:
Introduce the resort in a newsletter no longer than three paragraphs.
Inform the guests about their reservation using the following details:
Check In: {Check-in Date}
Check Out: {Check-out Date}
Room Selection: {Room Type}
Include a bulleted list of the experiences available during the guests stay, including the description and the locations. The experiences are as follows:
Experience Name: {Experience Name}
Experience Location: {Experience Location}
Experience Details: {Experience Details}
Use clear and straightforward language using the active voice and strictly avoiding the use of filler words and phrases and redundant language. Be conversational.
Do not attribute any negative traits in the summary.
End with a call to action for readers to look at our website for these offers.
Now create the newsletter.
Add Merge Fields
Within your new prompt, the merge fields–the text enclosed in curly braces–add context. In Prompt Builder, you can easily incorporate relevant data from CRM, Data 360, or external sources (via Data 360) by selecting the resource from the Resource picklist. You do that next.
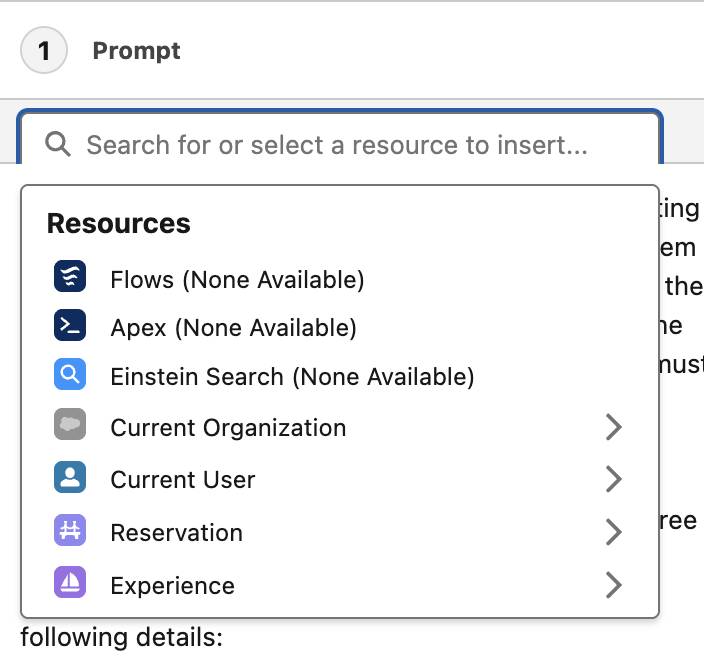
- Find the text {the new guest} in the prompt and delete it. To replace that text with the correct merge field, click Insert Resource and select Reservation > External Guest > First Name.
- Find the text {Check-in Date} in the prompt and delete it. Click Insert Resource and select Reservation > Check-in Date.
- Find the text {Check-out Date} in the prompt and delete it. Click Insert Resource and select Reservation > Check-out Date.
- Find the text {Room Type} in the prompt and delete it. Click Insert Resource and select Reservation > Room Type.
- Find the text {Experience Name} in the prompt and delete it. Click Insert Resource and select Experience > Experience Name.
- Find the text {Experience Location} in the prompt and delete it. Click Insert Resource and select Experience > Location.
- Find the text {Experience Details} in the prompt and delete it. Click Insert Resource and select Experience > Description.
- Under Models, select OpenAI GPT 4 Omni Mini.
- Click Save.
Your prompt template should read:
You're the Director of Fun at Coral Cloud Resorts writing a newsletter to welcome Input:Reservation.External_Guest__r.First_Name__c and inform them of upcoming activities during their stay. The purpose of the newsletter is to get guests excited about staying at the resort. When I ask you to create the newsletter, you must strictly follow my instructions below.
Instructions:
Introduce the resort in a newsletter no longer than three paragraphs.
Inform the guests about their reservation using the following details:
Check In: Input:Reservation.Check_in_Date__c
Check Out: Input:Reservation.Check_out_Date__c
Room Selection: Input:Reservation.Room_Type__c
Include a bulleted list of the experiences available during the guest’s stay, including the description and the locations. The experiences are as follows:
Experience Name: Input:Experience.Name
Experience Location: Input:Experience.Location__c
Experience Details: Input:Experience.Description__c
Use clear and straightforward language using the active voice and strictly avoiding the use of filler words and phrases and redundant language. Be conversational.
Do not attribute any negative traits in the summary.
End with a call to action for readers to look at our website for these offers.
Now create the newsletter.
Great work! Your prompt template is now complete and ready to be tested.
Test the Prompt
Let’s use the Preview functionality with two fields for test data, Experience and Reservation. In Preview, you can select test data for your prompt template to see what a generated response would look like.
- Click the Preview button to open Preview Settings.
- In the Reservation field type,
erand select any reservation.
- In the Experience field type,
Sunand selectSunrise Yoga.
- Click Preview and review the output of your prompt template.
In the Generated Response section, you can see how the Reservation and Experience data personalizes the newsletter for your guest. However, there are multiple events at the resort. You want the newsletter to share more than just one event. In the next step, learn how to use flows to add additional content–in this case, additional guest experiences.