Build a Reusable UI Component with Lightning Web Components
Follow Along with Trail Together
Want to follow along with an expert as you work through this step? Take a look at this video, part of the Trail Together series.
(This clip starts at the 46:56 minute mark, in case you want to rewind and watch the beginning of the step again.)
Introduction
Lightning web components are custom HTML elements that use the Web Components standards and are built with HTML and modern JavaScript. A Lightning web component (LWC) runs in the browser natively and allows developers to customize the out-of-the-box user interface.
Create and Deploy a Lightning Web Component
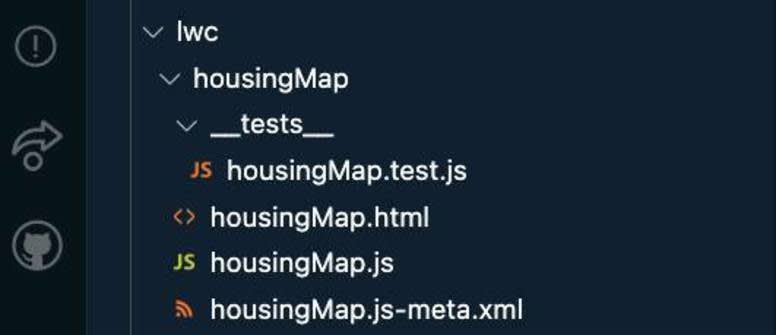
- Under the force-app/main/default, right-click the lwc folder and select SFDX: Create Lightning Web Component.
- Name the Lightning web component
housingMapand select the main/default/lwc directory.
- You see these files: an HTML file, a JavaScript file, a metadata XML file, and a test.js file.
- In the HTML file, housingMap.html, copy and paste the following code.
    <template>
  <lightning-card title="Housing Map">
    <!-- Explore all the base components via Base component library
    (https://developer.salesforce.com/docs/component-library/overview/components)-->
      <lightning-map map-markers={mapMarkers}> </lightning-map>
  </lightning-card>
</template>
- Save the file.
- In the JavaScript file, housingMap.js, copy and paste the following code.
import { LightningElement, wire } from "lwc";
import getHouses from "@salesforce/apex/HouseService.getRecords";
export default class HousingMap extends LightningElement {
    mapMarkers;
    error;
    @wire(getHouses)
    wiredHouses({ error, data }) {
        if (data) {
        console.log(data);
    }
  }
}Next, let's add code to transform the data as needed by the lightning-map Base component. Replace the code after if (data) { with the following lines.
// Use JavaScript Map function to transform the Apex method response wired to the component into the format required by lightning-map
          this.mapMarkers = data.map((element) => {
                return {
                    location: {
                        Street: element.Address__c,
                        City: element.City__c,
                        State: element.State__c
                    },
                    title: element.Name
                };
            });
            this.error = undefined;
        } else if (error) {
            this.error = error;
            this.mapMarkers = undefined;
The final code in the housingMap.js file should look like this.
import { LightningElement, wire } from "lwc";
import getHouses from "@salesforce/apex/HouseService.getRecords";
export default class HousingMap extends LightningElement {
    mapMarkers;
    error;
    @wire(getHouses)
    wiredHouses({ error, data }) {
        if (data) {
         // Use JavaScript Map function to transform the Apex method response wired to the component into the format required by lightning-map
          this.mapMarkers = data.map((element) => {
                return {
                    location: {
                        Street: element.Address__c,
                        City: element.City__c,
                        State: element.State__c
                    },
                    title: element.Name
                };
            });
            this.error = undefined;
        } else if (error) {
            this.error = error;
            this.mapMarkers = undefined;
        }
    }
}- Save the file.
- In the XML file, housingMap.js-meta.xml, make the code changes to match lines 4-7.
<?xml version="1.0" encoding="UTF-8"?>
<LightningComponentBundle xmlns="http://soap.sforce.com/2006/04/metadata">
 <apiVersion>59.0</apiVersion>
 <isExposed>true</isExposed>
  <targets>
 <target>lightning__HomePage</target>
</targets>
</LightningComponentBundle>
- Save the file.
- Right click and select SFDX: Deploy This Source to Org.
Add the Component to the App Home
- In Visual Studio Code, open the Command Palette by pressing Ctrl+Shift+P (Windows) or Cmd+Shift+P (macOS/Linux).
- Type
SFDX.
- Select SFDX: Open Default Org.
This opens your Trailhead Playground in a separate browser.
- Click
 , search for and select Dreamhouse.
- Navigate to Home Tab: Click "Home" in the top navigation menu.
- Click
 , then select Edit Page.
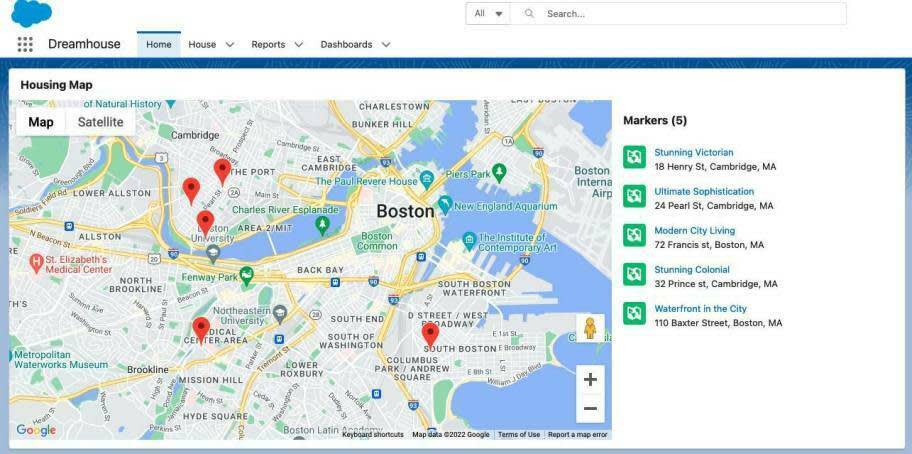
- Drag the housingMap Lightning web component from the custom area of the Lightning Components list to the top of the Page Canvas.
- Click Save.
- Click Activate.
- Click Assign as Org Default.
- Click Save.
- Click Save again, then click
 to return to the page.
- Refresh the page to view your new component.
Building with Lightning web components on Salesforce managed runtime is faster because:
- You write less code to achieve more with access to a number of Base Lightning components (lightning-map and lightning-card in the Housing Map component were examples of Base components we used above).
- Wiring client-side to the backend Apex data service is simplified with the JavaScript decorators (example, @wire decorator we used in the code above) and built-in modules (@salesforce/apex).
This was a very simple LWC example. Want to see a more advanced example of a Lightning web component? Take a look at the components involved in building the property explorer page in the Get to Know the Sample App unit of the Quick Start: Explore the Dreamhouse Sample App Trailhead module. Here we use a Lightning web component to customize the application's user experience completely.

Another option? Install and explore the complete Dreamhouse Sample app to learn more about building an end-to-end application on the Salesforce Platform.
What’s Next?
This project gave you an overview of what it’s like to be a developer working with Salesforce Platform capabilities like LWC and Apex. However, that's not all you can do!
Heroku is another product our developers can use if they fully need to control the horizontal and vertical scaling of the app resources. And with the Salesforce suite of products and Salesforce AgentExchange, the sky’s the limit for learning opportunities for you.
You aren’t alone in the learning journey. Collaborate, network, build connections, and learn Salesforce development with other developers globally in the Salesforce Developer Group in the Salesforce Trailblazer Community.
Resources
- Salesforce Developers Documentation: Salesforce Developer Get Started page
- Salesforce Developers Documentation: Salesforce Developer Centers
- Salesforce Developers Documentation: Code Samples and SDKs
- Salesforce Developers Documentation: Working with Base Lightning Components
- Trailhead: Heroku Enterprise Basics
- GitHub: LWC Recipes
- Trailhead: Build Lightning Web Components
- Salesforce Developers Documentation: Make a Component Aware of Its Record Context
- GitHub: Dreamhouse Sample App