Create and Manage Shifts
Learning Objectives
After completing this unit, you’ll be able to:
- Create shifts and assign people to them.
- Use Recordset Filter Criteria to restrict shift assignment.
Get Shifty
The previous unit looked at objects for resources, territories, and operating hours. Each service resource worker belongs to a territory with specific working hours; each territory contains resources, default operating hours, and so on.
With those objects configured, you’re ready to create a shift.
Want to Get Hands-on with Shifts?
In this module, we show you the steps to create shifts and assign people to them. We don’t have any hands-on challenges in this module, but if you want to follow along and try out some steps, here’s how to launch your Trailhead Playground.
First, make sure you are logged in to Trailhead. Then click your user avatar in the upper-right corner of this page and select Hands-on Orgs from the dropdown. Click Launch next to the org you want to open. Or, if you want to create a new playground, click Create Playground. Be aware that you won’t have the sample data that we reference in this module in your Trailhead Playground. That means you won’t see the same users or features like preexisting patterns, or be able to complete all the actions in your playground.
You need to enable Field Service first to get the Shift object.
- From Setup, enter
Field Service Settingsin the Quick Find box, then select Field Service Settings.
- Enable Field Service, and click Save to display more settings. See Salesforce Help for full instructions on enabling Field Service.
Note: If you don’t have a Field Service add-on license, you just see an option to enable work orders, which is on by default.
Once you’ve enabled Field Service, to see existing shifts, start by typing Shifts in the  App Launcher and select Shifts.
Let’s say you’re interested in shifts in the Eastern Region territory; first, select a previously created list view, All Eastern Region Shifts.
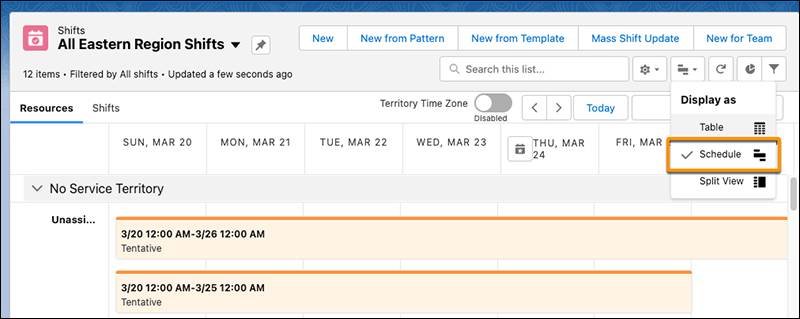
You can view shifts in a traditional Salesforce list view, but you can also view them in a special Schedule view, shown here, which makes it easy to visualize shift scheduling.
The Resources tab shows who’s available to work. Resources are arranged by territory; if a person isn’t assigned to a territory, they go in the No Service Territory group.
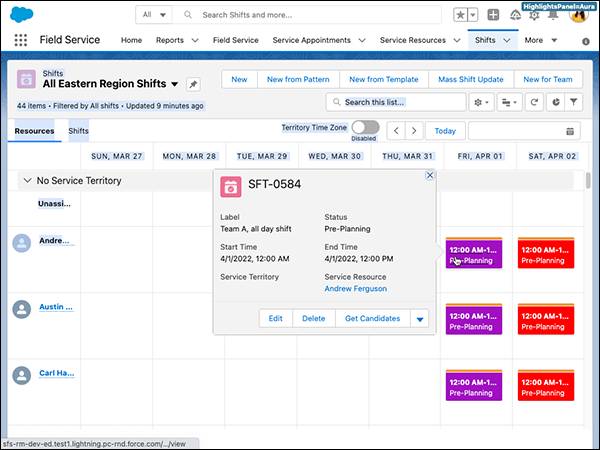
Each cell in the grid is a space for one or more shifts. Hover over a cell with an existing shift to see information for that shift. Shift parameters include start and end times, status, territory, service resource, and more. However, not all of these items need to be defined; for example, you can create an unassigned shift.
The color of the horizontal bar at the top of each shift indicates the shift’s status, taken from the shift’s Status field.
-
Yellow: Tentative. The shift has been configured, but may not be finished or assigned.
-
Blue: Planned. The shift has been configured and looks good. Service can notify the worker.
-
Green: Confirmed. The shift is assigned and confirmed by the workers.
You can change the background color of each shift in any way you want; for example, you can make all shifts assigned to field service technicians green.
You create shifts in either of two ways. One way is by worker availability: You see who’s available to work and create shifts for them. You can also create shifts based on demand: You create shifts based on what skills are needed at a given time.
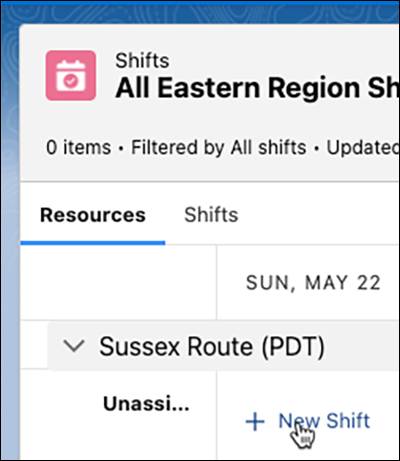
Let’s create a new shift. Let’s say you need a driver to work from noon to 4:00 PM on May 22 in the Sussex Route service territory.
- In the May 22 column, hover over the cell in the Unassigned row. The cell displays + New Shift.
- Click + New Shift to open the New Shift popup.
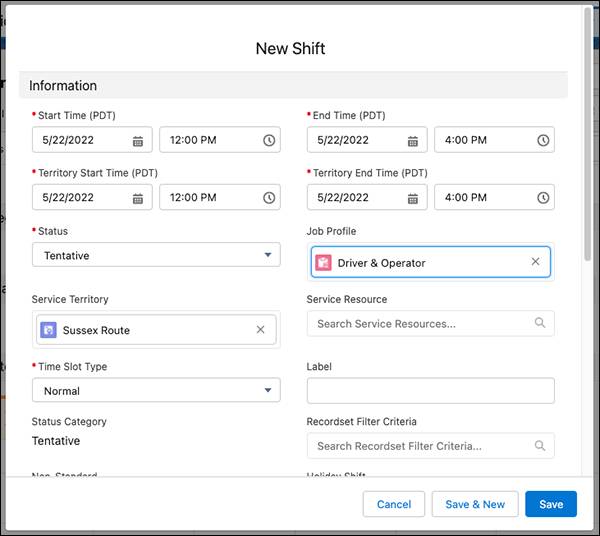
A New Shift screen comes up, prepopulated with values based on the position of the cell in the Schedule view, like the date (May 22) and the territory (Sussex Route). It also sets the Status to Tentative.
- Enter
12:00 PMas the start time and4:00 PMas the end time, and set the Job Profile to Driver & Operator.
Notice that in addition to Start Time and End Time, there are also fields for Territory Start Time and Territory End Time. These fields are there for the cases in which the person creating the shift is not in the same time zone as the worker. For example, suppose you’re in New York and the worker is in San Francisco. You’re 3 hours ahead of them, so if you create a shift starting at 9:00 AM, that’s 6:00 AM for the San Franciscan, who’s now cursing their alarm clock and seriously thinking of quitting and going back to grad school. By using the Territory times, you make sure that the shift times are applicable to the worker, not you. In this case, you’re in the same time zone as the shift’s territory, so the start and end times are automatically synched.
- You don’t know who’s available for this new shift, so leave the Service Resource value blank and click Save.
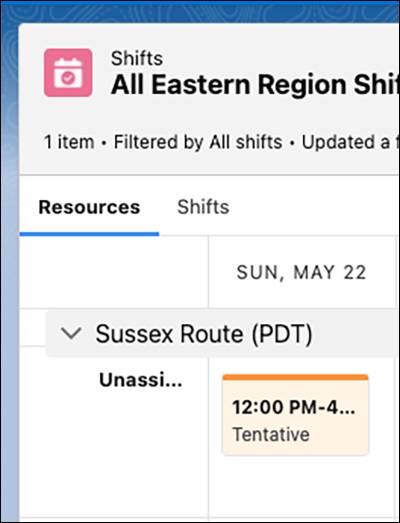
A new shift appears on the Unassigned row of the Schedule view. It has an orange line at the top to indicate that its status is Tentative, and a yellow background to show that it’s unassigned. Now it’s time to assign the shift to a worker. You see on the Schedule view that Andrew Ferguson works in the Sussex Route territory and is available on May 22.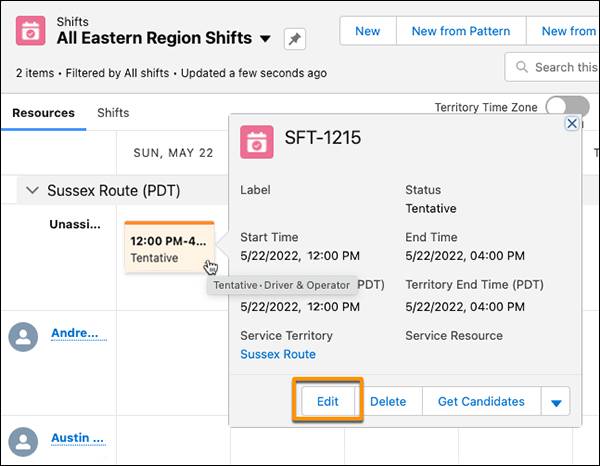
- Hover over the new, unassigned shift, and a popup appears.
- Click Edit.
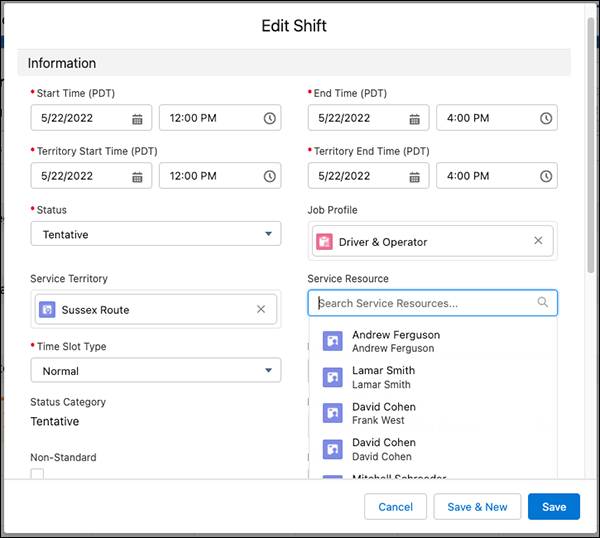
- Under Service Resource, select Andrew Ferguson, and Save the shift.
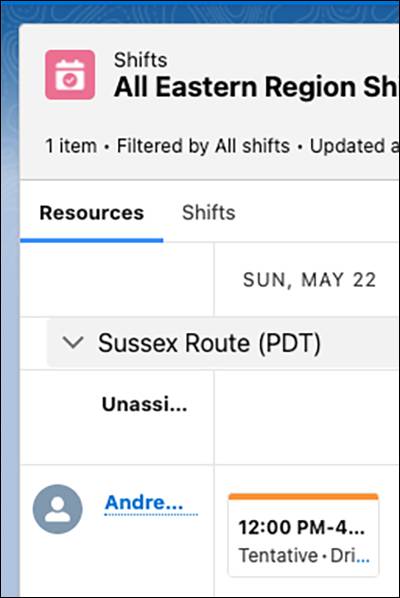
The new shift now has moved from the Unassigned row to Andrew’s row; and the yellow background color it had, indicating that it’s unassigned, has disappeared.
Recordset Filter Criteria
When creating the shift, you may have noticed a field in the New Shift window, Recordset Filter Criteria. What is this mysterious-yet-compelling field that’s the talk of high society? Let’s take a brief detour to look at Recordset Filter Criteria objects and how to use them when creating shifts.
Many jobs are similar but not the same. A job for a printer technician can be routine—delivering a spare toner cartridge—or high-priority, like fixing a paper jam. And workers with the same job title can differ, too; for example, some technicians only work on high-priority calls. You want to be able to fine-tune shift assignments accordingly.
Consider this scenario: You want to create an on-call, after-hours shift and assign a doctor to it. But since the shift is after hours, you only want the doctor to deal with emergencies. So you want to designate that medical shift as only for emergencies.
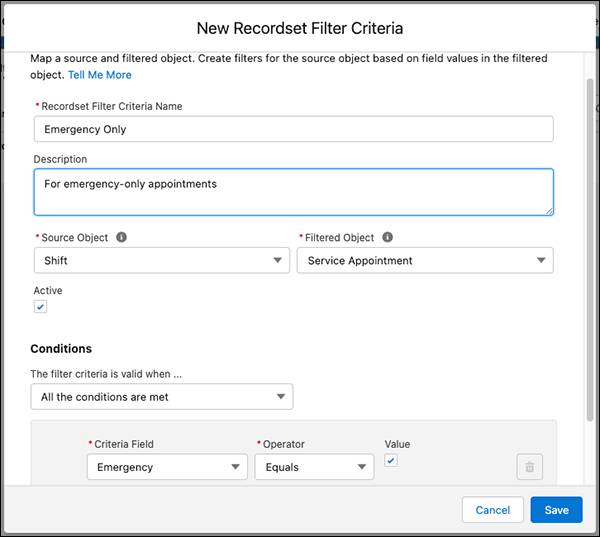
In this case you use (or create and use, if it doesn’t already exist), a Recordset Filter Criteria object to define an emergency job. Recordset Filter Criteria objects use fields in Service Appointments that characterize a job, such as start and end times, driving times, priority, customer, and so on. In this scenario, you might create a Recordset Filter Criteria object called Emergency Only, in which the Criteria Field is Emergency.
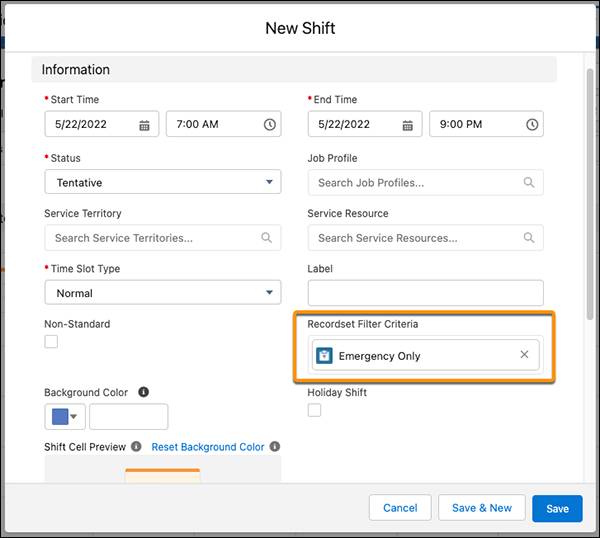
When creating the shift, you specify the newly created Recordset Filter Criteria called Emergency Only. This filters any jobs that are assigned to the shift; specifically, now when you create and assign the shift to the doctor, only emergency jobs will be assigned to the shift.
Congratulations. You’ve created a shift, edited it, and assigned it, and you’ve learned how Recordset Filter Criteria objects work to filter assignments. Now it’s time to really take advantage of Salesforce’s shift technology, with templates and patterns.
Resources
- Salesforce Help: Create Flexible Work Shifts
- Salesforce Help: Guidelines for Recordset Filter Criteria
- Salesforce Help: Enable Field Service
- Salesforce Help: Guidelines for Shift Availability
- Salesforce Help: Field Service Objects