Define Your Salesforce Call Center
Learning Objectives
After completing this unit, you’ll be able to:
- Identify a Call Center definition file.
- Explain Visualforce’s role with Call Center.
- Add a Call Center definition file to Salesforce.
Follow Along with Trail Together
Want to follow along with an expert as you work through this step? Take a look at this video, part of the Trail Together series.
(This clip starts at the 18:20 minute mark, in case you want to rewind and watch the beginning of the step again.)
Understand a Call Center Definition File
Maria learns about a thing called a call center definition file, and she wonders what in the world it is. In short, it’s a file that a developer or partner creates while building a Call Center with Open CTI. Typically, it’s an XML file with a few lines of code that defines what a call center can do. The XML file is included in the CTI package installed from AppExchange. Usually, the file is automatically installed in an org during AppExchange package installation. Maria, and you, need this file to get started with Call Center.
A call center definition file lists a Call Center’s properties, such as fields, field order, which API to use, and softphone height and width. Since this module isn’t for developers, we’re not going to go into great detail. But you should know what a call center definition file is because sometimes you may have to update one to get your call center up and running. Here’s what a call center definition file looks like.
<callCenter> <section sortOrder="0" name="reqGeneralInfo" label="General
        Information"> <item sortOrder="0" name="reqInternalName"
        label="InternalName">DemoAdapterOpenCTI</item> <item sortOrder="1"
        name="reqDisplayName" label="Display Name">Demo Call Center Adapter OPEN CTI</item>
        <item sortOrder="2" name="reqAdapterUrl" label="CTI Adapter
        URL">https://local/softphone.</item> <item sortOrder="3" name="reqUseApi" label="Use
        CTI API">true</item> <item sortOrder="4" name="reqSoftphoneHeight" label="Softphone
        Height">300</item> <item sortOrder="5" name="reqSoftphoneWidth" label="Softphone
        Width">500</item> </section> </callCenter>
Whether or not you’re a developer, notice how some of the code lists Call Center properties. In row 06, name="reqUseApi" label="Use CTI API">true</item> defines which Salesforce API this Call Center uses to integrate phone calls. In row 07, name="reqSoftphoneHeight" label="Softphone Height">300</item> defines the pixel height of the softphone this call center uses when the softphone appears in Salesforce.
A call center definition file is usually downloaded as an AppExchange package, which also includes a Visualforce page that tells a Call Center what the softphone looks like. OK, that might sound like developer speak. Visualforce is just a Salesforce language that defines what certain things look like in Salesforce. It’s similar to how HTML defines what a web page looks like in a browser. To cook up Call Center, you can say that your developer or partner uses a pinch of Visualforce and a dash of XML to define phone call integration with Salesforce.
For the purposes of this module, we’re going to keep things simple. We’re not going to have you visit AppExchange to download a CTI package that includes all the necessary call center files. Instead, download or save this call center definition file to your desktop in XML format. This file doesn’t create a fully functional call center; rather, it lets you see a blank softphone before you make any commitments to a real integration in your Salesforce org. In the real world, a softphone displays buttons and colors and is designed by a developer.
Add a Call Center Definition File to Salesforce
In this step, Maria imports a call center definition file into Salesforce so that a softphone can “talk” with Salesforce. Here’s how she does it.
- From Service Setup, enter Call Centers in the Quick Find box, then select Call Centers.
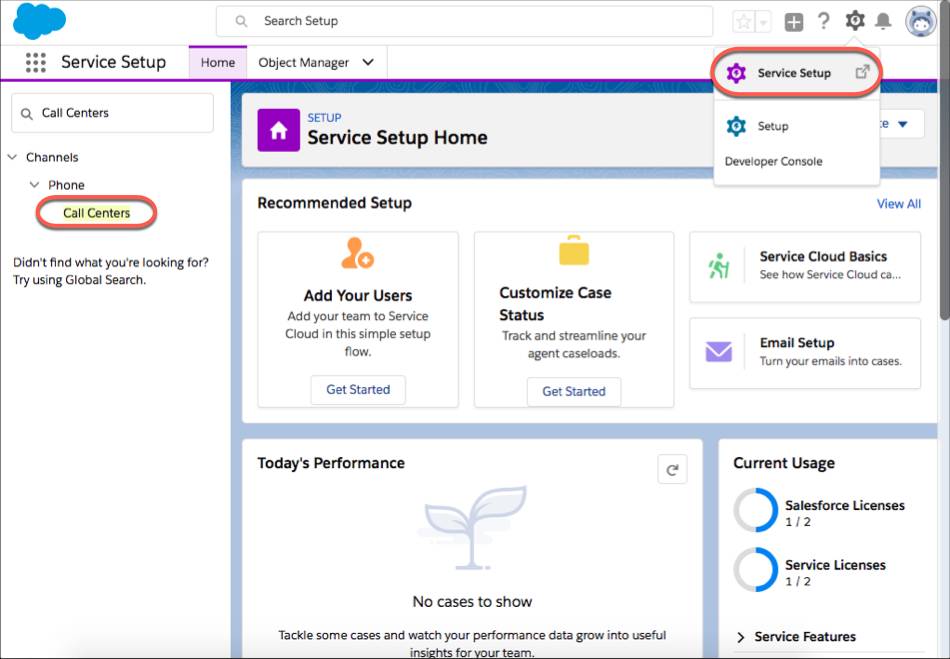
- If an overview page displays, click Continue.
- Click Import.

- Depending on your browser, click Browse or Choose File to select the call center definition file we already saved on your desktop, then click Open.

- Click Import.
As you can see, we created a call center and you can now view its settings.
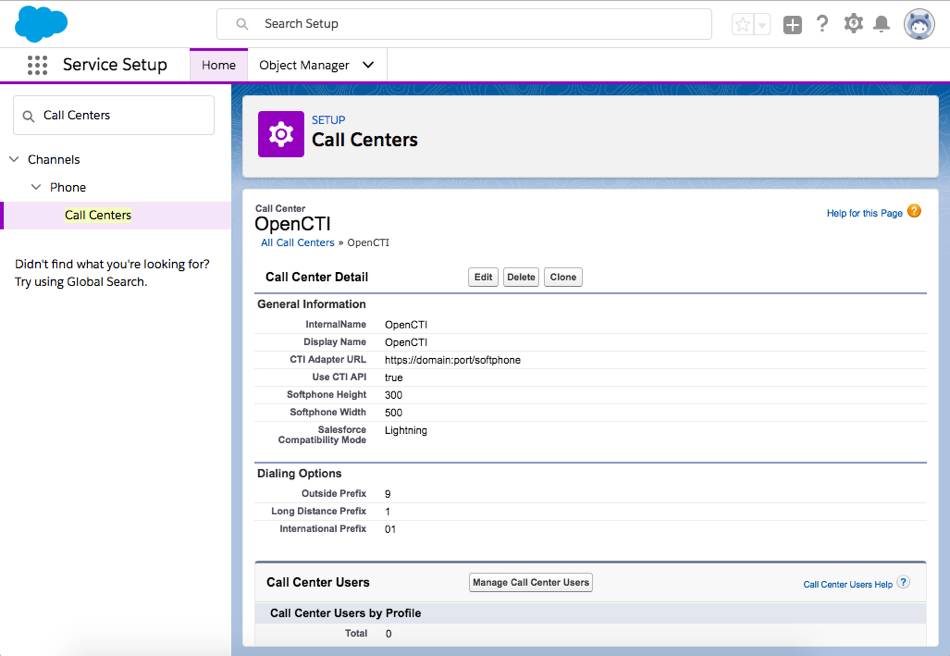
In the next unit, we assign you to your call center so that you can start using it.
Resources
- Salesforce Help: Creating a Call Center
- Salesforce Help: Call Center Definition File
- Developer Docs: Open CTI Developer Guide