Set Up Service Console Productivity Tools
Learning Objectives
After completing this unit, you’ll be able to:
- Give users access to quick text and macros.
- Customize your app for quick text, macros, and history.
- Set up mass quick actions.
- Customize an email action.
- Enable email notifications for case owners.
Give Users Access to Quick Text
Maria is excited to set things up in her org. She learns that in Lightning Experience, quick text is enabled by default. Maria just needs to give her reps the right permissions.

Before Maria sets up the permissions, she finds out a bit more information. In orgs created after Spring ’18, all user profiles include read access on the quick text object by default. This default read permission means that users can insert quick text without any additional permissions. To give users more permission, like the ability to create quick text, you update their user profile or use a permission set. She also learns quick text isn’t supported on Salesforce Platform users’ licenses.
Maria wants her reps to insert and manage their own quick text. So she creates a permission set with read, create, edit, and delete permission on the quick text object.
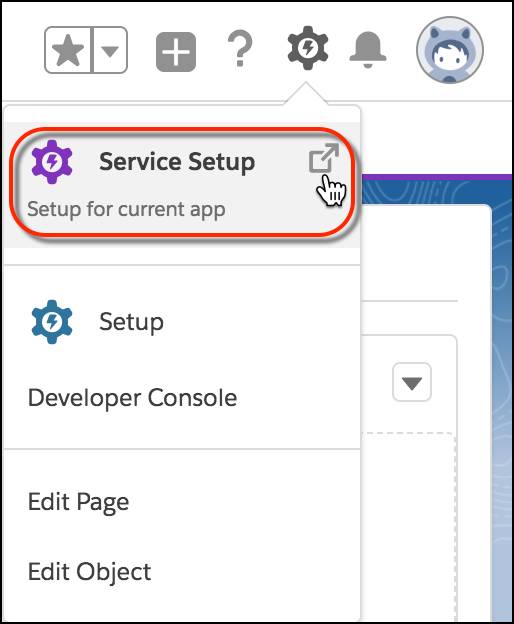
- In the header, click the setup icon and then select Service Setup.
- From Service Setup, enter
Permission Setin the Quick Find box, then select Permission Sets.
- Click New to create a permission set.
- Fill out the permission set details.
- Name:
Quick Text Power User - Description:
Allows users to create, edit, and delete quick text - User Licenses: None
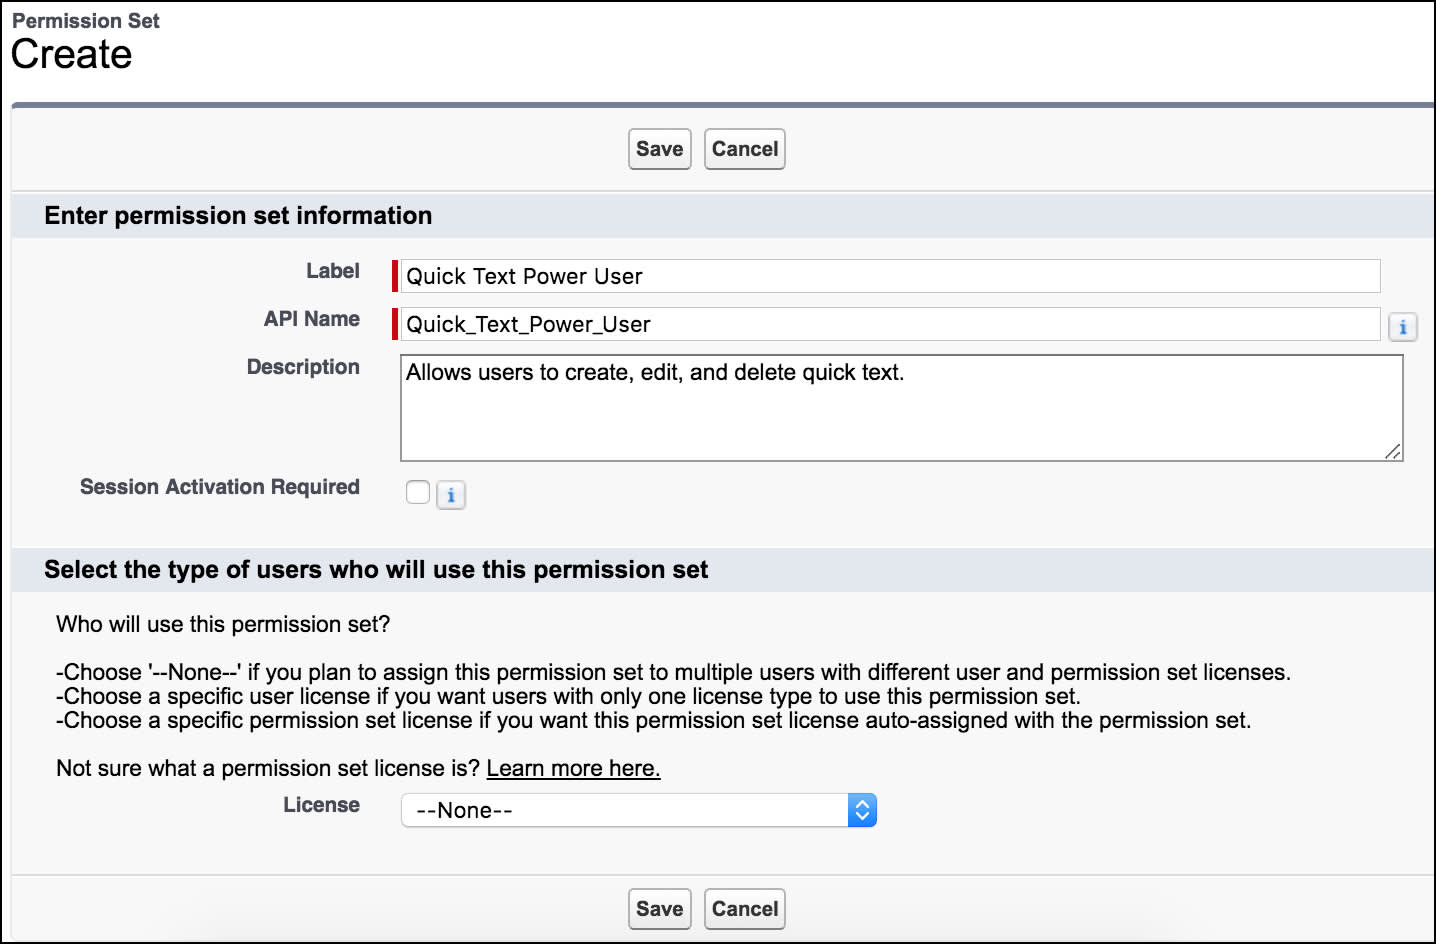
- Click Save.
- In the Apps section, click Object Settings.
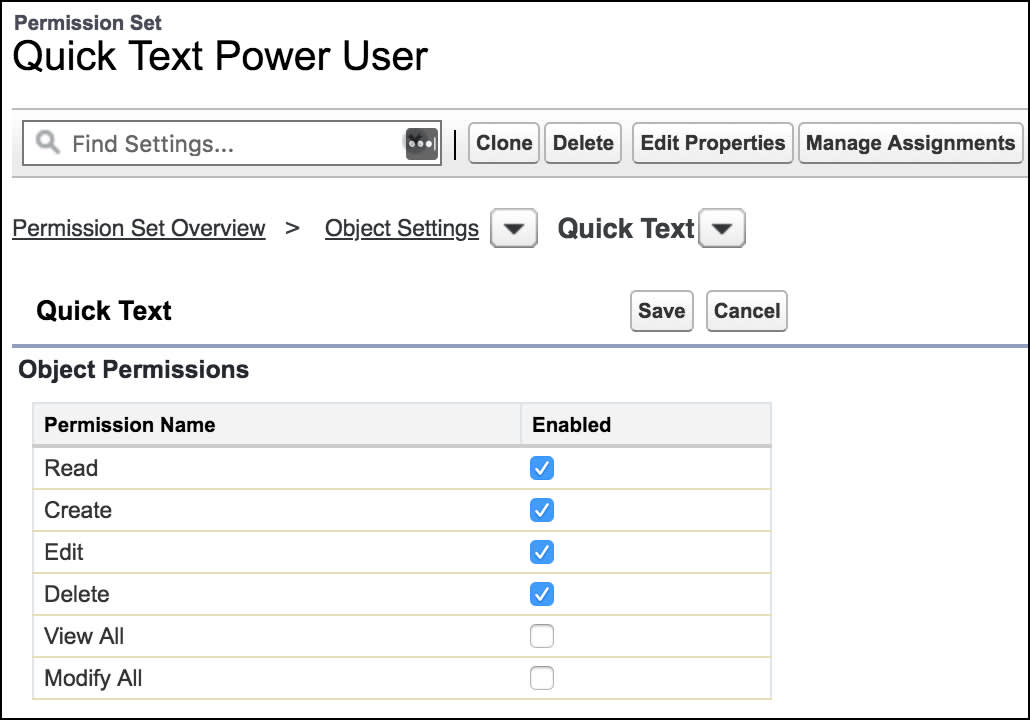
- Scroll to the Quick Text object and click it to open the properties.
- Click Edit to modify the permissions.
- Select Read, Create, Edit, and Delete. Then click Save.
Maria’s not ready to assign this permission set just yet, but it’s ready to go.
To let reps share quick text with each other, Maria enables folders for quick text.
- From Service Setup, enter
Quick Text Settingsin the Quick Find box, then select Quick Text Settings.
- Select Share and organize quick text in folders.
- Click Save.
Give Users Access to Macros
When Maria digs into macros, she finds more good news—again, there’s nothing for her to enable. Just like before, all she has to do is create a permission set.
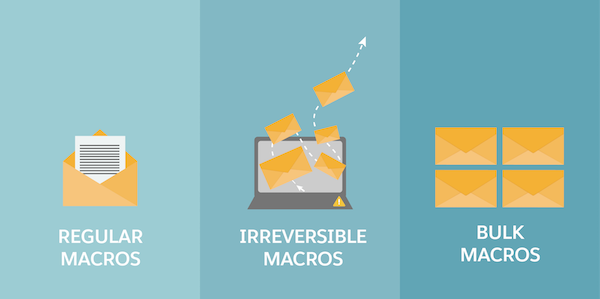
Before we give users permission for macros, let’s talk about the types of macros.
Macro Type |
Description |
|---|---|
Regular macros |
These macros perform actions that can be undone, meaning nothing is submitted, sent, or saved. For example, a macro that inserts an email template but doesn’t send the email is a regular macro. |
Irreversible macros |
These macros perform actions that can’t be undone, such as sending emails to customers or updating a case’s status. These macros contain a Submit Action instruction that’s irreversible. There’s also a special permission that allows users to work with them. To create, edit, or run macros that contain irreversible actions, the user must have the Manage Macros Users Can’t Undo permission. Users without the Manage Macros Users Can’t Undo permission can still create and edit macros that don’t contain instructions for performing irreversible actions. Just make sure they have create and edit permission on the macro object itself. |
Bulk macros |
These macros can run on multiple records at a time. |
In Lightning Experience, you can add conditional logic to regular and irreversible macros. By adding logical expressions that control when to take action, you can make your macros even more powerful.
Almost all of the reps at Ursa Major Solar send customer emails, and Maria wants them to be able to create macros for those communications. So she decides to let her reps run irreversible macros.
Maria creates a permission set with create, edit, and delete permission on the macros object and also includes the Manage Macros Users Can’t Undo permission.
- From Service Setup, enter
Permission Setin the Quick Find box, then select Permission Sets.
- Click New.
- Fill out the permission set details.
- Label: Macros Power User
- License: Salesforce
-
Important: To set tab visibility for macros, you must specify a License type. Alternatively, you can leave the License type blank, and then apply tab visibility for macros at the user profile level.
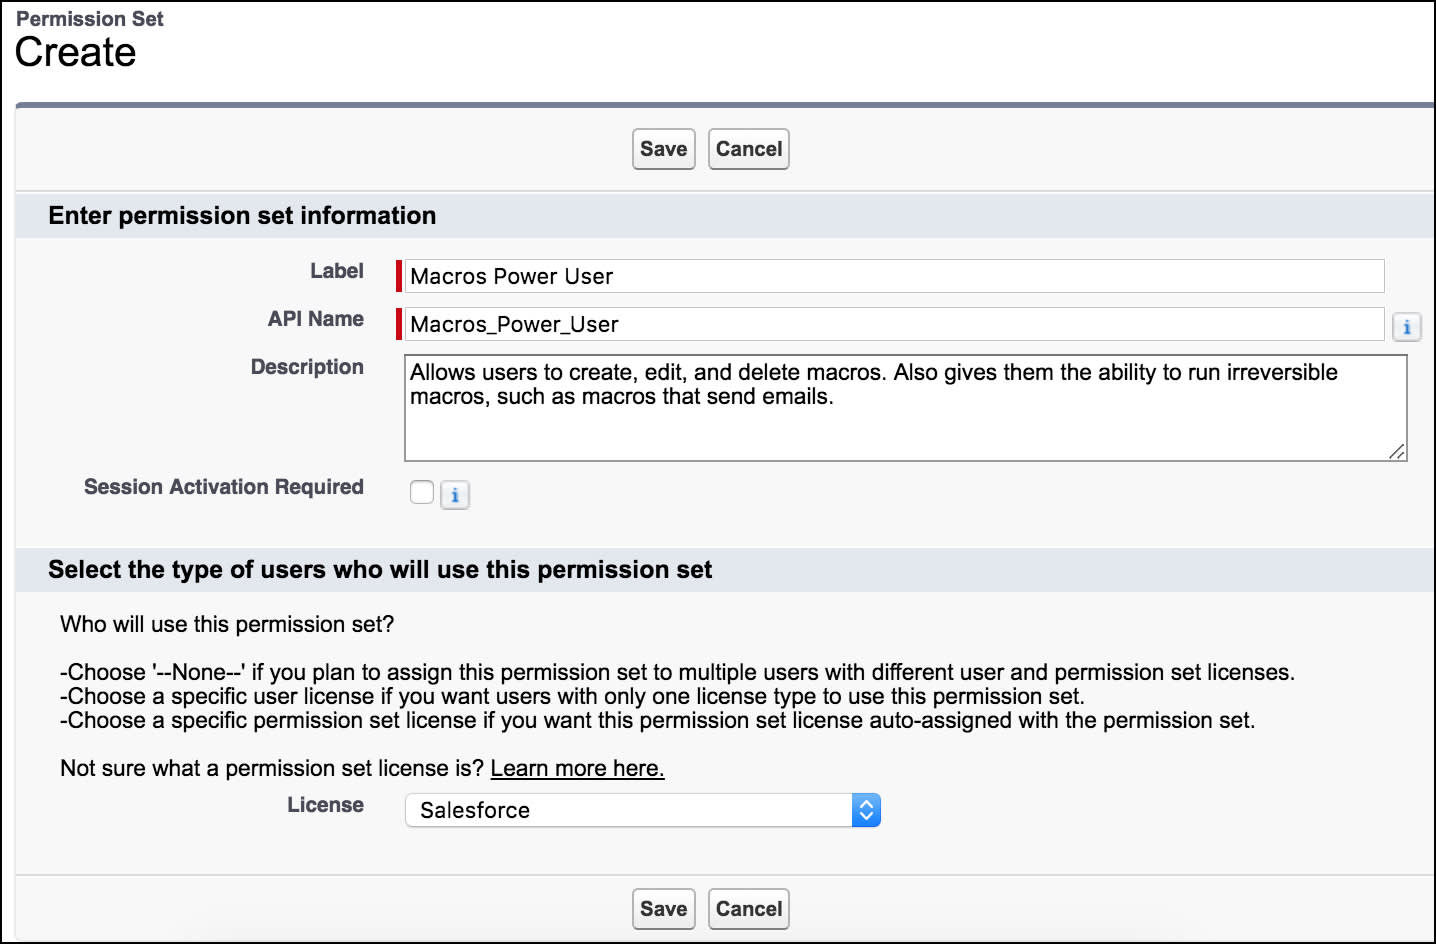
- Click Save.
- In the Apps section, click Object Settings.
- Scroll to the Macros object and click it to open the properties.
- Click Edit to modify the permissions.
- Select Visible, which auto-selects Available. Then select Read, Create, Edit, and Delete.
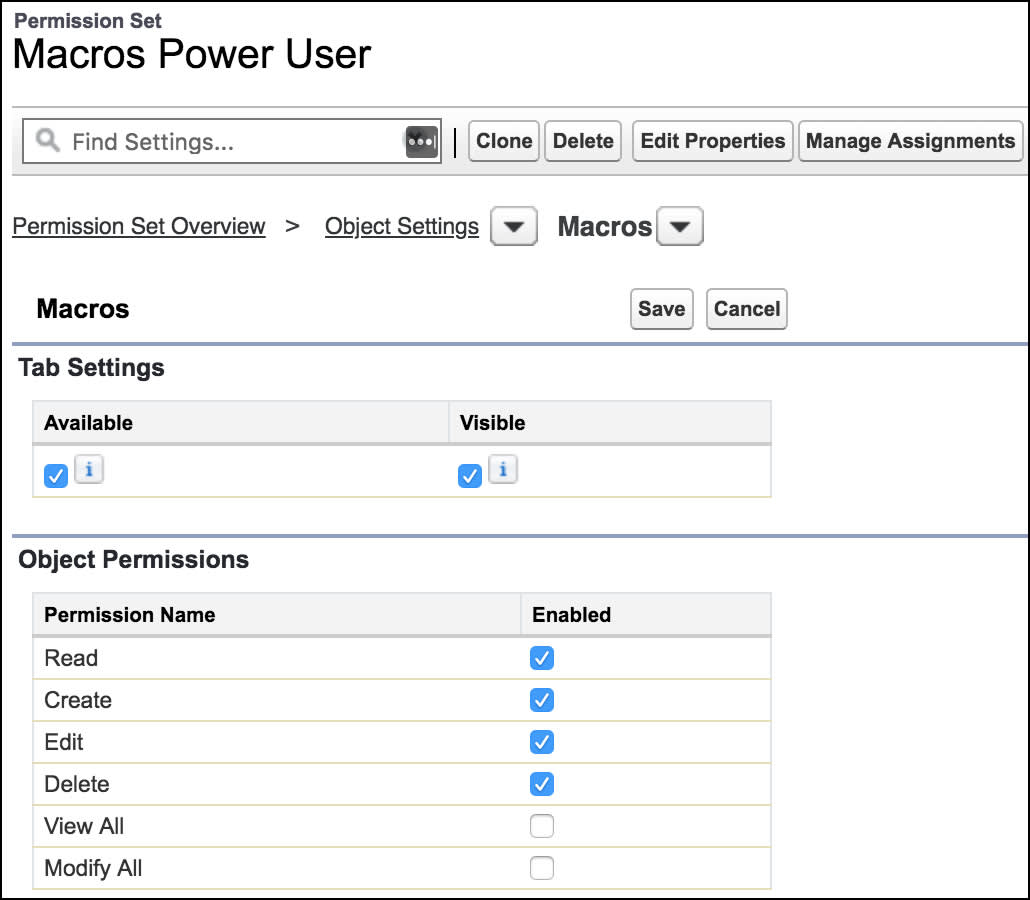
- Click Save.
- Use the dropdown arrow next to Object Settings to switch to App Permissions.
- Click Edit to modify the permissions.
- Select Manage Macros Users Can’t Undo. Then click Save.

Maria holds off on assigning this permission set too. She wants to test things out on her own first.
To let reps share macros with each other, Maria also enables folders for macros.
- From Service Setup, enter
Macro Settingsin the Quick Find box, then select Macro Settings.
- Enable Share and organize macros in folders.
- Click Save.
Customize Your Console App with Productivity Tools
With permission sets and sharing squared away, Maria is now ready to set things up in the app. She plans to let her reps create macros and quick text, which means they need a way to do that in the app. Maria heads over to the App Manager page in Setup to add the right utilities and items to her app.
- From Service Setup, enter
App Managerin the Quick Find box, then select App Manager.
- Find the Service Console app and click Edit from the dropdown menu.
- Click Utility Items.
- Click Add Utility Item, then find and add the Macros utility.
By default, the Service Console app comes with the History utility. If your org uses Notes, you also see the Notes utility.
- Click Save.
- Click Navigation Items and add Macros and Quick Text to the Selected Items list.
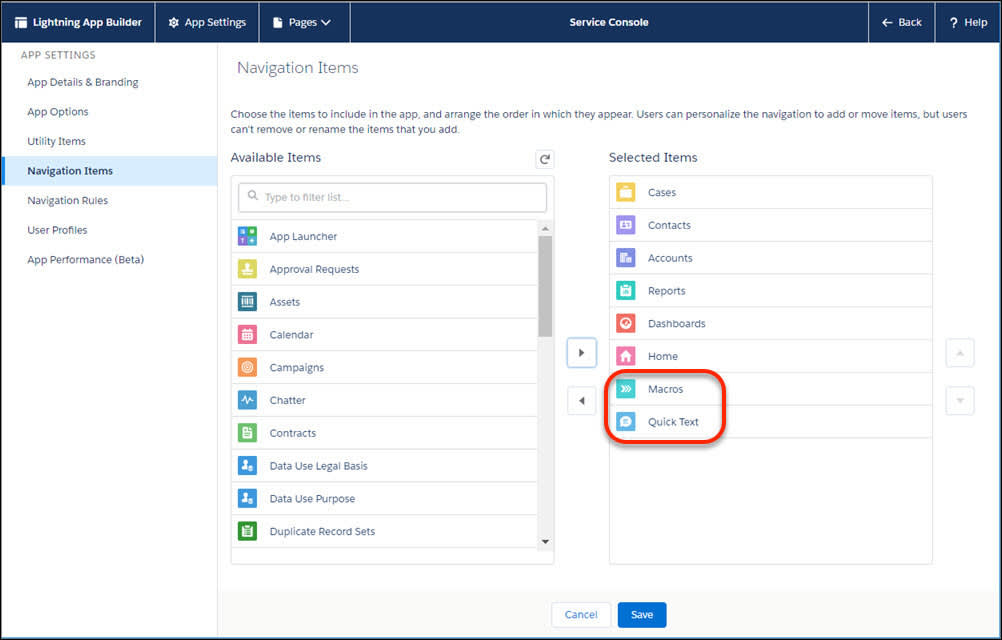
- Click Save.
Now the Service Console app is ready with new tools for reps to use.
Set Up Mass Quick Actions for Cases
Maria wants her reps to be able to update a bunch of records at the same time. These broken solar panels are a critical issue that the company wants to resolve as fast as possible. These cases also need to be assigned to a handful of reps that are authorized to send replacements. To help reps do this, Maria decides to set up a mass quick action for cases.
Mass quick actions let your users edit up to 100 records in a list view, except for Recently Viewed lists. You can use mass quick action with cases, leads, accounts, campaigns, contacts, opportunities, work orders, and custom objects that support quick actions and have a search layout in Lightning Experience. After you set up mass quick actions, users see buttons in the list view that let them perform the same action on multiple records.
Before you set up mass quick actions, you need to create the actions that you want your users to be able to take from the list view. Maria wants reps to be able to change the owner and update the status of multiple cases for solar panel replacements. She sets up a Replacement Owner quick action.
- From Service Setup, click the Object Manager tab. Select Case, and open the Buttons, Links, and Actions setup page.
- Click New Action.
- Fill out the action details.
- For Action Type, select Update a Record.
- For Standard Label Type, select None.
- For Label, enter
Replacement Owner.
- The Name field is auto-filled.
- Click Save.
- Drag the Case Owner field from the palette into the layout. Remove the other fields except for Status.
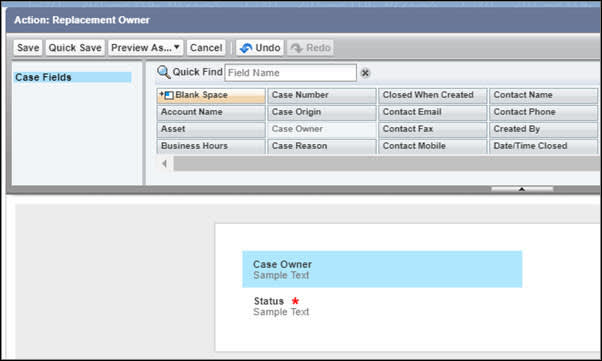
- Click Save.
Now Maria is ready to set up mass quick actions. To set it up, you customize an object’s List View search layout. So she edits the case search layout.
- From the Service Setup Object Manager tab, select Case.
- Click List View Button Layout.
- Use the action arrow at the end of the List View entry to select Edit.
- Scroll and add Replacement Owner to Selected Quick Actions.
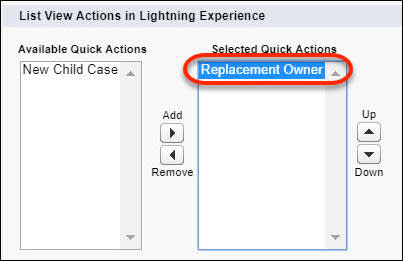
- Click Save.
Now reps see a Replacement Owner button on their list views that they can use to perform updates on multiple cases at a time.
Customize the Email Action for Email Templates
Customizing the default values of the Email action is another great way to save reps time. When reps spend so much time emailing customers, having an email template can make communicating with customers easier and faster. You can customize the Email action with predefined field values, like adding CC and BCC recipients. But the best time-saver of all is the ability to specify a default email template. Maria knows that this can save her reps so much time.
- From Service Setup, click the Object Manager tab. Select Case, and open the Buttons, Links, and Actions setup page.
- Edit the Email action. Make sure you edit the action that’s used on the case page layout for your reps.
- In the Default Email Template field, choose the email template to use.
Important: Only Salesforce Classic email templates of the type Custom are shown in the lookup menu.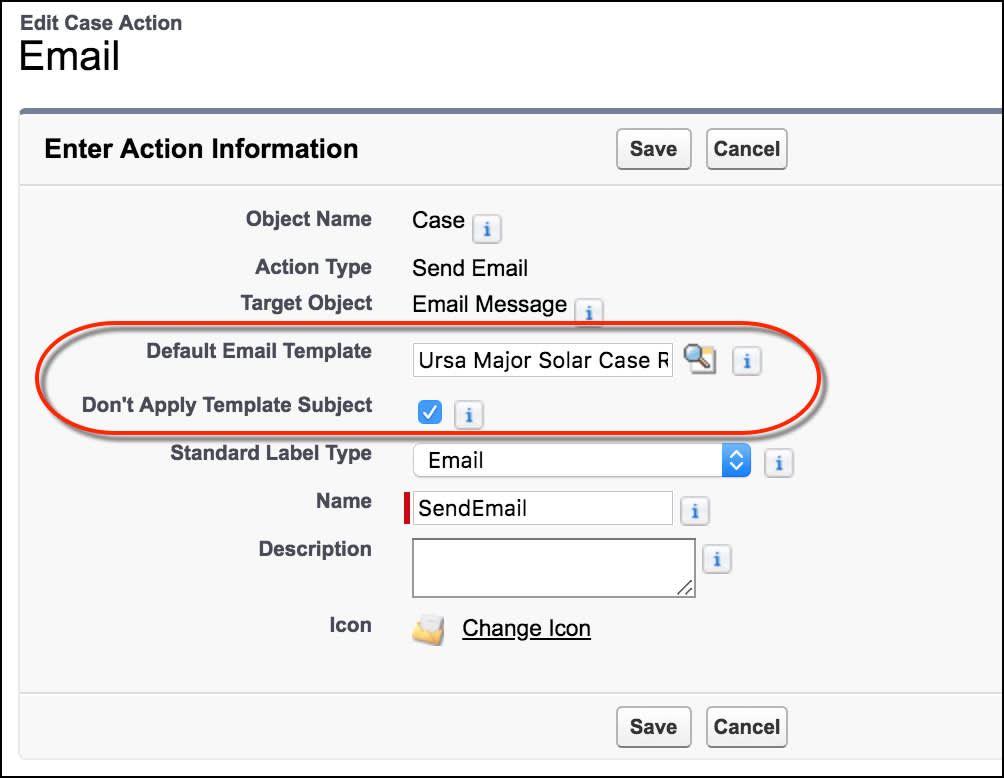
- Optionally, select Don’t Apply Template Subject to ignore the email template subject and use the subject from the customer’s email.
- Click Save.
Now when reps click the Email action, the body is prepopulated with an email template.
Send Out Email Notifications for Case Updates
While Maria is getting coffee in the breakroom, she overhears reps talking about missing notifications for case updates. She approaches the group and finds out that the reps aren’t being notified when other reps update a case they own or reassign a case to them. How frustrating! With all the broken solar panels, it’s important to keep all the reps informed and up to date. Maria knows an easy fix for these complaints and heads over to the Support Settings page in Setup to make one final configuration. Here’s what she does.
- From Service Setup, enter
Support Settingsin the Quick Find box, then select Support Settings.
- Click Edit to customize your settings.
- Select the Notify Case Owner of New Case Comments option. This setting sends case owners an email every time a case comment is added by a user who is not the case owner, and includes internal and external comments.
- Select the Notify Case Owners When Case Ownership Changes option. This setting sends new case owners an email when the case is assigned using the Change Owner action. When a rep changes the case owner, the Send notification email checkbox is selected by default. A rep can override this setting by deselecting the checkbox.
- Click Save.
Now Maria’s reps can definitely be in the loop. Maria had quite a productive day. She researched and configured multiple rep productivity tools. Tomorrow, she’ll try out quick text and macros herself.
Resources
- Salesforce Help: Standardize Responses with Quick Text
- Salesforce Help: Automate Repetitive Tasks with Macros
- Salesforce Help: Create and Edit a Custom Lightning Console App
- Salesforce Help: Set Up a Mass Quick Action for List Views
- Salesforce Help: Apply a Default Email Template Using the Send Email Quick Action
- Salesforce Help: Customize Support Settings