Get Started with Screen Flows
Learning Objectives
After completing this unit, you’ll be able to:
- List the types of components you can add to screens.
- Develop a plan for a screen flow based on given requirements.
Before You Start
This badge assumes that you know how to create a flow with variables, inputs, and data elements, such as Get Records. If you aren’t familiar with these concepts or need a refresher, see the Data and Actions in Flows badge and the Flow Builder Logic badge.
The Power of Interaction
Automation is amazing, but sometimes you need automation to be a little less… automatic. People, not programs, are the heart, soul, and mind of your organization. It’s people that make decisions and take action, so sometimes people need to drive how your automation runs.

With screen flows, Salesforce interacts with your users, asking questions and presenting information. Based on the user’s answers, a screen flow can update data, send out communications, and show more questions or information.
Plus, you choose how to show a screen to your users. You can embed it on a Lightning page, or kick it off with the click of a button, or dock it at the bottom of any Salesforce app, or expose it externally on Experience Cloud pages. Whatever flows your boat!
With all this power, screen flows position you as a superhero to your users. By presenting them what they need, when they need it, and using their input to guide them and automate their tasks, you save your users valuable time and mental energy.
What Is a Screen?
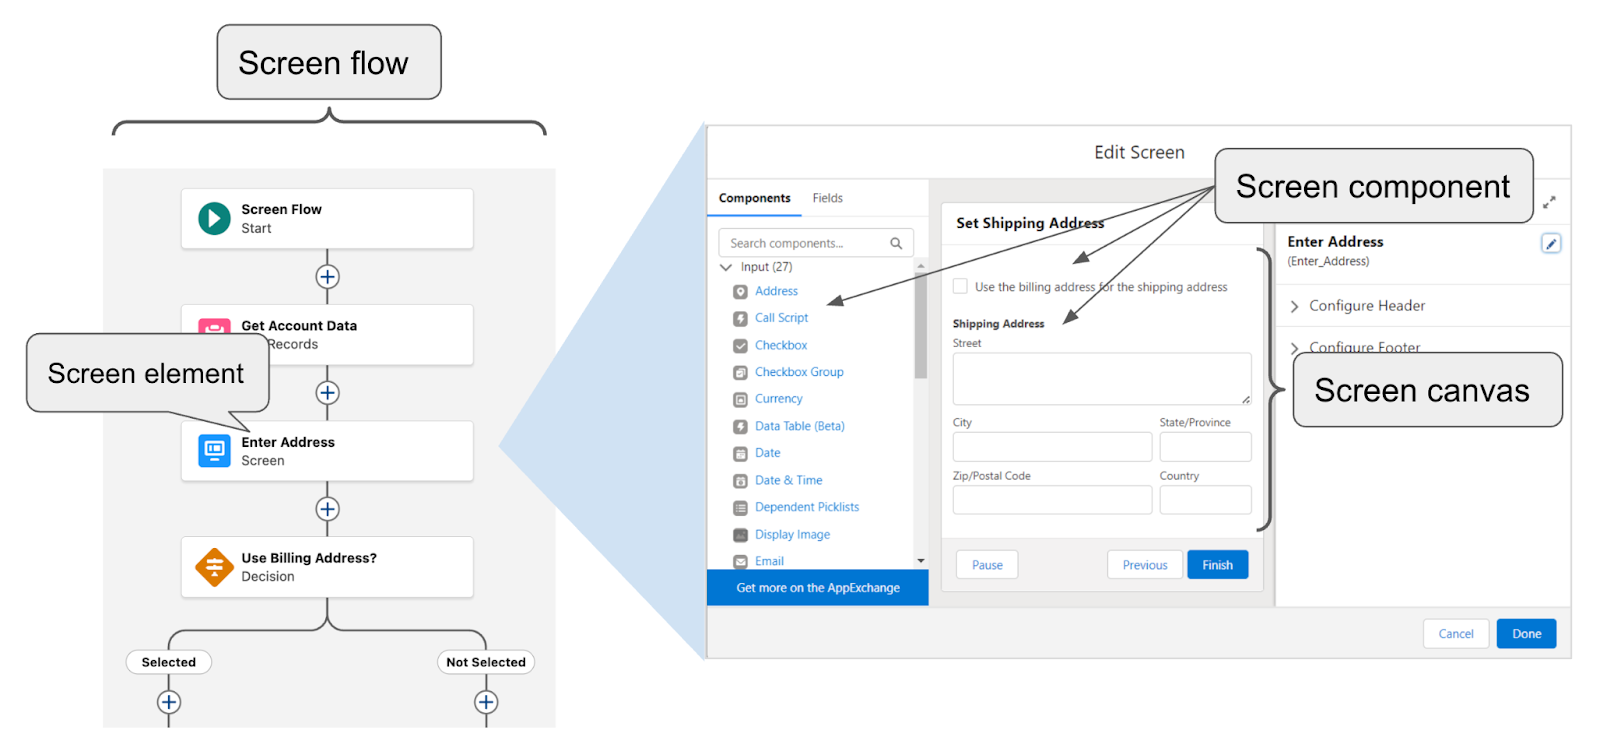
When we talk about screen flows, we also talk about Screen elements, screen components, and screens. So let’s start with some terminology.
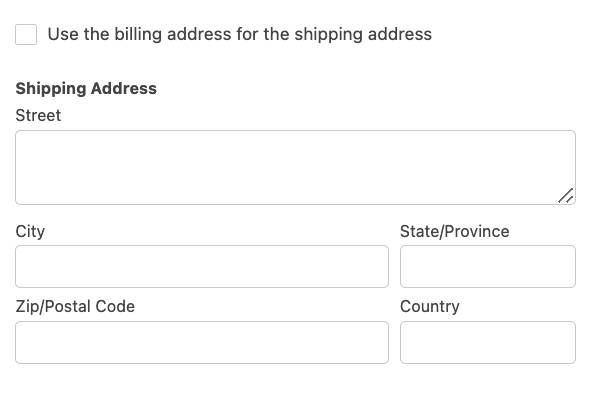
If you completed the Flow Builder Logic badge, you created a screen flow for setting a shipping address. In the screen flow, you used a Screen element. Of all the element types, the Screen element is the only one that users see when the flow runs. Within the Screen element, you chose screen components to collect user input, and you arranged them on the screen canvas.

A screen is a page that the user sees when the flow runs. Each page is defined by a single Screen element on the flow canvas. It doesn’t have to take up the user’s whole monitor screen. Even if the flow is embedded in just a small part of your Salesforce window, it’s still called a screen.

When a flow runs a Screen element, the flow remains on that element and waits for the user. When the user clicks Next, the flow continues down its path. To present multiple pages of questions and instructions to users, you use multiple Screen elements.
Screen Components
Screen components come in many types, but they fit into three broad categories.
-
Display Components only display information. They don’t accept input from users.
-
Input Components receive input from users. They hold that input to use later in the flow.
-
Record Fields also receive input from users, but store that input in a record variable. We talk about Record Field components in a later unit.
Of these three components, input components are used the most. Think of input components like fields on a Salesforce object: They allow users to input data, and they hold that input. However, screen flows hold the data only until the flow ends. To save data beyond the end of the flow run, you need a data element, such as Create Records or Update Records.
Input components are like object fields in another important way: They share a lot of the same data types. There are text, checkbox, date, date/time, lookup, and picklist screen components, to name just a few. As a rule, if a field type exists in Salesforce, there’s a way to ask users for that type of data in a screen component. (Even if there’s no exact match, there’s always a way. For example, there’s no Percent screen component, but you can use a Number component and send its entered data to a percent field.)
Because of these similarities, it’s easy to use screen flows to work with records. For example, users are often overwhelmed by creating a record if they’re shown a large number of fields. This feeling can make some users avoid entering data. Some users even resort to writing info down so they don’t have to deal with a Salesforce record page. They may honestly intend to enter it later, but that doesn’t always happen. However, if you instead show users a screen flow that asks for only the fields they need the most, they're much more likely to enter that data!
Keep in mind that screen components don’t have to correspond to Salesforce fields. You can ask any questions you want and use the answers in all the various ways that flows can use data.
Capture Customer Help Requests with a Screen Flow
Flo Smith is a senior Salesforce admin and business analyst for Pyroclastic, Inc. In this module, you’re a Salesforce admin on Flo’s team, helping her automate some of Pyroclastic’s business processes.
Pyroclastic’s support agents want to capture new case information while viewing and editing a caller’s Contact record. Flo asks you to create a screen flow that captures the information the support agents need and uses that information to create a new case. Then she can embed the flow on the support team’s contact Lightning page.
Examine the Requirements and Plan the Flow
Before you dive into Flow Builder to create the flow, let’s gather some more information and sketch out a plan for the flow. First, you meet with some support managers to find out what information they want to capture.
The main things they want are:
- The caller’s description of their issue
- The support agent’s summary of that issue
- An indicator of whether the issue was resolved during the call
With that information, you’re ready to dig into the requirement:

Let’s break that apart a bit.
- To allow agents to capture information, you need a flow that allows user input. Use a screen flow with a screen element.
- After the agent collects new case information, you need to get that information into a new case record in Salesforce. That’s a job for the Create Records element.
- Because the support agent is viewing the caller’s Contact record, you probably want the flow to have some information from that record. You need some variables so that you can pass data from the Contact record to the screen flow.
Now, thinking ahead to the new case record to be created, what do you need to populate that record?
First, for the new case information, you need input from the user in a screen element. You’ll use that information to populate fields when the flow creates the case record.
Screen Element
Case field |
Information needed |
Screen component to use |
|---|---|---|
Description |
Caller’s full, detailed description of the problem |
Long text |
Subject |
Agent’s summary of the problem (for the Case subject) |
Short text |
Status |
Call result: problem solved or not solved |
Toggle* |
*To provide a smooth user experience, you want to use the Toggle screen component, but there’s a hitch. The Toggle component returns a value of either True or False. Case Status is a picklist field with a variety of choice values. So you need a way to map the toggle values to the picklist’s values.
Using a formula resource, you can translate the True and False values to the mapped picklist values.
- If the toggle is set to Solved, the toggle returns True, and the formula should return Closed.
- Otherwise, the toggle returns False, and the formula should return New.
Next, you need two inputs from the current Contact record in the Create Records element.
Create Records Element
Case field |
Information needed |
Resource to use |
|---|---|---|
Account ID |
Account related to the current record |
Text variable Available for input |
Contact ID |
The current contact record |
Text variable Available for input |
With your plan in hand, you’re ready to fire up Flow Builder to build the new flow.
Resources
- Salesforce Help: Flow Element: Screen
- Salesforce Help: Standard Flow Screen Components
- Salesforce Help: Flow Screen Input Component: Toggle
