Build a Screen Flow
Learning Objectives
After completing this unit, you’ll be able to:
- Build a simple screen flow.
- Use simple screen components to ask questions.
- Add guiding information to a flow screen.

Hands-On Challenge
Ready to get hands-on with Flow Builder?
Launch your Trailhead Playground now to follow along and try out the steps in this module. To open your Trailhead Playground, scroll down to the hands-on challenge and click Launch. You also use the playground when it's time to complete the hands-on challenges.
For reference, here are the details for the flow you planned in the previous unit. In this unit, you build the flow.
Screen Element
Case field |
Information needed |
Screen component to use |
|---|---|---|
Description |
Caller’s full, detailed description of the problem |
Long text |
Subject |
Agent’s summary of the problem (for the Case subject) |
Short text |
Status |
Call result: problem solved or not solved |
Toggle Formula: If True, Status = Closed; otherwise Status = New |
Create Records Element
Case field |
Information needed |
Resource to use |
|---|---|---|
Account ID |
Account related to the current record |
Text variable Available for input |
Contact ID |
The current contact record |
Text variable Available for input |
Create a Screen Flow and Add a Screen Element
Let’s start by creating a screen flow and adding a screen to it.
- In Flow Builder, create a Screen Flow.
- Add a Screen element.
- In the Screen Properties pane, for Label, enter
Questions.
This label is shown on the Flow Builder canvas and isn’t shown to users. Users see the flow’s name at the top of the screen.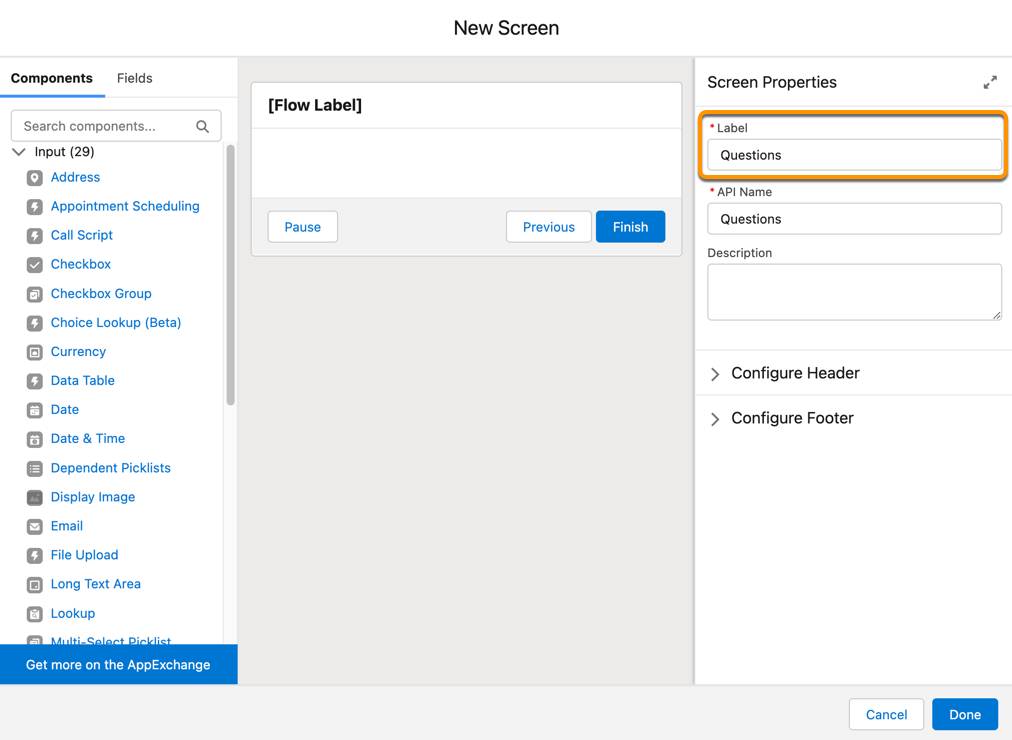
Add Guiding Text
Now it’s time to add some things to the screen. Before we dive into asking questions, let’s provide a script to guide support agents through a conversation with a customer. We want to help the support team say the right things, so start with some guiding text.
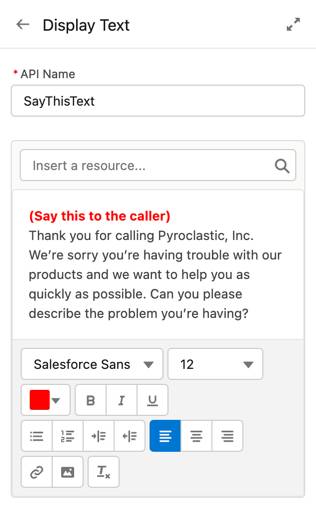
- Drag Display Text from the Components list to the screen canvas. Alternatively, you can click the component’s name to add it to the end of the screen canvas.
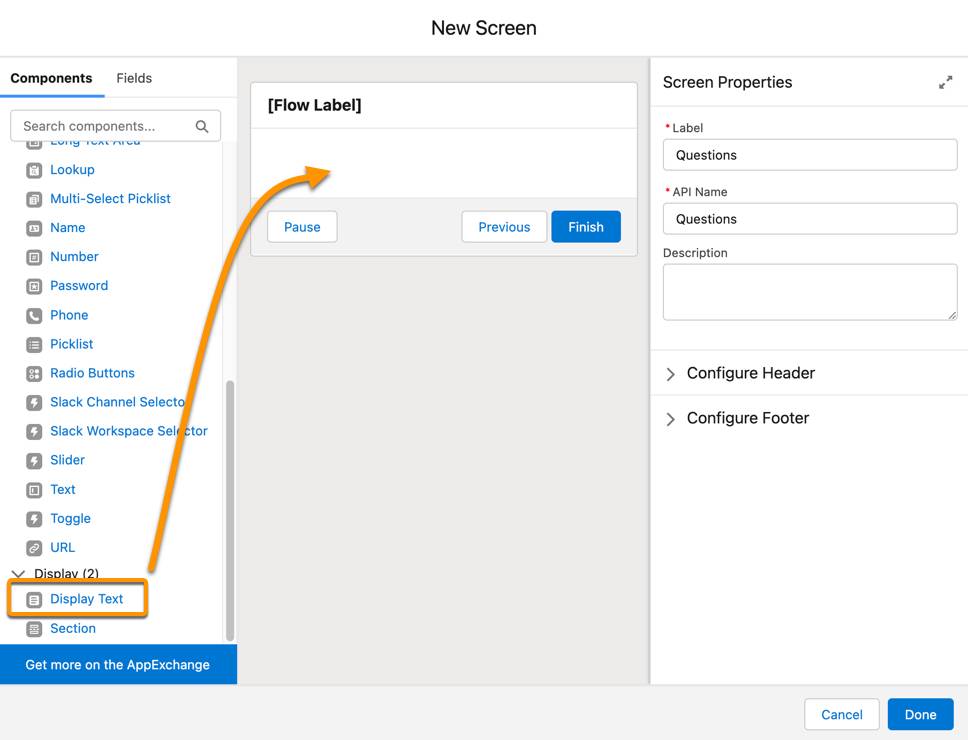
- For API Name, enter
SayThisText.
- Below the API name is an unnamed rich text field. That’s where you enter the text that you want to show to your users. Enter:
(Say this to the caller) Thank you for calling Pyroclastic, Inc. We’re sorry you’re having trouble with our products and we want to help you as quickly as possible. Can you please describe the problem you’re having? |
- Change the formatting of the text so that the font is Salesforce Sans and the size is 14. Change the formatting of the first line to make it bold and bright red, so that it stands out from the rest of the text.
Add Questions
Next, let’s add the questions for the support agent to answer.
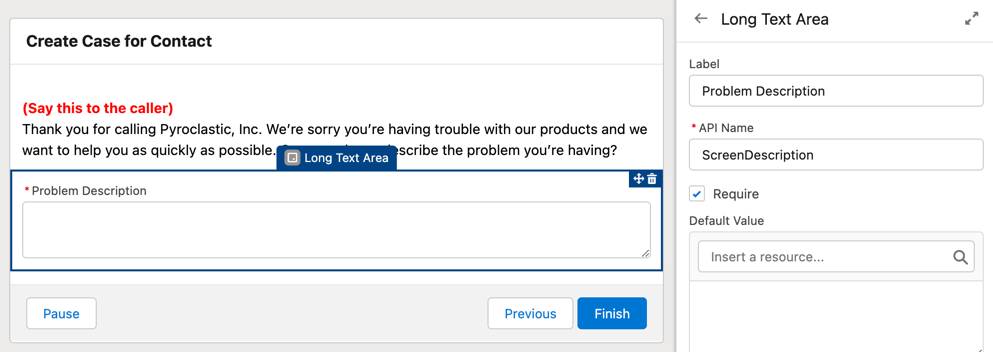
- To give support agents plenty of space to describe the caller’s problem, add a long text component.
- Drag Long Text Area from the Components list to the screen canvas.
- For Label, enter
Problem Description.
- In the Long Text Area properties, for API Name, enter
ScreenDescription.
Yes, we're creating a screen component with a label and an API name that don't match. Sometimes it makes sense to create a screen component with a label that's easy for your flow's users to understand, along with an API name that's easy for you and other admins to understand.
- Click Require to prevent users from completing the flow without answering this question.
- Add a text question for agents to enter the case subject.
- Drag Text from the Components list to the screen canvas.
- In the Text properties, for Label, enter
Case Subject.
- For API Name, enter
ScreenSubject.
We’re giving it a unique name here to prevent confusion later.
- Click Require.
- Add a toggle to close the case as it’s created, if the support agent solved the customer’s problem during the call.
- Drag Toggle from the Components list to the screen canvas.
- For API Name, enter
CloseCase.
- For Label, enter
Were you able to solve the customer's problem during this call? - For Active Label, enter
Yes, Solved.
- For Inactive Label, enter
No, Not Solved.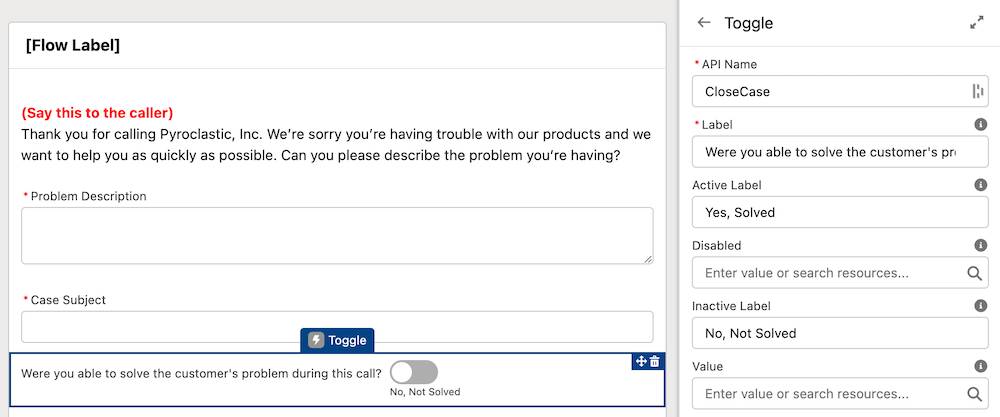
- Click Done to close the screen element.
Just like that, you’ve got a screen that asks three questions.
Use the Answers to Create a Case
So far, you have the Description, Subject, and Status (Solved or Not Solved) entered by the user in the screen element. It’s time to create a formula to change the Toggle’s True or False value to either Closed or New, but there’s a hitch. (Again!) You can’t get the user’s choice from the Toggle itself. You have to reference the Toggle’s value property, like this: {!CloseCase.value}
Also, to use the Account ID and Contact ID from the current Contact record, you need a variable that can receive each ID in the flow.
- Create a formula resource:
- API Name:
frmStatus - Data Type: Text
- Formula:
IF({!CloseCase.value} = TRUE, "Closed", "New")
- Create a variable to receive the current contact’s ID:
- API Name:
inputContactId - Data Type: Text
- Select Available for input
- Create a variable to receive the current contact’s account:
- API Name:
inputAccountId - Data Type: Text
- Select Available for input
- After the Screen element, add a Create Records element to create the case:
- Label:
Create Case - How to set record field values: Manually
- Object: Case
- Set field values:
- Field: Account ID, Value: inputAccountId
- Field: Contact ID, Value: inputContactId
- Field: Description, Value: Questions > Problem Description
- Field: Status, Value: frmStatus
- Field: Subject, Value: Questions > Case Subject
- Save the flow. For Label, enter
Create Case for Contact.
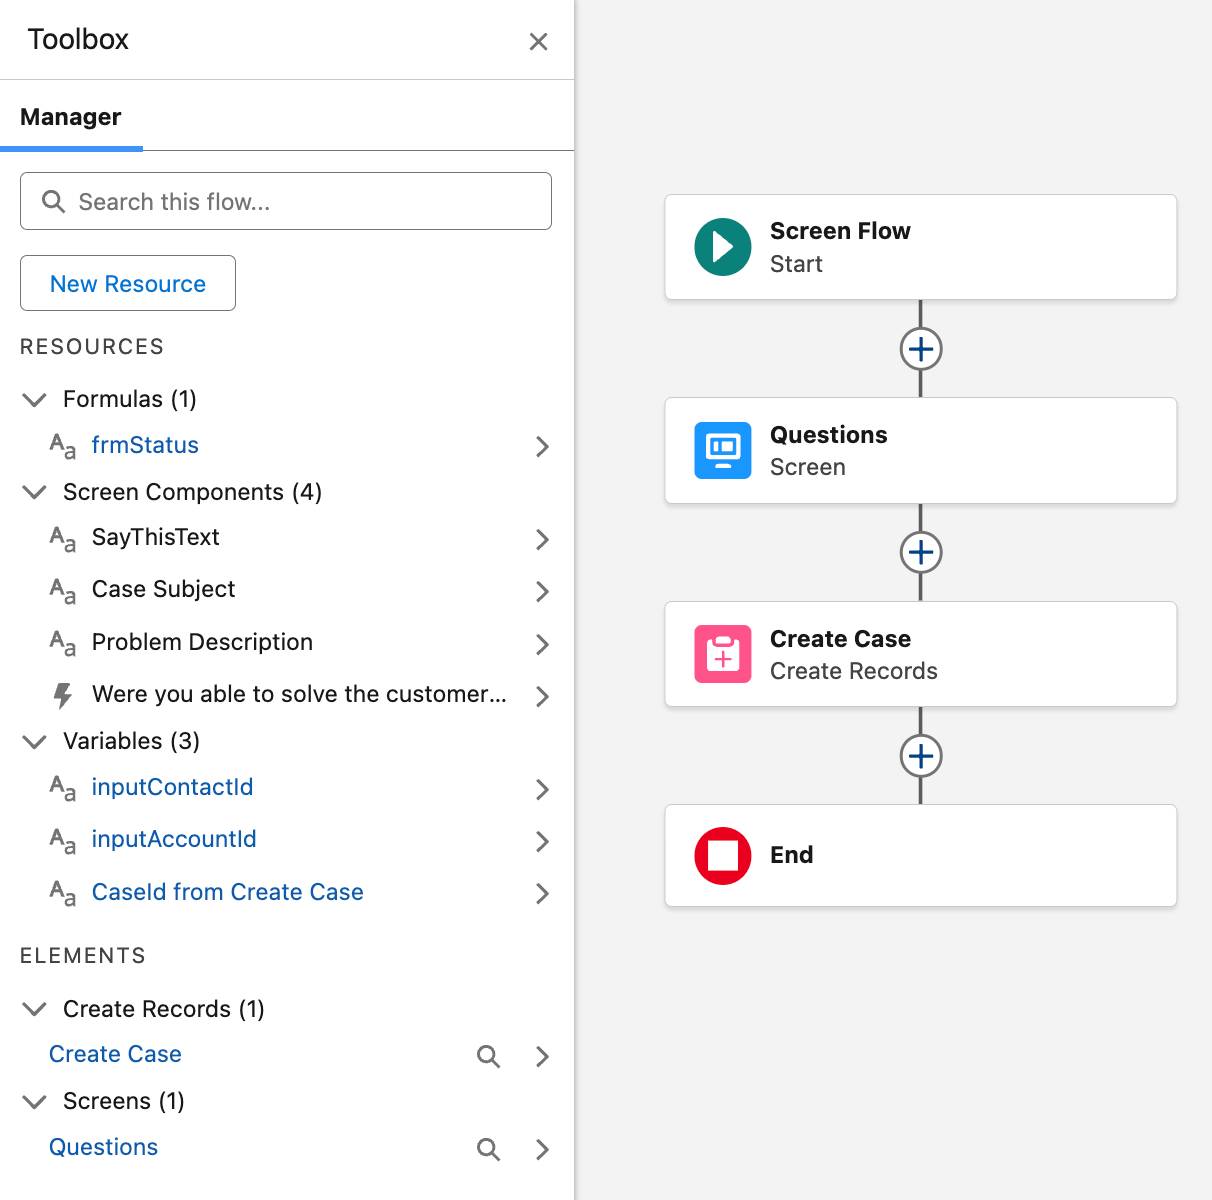
Your Toolbox and flow canvas should look something like this.
Resources
- Salesforce Help: Flow Element: Screen
- Salesforce Help: Standard Flow Screen Components
- Salesforce Help: Flow Screen Input Component: Toggle
- Trailhead: Screen Flow Distribution