Design and Build a Case Management Omniscript
Learning Objectives
After completing this unit, you’ll be able to:
- Explain implementation best practices for Omnistudio for Managed Packages components.
- Determine when to use custom Lightning web components to enhance standard Omnistudio functionality.

Before You Start
Before you start this module, make sure you complete this content. The work you do here builds on the concepts and work you do in that content.
-
Lightning Web Components Basics
-
Omniscripts in Omnistudio for Managed Packages
-
Flexcards in Omnistudio for Managed Packages
A New Challenge in Omnistudio for Managed Packages
Vijay Lahiri, a Salesforce Certified Omnistudio Developer at Cloud Kicks, is working on an implementation project that involves Omnistudio components, including Omniscripts and Flexcards.
Vijay receives the following use case with requirements from his customer:
As a customer service rep, I want a workflow that allows me to manage cases for an account.
On the first page, I want to:
-
Select an account from a list of accounts.
-
View all the cases related to the selected account.
-
Create a new case and see it immediately in the list of cases.
-
Select a case from the list of cases.
When I select a case, I want to move to a second page where I can:
-
View case comments in tabular format.
-
Submit new comments that appear immediately in the table of comments.
Just another puzzle for Vijay to solve. But he can put the pieces together! In this module, you follow along with Vijay to create the solution.

Omnistudio Implementation Best Practices
Before Vijay puts on his application-designer hat, Vijay revisits Omnistudio for Managed Packages implementation best practices, because he wants this application to be top-notch. He’s worked with Omnistudio for Managed Packages before, so he knows how to use the drag-and-drop WYSIWYG Omniscript and Flexcard designers to build many of his customer’s workflows entirely in Omnistudio.
However, Vijay sometimes receives a use case that requires him to build functionality that isn’t available in the Omnistudio for Managed Packages designers. In this case, he needs to minimize the codebase. Apps that use minimal code not only run faster but are easier for his customers' Salesforce admins to maintain.
Vijay reviews the high-level best practices for Omnistudio projects.
Best Practice |
Guidance |
|---|---|
Use standard Omnistudio for Managed Packages components. |
Use standard components in the Omnistudio for Managed Packages designers whenever possible. Define as much functionality as you can by using the Omniscript and Flexcard designers. |
Customize standard Omnistudio for Managed Packages components only when necessary. |
If you need functionality not included in the Omnistudio for Managed Packages designers, use extensions or imports to customize standard Omnistudio components. Make sure admins can still use the designers for maintenance. When you create code:
|
Use a hybrid Omnistudio for Managed Packages designer and minimal code approach to build new components. |
When it’s not possible to use or customize standard components to meet requirements, build a new component. Use a hybrid Omnistudio for Managed Packages designer and minimal code approach.
|
Use Case Requirements
The best-practice guidance makes perfect sense. Vijay’s excited—it’s time to design and build! He breaks down the requirements of his new use case, starting with the overall requirement for a two-page workflow that allows users to manage cases for an account.
Create a Two-Page Workflow for Case Management
Vijay decides to use the Omniscript designer, because it’s the best tool for the job. The Omniscript should have two steps, one for each page of the workflow. On the first page, users select an account and case. On the second page, they manage case comments.
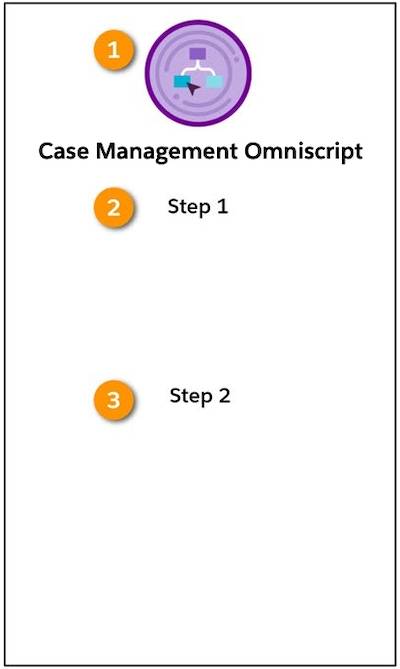
This Case Management Omniscript (1) acts as a container for the standard components Vijay uses and for any custom Lightning web components he creates. He takes advantage of the UI architecture of Omnistudio so that admins can maintain the workflow with an Omnistudio designer.
Vijay plans to use the first step (2) to contain the components he needs for the first page of the workflow and the second step (3) to hold the components for the second page of the workflow.
Select an Account and Show Related Cases
For this requirement, Vijay focuses on what his customer wants to do on the first page. They want to select an account from a list of accounts and display the cases related to the account. To this end, he adds a standard Lookup component to the Omniscript. The Lookup allows users to get data from Salesforce one record at a time, which suits the requirement.
The standard Lookup component meets only half the requirement, because Vijay also needs to fetch cases for a selected account. To do this, when a user selects an account, the Omniscript must pass a message to the component that fetches the cases.
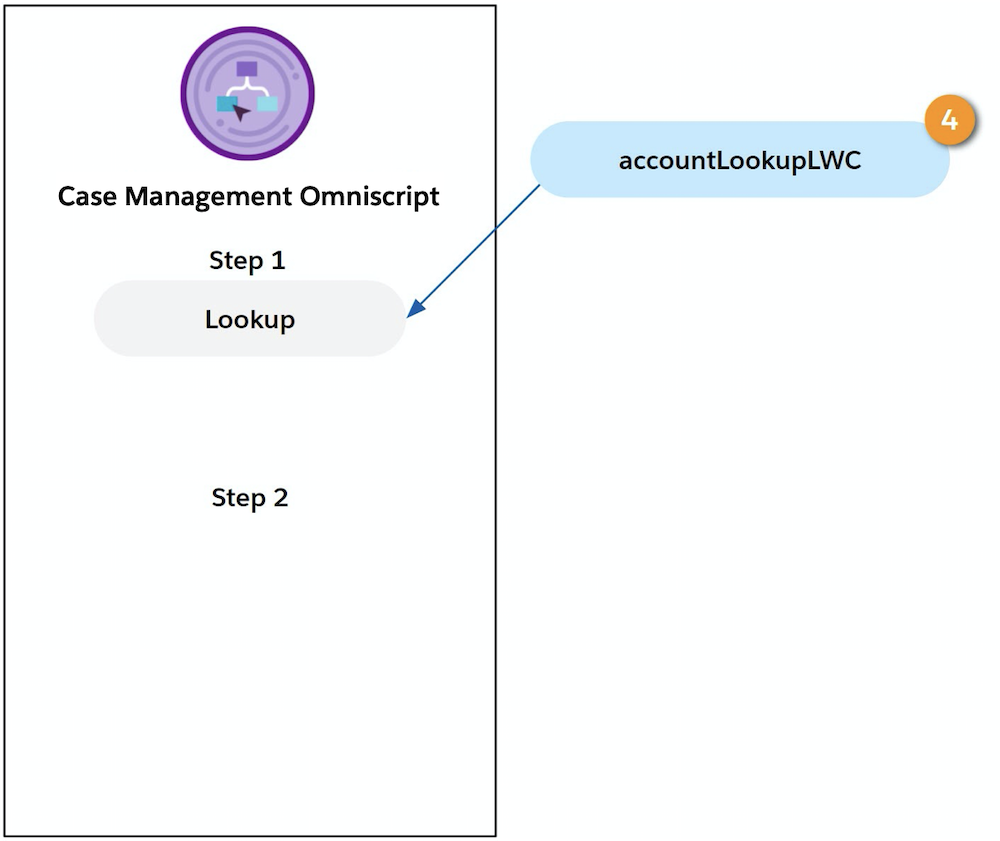
To achieve this, Vijay decides to create a custom Lightning web component called accountLookupLWC (4). When the user selects an account, Vijay’s plan is for this custom component to send a message to a second custom component that fetches and displays the cases. This is the cue for the second component to fetch and display cases related to the account. Vijay uses the LWC Component Override field of the standard Lookup component to link the accountLookupLWC component to the Omniscript.
Create a New Case and Select a Case
The next requirement is for users to create a new case and see it immediately in the list of cases. Then they want to select a case from the list. To build this requirement, Vijay decides to use the Omnistudio designers as follows.
- Use the Omniscript designer to build another Omniscript that allows users to create new cases.
- Use the Flexcard designer to create a Flexcard that displays selectable case records.
But where do they fit in the Omniscript?
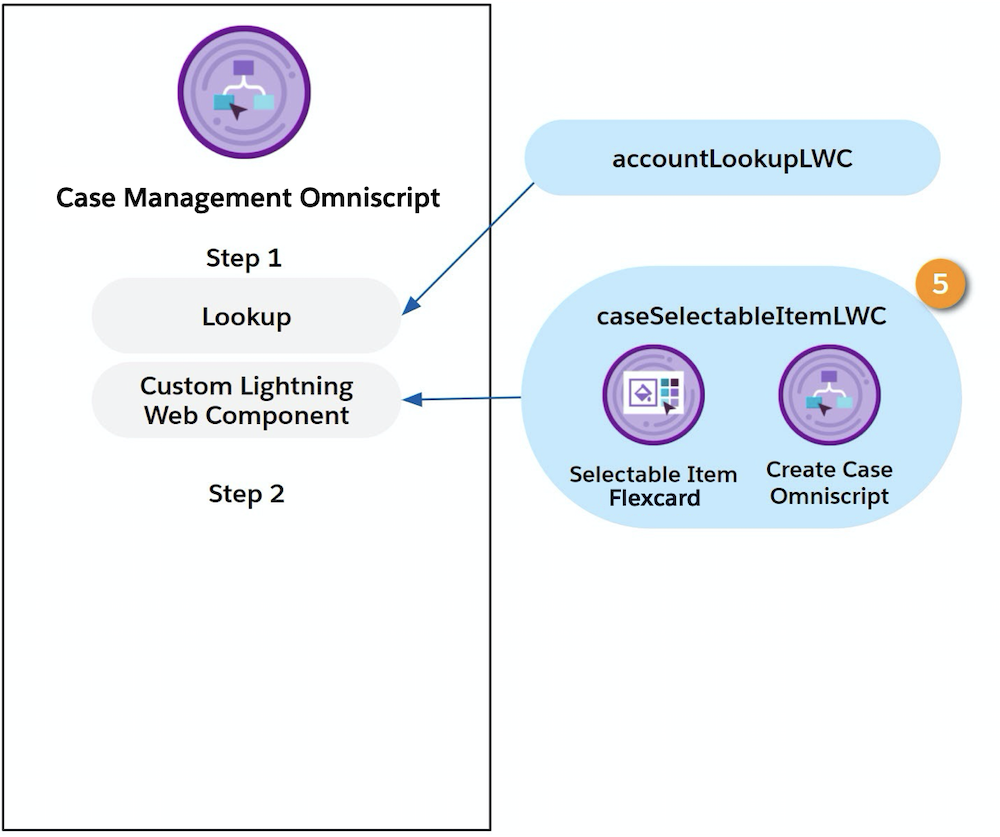
Because Vijay needs to provide additional functionality, he decides to create a custom Lightning web component called caseSelectableItemLWC (5). This component must:
- Contain the Selectable Item Flexcard and the Create Case Omniscript.
- Receive a message from the accountLookupLWC component when a user selects an account.
- Display a new case immediately in the list of cases without advancing to the next page.
- Enable users to select a case to automatically advance to the next page.
Vijay plans to use a Custom Lightning Web Component element to link the caseSelectableItemLWC component to the Case Management Omniscript.
Now, Vijay focuses on the requirement for the second page of the workflow.
View and Submit Case Comments
Users want to view existing case comments in a tabular format so the comments are easy to read. In addition, they want to submit new comments that appear immediately in the table of comments.

Vijay decides to add two standard components to the second step.
- A Text Area (1) for users to enter a new case comment
- A Data Mapper Post Action (2) that links to a Data Mapper Load to save a new case comment
To show existing case comments, Vijay decides to:
- Use the Flexcard designer to create a Flexcard with a Datatable element.
- Create a custom Lightning web component called caseCommentDataTableLWC (3), which contains the DataTable Flexcard.
- Use a Custom Lightning Web Component element (4) to link the caseCommentDataTableLWC component to the Case Management Omniscript.
Vijay now has the structure in place for the Case Management Omniscript.
Case Management Workflow: A Preview
Let’s skip ahead to preview the steps a user will take to run Vijay’s design for the Case Management Omniscript after it’s finished.
- Open the Case Management Omniscript. The Select Account and Case page opens.
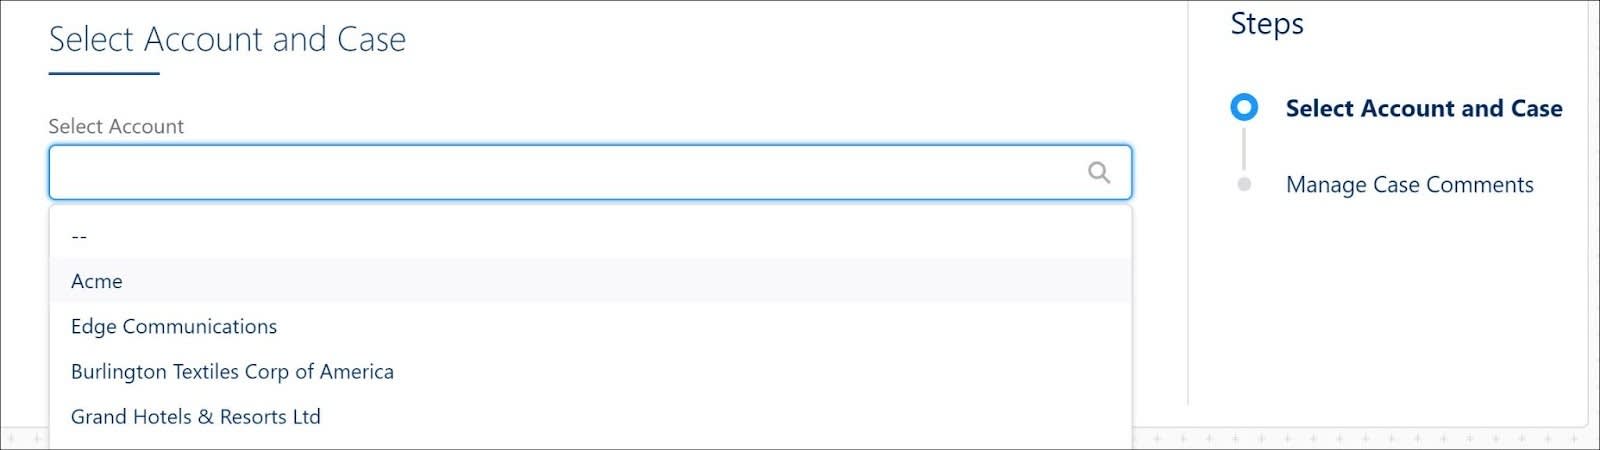
- To find an account, start typing in the Select Account search box.
- Choose an account from the search results. The Select Account and Case page opens and shows:
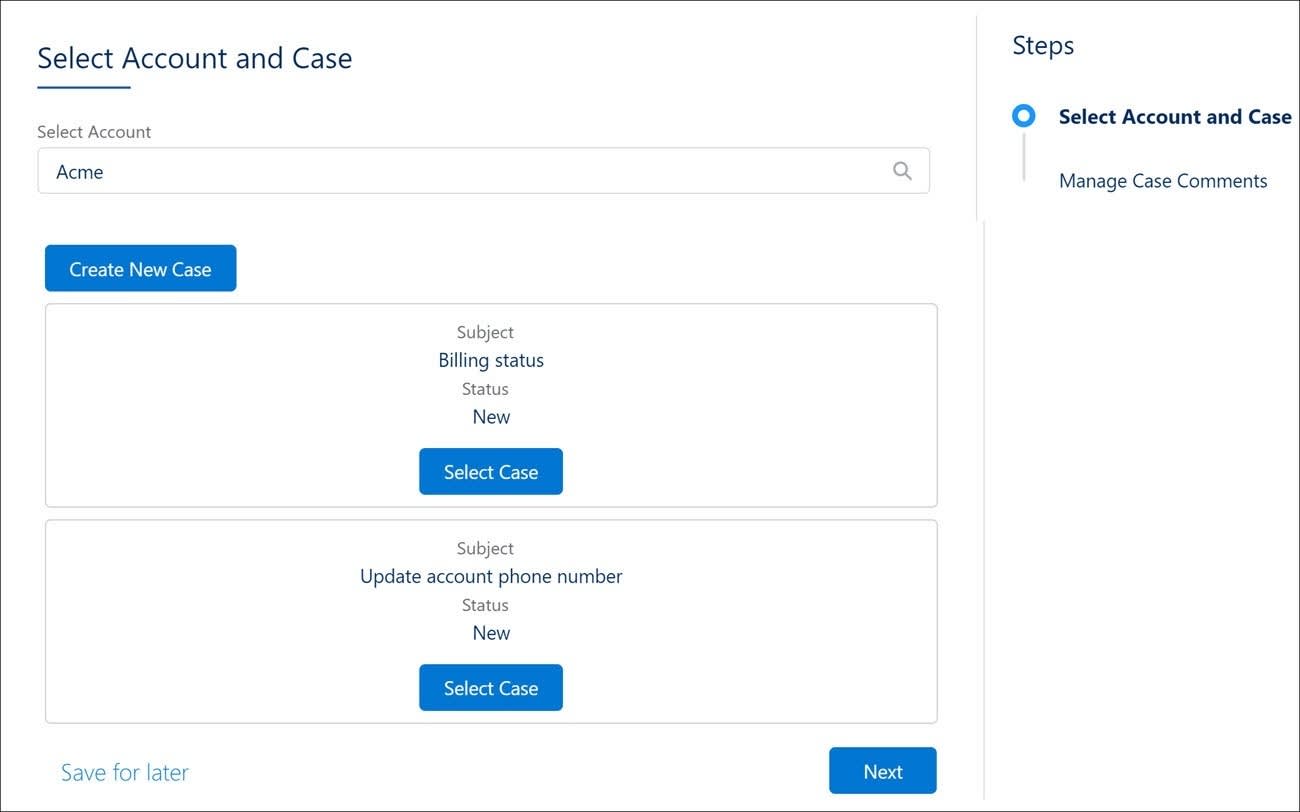
- A Create New Case button
- A list of the account’s current cases, each with a Select Case button
- A Create New Case button
- Click Create New Case.
The Create New Case modal opens with: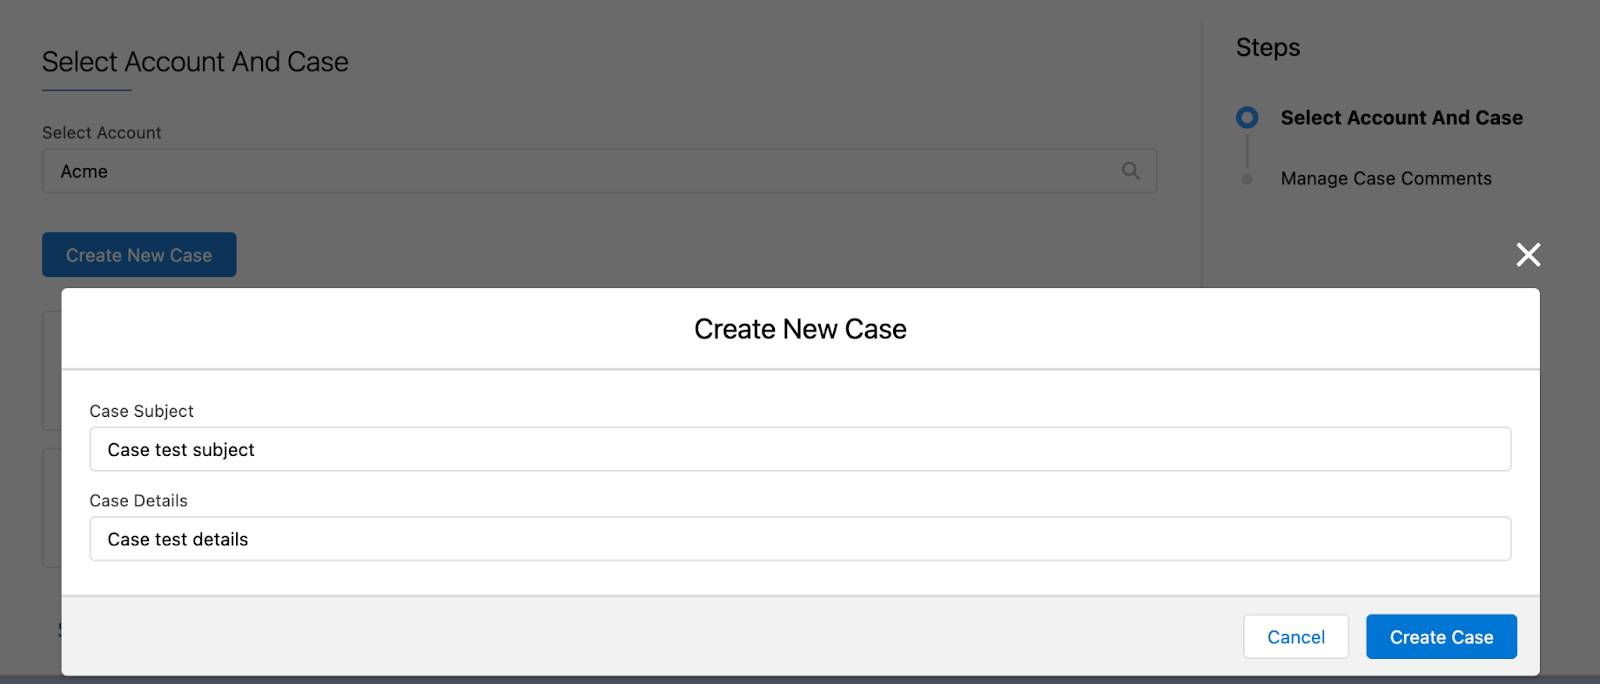
- Two input fields, one for the case subject and another for case details
- A Create Case button to create the case
- Two input fields, one for the case subject and another for case details
- Add the case details, and click Create Case. When you create a new case, it immediately displays in the list of cases related to the account.
- Click Select Case to choose a case and advance to the Manage Case Comments page. This page displays:
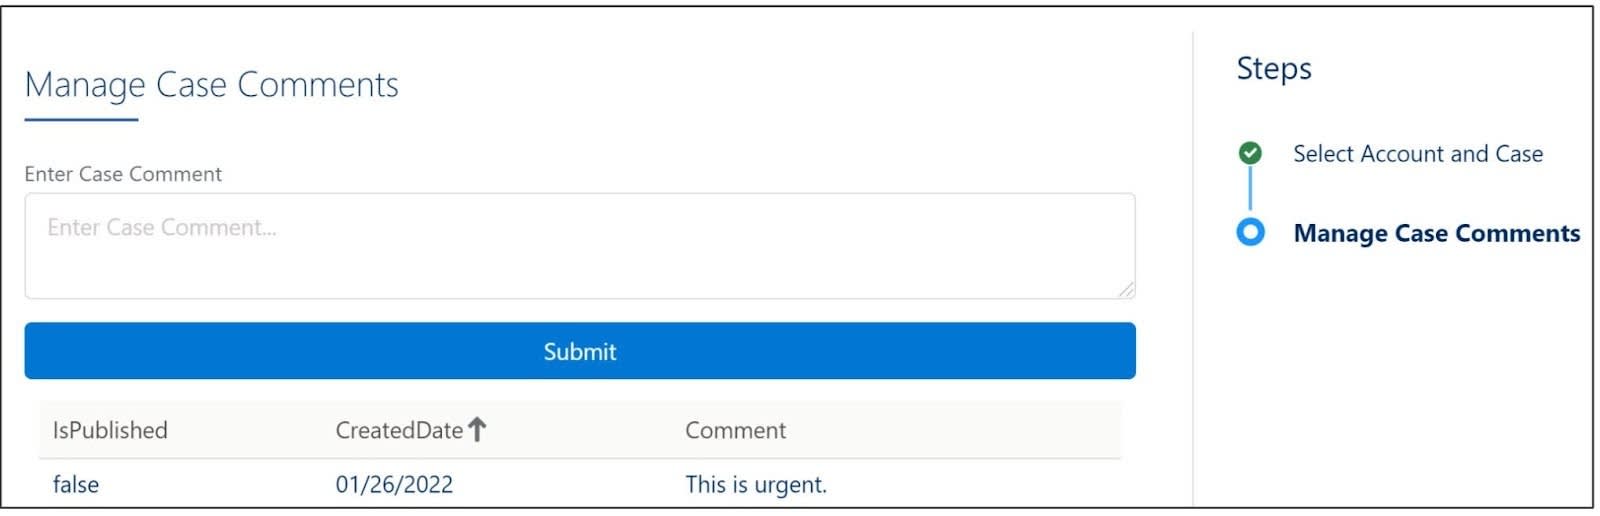
- An input field to enter a new case comment
- A Submit button to submit the comment
- A table of case comments
- An input field to enter a new case comment
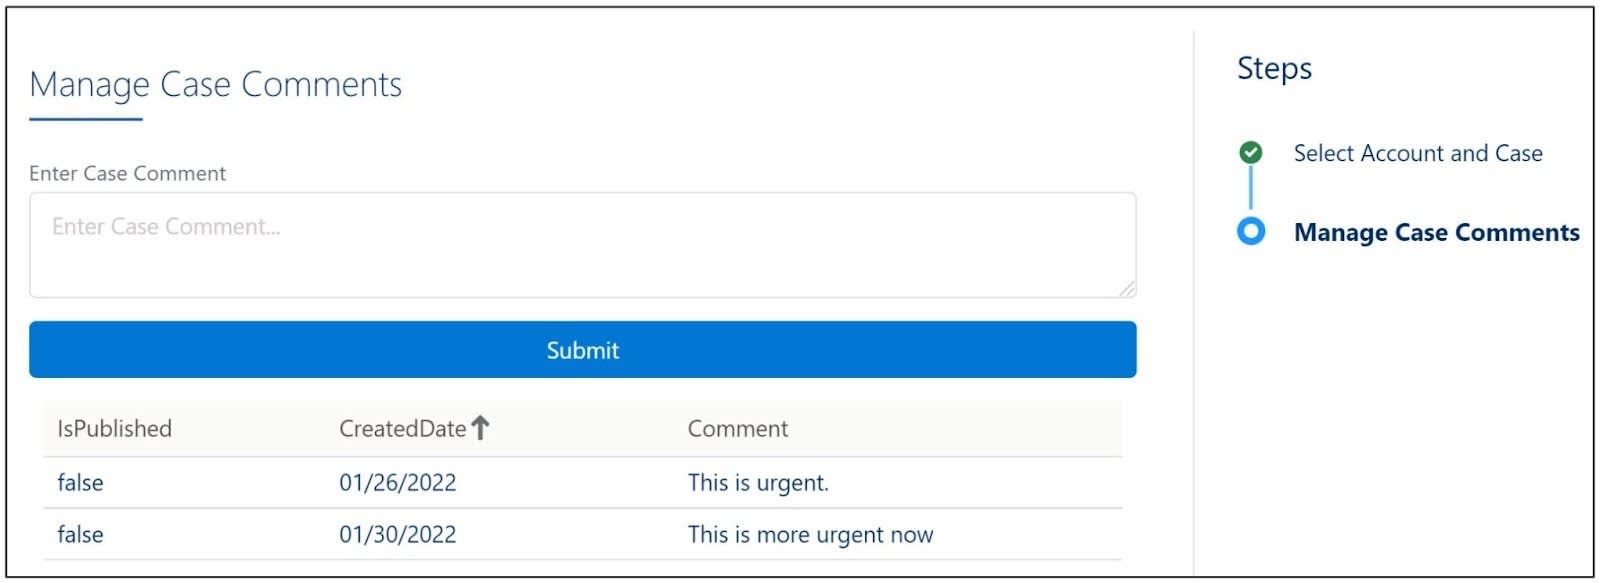
- Enter and submit a new case comment. It immediately displays in the table of comments.
In the next unit, you delve into the configuration details and learn how Vijay configures and modifies the standard Lookup component.
Resources
- Trailhead: Lightning Web Component Basics
- Trailhead: Quick Start: Lightning Web Components
- Salesforce Help: Omnistudio for Managed Packages