Create a Segment in Data 360
Learning Objectives
After completing this module, you’ll be able to:
- Define segment attributes.
- Create a filtered segment in Data 360.
- Configure an activation target.
Segment Your Audience
If you recall Mary’s requirement, she wants to create a segment from the Athletes group so she can run a personalized promotion.

For the promotion, Mary wants to target a high-value subgroup of the Athletes group, so she creates a filtered segment called Fitness and Sports Enthusiasts. Let’s understand how she sets up the segment.
In Unit 1, Mary identified broad characteristics and statistics for the Athletes group. Next, she establishes a profile for members of this segment, who have these attributes.
- Actively involved in fitness or sports, and workout or play at least four times a week
- Looking for performance shoes
- Interested in shoes that are designed for a particular function
- Seeking innovative and technologically advanced products
- In the age group 16 through 38
Next, she defines more specific criteria to create the filtered segment based on these attributes.
-
Activity level: Because this segment is for serious athletes, Mary wants to target customers who have participated in at least two running or fitness-related events in the past year.
-
Purchase frequency: This segment has the highest share of sales, so the target customers are those who have purchased at least one pair of shoes in the last 3 months.
-
Share of transactions: This segment also has the highest share of transactions, so the customers should have a customer lifetime value (CLV) of at least $1,000.
-
Age group: The customer age group should be between 16 and 38.
Mary shares the segment details with Linda, who does the leg work to create the Fitness and Sports Enthusiasts segment in Data 360.

Create a Segment
Linda first identifies the target Salesforce object that the segment builds on. For example, she can build a segment on Individual, Account Contact, or Loyalty Program Member. As you may guess, she creates the segment on the Loyalty Program Member object.
- Click
 , and select Data 360.
- Click the Segments tab.
- Click New and add the following details.
- Segment On: Loyalty Program Member
This identifies the object that the segment builds on.
- Publish Schedule: 24 hours
- Segment Name:
Fitness and Sports Enthusiasts - Start Date: Current date
- Expiration Date: Any future date

- Click Save.
Every 24 hours, this segment refreshes with new or modified data based on changes to the Loyalty Program Member object. It’s what makes the segment dynamic. Linda now adds the filters.
Select Segment Attributes
The segment target selected in the previous set of steps determines the attributes available for creating segmentation rules. Linda chooses from two types of attributes.
-
Direct attributes have a one-to-one relationship with the segment target, such as postal code or first name.
-
Related attributes can have multiple data points, such as purchases and product characteristics.
Based on the details Mary provided, Linda adds the required attributes to narrow down the target audience and create the filtered segment.
- Open the Fitness and Sports Enthusiasts segment record page.
- Under Direct Attributes, select Loyalty Program Member.
- From the Attributes pane, drag Loyalty Program Member Status to the Build your Segment section.
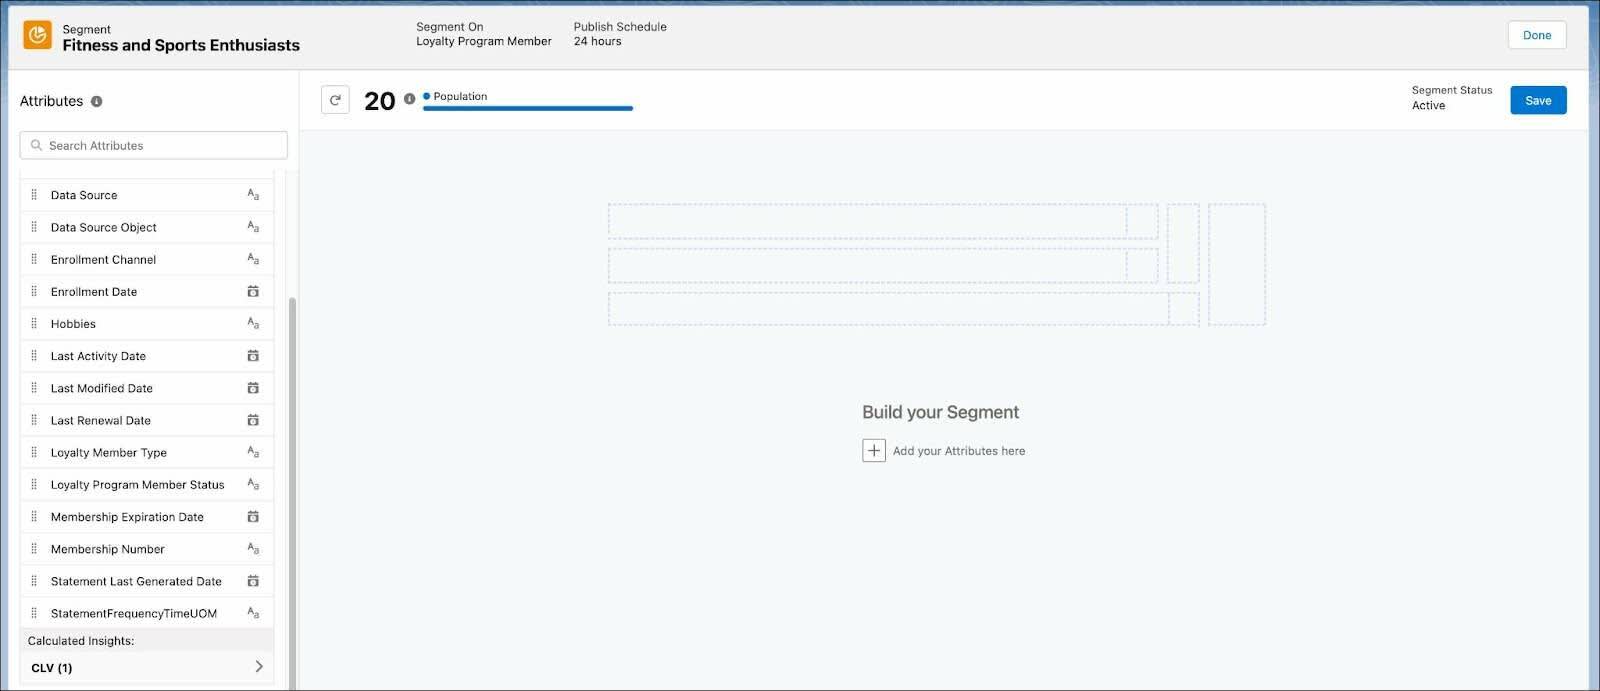
- In the Value field, enter and select Active.
- Click Done.
- Repeat steps 1–4 to add the attributes in the following table. Note that some attributes are custom fields that Linda has mapped in the data model.
Attribute Name
Container Path
Operator
Value
Direct Attributes > Loyalty Program Member > Hobbies
Is Equal To
RunningDirect Attributes > Loyalty Program Member > CLV > transactionamount_c
Is Greater Than Or Equal To
1000Direct Attributes > Loyalty Program Member > Age
Is Between
16(Lower Bound),38(Upper Bound)Related Attributes > Loyalty Transaction Journal > Activity Date
Container Path: Loyalty Transaction Journal.Related Loyalty Transaction Journal > Loyalty Transaction Journal.Loyalty Program Member > Loyalty Program Member.Loyalty Program Member Id
Count At Least1Last Number of Months
3 - After adding all the attributes, click Save.

Data 360 recalculates the segment population based on the filters. Linda has successfully created the Fitness and Sports Enthusiasts segment with the required attributes.
Mary plans to create a targeted promotion for this segment and send communications to segment members using a Marketing Cloud Engagement journey. So Linda creates an activation target to make this data available in Marketing Cloud Engagement. Let’s learn more about activation targets.
Create an Activation Target
You can export segments to various channels called activation targets. These targets are the locations where the segment is used. To send data about the Fitness and Sports Enthusiasts segment to Marketing Cloud Engagement, Linda first creates an activation target.
- Click
 , and select Data Cloud Setup.
- Under Configuration, click Marketing Cloud Engagement.
- To connect a Marketing Cloud Engagement account, click Manage. This takes Linda to the login page where she enters her Marketing Cloud Engagement credentials.
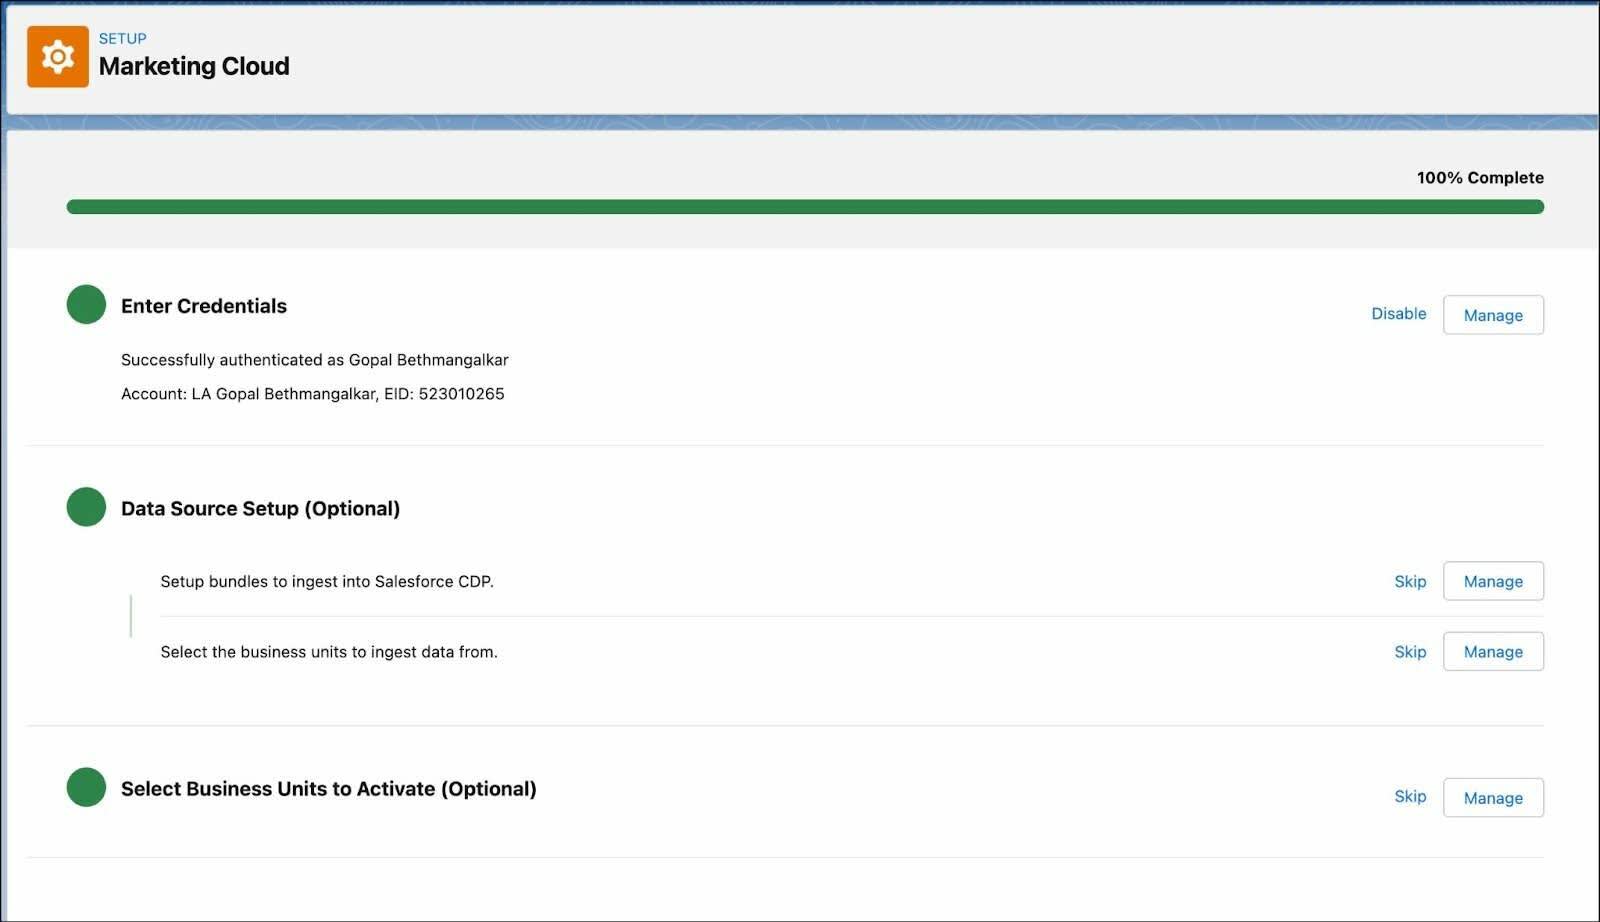
- After successful authentication, click
 , and select Data 360.
- Click the Activation Targets tab.
- Click New.
- Select Marketing Cloud Engagement.
- Click Next.
- Enter an easy-to-recognize and unique name.
- Click Next.
- Click the arrows between columns to add or remove business units that receive the published segments.
- Click Save.
Linda has successfully created an activation target. Let’s recap everything she’s done up to now. She created a segment, selected attributes to create the segmentation rules, and created an activation target to make the segment available in Marketing Cloud Engagement.
In the next unit, you see how Linda creates a promotion for this segment and sends the promotion data to Marketing Cloud Engagement.
Resources