Set Up a Simple Knowledge Base
Learning Objectives
After completing this unit, you’ll be able to:
- Identify and assign Knowledge User licenses.
- Use Salesforce Go to set up Knowledge.
- Create and publish an article.
Count and Assign Knowledge Licenses to Users
As a Salesforce admin, you’re ready to purchase licenses for Salesforce Knowledge. But first, you have to figure out who needs them. All internal users can read articles without a special license, so most service reps don’t need licenses right away because they primarily consume Knowledge articles.
The power users on your team—admins and expert authors—do more than read articles; they create them, which requires a specific license. Knowledge User licenses are often included with Agentforce Service editions. Check with your Salesforce account executive to determine your licensing needs.
Once your Knowledge base is running, anyone who writes or edits articles, including subject matter experts and managers, needs a license.
You need to assign the Knowledge User license to yourself and any other key admins or article authors to begin setting up the knowledge base. Here’s how an admin assigns the license.
- From the Setup menu
 , choose Setup.
- In the Quick Find box, enter
Users.
- Click Users.
- Click the username. Select a user who needs author permissions.
- Click Edit, and select Knowledge User.
- Click Save.
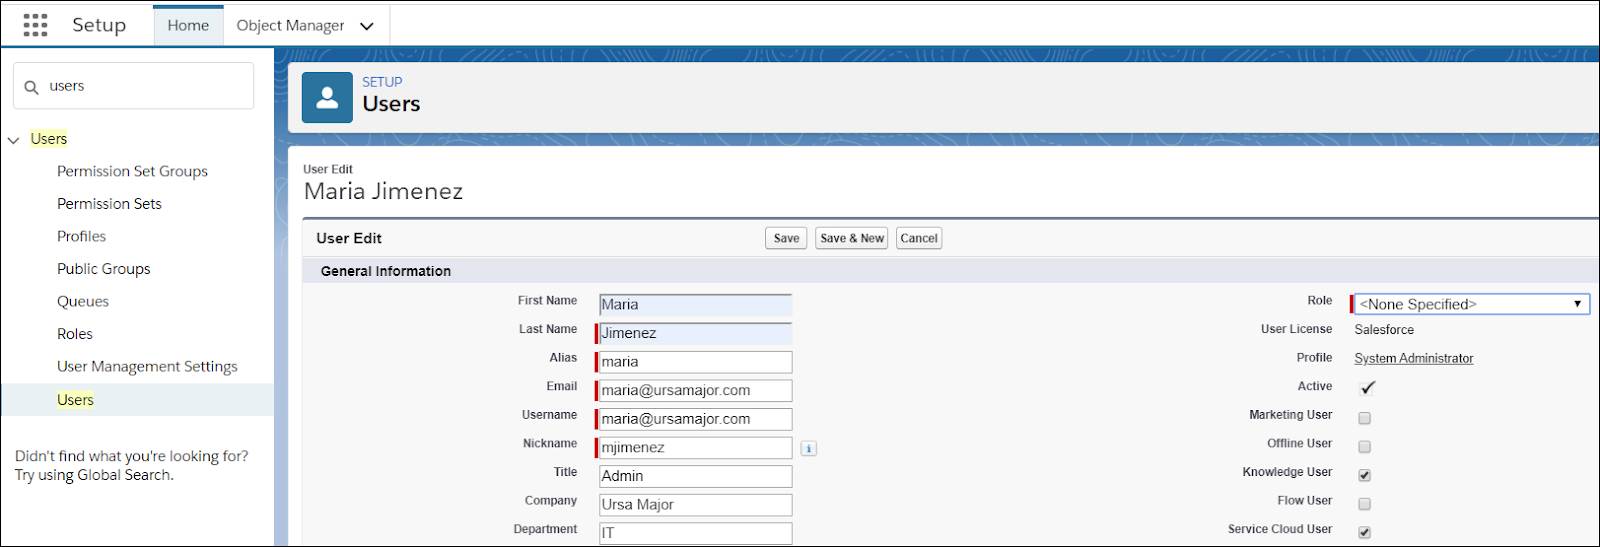
When you assign a Knowledge User license, the Knowledge pages appear in the user’s Setup.
Enable Knowledge
With the necessary permissions, you can enable Knowledge for your organization. Remember, once you enable Knowledge, you cannot disable it later.

- From the Setup menu
 , choose Service Setup.
- In the Quick Find box, enter
Knowledge Settingsand select Knowledge Settings.
- Select Enable Lightning Knowledge.
Set Up Knowledge with Salesforce Go
You can save time by using Salesforce Go to set up Knowledge. Salesforce Go automatically turns on Knowledge, assigns licenses to article authors, and sets up initial data groups and categories. This setup is critical because accurate data groups and categories are essential to ground your generative AI tools—which ensures they surface the most relevant, trusted articles for reps, customers, and AI agents.
- From the Setup menu
 , choose Salesforce Go.
- Type
Knowledgeinto the Search features box, and select Knowledge.
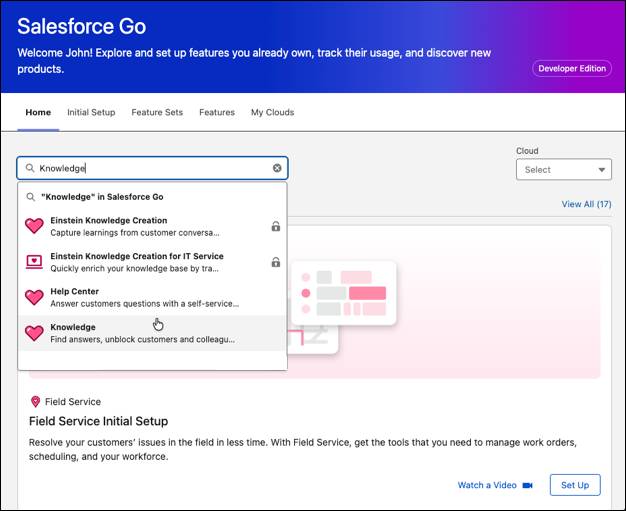
- Next to Assign Your Knowledge Authors and Create Data Categories, click Manage.

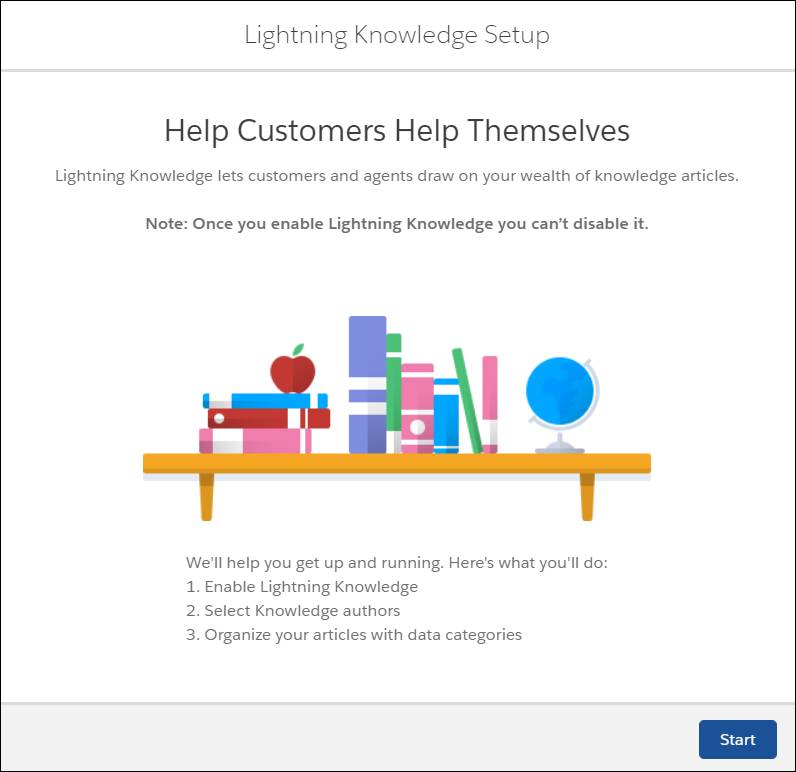
- Click Start.
- In the search box, enter a Knowledge Author. For example, you might enter the name of a senior service rep.
- Select an author, and click Next.
- Enter your data group and data categories and click Next. You might enter
Installationas the data group andHot Water Heater Installationas the data category.
- Click Next, then Finish.
Create Knowledge Articles
Everything is set up and a service rep is ready to create their first article, perhaps an answer from a frequently asked questions (FAQ) list. This is the first step in building the trusted data layer that powers AI. Follow the process for creating and publishing an article.
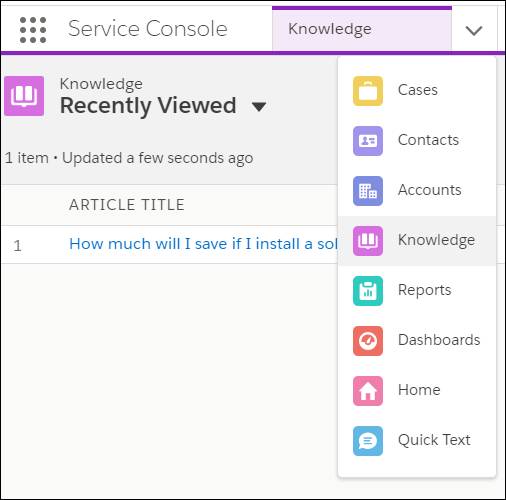
- From the Navigation tab in the Service Console, select Knowledge. If you need to get to the console, select it from the App Launcher.
- Click New.
- If asked, choose the record type for the article, such as FAQ.
- Click Next.
- Enter the article title in the Title field. For example, enter:
How much will I save if I install a solar hot water heater? - Click in the URL name field. Knowledge generates a URL based on the article title. You can change it, but opt not to.
- If asked, choose a Validation Status, such as Work in Progress.
- To show what the article is about, enter a summary. The summary appears in the search results.
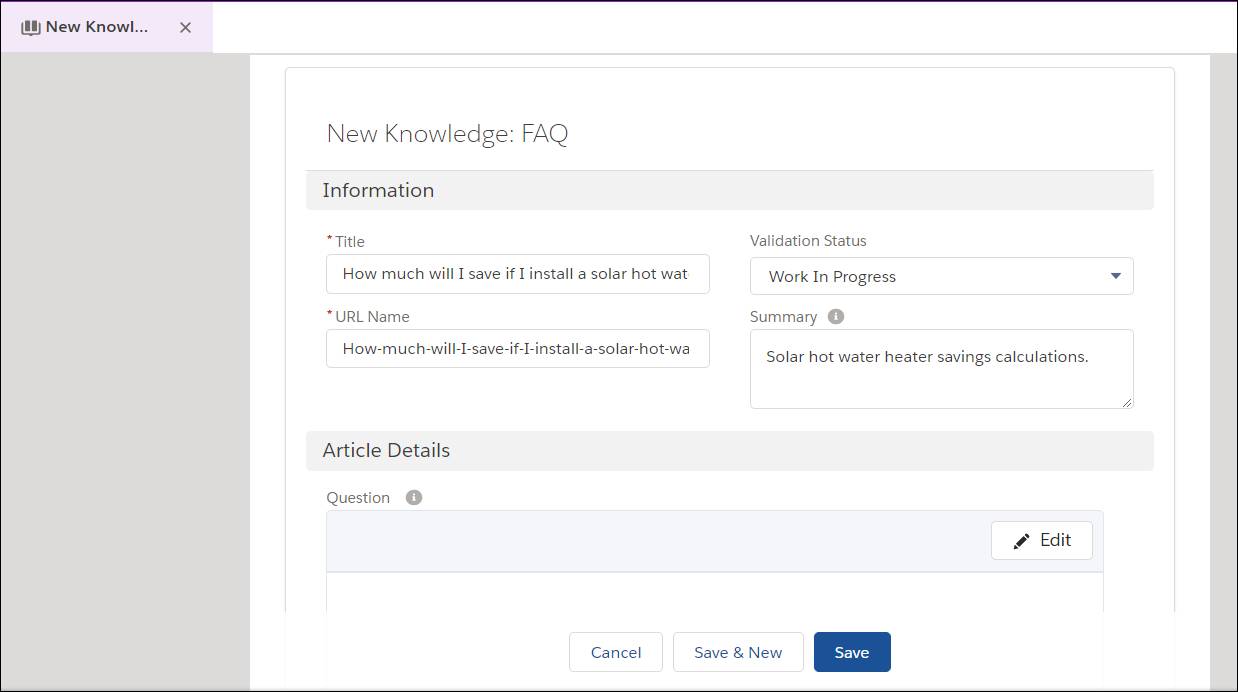
- Click Save.
You’ve created the structure of your first article! Now, add the main content.
- In the Knowledge tab, click the article name. If you don’t see the article, you might have to switch to the Draft Articles view.
- Click Edit.
- Next to Question, click Edit.
- Enter the question:
How much will I save if I install a solar hot water heater?
- Next to Answer, click Edit.
- Enter the answer:
Here in the Southwest, we have ample solar energy year-round, except for the few days when it rains. That means your solar hot water heater is always working for you. How much you save depends on how much hot water your household uses. For some households, that's up to 85% of your bill, but the average is around 50%.
- Click Save.
Later, an admin can set up an approval process to make sure that articles are properly reviewed. For example, articles written by trainees or ones that must stay in compliance with rules need to be reviewed. For now, you decide to publish this article on your own. Here’s how it’s done.
- In the Knowledge tab, click the article.
- Click Publish.
- Select when to publish the article or Publish Now.
- Click Publish.
Put Knowledge to Work
Your service team is ready to populate its knowledge base. You’ve configured user access, enabled Knowledge, and published the first article. You’ve laid the groundwork for the trusted data layer that powers AI and maximizes rep and AI agent productivity. Now it's time to put Knowledge to work for you. You’re ready to experience how Knowledge acts as the foundation for successful AI.
Resources
- Salesforce Help: Edit Users
- Salesforce Help: Knowledge Settings
- Salesforce Help: Create and Edit Articles