Customize Mobile-First Login with Code
Learning Objectives
After completing this module, you’ll be able to:
- Locate and rename the Login Discovery handler.
- Add social sign-on functionality to the login discovery handler.
- Gather user information with request attributes.
Locate the Default Login Discovery Handler
When you create your login discovery handler from the Login & Registration page, Salesforce creates the default handler as an Apex class. This handler can be found along with other Apex classes on your org’s Apex Classes page.
- From the Login & Registration page, under Login Page Setup, note (or copy) the handler name that is listed in the Login Discovery Handler text box. If you need to reopen the Login & Registration page, from Setup, in the Quick Find box, enter All Sites and select All Sites. For the NTO Customers site, click Workspaces. Click the Administration tile, then click Login & Registration.

- In another tab, from Setup, enter
Apex Classesin the Quick Find box, and click Apex Classes. The handler appears in a list of classes on the Apex Classes page.
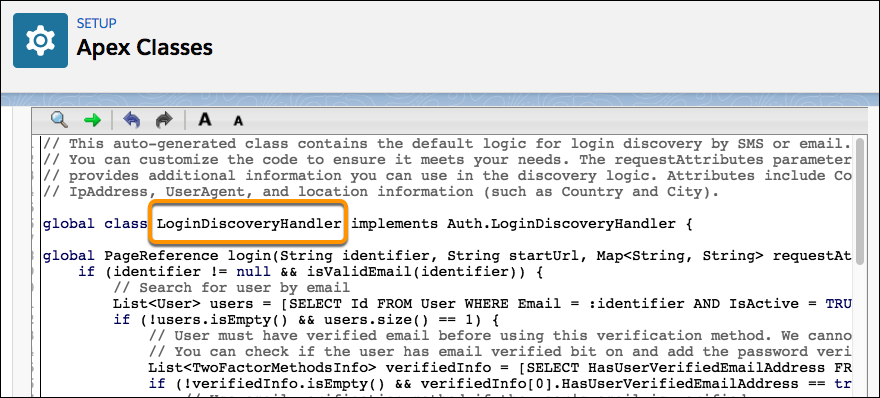
- Locate (or find) the name of the login discovery handler in the list. It’s not so easy scanning the list of Apex classes to find the handler, is it? We can fix that by renaming the handler to something more recognizable. Plus, by renaming it, you can see at a glance that the handler is customized. The handler no longer has to be “auto created,” so let’s go ahead and change the name to reflect it.
- Click Edit next to the name of the handler. The handler name appears on the first line of code.
- Replace the Salesforce name with your own and click Save.
 Return to your Login & Registration page and refresh the page. Notice Login Discovery Handler is updated with its new name.
Understand the Default Login Discovery Handler
Before we start to customize the handler, let’s get familiar with the handler that Salesforce generates. You can view the complete code example located in the Salesforce Apex Developer Guide: LoginDiscoveryHandler Example Implementation. Here we describe how the login discovery handler works.
The first step is to get the identifier (email or phone number), passed in from the login page. Then check whether the identifier is in a valid format.
Next, query the database for a user associated with that identifier. If the user is active, and if the identifier is unique, check whether the user has already verified that identifier.

If the identifier has been verified, send a verification code via email or text message, and specify where the user goes after successful verification. Then redirect the user to the Verify page where the user enters the verification code. If the identifier has not been verified, redirect the user to the page where the user enters a password.
Now let’s see what the handler logic looks like as a graphic.

Here’s another way to look at the process of identity verification.
- Get the identifier.
- Is the identifier valid?
- If valid, look up a user associated with the identifier.
- Is the user active?
- If active, is the identifier unique?
- If yes, has the user verified their identity with that identifier?
- If yes, the identifier is verified, send a verification code. If no, the identifier isn’t verified, ask for a password.
- If verification code or password entered correctly, direct the user to the Experience Cloud site home page.
Customize the Login Discovery Handler for Social Sign-On
Customers often like to log in to a site with their social network credentials, such as Twitter, Google, or LinkedIn. If you’ve set up your org to allow social sign-on, Login Discovery makes it even easier for your customers. You can add logic to the handler for social sign-on programmatically. It redirects customers directly to the social network determined by your handler logic.
-
Set Up Salesforce Auth. Providers. The first step to customizing the handler for social sign-on is to check whether your org is configured for the social networks that you want to support. Your org must have authentication providers to connect to each one. Salesforce provides several default authentication providers to connect with popular social networks—and we add new ones as they emerge. If you don’t have the social networks you want, you can create them in a few clicks.
- From Setup, enter
Auth. Providersin the Quick Find box, and select Auth. Providers.
- Create an authentication provider for a social network. Your Playground org isn't configured with any authentication providers. If you want to create one, you can refer to the Set Up Social Sign-On unit in the Identity for Customers Trailhead module. That unit shows how to set up authentication providers and add them to your login page with clicks.
-
Locate the SSO URLs for Your Social Network. When you add Auth. Providers programmatically, you need to add the appropriate SSO URLs to the social network.
- To return to the Auth. Providers page, from Setup, enter
Auth. Providersin the Quick Find box, and select Auth. Providers.
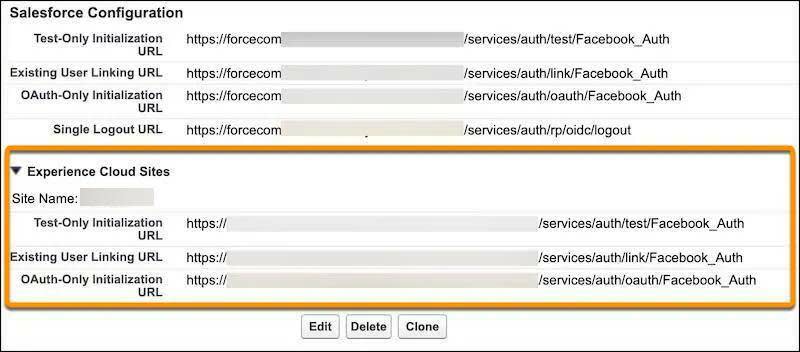
- Click the link to the name for your desired social network. You click the name itself, not the Edit link.
- Expand Experience Cloud Sites. The SSO URLs for each authentication provider in your org are listed.
-
Add the SSO Logic to Your Login Discovery Handler. For this exercise, SSO logic is provided for the NTO Customers site. For your production org, add logic to your Login Discovery handler to determine when users are redirected to their social network. Your custom code includes logic to determine whether the user should use a social network or log in directly to Salesforce. For example, it can look up a custom field on the User object. Here’s an example that implements social sign-on using the ThirdPartyAccountLink (TPAL) standard object. A list of third-party account links (TPAL) is generated when users of an org authenticate using a third-party Auth. Provider. This example queries the TPAL table and redirects the user to log in via Facebook or Linkedin if it finds the TPAL associated with the user’s email.
//Redirect to Social Sign-On private PageReference getSsoRedirect(User user, String startUrl, Map<String, String> requestAttributes) { // You can look up whether the user can log in with their social credentials.
List<ThirdPartyAccountLink> providers = [select provider from ThirdPartyAccountLink where Handle = :user.email]; String provider = providers[0].Provider; if (provider == 'facebook') { return new PageReference([select SsoKickoffUrl from AuthProvider where DeveloperName='facebook'].SsoKickoffUrl); } else if (provider == 'linkedin') { Return new PageReference([select SsoKickoffUrl from AuthProvider where DeveloperName='linkedin'].SsoKickoffUrl); } else { return null; }
Gather User Information with Request Attributes
You can determine login policies based on the user's browser state when they access the login page. For example, you can have different policies based on whether people are logging in from the United States versus people logging in from China.
To collect the browser data, use the requestAttributes parameter of the LoginDiscoveryHandler.login method. The parameter passes in these values: CommunityUrl, IpAddress, UserAgent, Platform, Application, City, Country, and Subdivision. City, Country, and Subdivision values come from IP geolocation.
CommunityUrl=http://MyDomainName-dev-ed.my.site.com:5555/discover IpAddress=55.555.0.0 UserAgent=Mozilla/5.0(Macintosh; Intel Mac OS X 10_13_4) Version/11.1 Safari/605.15 Platform=Mac OSX City=Chicago Country=United States Subdivision=Illinois
Here’s an example using IP geolocation values.
private PageReference getSsoRedirect(User user, String startUrl, Map<String, String> requestAttributes) { // Send US users through a local IdP service if(requestAttributes.get('Country') == 'United States') { String ssoURL = 'https://mycompany.com/idp'; return new PageReference(ssoURL); } return null; }
Here’s an example for mobile (iOS) users.
private PageReference getSsoRedirect(User user, String startUrl, Map<String, String> requestAttributes) { // Send iOS users through Facebook SSO if(requestAttributes.get('Platform') == 'iPhone') { String ssoURL = 'https://<MyDomainName>.my.salesforce.com/nto/services/auth/sso/Facebook'; return new PageReference(ssoURL); } return null; }
Ensure Uniqueness for Users
Your production org can have multiple users with the same verified email address and mobile number. But your customers must have unique identifiers. To address this problem, you can add a few lines of code to the login discovery handler that filters users to ensure uniqueness.
The LoginDiscoveryHandler class described in the Apex Developer Guide contains a code example that ensures users with the External Identity license are unique. You can adapt the code to support other use cases. For example, you can modify the code to address users with other user licenses or criteria.
You’ve learned how to set up your mobile-first login pages and customize them. In the next unit, you’ll learn how to track your progress by setting up reports, charts, and a dashboard to display them.