Create Document Templates
Learning Objectives
After completing this unit, you’ll be able to:
- Describe three types of tokens used in OmniStudio Document Generation and their syntax.
- Create a document template in Document Template Designer.
- Explain OmniDataTransform and custom class data-mapping flow.
Prerequisites
Before you start, make sure you complete the following required content.
Also, consider completing this recommended content.
Document Generation at Cloud Kicks
In the OmniStudio Document Generation Foundations module, you saw how Cloud Kicks simplified and expedited the sales process with digital document generation.
Candace Evans, a sales rep at Cloud Kicks, learned the benefits and capabilities of document generation.

Always keen to help Cloud Kicks succeed, Candace now wants to set up an all-singing, all-dancing document-generation system.
Enter Linda Rosenberg, the trusty Salesforce administrator at Cloud Kicks.

Linda knows how to set up the logic required to implement and maintain an OmniStudio Document Generation solution. Now it’s time for Linda to help out Candace and her team.
About Document Templates
With OmniStudio Document Generation, you can design Microsoft Word and PowerPoint templates to make document generation a breeze for teams. Your templates can be as simple or sophisticated as needed to optimize your business processes. Creating your document templates is the first project to tackle when you’re setting up a document-generation system.
When you design a template, you can include standard, conditional, and dynamic elements. This way, when the end user generates a new document from the template, a lot of the content is already populated, so a lot of work is done.
With this solution, use standard content, tokens, and display conditions in your templates. For example, a quote template often requires standard elements, like the company name and contact details. The template may also use dynamic elements, like the customer’s chosen product and features, along with a quoted price. Some documents require sections to only display under certain conditions. No worries, you’re covered with OmniStudio Document Generation.
Once your template is ready:
- Upload the file to the Document Template Designer.
- Specify the template metadata, such as name and type.
- Choose the Data Mappers required for data mapping and extraction.
- Kick the tires to test your template.
When you’re happy with the template, it’s ready to roll out.
It’s exciting to learn all about setting up document templates. At this moment, Linda, our Salesforce admin, is creating a quote document template for Candace in Sales.
Embedded Tokens
A token is a placeholder in a template that maps input data for dynamic generation. For .docx and .pptx templates, you can embed various types of tokens, such as for variables, repeating content, and condition evaluations.
Click each token type to learn more.

Let’s look at how Linda uses these tokens in her quote template.
Variable Token
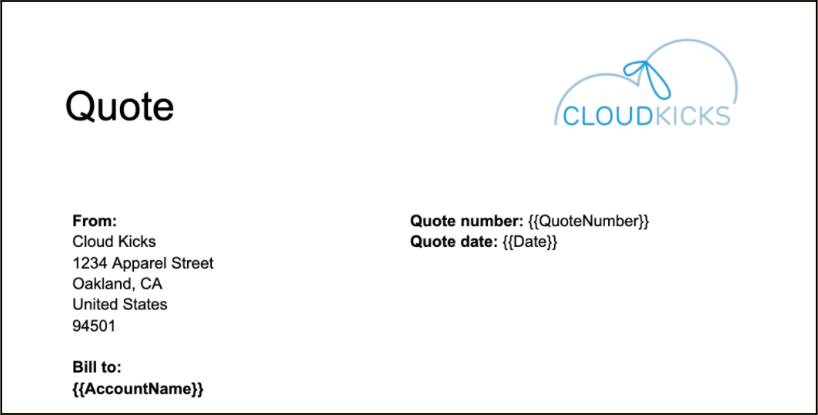
Linda’s quote document includes variables like company name, quote number, and quote date. She uses variable tokens to represent the variables in her template.
In this example, the account name and token are in bold. The Account name is the name of the customer company.
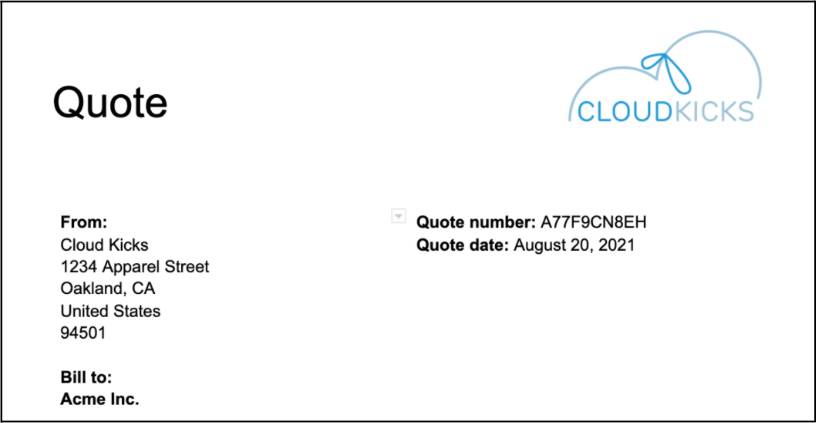
The final output document displays the account name, quote number, and quote date. Just like the token, the account name is also bold.
Repeating Content Token
The quote document includes a section that lists all products, in this case, the super-comfy sneakers that the customer wants to order.
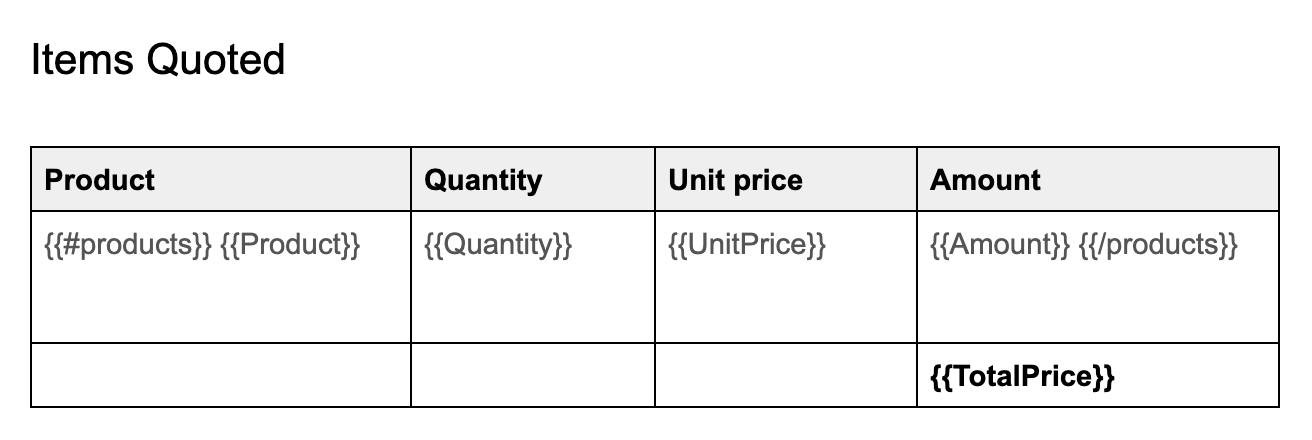
For this variable, Linda uses a repeating content token in tabular format.
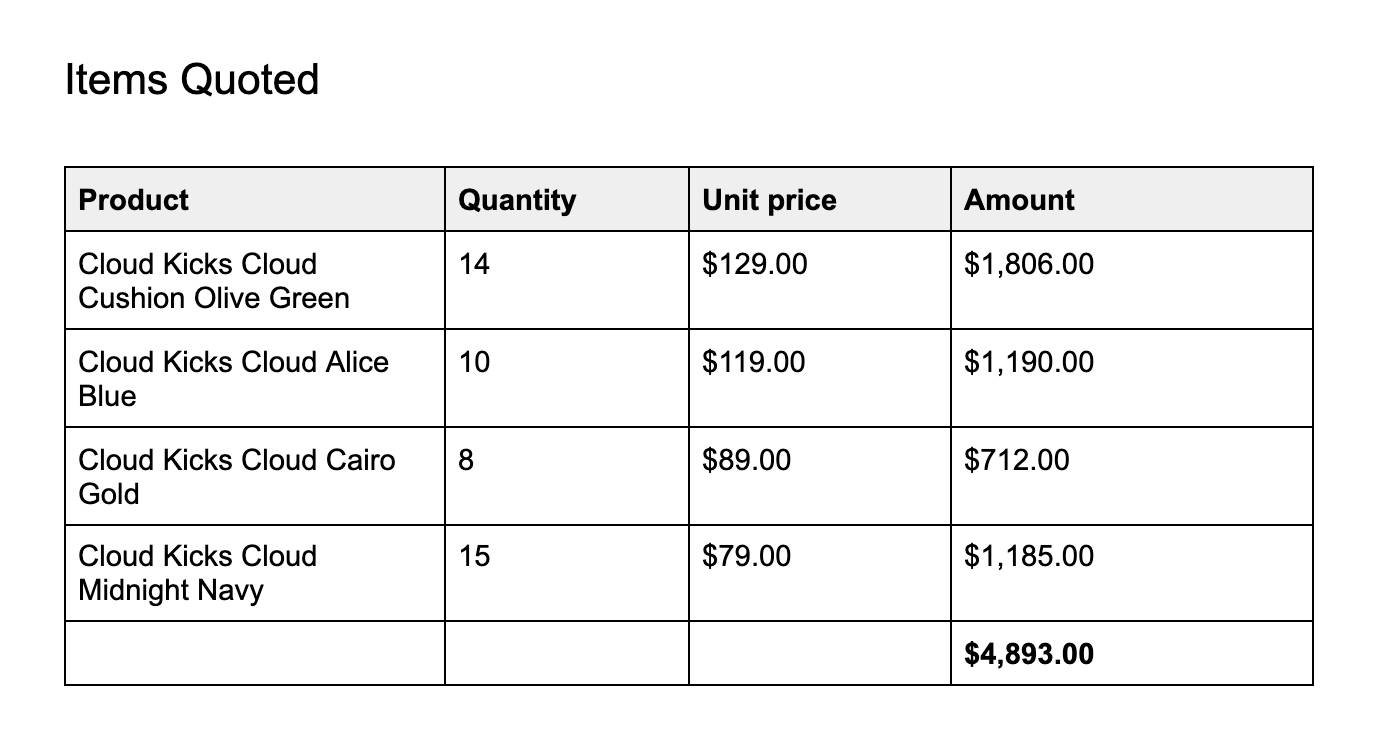
The final output document includes a table with multiple rows of products, which list each type of sneakers the customer is interested in buying.
Condition Evaluation Token
At Cloud Kicks, the shoe delivery time for customers who live in Alaska and Hawaii is longer than for customers living in other states. Therefore, quote documents for those in Alaska and Hawaii include a section with a disclaimer about the delivery time. Only customers whose shipping address is in Alaska or Hawaii need to see the disclaimer.
To set this up, Linda creates a conditional clause.
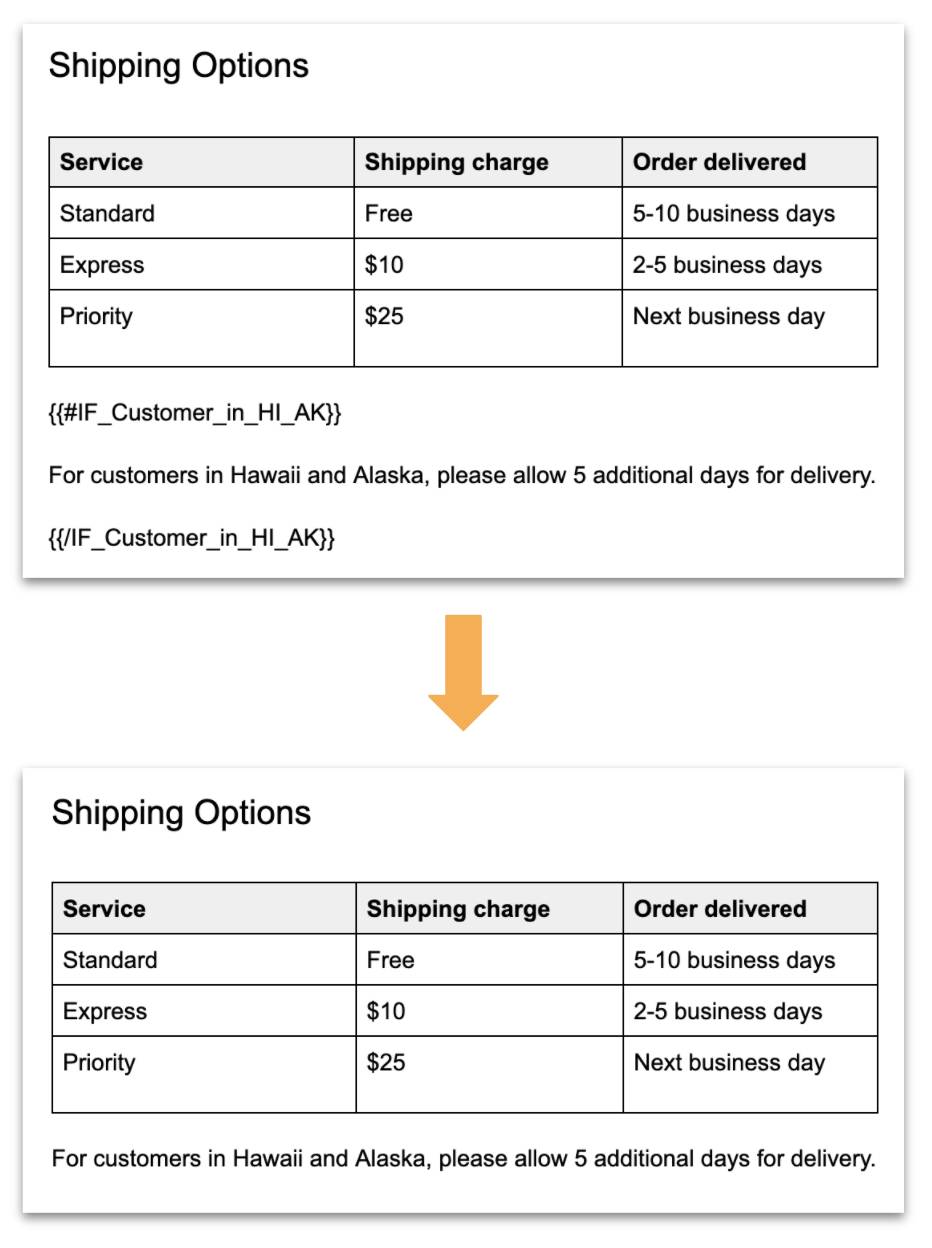
To configure the clause, Linda uses a condition evaluation token in the document template.
This way, the final output document for customers in Alaska and Hawaii includes the disclaimer. For customers in all other states, the template hides the disclaimer. Remember, the condition evaluation token only works with true/false statements.
Document Template Designer
After you create a .docx or .pptx template, the next step is to upload it to the Document Template Designer. Now Linda uses the Designer to define the document template and test it out.
- Go to the App Launcher, and open Document Template Designer.
- Click New. The Start New Template window opens.
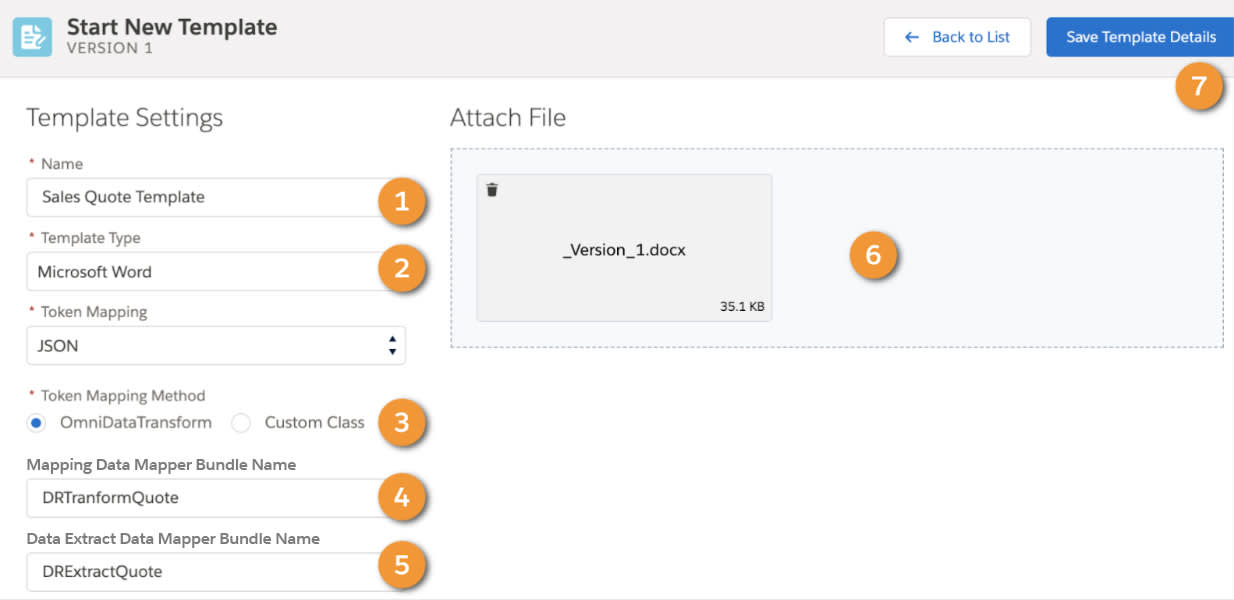
- Enter a Name for the template, for example
Sales Quote Template(1).
- For Template Type, select Microsoft Word or Microsoft PowerPoint (2).
The Token Mapping setting determines how you populate the tokens. You can use an OmniDataTransform or a custom class. For more information, see Resources.
- For Token Mapping, choose a method. For instance, select OmniDataTransform if you want to use Data Mappers to create the mapping (3).
A Mapping Data Mapper (4) extracts tokens from the .docx or .pptx template and matches them to fields in Salesforce. Use the Quick Match function in the Data Mapper designer to save time and match the fields automatically.
- Enter a Mapping Data Mapper Bundle Name to transform the data for use in tokens. The example screen above shows the name DRTranformQuote (4).
- Optionally, enter a Data Extract Data Mapper Bundle Name (5) to retrieve Salesforce data for use in tokens. The example screen shows the name DRExtractQuote. You only need to perform this step if you’re using an OmniScript to collect data for the document template.
- Drag the .docx or .pptx file from your computer into the Document Template Designer, Attach File area, or click Browse to find the file (6).
- Click Save Template Details (7).
The new Microsoft Word .docx template is ready.
Now Linda tests the template.
Use the sample client-side OmniScript to generate a document. Then check the document to make sure it’s up to scratch. Use the Document Template Designer to troubleshoot and adjust the template until your documents are just right.
Data Mapping in Document Generation
So far, you learned about data mapping in the document-generation process, but you might want to know more about how data makes its way into your document. Let’s take a closer look at the OmniDataTransform and custom class token-mapping methods.
OmniDataTransform Data Mapping
With OmniDataTransform as your token-mapping method, Data Mappers extract and map the data to the template fields. Linda’s quote document requires data, such as Account Name and Quote Number, which is stored in Salesforce. To use this data in her template, she uses a Data Mapper Extract to get the data from the Salesforce database in JSON format.
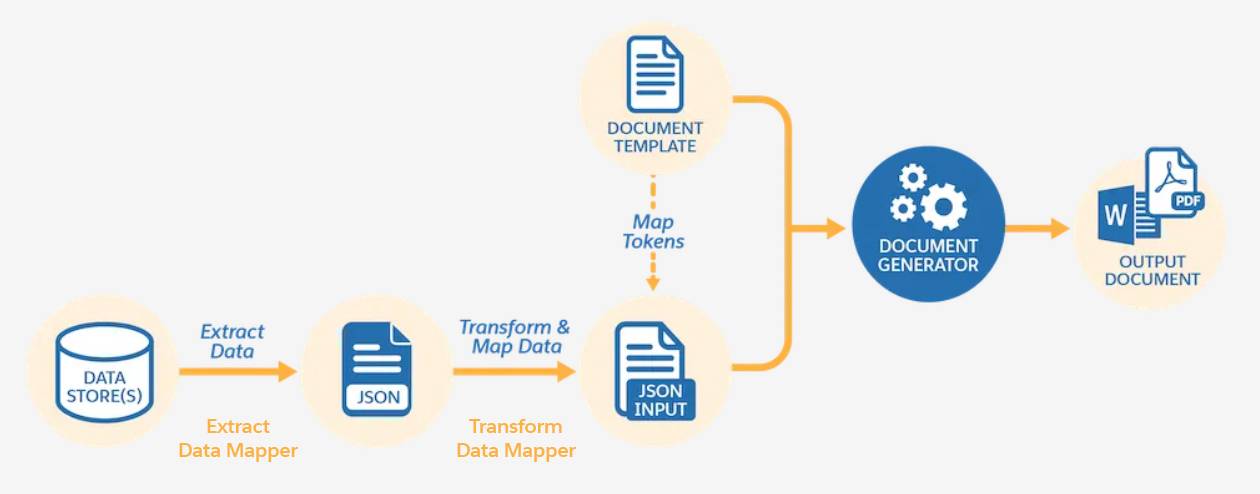
[Alt text: A diagram that shows the JSON-based document-generation data flow and data mapping.]
The extracted JSON needs some work before Linda can use it. For each document template, she needs to use a second Data Mapper, which is a Data Mapper Transform. It reformats the JSON code to something the Document Generator can read.
Once transformed, the JSON code is ready to use as input for the document-generation OmniScript. When the end-user completes the OmniScript, voila! The final Microsoft Word, Microsoft PowerPoint, or .pdf document is ready.
Custom Class Data Mapping
When you select a custom class as your token-mapping method, the process is similar to the OmniDataTransform Data Mapping, with just a few more steps.
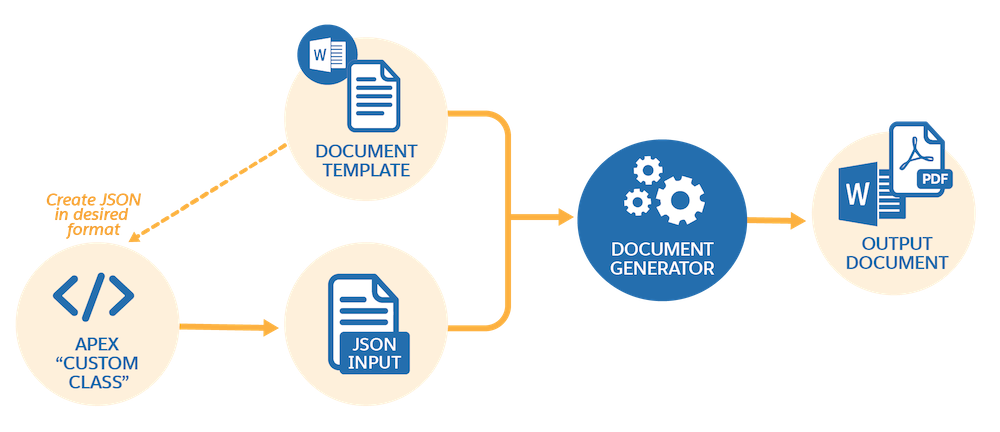
For Linda’s quote document template, she creates an Apex custom class independently, and this serves as JSON input to the document-generation OmniScript. The final result is another unique, formatted Microsoft Word, Microsoft PowerPoint, or .pdf document.
We talked a lot about the document-generation OmniScript, but there’s more to the story. Let’s move on to see the other pieces of OmniStudio Document Generation.
Resources
- Trailhead: OmniStudio Data Mappers
- Trailhead: OmniScripts
- Documentation: OmniStudio Document Generation Document Templates
- Documentation: Microsoft Word and Microsoft PowerPoint Document Templates
- Documentation: Using a Custom Class in a Generation Document Template
- Practice Guide: Create Document Templates, and Sign Up for the