Set and Change Variable Values
Learning Objectives
After completing this unit, you’ll be able to:
- Change the value of a flow variable.
- Use a variable to accept data from multiple sources.
- Create multiple paths with individual Assignment elements.

The Power of Change
Every time you store data in a flow, it’s practically perfect and never ever needs to be changed in any way, right? No, that’s pretty rare. Often, you retrieve record data in a flow, add to it, delete from it, or change it in other ways, and then send it back to the record it came from.
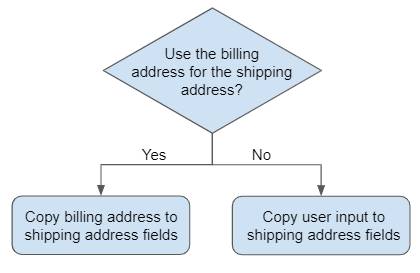
Pyroclastic’s Marketing and Enablement teams want to start using the shipping address for communications. Many accounts have the required billing address but no shipping address. Flo asks you to create a flow that asks users if they want to copy the billing address or enter a shipping address manually, and then updates the shipping address fields accordingly.
It could be a simple record-triggered flow with a single Update Records element, but there’s a hitch. Remember when you updated case priority by setting the value of the Priority field? You had just one value for the Priority field.
In the shipping address scenario, the shipping address could come from the billing address or it could come from user input. Theoretically, the Update Records element would look like this:

That won’t work. The Value field requires a single data source. It can’t use either the billing address or user input; it must be one or the other.
Instead, you need an intermediate holding place—a variable—that can accept a shipping address from either the billing address or user input.

And you need a way to determine whether the user chose to copy the billing address or manually enter an address, and act accordingly. You can use a Decision element for that.
Then you can configure the Update Records element to set the Shipping Address values from the variable. But how do you set the value of the variable?
That’s where the Assignment element comes in. The Assignment element assigns the user’s desired address to the variable, so that the variable value can be used to update the Shipping Address fields.
The Assignment Element
To assign a value to a variable, you use the Assignment element. In the shipping address scenario, you change the value of a variable to update one field in one record, but the Assignment element can do much more.
A variable is like a lunchbox. While a lunchbox can store a variety of foods, a variable can store a variety of values.

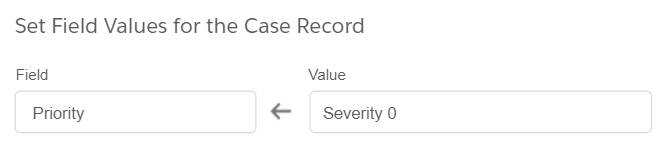
To set the value of a variable, you assign a value to it. For example: Priority equals Sev 0.
In the Assignment element, you set the value of a variable by specifying the variable and its value. Each assignment statement also includes an operator, which controls how the variable is updated. Consider this example.

In this example, the Equals operator replaces the variable’s current value with the specified value. As a result, the Priority variable stores Sev 0 as its value.
Build a Flow with Assignment Elements
Looking back at the shipping address flow that Flo requested, let’s build a screen flow that Flo can embed on the Account Lightning page and hide if the Shipping Address fields are filled in.
Start by using what you learned in this badge and the Data and Actions in Flows badge to create a screen flow.
Create a Screen Flow and a Text Variable
- Create a flow and select the Screen Flow type.
- Create a text variable to receive the current record’s ID:
- API Name:
recordId - Data Type: Text
- Available for input: checked
Create Get Records, Screen, and Decision Elements
- Add a Get Records element to retrieve the current record’s details and store them in a record variable.
- Label:
Get Account Data - Object: Account
- Filter Condition Requirement:
- Field: Account ID
- Operator: Equals
- Value: recordId
- Field: Account ID
- How Many Records to Store: Only the first record
- How to Store Record Data: Automatically store all fields
- Add a Screen element that prompts the user to copy the billing address or enter a shipping address.
- On the canvas, after the Get Account Data element, click
 .
.
- Select Screen.
- For Label, enter
Enter Address.
- From the Components panel, drag a Checkbox to the screen canvas.
- For Label, enter
Use the billing address for the shipping address.
- For API Name, shorten the default name to
Use_the_billing_address.
- Drag an Address component to the screen canvas below the checkbox.
- For API Name, enter
ScreenShipping.
- For Label, enter
Shipping Address.
The screen canvas should look like this.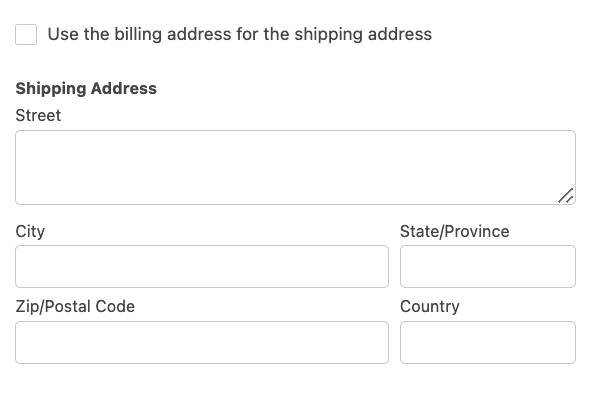
- Click Done.
- Add a Decision element to create different paths based on the user’s choice.
- Label:
Use Billing Address? - Outcome 1 Label:
Selected - Outcome 1 Condition Requirement:
- Resource: Enter Address > Use the Billing Address…
- Operator: Equals
- Value: True
- Resource: Enter Address > Use the Billing Address…
- Default Outcome Label:
Not Selected - Click
 to close the side panel.
- Save the flow. For Flow Label, enter
Set Shipping Address.
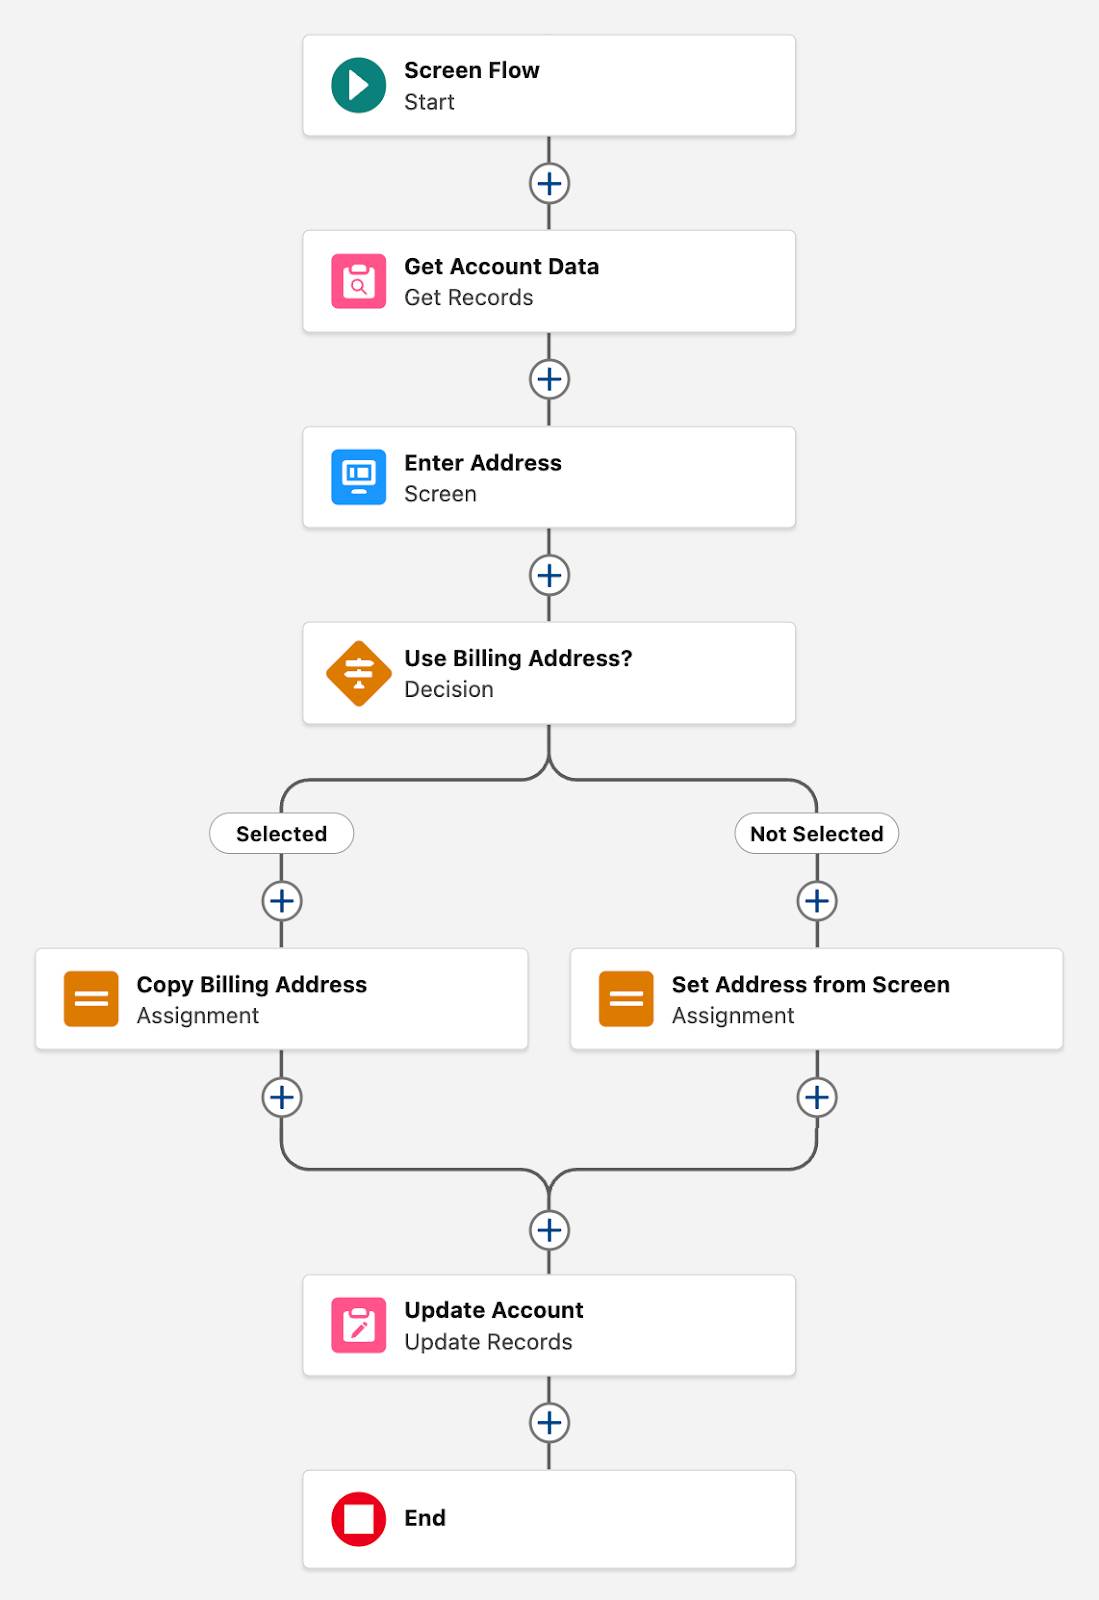
Your flow should look like this:

Now you have a screen flow that allows the user to either copy the billing address or enter it manually. From whichever source the user chose, you need to copy the shipping address to the Get Account Data record variable.
- If the user chose to use the billing address, the flow assigns the values from the record variable’s billing address fields to its shipping address fields.
- If the user chose to enter the shipping address manually, the flow assigns the values entered into the Enter Address screen to the record variable’s shipping address fields.
Next, you update the data in the Get Account Data element’s record variable (Account from Get Account Data). You’ll create two Assignment elements to set field values in that record variable: one to copy the billing address (in the Selected path), and one to copy data from the Enter Address screen element (in the Not Selected path).
Add an Assignment Element to the Selected Path
- In the Selected path, click
 .
.
- Scroll to the Logic section and select Assignment.
- For Label, enter
Copy Billing Address.
- For Variable, select Account from Get Account Data and then select Shipping City.
- For Value, select Account from Get Account Data and then select Billing City.
- Click +Add Assignment four times, so you have a total of five rows.
You have to set each Address field individually, so you need one assignment row for each of the five address fields.
- Select these values in the added assignment rows:
-
Account from Get Account Data > Shipping Country equals Account from Get Account Data > Billing Country
-
Account from Get Account Data > Shipping Zip/Postal Code equals Account from Get Account Data > Billing Zip/Postal Code
-
Account from Get Account Data > Shipping State/Province equals Account from Get Account Data > Billing State/Province
-
Account from Get Account Data > Shipping Street equals Account from Get Account Data > Billing Street
- Click
 to close the side panel.
- Save the flow.
Add an Assignment Element to the Not Selected Path
- In the Not Selected path, click
 .
.
- Scroll to the Logic section and select Assignment.
- For Label, enter
Set Address from Screen.
- Click +Add Assignment four times, so you have a total of five rows.
- Select these values in the assignment rows:
-
Account from Get Account Data > Shipping City equals Enter Address > ScreenShipping > City Value
-
Account from Get Account Data > Shipping Country equals Enter Address > ScreenShipping > Country Value
-
Account from Get Account Data > Shipping Zip/Postal Code equals Enter Address > ScreenShipping > Postal Code Value
-
Account from Get Account Data > Shipping State/Province equals Enter Address > ScreenShipping > State or Province Value
-
Account from Get Account Data > Shipping Street equals Enter Address > ScreenShipping > Street Value
- Click
 to close the side panel.
- Save the flow.
Now the flow assigns values to the record variable’s shipping address fields. But you still need to get that shipping address back into the account record. The Assignment element doesn’t actually save the new values to the record. You need an Update Records element to do that. Create an Update Records element after the Selected and Not Selected paths merge back into one path.
Update the Account Record
- After the two Assignment elements on the flow canvas, add an Update Records element.
- For Label, enter
Update Account.
- For How to Find Records to Update and Set Their Values, keep Use the IDs and all field values from a record or record collection.
On the Update Records element, this setting updates the record from a record variable. The element uses the record variable’s ID field to determine which record to update, and updates that record’s fields to match the variable’s fields.
- For Record or Record Collection, select Account from Get Account Data.
- Save the flow.
That’s it! You built a flow that uses five types of elements.
- The Get Records element (Get Account Data) gets the current account record’s field values.
- The Screen element (Enter Address) prompts the user to either enter a shipping address or copy the billing address.
- The Decision element (Use Billing Address?) determines what the user chose and creates a path for each possibility.
- The two Assignment elements make changes to the shipping address fields in the Get Account Data record variable, either copying the billing address to the shipping address (Copy Billing Address) or copying the manually entered information to the shipping address (Set Address from Screen).
- And finally, the Update Records element (Update Account) commits the changed values in the record variable back to the current account record.
You may be wondering what else Assignment elements can do. Well, read on.
Resources