Discover and Configure Products
Learning Objectives
After completing this unit, you’ll be able to:
- Sign up for a special Developer Edition org with Agentforce Revenue Management.
- Browse products in your catalog.
- Select products to include in your quote or order.
- Customize products by choosing the right options and attributes.
CPQ Lifecycle
The CPQ feature in Transaction Management ensures a seamless quote-creation and order-capture experience using these steps.

Start by creating a quote. Then, browse the catalog to find and configure the right products, applying any discounts or price changes. After you’ve generated a contract, if needed, and created the order, review and submit the order. Finally, view the assets created.

In this unit, you kickstart your CPQ journey by diving into Product Discovery and Configurator. But first, get set up with your own Salesforce org.
Sign Up for a Developer Edition Org with Agentforce Revenue Management
To complete this module, you need a special Developer Edition org that contains Agentforce Revenue Management and our sample data. Get the free Developer Edition and connect it to Trailhead now so you can complete the challenges in this module. Note that this Developer Edition is designed to work with the challenges in this badge, and may not work for other badges. Always check that you’re using the Trailhead Playground or the special Developer Edition org that we recommend.
- Sign up for a free Agentforce Revenue Management Developer Edition org.
- Fill out the form.
- For Email, enter an active email address.
- For Username, enter a username that looks like an email address and is unique, but it doesn’t need to be a valid email account (for example, yourname@example.com).
- After you fill out the form, click Sign me up. A confirmation message appears.
- When you receive the activation email (this might take a few minutes), open it and click Verify Account.
- Complete your registration by setting your password and answering the challenge question. Tip: Save your username, password, and login URL in a secure place—such as a password manager—for easy access later.
- You’re logged in to your Developer Edition Org.
Now connect your new Developer Edition org to Trailhead.
- Make sure you’re logged in to your Trailhead account.
- In the Challenge section at the bottom of this page, click the playground name and then click Connect Org.
- On the login screen, enter the username and password for the Developer Edition you just set up.
- On the Allow Access? screen, click Allow.
- On the Want to connect this org for hands-on challenges? screen, click Yes! Save it. You’re redirected back to the challenge page and ready to use your new Developer Edition to earn this badge.
Enable Pricing
Now that your org is connected, make sure it’s ready to use.
- From Setup, in the Quick Find box, search for and select Salesforce Pricing Setup.
- Under the Sync Pricing Data section, click Sync.

- Confirm that you want to sync your org.
Product Discovery and Configurator
Picture this. You’re shopping online for a new shirt. First, you click the Tops category. Then, you browse all the different shirts and T-shirts before selecting one you like. Finally, you choose the color and size before adding it to the cart.
Much like browsing through your favorite online store, the Product Discovery feature in Agentforce Revenue Management provides a simple, structured product browsing experience to efficiently identify the most suitable products. Product information like images, descriptions, pricing, and buying options are all at your fingertips.
To access Product Discovery, use the Browse Catalogs button in a CPQ quote or order, as shown in this image.

Later in this unit, you use your Developer Edition org to practice creating a quote and browsing the catalog to add products. For now, just read along to learn about Product Discovery and Product Configurator in Agentforce Revenue Management.
Here’s an example of the Product Discovery page on a quote. Click the numbered callouts to learn more.
Product Configurator
Product Configurator is a Agentforce Revenue Management application that simplifies product configurations, saving time and effort. Just select the desired options and attributes for a product, and the app automatically tailors the product specifications.
You have two ways to access Product Configurator: through Product Discovery or from a CPQ quote or order. The example screen shows how to launch Product Configurator from a quote.

From the Laptop line item, open the action menu to view the Configure menu option. Here’s the configuration page that opens for the Laptop product.

The Laptop product has customizable attributes like Display, Graphics, and Processor Speed (1), with a field for updating the product quantity (2). If the Product Validation and Instant Pricing toggle buttons (3) are enabled, your product selections are validated instantly and real-time price updates are provided based on the configured selections. The Summary (4) provides a clear overview of the customized product, including its final price and specifications.
The next image shows an example of a more complex product offering called Laptop Pro Bundle. This bundle includes a Laptop, Mouse, Warranty, Support, and Printer Bundle.

The configure button (1) on each product is where you configure each item. The Summary (2) gives an overview of the customized bundle and all the products in it, including the final price and specifications. The Save & Exit (3) button is for adding the customized product directly to the quote or order.
Select and Customize Products
Chris, our sales representative at InfinitraBytes, has been working hard to close deals with EdgeMX, a valued customer. He’s thrilled to learn that EdgeMX is looking for a quote for products to support their office upgrade. With the adoption of Agentforce Revenue Management by InfinitraBytes, Chris feels free from their outdated and error-prone CPQ system. With the new solution, he can now breeze through the quoting and order-capture experience using the advanced CPQ capabilities in Agentforce Revenue Management. So, he gets to work right away.
Time for some hands-on practice! Follow along with Chris in your Developer Edition org to create and configure a new quote for EdgeMX.
Create a Quote
- From the App Launcher, find and select Revenue Lifecycle Management.
- From the navigation menu, select Accounts and change the list view to All Accounts.
- Click EdgeMX.
- In the Related tab, under Opportunities, click Office Upgrade.
- In the Related tab, under Quotes, click New Quote.
- Add the new quote details:
- Quote Name:
Office Supplies
- Account for Quote:
EdgeMX
- Click Save. The new quote opens.

You’ve successfully created a quote for EdgeMX. Next, you add and configure the quote line items.
Select and Configure Products
- From the newly created Office Supplies quote page, click Browse Catalogs.
- In the Choose Price Book window, make sure Standard Price Book is selected, and click Save.
- In the All Catalogs list, select Hardware Catalog, and click Next.
- Under Categories, click Laptops. If you don't see any products in your catalog, close the Product Discovery window, refresh the quote, and follow steps 1–4 again.
- From the displayed products list, select Laptop Pro Bundle, and click Add.
- Select the Accessories category.
- On the Mouse product, click
 . The product configuration page opens.
- For Connection Type, select Wireless.
- Use the toggle bar to enable Instant Pricing. As the example screen shows, the price updates to $9.99 based on the attribute change. Note that the currency and price may differ in your org due to your regional settings.
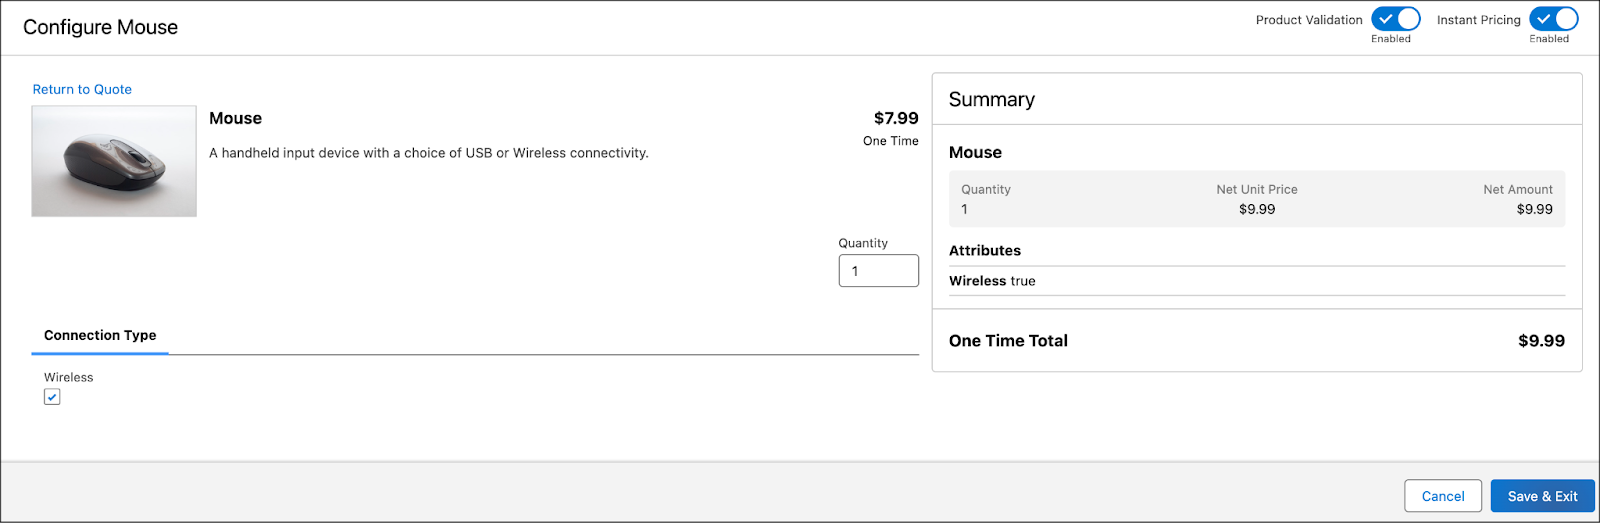
- Click Save & Exit to add the customized Mouse directly to the quote. Your configured product is added to the quote.
- Click Save Quote. The example screen shows the quote with the line items you added.
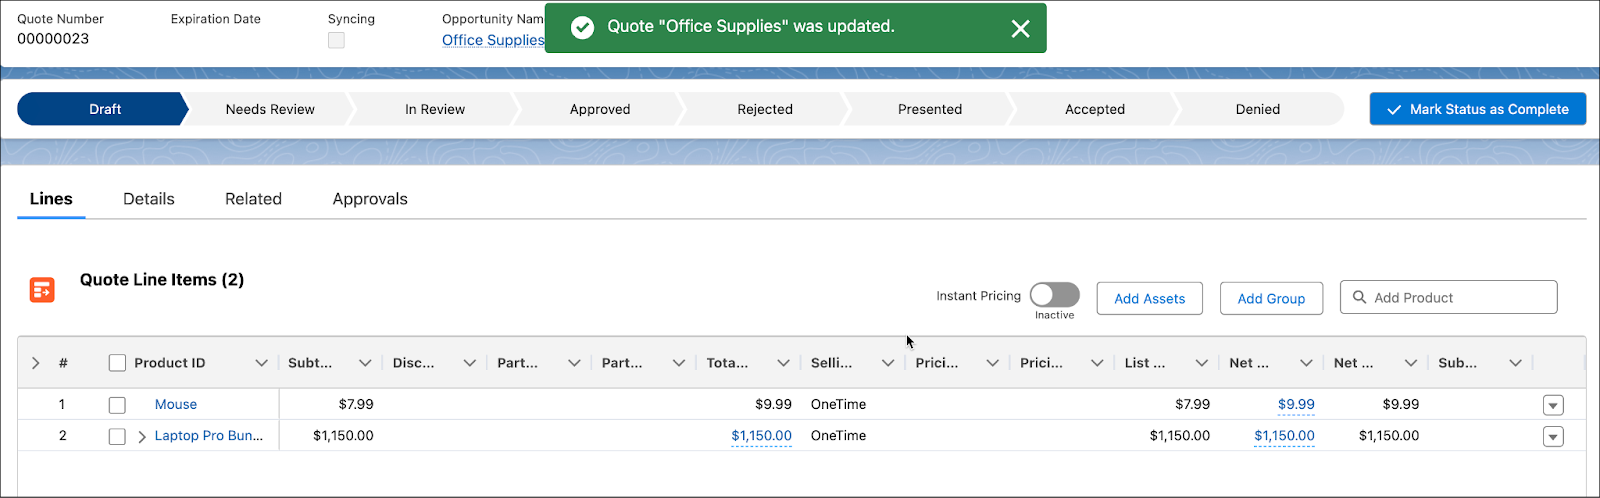
With quote creation so fast and easy, Chris suddenly has free time in his workday. The new CPQ features make it easy to select and customize products for his quotes. He has two more products to add to the quote, and then he’s done.
Next, work through the Hands-On Challenge at the end of this unit, where you add those products to the quote. If you get stuck, refer back to the previous practice steps for guidance.
Up Next
In this unit, you learned how to use Product Discovery and Product Configurator to add and configure products for a quote. In the next unit, you explore and use CPQ’s powerful and flexible, spreadsheet-inspired quoting experience.