Schedule a Flow
Learning Objectives
After completing this unit, you’ll be able to:
- Create a flow that runs at a predetermined time.
- Run a schedule-triggered flow for every record that matches certain conditions.

Schedule-Triggered Flows vs. Scheduled Paths
In the Record-Triggered Flows badge, you learn about scheduled paths. Scheduled paths can run elements a certain amount of time after a trigger, or before or after a date on the triggering record. They rely on a record being created, updated, or deleted. What if you want to run automation that’s not triggered by a record, but at a specific time or on a specific schedule? For that, you need a schedule-triggered flow.
The Schedule-Triggered Flow type is part of the Autolaunched Flow family. It’s like a quiet younger brother who’s easy to forget but nevertheless is quite dependable.
When you need to run something on a schedule, consider these differences between scheduled paths and schedule-triggered flows.
Consideration |
Scheduled Paths |
Schedule-Triggered Flows |
|---|---|---|
Flow Type |
Record-Triggered |
Schedule-Triggered |
Trigger |
A record is created, updated, or deleted |
A specific date and time |
What Time |
A specified amount of time after the trigger or A specified amount of time before or after a date on the triggering record |
A specific date and time |
Frequency |
Runs once for each time it’s triggered |
Can run once, daily, or weekly |
Why Use Schedule-Triggered Flows?
Schedule-triggered flows can run once, daily, or weekly, depending on how you configure them. They truly are automated automation! Use schedule-triggered flows to handle regular tasks such as maintaining your org’s data or sending messages to your users. Here are a few examples of what scheduled flows can do for you.
-
Automatically escalate open tasks or cases that have been open too long.
Raise the priority or change the status to something that gets more attention. You can also notify key personnel of the escalation. “Hey Sal, this task has been open for 42 days.”
-
Check contacts for missing field values and send their creators an email reminding them to fill in the data.
Sometimes users need to create a record before they have all the required data. A schedule-triggered flow can remind them to fill in those important values at a later date. “You really should have that contact’s email address by now, Sal.”
-
Push a batch of changes overnight.
If you can define changes in a flow, you can push them in batches. You can’t push updates from a CSV file, but you can, for example, reassign all of Sal’s accounts in the Northwest territory to someone else if he doesn’t improve his data entry by next week. (Though you probably shouldn’t do that unless his manager requests it!)

In many cases, you could use either scheduled paths or schedule-triggered flows. The main difference is that a scheduled path runs based on a record change, whereas a schedule-triggered flow does all of its work at a specific time and at a specified frequency. Consider the example of automating reminders for contact creators to add missing field values.
A scheduled path can email each contact creator a few days after the contact is created. The timing is based on the contact creation date and the scheduled path runs once.
A schedule-triggered flow can send out all the notices for all incomplete contacts every Sunday night, so all creators can deal with all their data woes all at once first thing on Monday. The timing is set, the flow runs every week, and if a record isn’t corrected, its creator gets a reminder every Sunday until those missing field values are fixed.
To summarize, use a schedule-triggered flow when you want the flow to:
- Run at a specific time.
- Run independent of a record change.
- Run through many records at one time.
- Run daily or weekly.
Pyroclastic’s support managers want an ongoing record of the number of high priority cases they have at the start of each day. To record this metric in a reportable way, Flo asks you to create a custom object to store each day’s case count and build a schedule-triggered flow to record the count.
Before You Start
There are three settings to define before you start creating schedule-triggered flows. Some of these settings are likely already set in your production org, but it’s a good idea to confirm them. Make sure that these settings are correct in the Trailhead Playground you’re using for this badge before you create a scheduled flow.
- Set the Default Workflow User.
To run a schedule-triggered flow, Salesforce needs to know which user runs the flow. Make sure there’s a Default Workflow User selected on the Process Automation Settings page in Setup.
- Set the Automated Process User Email Address.
If your schedule-triggered flow sends emails, Salesforce needs an email address to use as the sender. To set this address, first define it as an organization-wide email address. Then, enter that organization-wide email address in the Automated Process User Email Address field, on the Process Automation Settings page in Setup.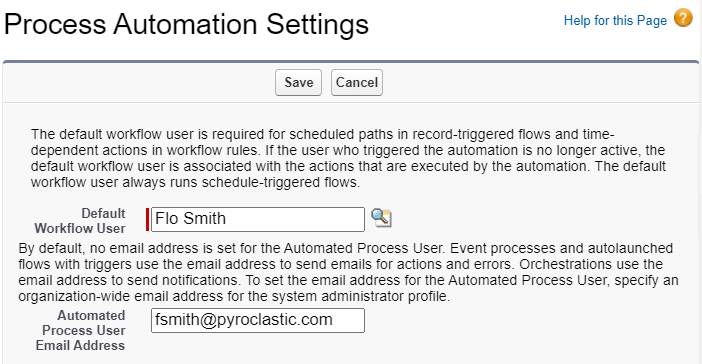
- Set the Default Time Zone.
Schedule-triggered flows are based on your Salesforce org’s default time zone. Find this setting on the Company Information page in Setup. To prevent unwanted timing surprises, confirm this setting before you schedule a flow. Keep in mind that if you change the default time zone, that may change the timing for other things in your org.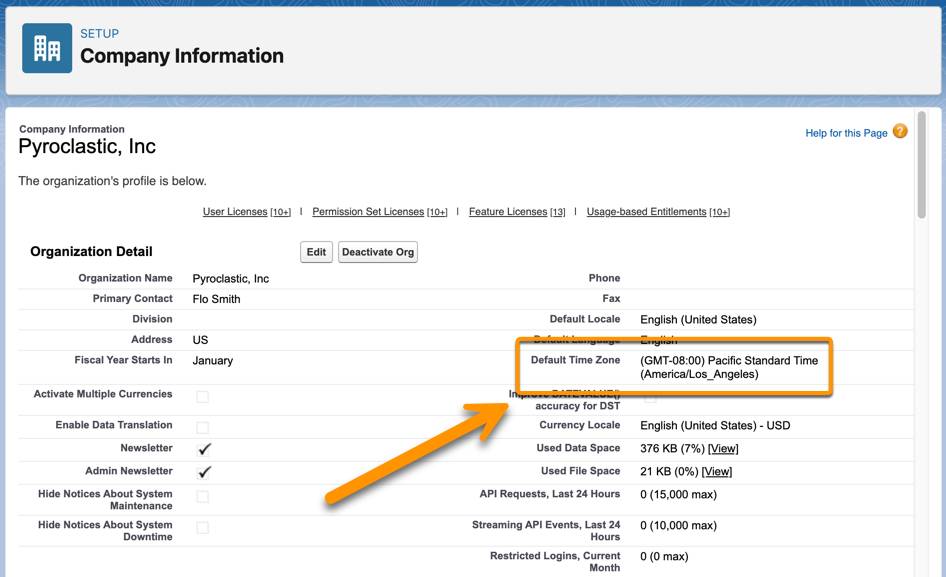
Create a Custom Object
First you create the custom object to store the daily case count.
- Create a custom object:
- Label:
Archived Metric - Plural Label:
Archived Metrics - Starts with vowel sound: Checked
- Record Name:
Archived Metric Number - Data Type: Auto Number
- Display Format:
Archive-{000000} - Starting Number:
1 - Allow Reports: Checked
- Create a custom field on the Archived Metric object:
- Data Type: Number
- Field Label:
Value
Schedule a Flow
With a few exceptions, schedule-triggered flows have the same components and abilities as most other flow types. Check out Schedule-Triggered Flow Considerations for more info.
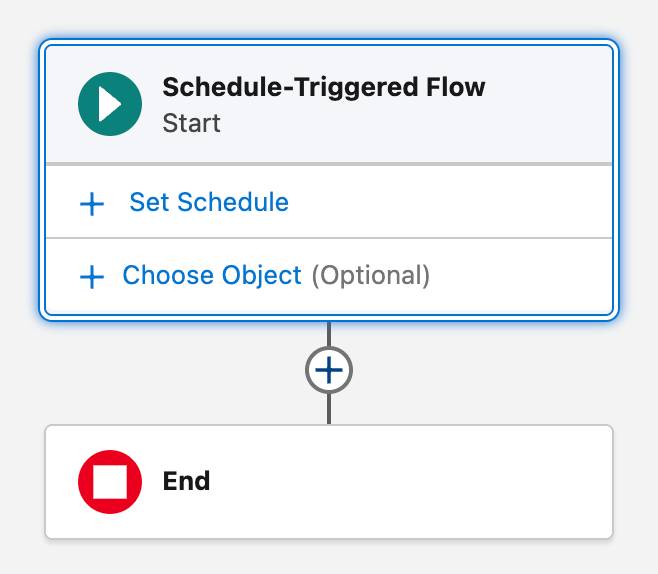
- Create a schedule-triggered flow.
- Set the flow’s schedule:
- Click Set Schedule.
- For Start Date, enter tomorrow’s date.
- For Start Time, enter the current time.
- For Frequency, select Daily.
- Add a Get Records element:
- Label:
Get High Priority Cases - API Name:
Get_High_Priority_Cases - Object: Case
- Condition Requirements: All Conditions Are Met (AND)
- Field: Priority, Operator: Equals, Value: High
- Field: Closed, Operator: Equals, Value: False
- Field: Priority, Operator: Equals, Value: High
- How Many Records to Store: All records
- How to Store Record Data: Automatically store all fields
- Create a Variable resource:
- API Name:
caseCount - Data Type: Number
- Decimal Places:
0 - Default Value:
0
- After the Get Records element, add an Assignment element:
- Label:
Count Cases - API Name:
Count_Cases
- Variable: caseCount
- Operator: Equals Count
The Equals Count operator counts the number of values contained in the Value’s resource, and assigns that number to the Variable’s resource. For example, if the Cases from Get High Priority Cases collection contains 15 cases, it assigns a value of 15 to the caseCount variable.
- Value: Cases from Get High Priority Cases
- After the Assignment element, add a Create Records element:
- Label:
Create Archived Metric - API Name:
Create_Archived_Metric - How to set record field values: Manually
- Object: Archived Metric
- Field: Value
- Value: caseCount
- Save the flow. For Flow Label, enter
Daily High Priority Cases.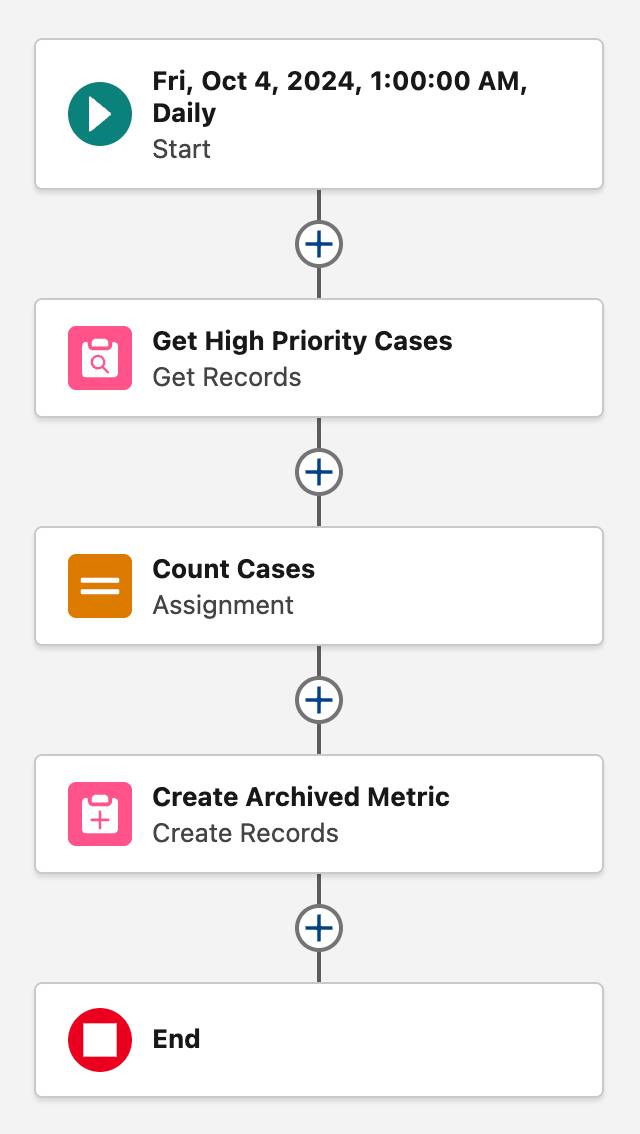
After you activate a flow, it runs according to the scheduled frequency. Unfortunately, flows aren’t time machines. If you schedule a flow to start at a time in the past, it can’t go back in time to run at that earlier date and time. Instead, the first run happens according to the scheduled frequency. For example, if you set a flow to run weekly starting on a Tuesday, and you activate it on a Wednesday, the flow runs for the first time on the next Tuesday.
Update Multiple Records with the $Record Global Variable
In a record-triggered flow, you can use the $Record global variable to access and update the record that triggered the flow. You can also use $Record in schedule-triggered flows. So, which record does $Record refer to in a schedule-triggered flow?
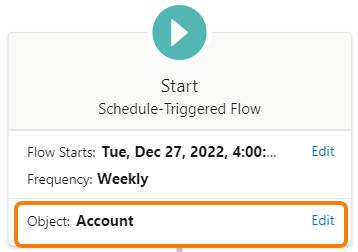
On schedule-triggered flows, the $Record global variable actually refers to multiple records. When you select a schedule-triggered flow’s Start element, you have the option to click Choose Object, then select a Salesforce object and define criteria.
When the flow runs, it finds all of that object’s records that match the criteria, and makes them available through $Record. If you don’t set an object and criteria, $Record isn’t available.
Because this criteria finds records from only one object, and the same actions are performed for all of those records, the flow can process all the records in a large group called a batch. Salesforce processes batches more efficiently than a series of single records, so batch processing is usually faster and less likely to exceed governor limits.
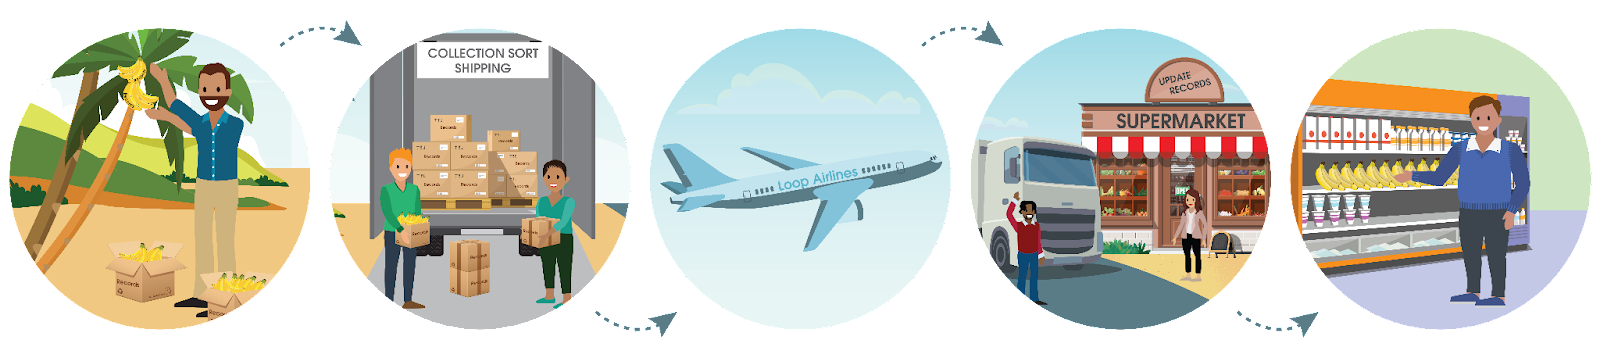
Think of batches of records like bananas; when you work with them, you work with multiple bananas together in a bunch. They grow in a bunch, and they’re harvested in a bunch, transported as a bunch, even sold in stores as a bunch. Handling bananas in bunches makes everything done with bananas simpler and faster. Batch processing does the same for Salesforce records.
Use $Record in a Schedule-Triggered Flow
When you set criteria in the Start element of an Autolaunched flow, two changes occur.
- In all of the flow’s elements, $Record is available as a global variable.
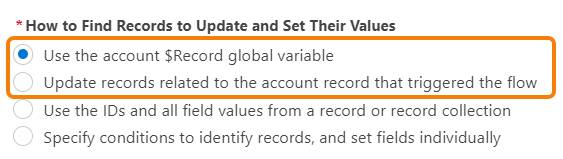
- In the Update Records element, under How to Find Records to Update and Set Their Values, there are two new options:
-
Use the $Record global variable: Use this option to update all the records that match the start criteria in one batch.
-
Update records related to the record that triggered the flow: Use this option to update all the child records for one related object, such as all the contacts related to the triggering account.
Lately, Pyroclastic employees across multiple teams are finding lots of accounts with no contacts. Sales leadership wants to address the problem but they don’t have an efficient way to identify accounts that need attention. Flo asks you to create a schedule-triggered flow that runs weekly and posts to Chatter alerting managers about accounts that have no contacts.
Build a Schedule-Triggered Flow
- Create a schedule-triggered flow.
- Set the schedule:
- Start Date: tomorrow’s date
- Start Time: the current time
- Frequency: Weekly
- Click Choose Object.
- For Object, select Account.
- For Condition Requirements, select None—Run Flow For All Accounts.
- Add a Get Records element:
- Label:
Find Contacts - API Name:
Find_Contacts - Object: Contact
- Condition Requirements: All Conditions Are Met (AND)
- Filter Condition Records
- Field: Account ID
- Operator: Equals
- Value: Triggering Account > Account ID
- Field: Account ID
- How Many Records to Store: Only the first record
- How to Store Record Data: Automatically store all fields
- After the Get Records element, add a Decision element:
- Label:
Contact Found? - API Name:
Contact_Found - Define one outcome:
- Label:
Yes - Outcome API Name:
Yes - Condition Requirements to Execute Outcome: All Conditions Are Met (AND)
- Resource: Contact from Find Contacts > Entire Resource
- Operator: Is Null
- Value: False (in the Global Contacts section)
- Label:
- Change the label for the default outcome to
No.
- Label:
- Create a text template resource:
- API Name:
ChatterBody - Change the View as Rich Text setting to View as Plain Text.
- Body:
@[{!$Record.Owner.ManagerId}] This account has no contacts.
Owner: @[{!$Record.OwnerId}]
- On the No path, add an Action element:
- Action: Post to Chatter
- Label:
Chatter Post to Manager - API Name:
Chatter_Post_to_Manager - Message: ChatterBody
- Target Name or ID: Triggering Account > Account ID
- Save the flow. For Flow Label, enter
Weekly Check for Contacts.
Resources
- Salesforce Help: Schedule Triggers for Flows That Run for Batches of Records
- Salesforce Help: Schedule-Triggered Flow Considerations