Run an Autolaunched Flow from a Custom Button
Learning Objectives
After completing this unit, you’ll be able to:
- Send data from a custom button to a flow.
- Add a custom button to a Lightning record page by using Dynamic Actions.

Before You Start
This unit continues immediately from the previous unit. If you haven’t completed the steps in the Build an Autolaunched Flow unit, do that now. Otherwise you won’t be able to follow the steps here.
Assign Values to Input Variables
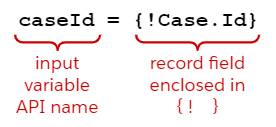
The button that you created contains the flow’s URL, but it doesn’t have any information from the record that the button is on. Specifically, we want to send the values in the fields that support technicians need, paired with their corresponding input variables, like this: caseId = {!Case.Id}
That format should look familiar. It’s the same format that you use to assign values to variables in an Assignment element: variable, operator, value (except that here we use the = symbol in place of the word Equals). In this example, caseId is the API name of the input variable and Case.Id is the record field that contains the value we want to assign to the input variable. The = operator works the same way it does in the Assignment element: it replaces the current value of the input variable with the value that follows the = symbol.
Remember those input variables you created in the Clone Closed Case flow? For this scenario, we need to add them to the button’s URL as input variable assignments, formatted like this.
Flow Input Variable |
Record Field |
Assignment* |
|---|---|---|
caseId |
Case.Id |
caseId={!Case.Id} |
caseSubject |
Case.Subject |
caseSubject={!Case.Subject} |
caseAccountId |
Case.AccountId |
caseAccountId={!Case.AccountId} |
caseType |
Case.Type |
caseType={!Case.Type} |
*Notice that there are no spaces in the assignment format.
Add URL Parameters to a Custom Button’s URL
To send variable assignments to the flow, we need to add those value assignments to the flow URL as parameters. URL parameters carry additional information to the server; in this case, to Salesforce. Parameters come at the end of the URL and they’re separated from the URL by a question mark, like this:
/flow/Clone_Closed_Case?<URL parameter>
Multiple URL parameters are separated by an ampersand, like this:
/flow/Clone_Closed_Case?<URL parameter 1>&<URL parameter 2>
Got it? Flowtastic! Let’s go update that custom button.
- If it’s not already open, open the Clone Closed Case button on the Case object.
- In the URL editor, add
?to the end of the URL to tell Salesforce that all the text that follows is parameters.
- Enter the API name of the case ID input variable:
caseId - Click Insert Operator and select = Equal.
- In the Insert Field picklist, select the field that you want the input variable to receive: Case ID.
The editor inserts the field’s name surrounded by {! and }. This special formatting, called merge field notation, tells Salesforce to merge that field’s value into the URL.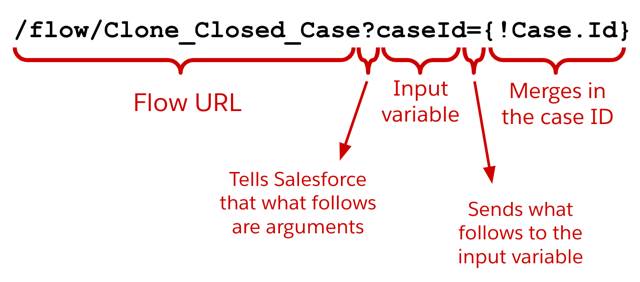
Now the URL is:/flow/Clone_Closed_Case?caseId={!Case.Id}
-
/flow/Clone_Closed_Caseis the flow’s dedicated URL.
-
caseIdis the API name of one of the flow’s input variables.
-
{!Case.Id}is the notation that tells Salesforce to merge in the Id field from the Case object.
- Make sure to remove any spaces added by the Insert Field picklist. The URL should contain no spaces.
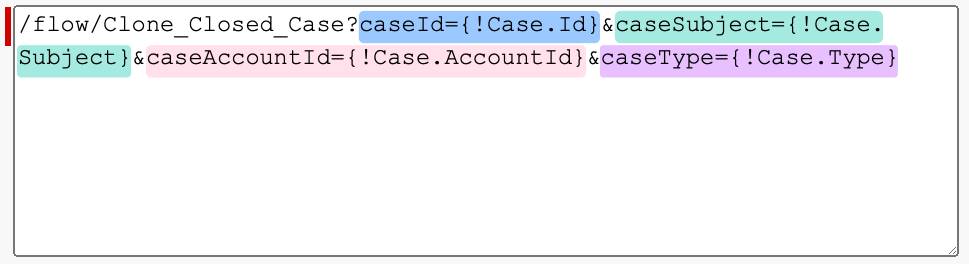
- Add parameters to assign values to the remaining input variables:
- caseSubject
- caseAccountId
- caseType
- Remember to enter the & symbol before each parameter except the first. That tells Salesforce that another parameter follows. Your URL should look like this (but without the highlighting).
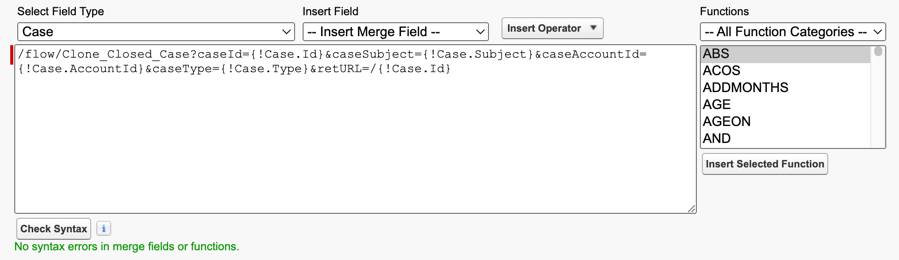
- Click Check Syntax.
The syntax checker reports errors in merge fields and formula functions in the URL. If there’s a problem with a merge field, try selecting the merge field in question and reselecting the field from the Insert Field list.
Define a Return Destination
Finally, you can tell the flow what page to automatically load when it finishes. How do we do that? You guessed it, another URL parameter: retURL.
- Enter
&retURL=/at the end of the URL.
- In the Insert Field picklist, select the ID of the record you want to load when the flow finishes: Case ID.
In most cases, this is the ID of the record where the flow runs. Make sure that the ID’s merge field is at the very end of the URL.
In this case, we want to send users back to the record where they clicked the button, so the final URL is:/flow/Clone_Closed_Case?caseId={!Case.Id}&caseSubject={!Case.Subject}&caseAccountId={!Case.AccountId}&caseType={!Case.Type}&retURL=/{!Case.Id}
- Click Check Syntax.
- Save the button.
Place the Custom Button
Now you need to place the button so your support team can use it. There are two ways to display the button, and in this module, you learn the Dynamic Actions method. If you want to follow the Classic Page Layout method, follow the steps in the Create Custom Buttons and Links unit of the Lightning Experience Customization badge.
- In the Object Manager, open the Case object.
- Click Lightning Record Pages and click New to create a new record page.
- Label:
Case Record Page - Object: Case
- Select Clone Salesforce Default Page, then Case Grouped View Default.
- Click Done.
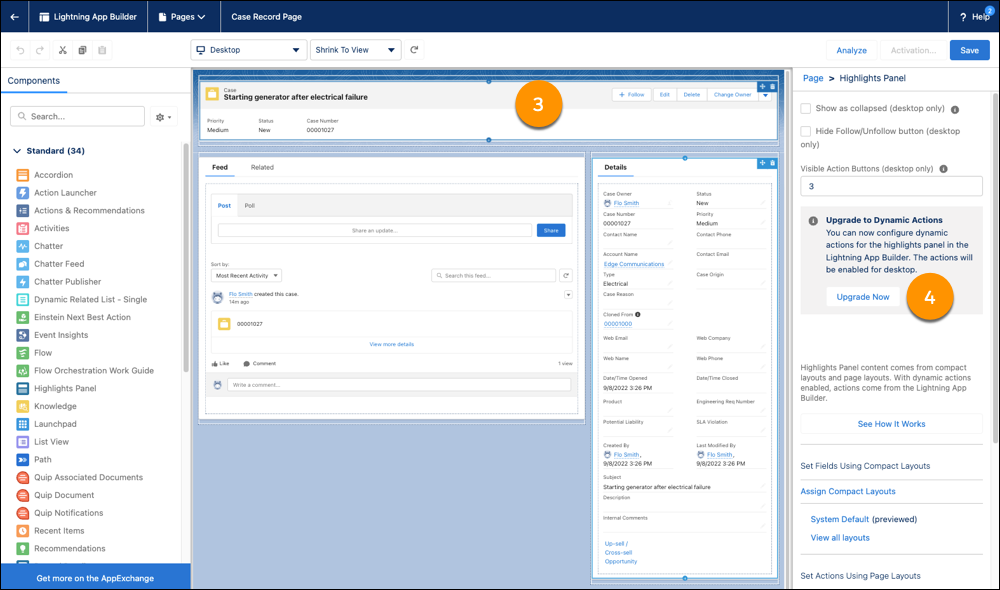
- Click the Highlights Panel.
- In the Highlights Panel properties pane, under Upgrade to Dynamic Actions, click Upgrade Now.
- Click the Migrate box, then click Next.
- Select Case Layout and click Finish.
With Dynamic Actions active on a Lightning record page, that page no longer uses classic page layouts to define the buttons in the Highlights Panel. Instead, you set each button individually in the Highlights Panel sidebar.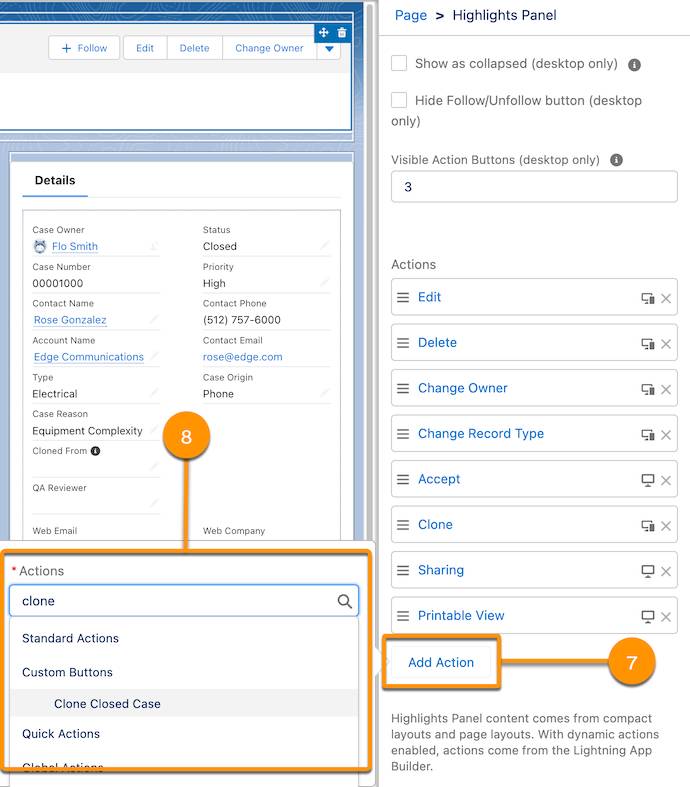
- In the properties pane, click Add Action.
- In Search Actions, enter
clone, select Clone Closed Case, and click Done.
- Drag the Clone Closed Case button to the top of the list.
- Click Save.
- Activate the page and make it the org default for Desktop and phone.
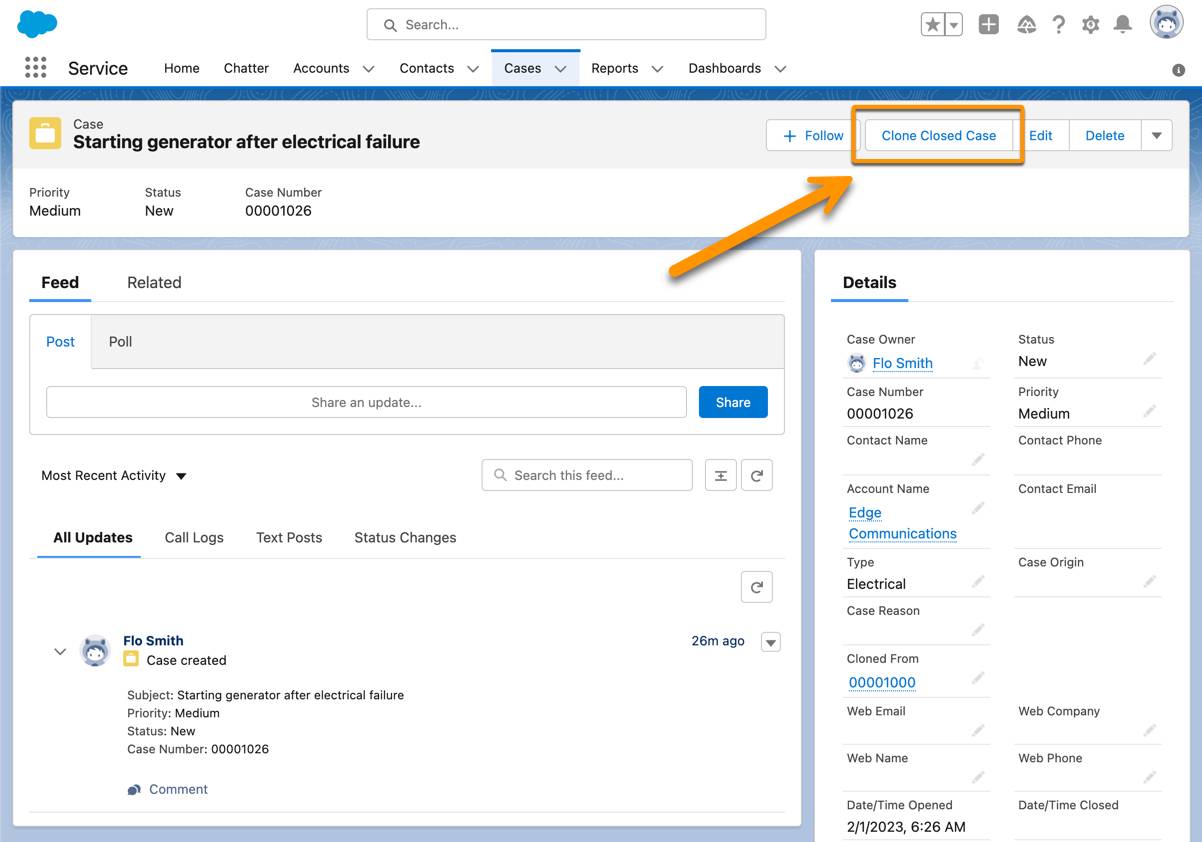
Congratulations, you’ve created a flow that runs from a button! Carry the flowmentum of your success on to the next unit; the flow must go on!
Resources
- Trailhead: Lightning Experience Customization
- Trailhead: Lightning App Builder
- Salesforce Help: Create Dynamic Actions in Lightning App Builder