Build an Autolaunched Flow
Learning Objectives
After completing this unit, you’ll be able to:
- Create a flow that runs from a custom button.
- Create a custom button that runs an autolaunched flow.

Automation That Runs with a Single Click

Salesforce admin and business analyst Flo Smith has been working with the Pyroclastic, Inc. support managers to automate business processes. In this module, you’re a Salesforce admin on Flo’s team, helping her automate some of Pyroclastic’s business processes. Flo recently learned that when a customer calls with an issue that they’ve received support for in the past, support technicians want the ability to clone the related closed case. The standard Clone button copies too much information that they don’t need. They want only specific details, and they want the newly cloned record to have a link back to the original record.
Salesforce is pretty powerful, and Einstein is pretty smart, but only a call agent can determine when the called-in problem really is the same as something that was handled before.
Flo considers these business requirements. Cloning specific information from a closed case requires no user interaction. Deciding when to perform this selective cloning process does require the user’s judgment. That’s a great candidate for an Autolaunched flow. Flo asks you to build this new flow and a custom button to initiate it.
Ready to Get Hands-on with Flow Builder?
Launch your Trailhead Playground now to follow along and try out the steps in this module. To open your Trailhead Playground, scroll down to the hands-on challenge and click Launch. You also use the playground when it's time to complete the hands-on challenges.
Here are the high-level steps you follow in the scenario.
- Create an Autolaunched flow with input variables.
- Get the URL for the flow.
- Create a custom button to run the flow and pass values into the flow’s variables.
Create an Autolaunched Flow with Input Variables
Before you start, you ask the support teams exactly what information they want in the cloned record. They decide that the most important fields from the closed case are:
- ID
- Subject
- Account ID
- Type
Note that the newly cloned case will have its own ID. You need a separate, custom field to capture the cloned case in the new case record.
Because you’re building an Autolaunched flow, not a record-triggered flow, when the flow runs, it doesn’t know which record it ran from unless you provide that information. You might remember a setting you used with a variable in the Flow Builder Logic badge: Available for input. In that badge, a child flow needed values from its parent flow, so you passed record data to the flow’s input variables. You do the same thing here to provide information to an Autolaunched flow.
- Create a custom field on the Case object:
- Data Type: Lookup Relationship
- Related To: Case
- Field Label:
Cloned From - Field Name:
Cloned_From - Leave other settings, field-level security, and page layouts as default.
- Create an Autolaunched Flow.
- Create an input variable for the case ID:
- API Name:
caseId - Data Type: Text
- Available for input: checked
- In the same way, create three more text variables available for input:
caseSubjectcaseAccountId-
caseType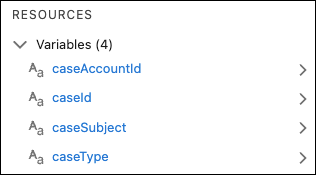
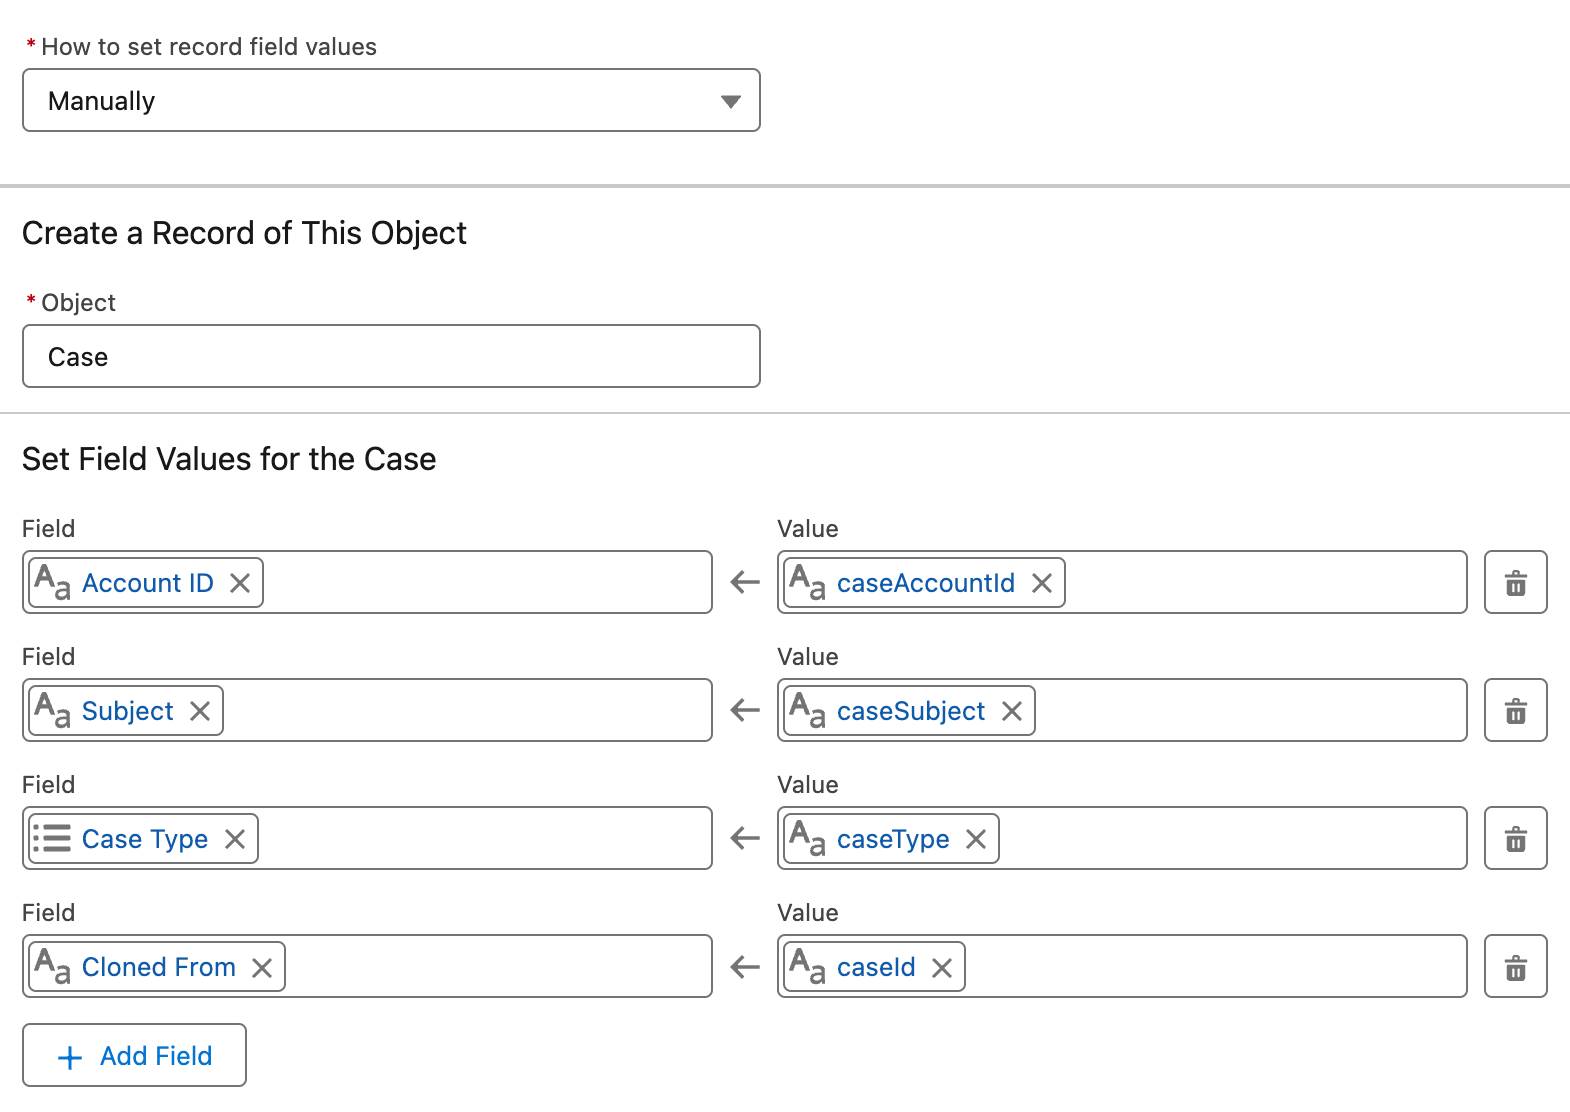
- Add a Create Records element that clones the case:
- Label:
Clone Case - API Name:
Clone_Case - How to set record field values: Manually
- Object: Case
- Set Field Values for the Case:
- Field: Account ID, Value: caseAccountId
- Field: Subject, Value: caseSubject
- Field: Case Type, Value: caseType
- Field: Cloned From, Value: caseId
- Save the flow.
For Flow Label, enterClone Closed Case.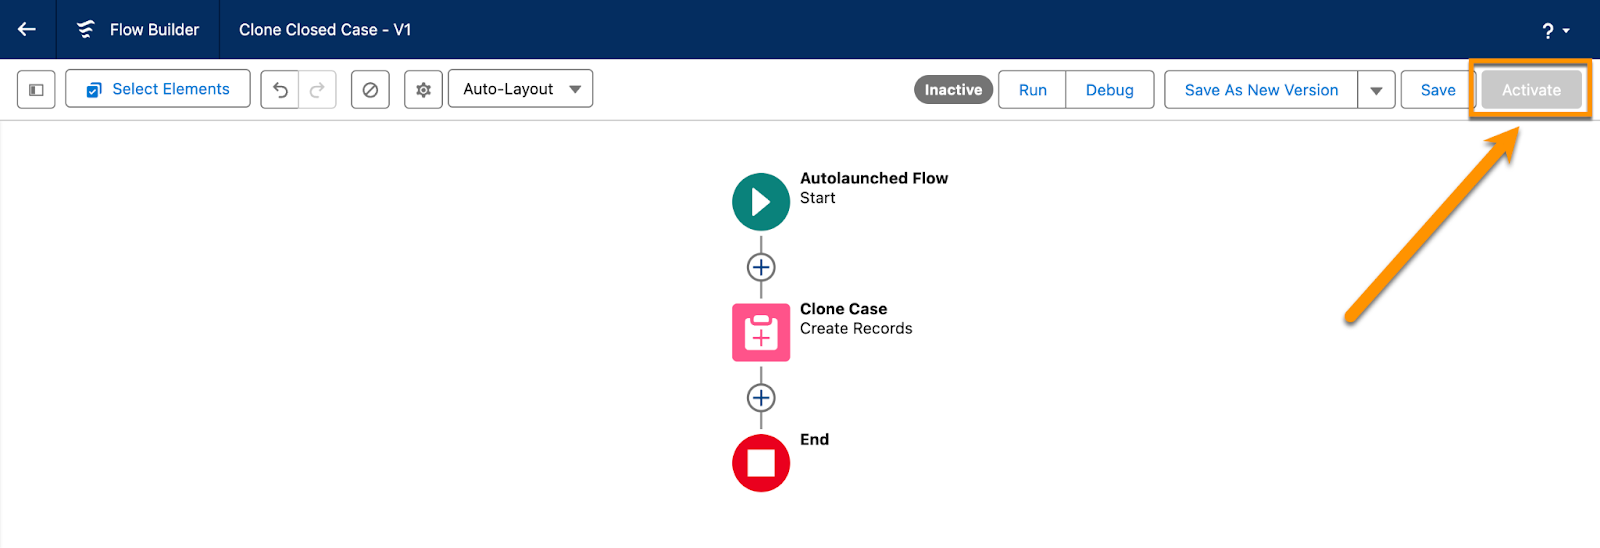
- (Optional) Click Activate to activate the flow.
As you learned in Flow Builder Logic, unless the flow is activated, only users with the Manage Flows permission can run it. Most admins have the Manage Flows permission, but most users who run the flows don’t have that permission.
Get the URL for the Flow
Now that the flow is built, you need a custom button to run it. Like custom links, custom buttons are directly related to a specific object. You can place them on any page layout or Lightning page related to that object. Custom buttons and links can run any URL. They can even merge record fields into a URL by including URL parameters, which you learn about in the next unit.
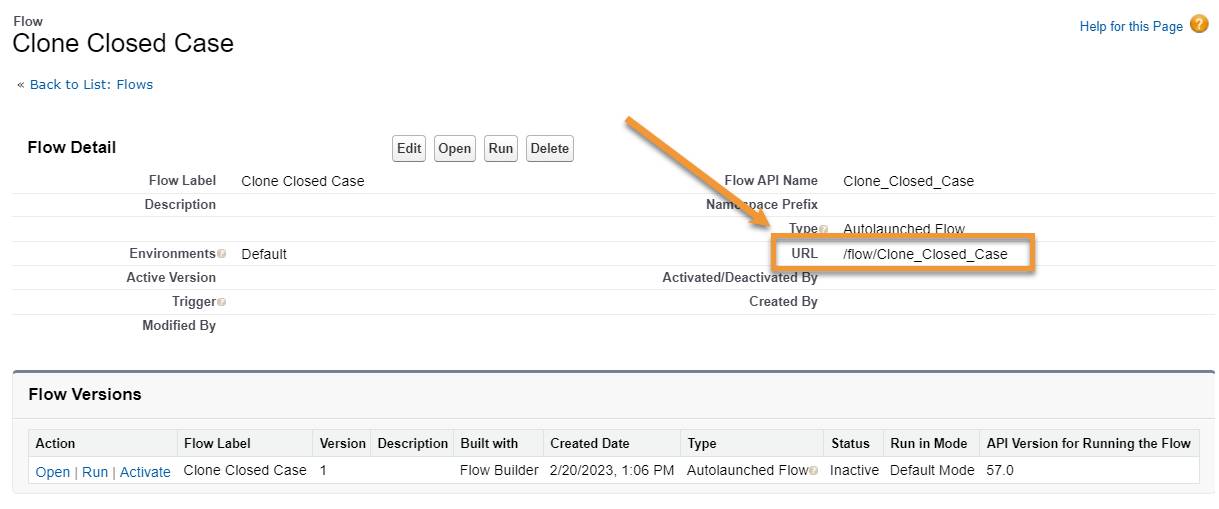
Because custom buttons run URLs, you need to know the URL of your Autolaunched flow before you can create the button. Here’s how to find it.
- In Setup, search for and select Flows.
- In the All Flows list view, find the Clone Closed Case flow and click
 , then View Details and Versions.
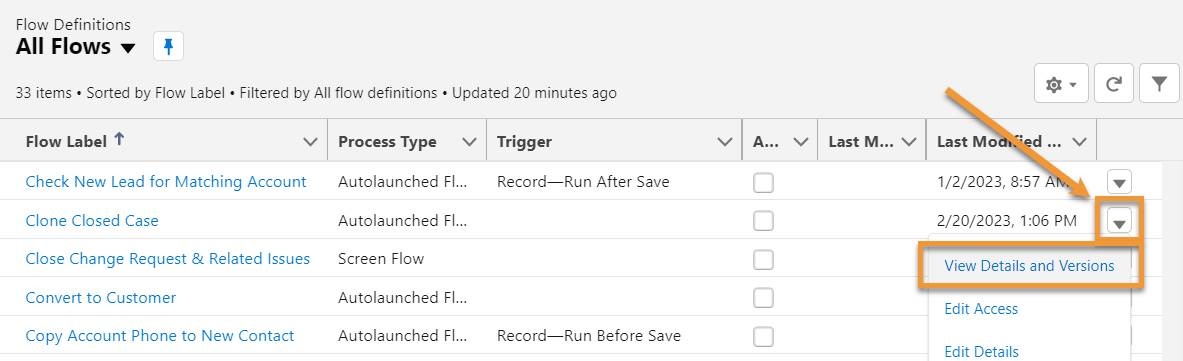
- Copy and paste the URL somewhere handy.
Create a Custom Button to Run the Flow
With the flow’s URL in hand, it’s time to create the button itself.
- In the Object Manager, open the Case object.
- Click Buttons, Links, and Actions.
- Click New Button or Link.
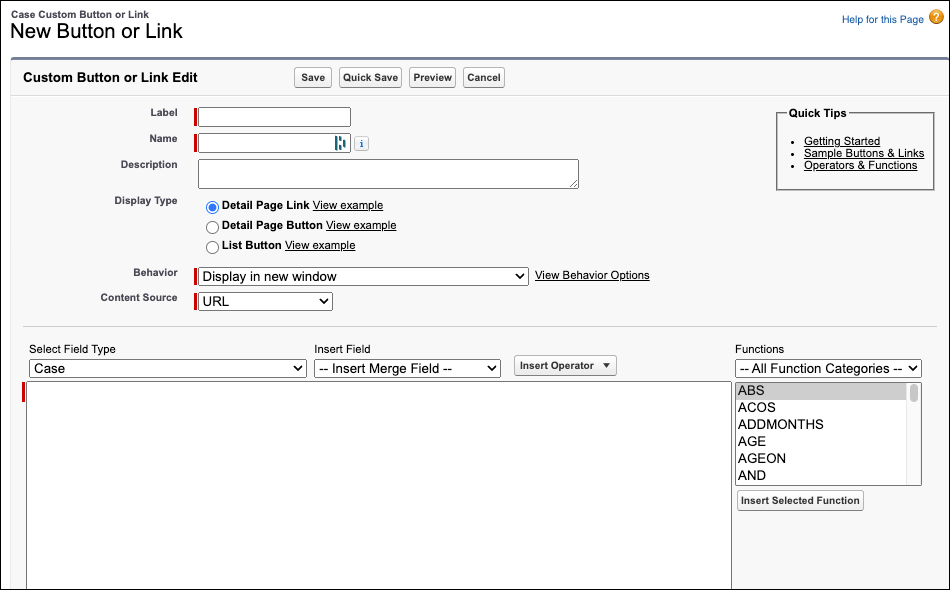
- For Label, enter
Clone Closed Case.
- For Display Type, select Detail Page Button.
This setting tells Salesforce that this is a button, not a link, and that it goes with the rest of the record buttons near the top of the page.
- For Behavior, select Display in existing window without sidebar or header.
This setting makes the flow run in the current browser tab, instead of opening a new tab.
- In the URL editor (the big unlabeled text area below Select Field Type), enter the URL of the Clone Closed Case flow.
- Click Quick Save.
But we’re not done yet! The button knows which flow to run, but the flow still doesn’t know which record the button is on. In the next unit, you learn how to pass record information from the button to the flow.
Resources
- Trailhead: Flow Builder Basics (Learn About Flow Variables)
- Trailhead: Lightning Experience Customization