Turn On Your New Lead Nurturing Agent
Learning Objectives
After completing this unit, you’ll be able to:
- Enable Lead Nurturing.
- Set up the agent using the guided setup experience.
Introduction
In the previous step, you activated Agentforce. Now, let’s set up access and configure the data library.

Enable Lead Nurturing
First, set up the Lead Nurturing agent.
- On the Agentforce for Sales page, under Start with an Agent Template, toggle on Lead Nurturing.
- When prompted, click Turn On in the dialog box. It may take a few moments for the agent to be enabled. Once enabled, the card displays the setup steps in sequence, with links to guide you through each one. This way, you can complete the entire setup methodically, without jumping between different sections. This is the streamlined setup experience powered by Salesforce Go.
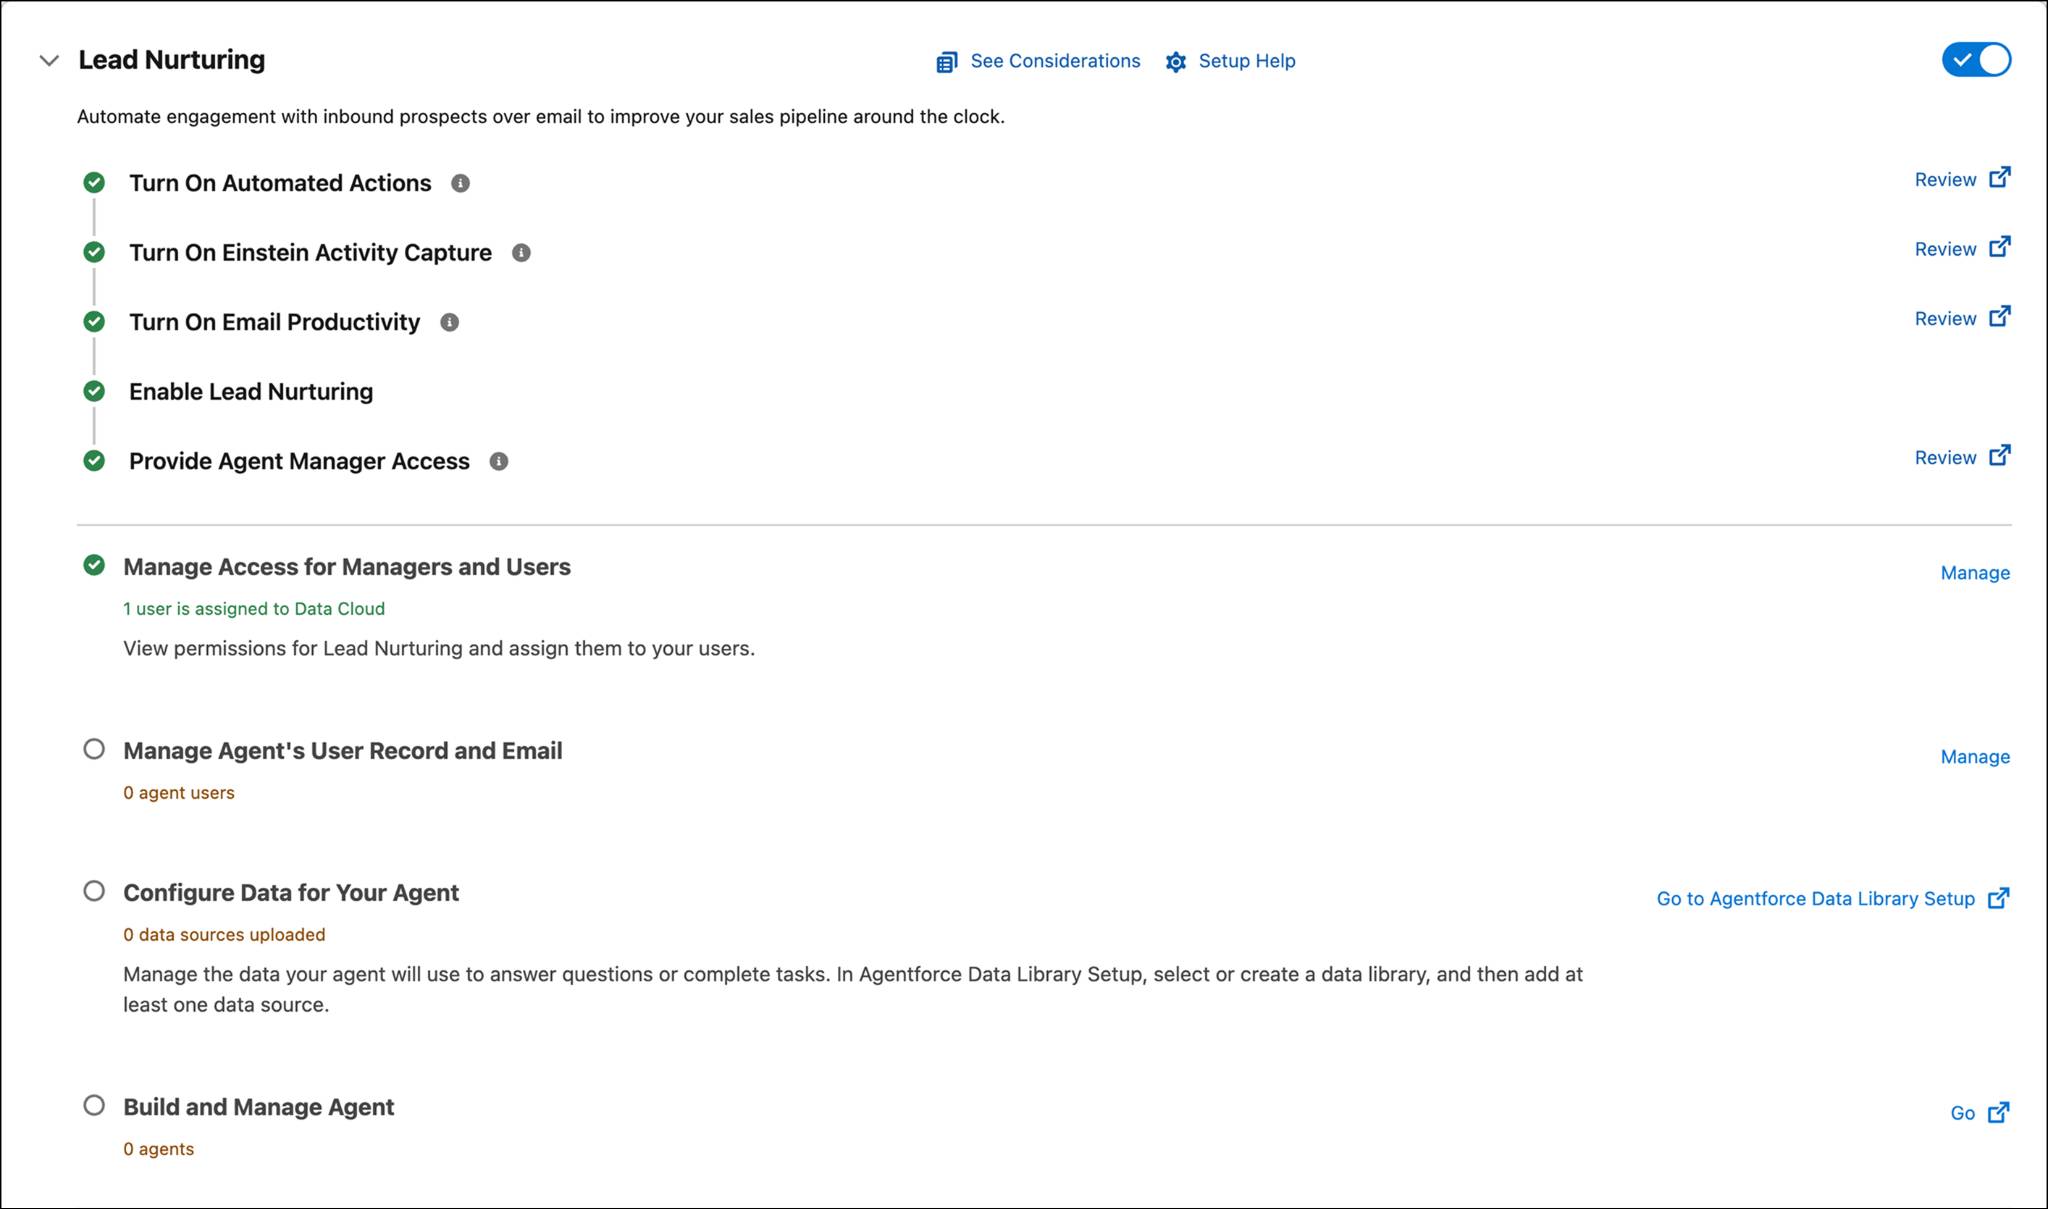
Your agent template is now enabled and ready to be set up.
With the Salesforce Go guided setup, it’s easy to turn on all of the required supporting features at once versus having to individually turn each feature on. Turning on these features lays the groundwork for your agent to do its job. If any of the features in the list were already enabled, you'll see a check next to them.
Turning on Agentforce Lead Nurturing lets you create an agent user record, assign its permissions, and configure the agent in Agentforce Builder.
Manage Access for Managers and Users
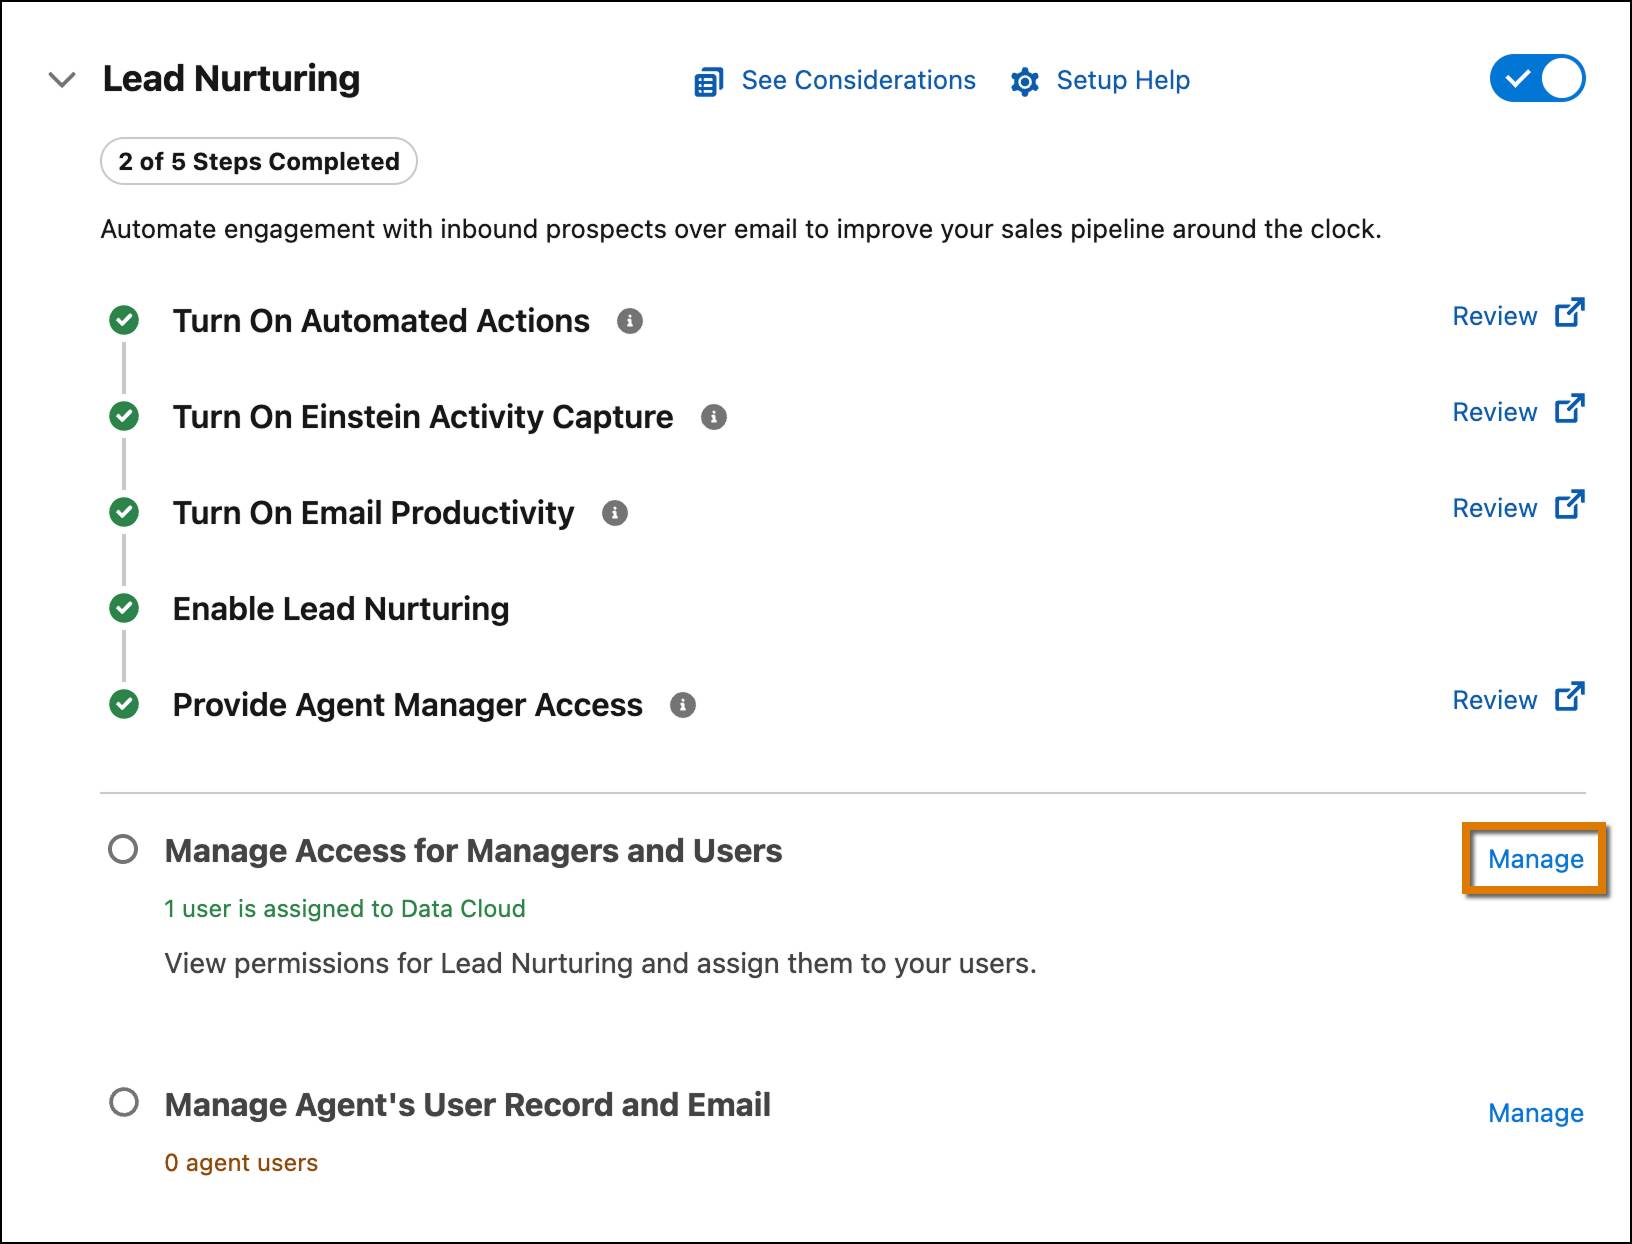
Now that the agent is activated, the next step is to assign permission sets to let sales users work with the agent. For this project, you assign access to yourself.
- In the Lead Nurturing setup area, next to Manage Access for Managers and Users, click Manage.
- Under the Use Lead Nurturing Agent tab, click the Recently Viewed dropdown and change it to All Users.
- Locate your name and check the box beside it.
- Click Assign.

- Click Done.

Configure Einstein Activity Capture
The next step is to configure the Einstein Activity Capture.
- Click Go to Setup button next to Configure Einstein Activity Capture (EAC).
- Click Start Set Up.
- Select Google for your email.
- Select User Level and click Next.
- Enter
Welo Connectionand click Next.
- Review Sync Settings and click Next.
- Review Advanced Settings and click Next.
- Select your name from the Available list, click the arrow to add to the Selected list. Click Next.
- Close that tab and refresh your Salesforce Go Agentforce for Sales page. It may require more than one refresh to work.
Manage the Agent’s User Record and Email
The next step in the process is to set up the agent’s user record and email. This step is essential because the agent user functions as a Salesforce user, with all the permissions needed to perform tasks securely. Follow the steps below to complete the setup directly in Salesforce Go.
- In the Lead Nurturing setup area, next to Manage Agent’s User Record and Email, click Manage.

- Click the Agent’s User Record dropdown and select + New User. Note: Refresh the page if you aren’t able to select a new user.
- Enter this information:
- First Name:
sales - Last Name:
agent
- First Name:
- Click Create. The agent user is created, and all necessary configurations are automatically applied.
- Click Next. After a few moments, a pop window opens.. This window guides you through setting up Inbox and Einstein Activity Capture.
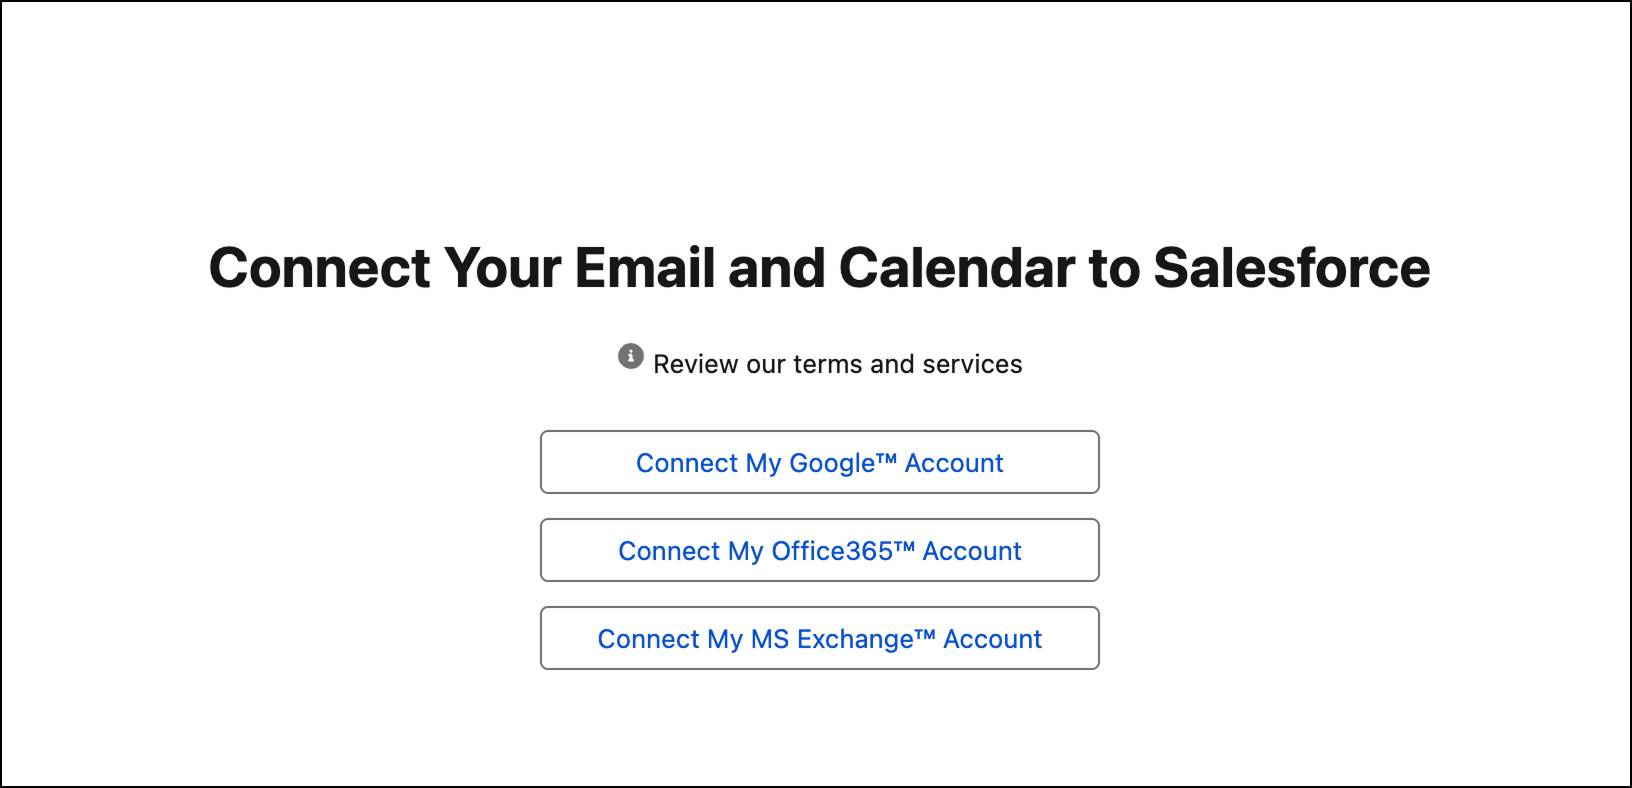
- Click Connect Account.
- Select the checkbox to confirm you’ve read and understood the terms.
- Click Next.
- Click on one of the Connect options and link your email account and calendar to Salesforce, then finish the setup.
After completing this step, you’re redirected to the setup experience and see confirmation that one agent user has been added.
Configure Data for Your Agent
For any agent, data is essential. It provides the context the agent needs to answer questions and complete tasks as expected. In this final step, you set up a data library.
- In the Lead Nurturing setup area, next to Configure Data for Your Agent, click Go to Agentforce Data Library Setup. This opens the page in a new tab.

- Click New Library +.
- In the pop-up window, enter the following:
- Name:
Welo Customer Policies Library - API Name: Auto-generated
- For Description, paste the following:
A collection of Welo’s official customer-facing documents, including return policies, warranties, service terms, and support guidelines.
- Name:
- Click Save. Your data library is now set up and ready for you to start adding sources, giving your agent the information it needs to deliver accurate, customized responses for your business.
- For this project, let’s add a web source. This type of data lets your agent search relevant websites to enrich its knowledge and deliver more accurate results. Click the Data Type dropdown and select Web.

- Toggle on the Turn on Web Search button to enable it.

- Click Save.
Your data library is ready to go! Your agent can now start taking action using the data sources you’ve added.