Deploy an AI Agent with Agentforce
Learning Objectives
After completing this unit, you’ll be able to:
- List the available channels for deploying AI agents with Agentforce Connections.
- Describe the basic steps to follow when deploying an agent.
Before You Start
Before you start this module, consider completing this recommended content.
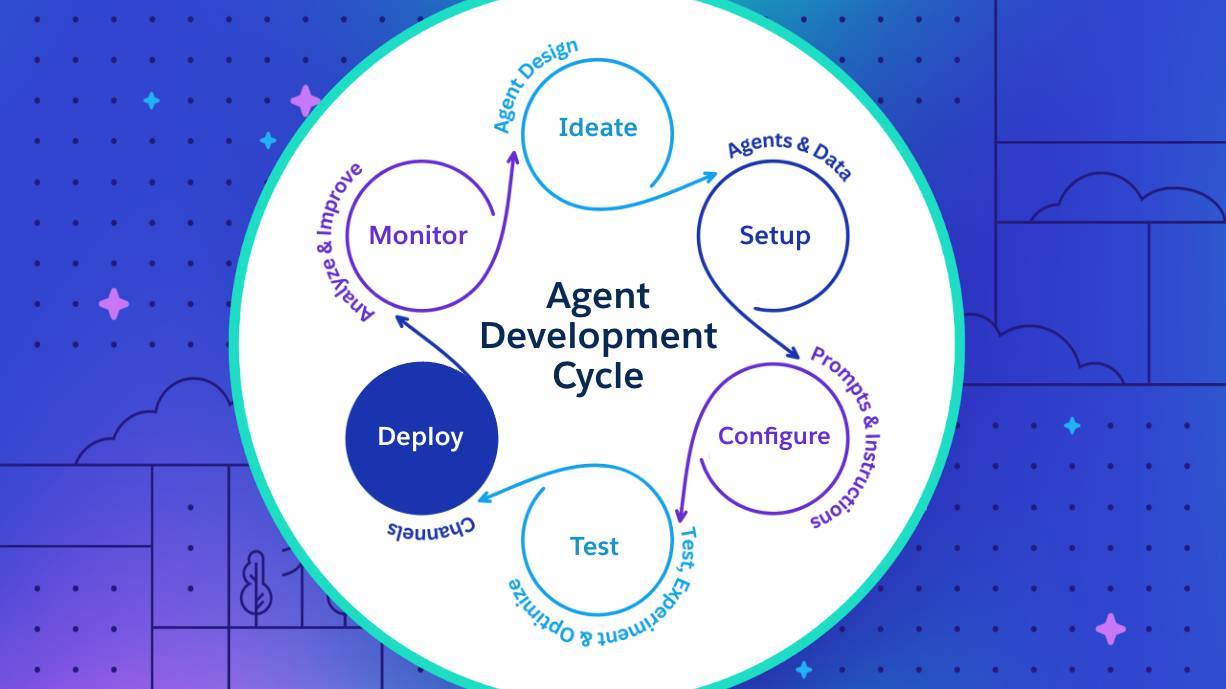
The Deployment Stage
Agentforce makes it easy to build, test, and quickly iterate on AI agents in Salesforce. After you verify that your new agent is accurate, safe, and reliable, it's time to get the agent into the hands of your employees and customers. If we consider the agent development lifecycle, that means it’s time to start the deployment stage of the process.
The Deployment Process
In the deployment stage, you prepare to impress your customers and employees with a helpful new AI agent. Here’s the process in a nutshell.
- Launch your deployment strategy.
- Configure the agent’s connections in your sandbox environment.
- Complete end-to-end testing.
- Deploy to your staging or production environment.
This module explores each step of the process in more detail.
Launch Your Deployment Strategy
A deployment strategy is your roadmap for maximizing the chances of your AI agent’s success and minimizing disruption. It helps you anticipate challenges, manage stakeholder expectations, and gather critical feedback for continuous improvement.
It’s a good idea to create your deployment strategy as you’re planning and prototyping your agent. Proper planning helps ensure that your AI agent rollout is a seamless and successful effort that delivers real value to your organization. Let’s go over the components of an effective deployment strategy.
Rollout Plan
The first step in your rollout plan is to think about the logistics of the deployment. What’s your rollout plan for the AI agent? With an AI project, it’s always wise to start with a pilot program, which is a small, controlled group of users. The group might be a specific team or department in your organization. This allows you to test the agent in a real-world scenario without risking a companywide disruption. After refining the agent’s performance, you can gradually roll it out to other users.
Change Management and Governance
AI projects require robust change management strategies to reduce risk and ensure successful adoption. Here are a few things that can affect how quickly and successfully your organization and customers adapt to the new AI agent.
- AI maturity and organizational readiness
- Process redesign and workflow integration for AI tools
- Ethical AI governance
- Comprehensive training plan, resources, and documentation
- Effective communication strategy
- Executive sponsorship and user evangelism
- Culture of AI experimentation, continuous learning, and transparency
- Feedback and collaboration channels
- Incentive and recognition programs for AI adoption
For more information about change management strategies for AI projects, see the Resources section.
Options for Agent Deployment
Now that you know more about the strategy behind rolling out AI agents to your employees and customers, how do you start deploying your agent to different channels and surfaces? Let’s go over the deployment options for two of the most popular types of agents: Agentforce Service Agent and Agentforce Employee Agent.
Here are the available channels for these agents.
- Service Agents: Telephony, Enhanced Chat, other enhanced messaging channels, and email
- Employee Agents: Salesforce Lightning Experience, Salesforce Mobile, Slack, and Enhanced Web Chat
Configure the Deployment in Your Sandbox
After planning all the connections for your AI agent, you’re ready to start setting up the channels in your sandbox environment. You can do that from the Agentforce Builder. The process is different in the new Agentforce Builder than it was in the legacy builder, so let’s go over both ways.
Configure Connections in the New Agentforce Builder
To set up your connections in the new Agentforce Builder, launch your agent in the builder. In the Explorer, click the plus sign next to Connections, then click Add Connections. After configuring your agent’s connections, you can continue to manage them from the Connections node in the Explorer.

Configure Connections in the Legacy Builder
The Connections tab in the legacy builder lets you deploy an agent to multiple channels—such as email, web, and chat—all from a single, unified view. It's designed to simplify the deployment process, allowing you to quickly create and deliver adaptive customer experiences.

Here are some resources to use when setting up connections for your agent.
Resources for Service Agent Deployments
Connection |
Resources |
|---|---|
Telephony |
|
Enhanced Chat |
|
Resources for Employee Agent Deployments
Connection |
Resources |
|---|---|
Lightning Experience and Salesforce Mobile |
|
Slack |
|
Enhanced Web Chat |
If you prefer a step-by-step walkthrough of the process of deploying agents, see the Deploy Your Agent chapter of the Agentforce Implementation Guide.
Validate Your Agent
When you finish configuring your deployment in your sandbox environment, test to make sure that the agent performs as expected in each channel. If you’re using adaptive response formats, validate how they look in a test channel.
Check out Agentforce Testing Tools and Strategies for an overview of the testing process. And see the Resources section for even more information about testing.
Deploy to Staging or Production
When you’re sure that your AI agent is ready for prime time, you can package the agent and deploy it to your target org, whether that’s a staging or production environment. Here are the basic steps.
- Review the metadata components for Agentforce.
- Retrieve the latest metadata from your sandbox org using Salesforce CLI and generate a package file for your agent. Include any custom Apex, flows, and prompt templates for your agent actions. Also include any permission sets assigned to the agent user.
- In your target org, verify you have the necessary licenses for your agent.
- Verify that Einstein, Agentforce, and Data 360 are enabled in the target org.
- Create the agent user in the target org.
- If you’re using Enhanced Chat, Embedded Service Deployments, or Omni-Channel Flows, deploy that functionality to the target org.
- Deploy the Agentforce metadata to the target org using Salesforce CLI.
- Verify that the agent is active.
- Add the deployed permission sets to the agent user.
- Make sure all deployed flows have the correct version active.
- If your agent uses Embedded Service Deployments, publish the web deployment in the target org.
After deploying to your target org, check that all your topics, instructions, variables, and filters look right. Verify that all permissions have been deployed or updated appropriately, and that the agent is responding to user requests.
Up Next: Monitoring and Improvement
Congratulations! You’ve learned the basics of deploying an AI agent that can assist your employees or customers 24/7. But how do you know if your newly deployed agent is really doing what you intended? And what do your users think of the experience? Check out Agent Analytics and Monitoring to dive into the monitoring stage of the agent development lifecycle and find out how to measure and optimize your agent’s performance.
Resources
- Salesforce Help: Deploy Your Agent to Channels
- Trailhead: Agentforce: Agent Planning
- Salesforce: Agentforce Implementation Guide
- Trailhead: Change Management for AI Implementation
- External Site: AI Transformation: A People-Centric Guide to Leading Change
- Salesforce: Get Hands on with Agentforce Service Agents
- Trailhead: Agentforce Testing Center
- Video: Test an AI Agent in Agentforce Testing Center
- Salesforce Help: Test Your Agent