Build Your Team
Create a Service Territory
Service territories help you organize your workforce. They typically represent geographical areas where your teams work, such as Los Angeles. They can also be functional territories, such as field sales and field service. So, for example, you may assign a mobile worker with a home base of Los Angeles to the Los Angeles territory.
Just like your mobile workers, dispatchers are also assigned to service territories. When they’re working in their dispatcher console, they see only the territories that they manage.
Let’s use Guided Setup to create the Los Angeles service territory we just talked about.
- From the App Launcher, find and select Field Service Admin, then click the Field Service Settings tab.
- Click Go to Guided Setup.
- Click Create Service Territories.
- Enter
Los Angelesas a service territory name and click Add.
You can always edit fields on the service territory from this page in Guided Setup or from the Service Territories tab.
Create a Service Resource and Dispatcher
Now let’s create a service resource to represent a mobile worker in your brand-new Los Angeles territory. Let’s call him James Clifton. James has lived and worked in Los Angeles for a long time, and he’s a great mobile worker. He’s ready for some work.
You play the part of dispatcher for that territory, which lets you manage James’s appointment assignments from the dispatcher console. Great things can be accomplished by a team of two.
First, set up your user profile.
- From Setup, enter
usersin the Quick Find box, then select Users.
- Click Edit next to your name, then change the following information.
- Ensure that Service Cloud User and Knowledge User are selected.
- Set your time zone to (GMT-07:00) Pacific Daylight Time (America/Los_Angeles). This label varies depending on whether it’s daylight savings time (March to November) or standard time (the rest of the year).
- Click Save.
Now, create a user to represent your reliable mobile worker, James.
- Select Users again in the Setup menu.
- Click New User and enter the following information:
- First Name:
James - Last Name:
Clifton - Email: Your email address
- Username: Any valid value
- Nickname: Any valid value
- User License: Salesforce
- Role: Installation & Repair Services
- Profile: Standard User
- Select Service Cloud User and Knowledge User
- Set the time zone to (GMT-07:00) Pacific Daylight Time (America/Los_Angeles)
- Deselect Generate new password and notify user immediately
- Click Save.
- Close the Setup tab.
James needs a service resource record where you set up his service territory and his licenses and permissions.
- From the App Launcher, find and open Field Service Admin, and click the Field Service Settings tab. Click Go to Guided Setup.
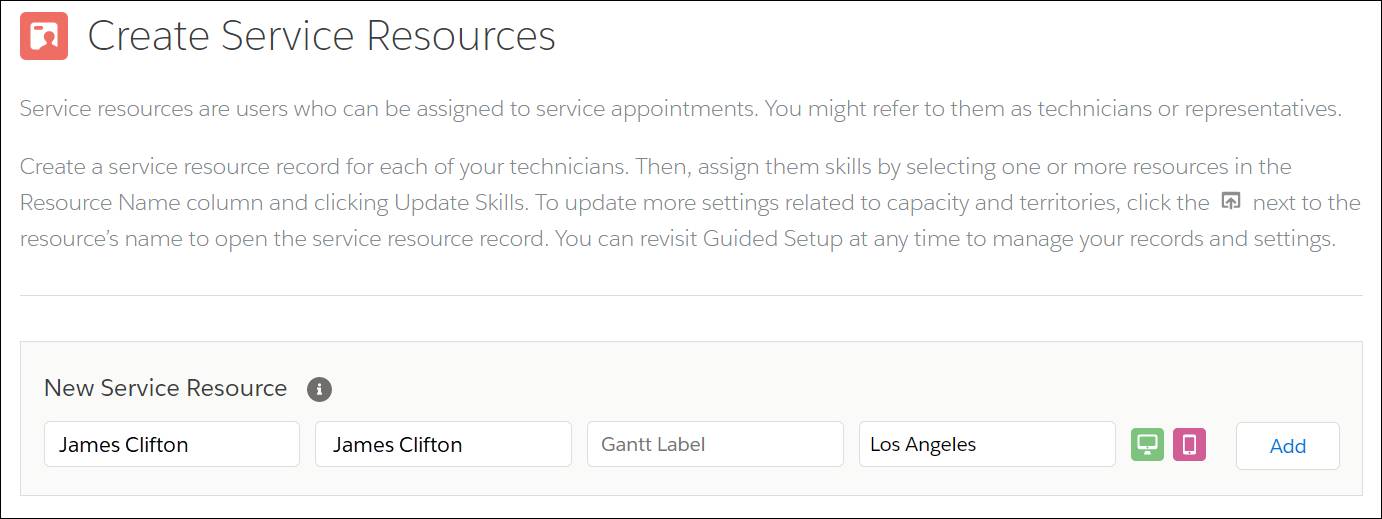
- Click Create Service Resources.
- Select James Clifton in the User field.
- Select Los Angeles as his service territory.
- Click both icons to assign James the Scheduling and Mobile licenses.

- Click Add.
James is all set up to start receiving work.
Last, make yourself a dispatcher for the Los Angeles service territory so you can start assigning work to James.
- From Setup, enter
usersin the Quick Find box, then select Users.
- Click your name.
- Hover over Permission Set Assignments and click Edit Assignments.
- Move Field Service Dispatcher License and Field Service Dispatcher Permissions to Enabled Permission Sets.
- Save your changes.
Now you can access the dispatcher console and get James to work.
Open Field Service from the App Launcher, then select the Field Service tab, select the Los Angeles territory, and click Save. The console looks pretty empty at this point, but you can see the schedule and James Clifton as an available mobile worker. If you don’t see them, make sure that Today is selected in the Gantt.
You can also give community users access to the dispatcher console. For help, see Add the Dispatcher Console to a Community.
And you’ve done it! You’ve set up your Trailhead playground, enabled Field Service and installed the Field Service managed package. You created all the necessary permission sets and assigned them. Then you created a team with a dispatcher (you!) and a mobile worker (James). Now that you’ve stepped through the process here, are you ready to get started in your own org ?