设置 Agentforce SDR
学习目标
在本项目中,您将:
- 启用 Agentforce 销售开发代表 (SDR)。
- 为智能体创建用户。
- 授予用户对您的智能体的访问权限。

以前所未有的方式培养潜在客户
Agentforce SDR 基于 Salesforce 受信 AI 平台构建,通过全天候培养潜在客户和建立销售漏斗来帮助您扩展销售团队。SDR 智能体可以是入站潜在客户的第一个联系点。智能体可以进行个性化的潜在客户外联,回答客户问题,甚至代表您的卖方预约面谈
在 Agentforce 运行的同时,您的销售团队可以专注于目标客户并建立更深层次的客户联系,帮助他们更快地完结更多交易。
启用支持功能并激活适用于销售开发的 Agentforce
只需简单两步,便可在 Agentforce 中启用 SDR 智能体:
-
在 Agentforce 中打开 SDR | 入站培养:激活 Agentforce 的功能以及必要的支持服务,使 SDR 智能体可用。
-
配置和激活智能体:使用 Agent Builder(智能体生成器),根据您的业务需求和销售流程定制智能体。
在此步骤中,您将学习如何完成第一步:通过 Salesforce Go 体验启用 SDR 智能体。Salesforce Go 是一种新的设置体验,它简化了您发现、启用、配置和监控 Salesforce 功能的方式。查阅资源部分,了解有关 Salesforce Go 的更多信息。
- 单击齿轮图标
 并单击 Salesforce Go。这将在 Setup(设置)中打开 Salesforce Go 主页。或者,如果您已进入 Setup(设置),请使用 Quick Find(快速查找)搜索并选择 Salesforce Go。
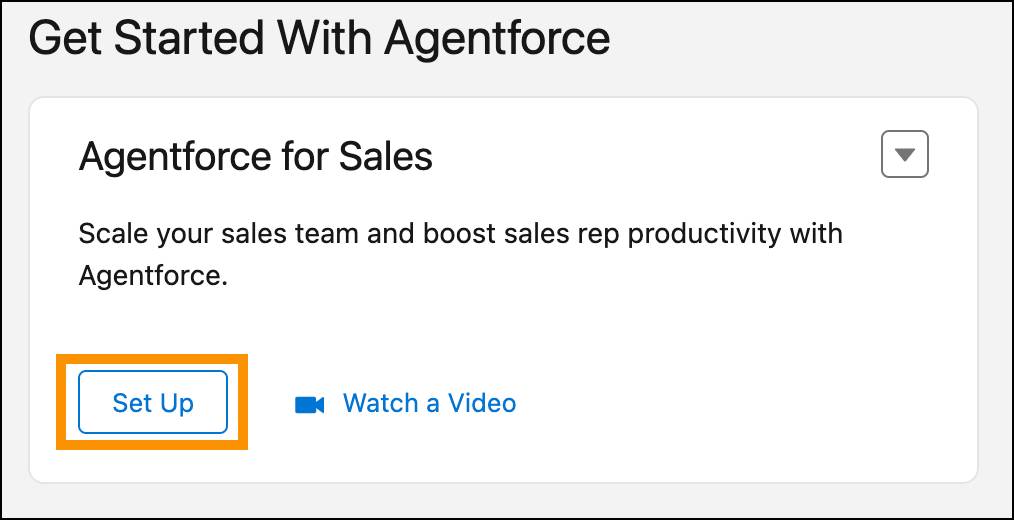
- 向下滚动到 Get Started with Agentforce(开始使用 Agentforce)部分,然后单击 Agentforce for Sales(适用于销售的 Agentforce)卡片上的 Set Up(设置)。
- 单击 Turn On(打开),以在您的组织中启用 Agentforce。

- 单击 Confirm(确认)。Agentforce 可能需要几分钟才能激活。启用后,Agentforce 会自动提供与销售相关的智能体用于设置。例如,适用于销售的 Agentforce 目前包括两个智能体:销售指导和 SDR 智能体。激活后,可从此页面访问这些智能体。
- 在 SDR Agent | Inbound Nurturing(SDR 智能体 | 入站培养)上切换。

- 单击对话框中的 Confirm(确认)。智能体可能需要几分钟才能激活。启用后,可提供您需要完成的设置步骤。现在完成了四个必需步骤中的一个——打开智能体。您的智能体现已启用并可进行设置。
做得好!在此步骤中,您了解了 Agentforce 销售开发智能体可以为您的公司做些什么,并且您为 Agentforce 销售开发启用了您的 Playground。现在,您可以创建一个用户并授予该用户构建智能体的正确权限。