Create a Semantic Model
Learning Objectives
After completing this unit, you’ll be able to:
- Describe a semantic model.
- Describe the types of semantic models.
- Create a semantic model.
Explore Semantic Models
Before you learn how to build a semantic model, you should first understand what semantic models are and how they’re structured. Semantic models are first-class Salesforce metadata, integrated throughout Data 360 to power analytical and data-driven experiences.
A semantic model consists of one or more data objects and their relationships and semantic definitions tailored for a specific analytical use case. For example, renaming a field from COGS to Cost of Goods, or setting the default aggregation to median.
There are a few ways to create semantic models, including from scratch, extending an existing model, and more.
If you’re using Tableau Next to create semantic models, see Add Semantic Models in Salesforce Help.
Create Your Semantic Model
To better understand how Tableau Semantics can help you with your business, let's create a model using the data model objects (DMOs) Account, Individual, and Case. This model can then be consumed by business analysts and users later on to answer questions such as how many escalated cases occurred this past quarter for a specific customer profile.
Before you begin, check the available data objects in Data 360 to make sure you have all the required data.
- From Data Cloud, select the Data Model tab.
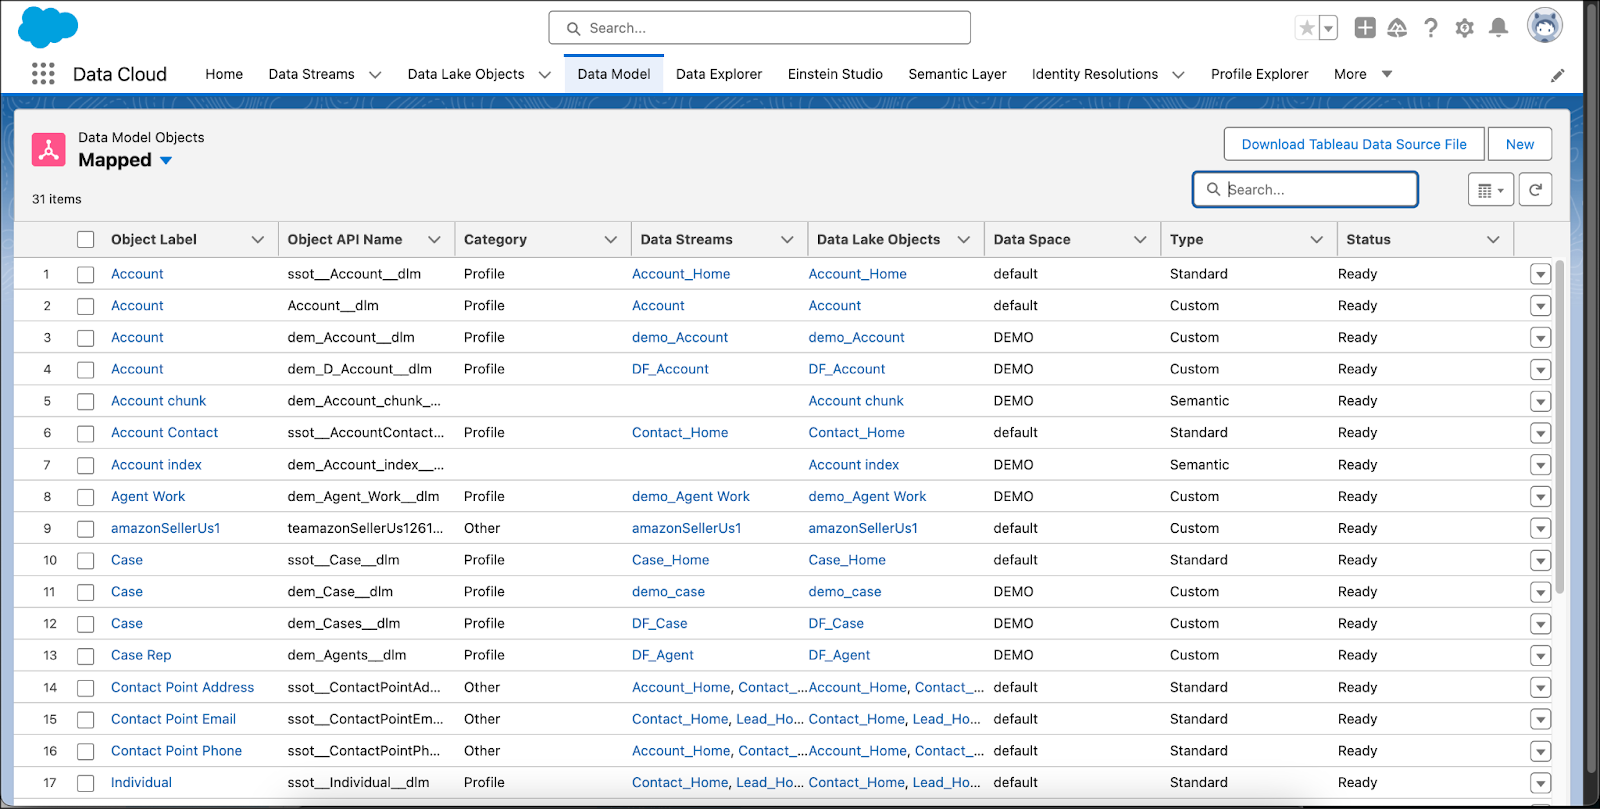
Here you can see you have the data model objects (DMOs) you need for your semantic model: accounts, sales, product, category, case, and case representative data objects. For more information about data model objects, see Data Model Objects (DMOs) in Salesforce Help.
After verifying that you have all the data you need, you're ready to create a semantic model.
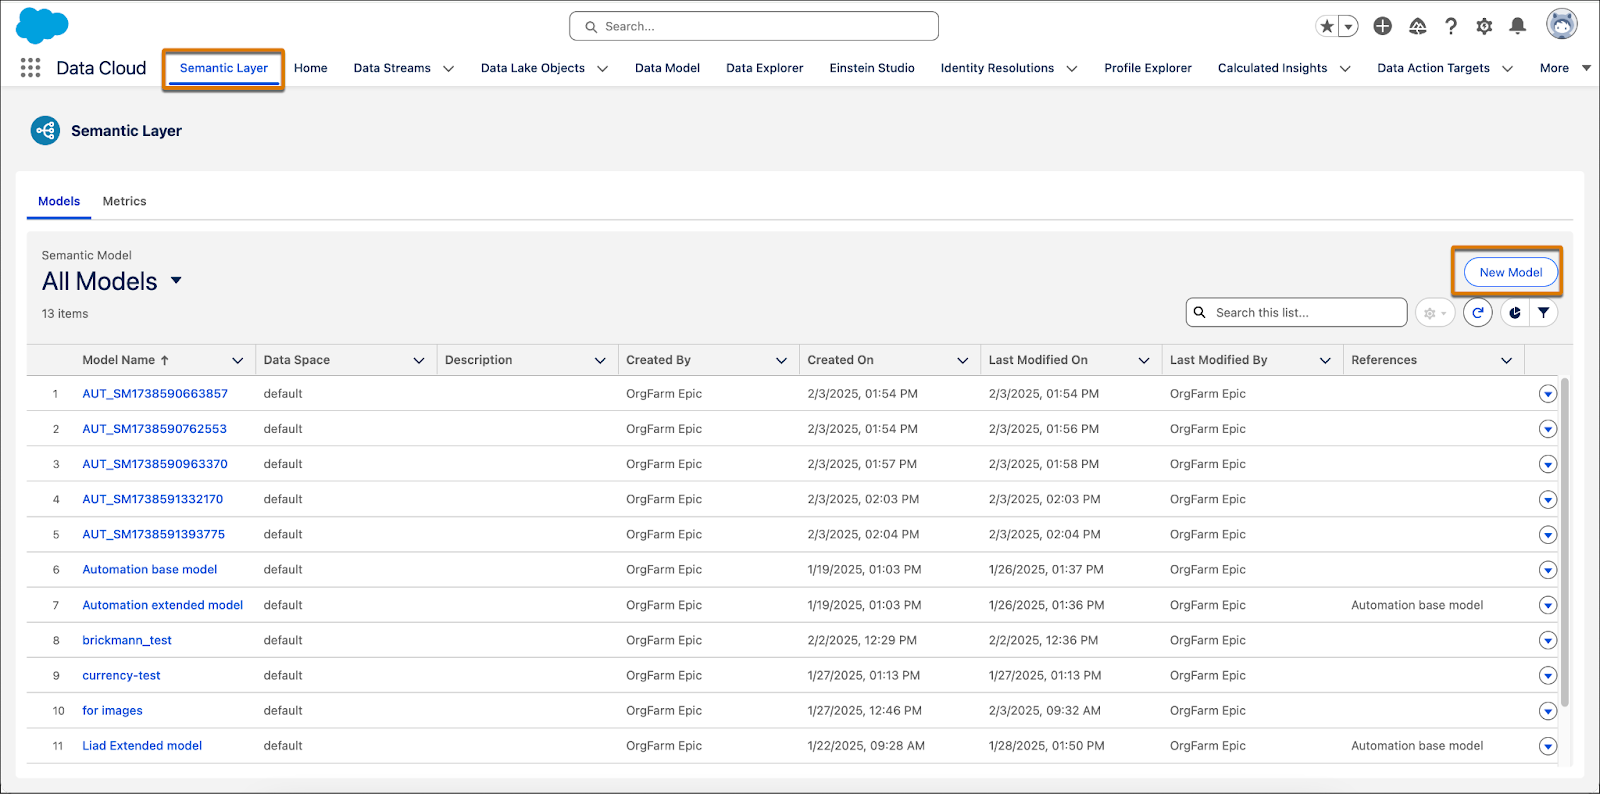
- In Data 360, select the Semantic Layer tab.
- Click New Model.
There are several options to create a new model, including starting from scratch, extending an additional model, and working from a data kit.
- Select Start with a New Model.
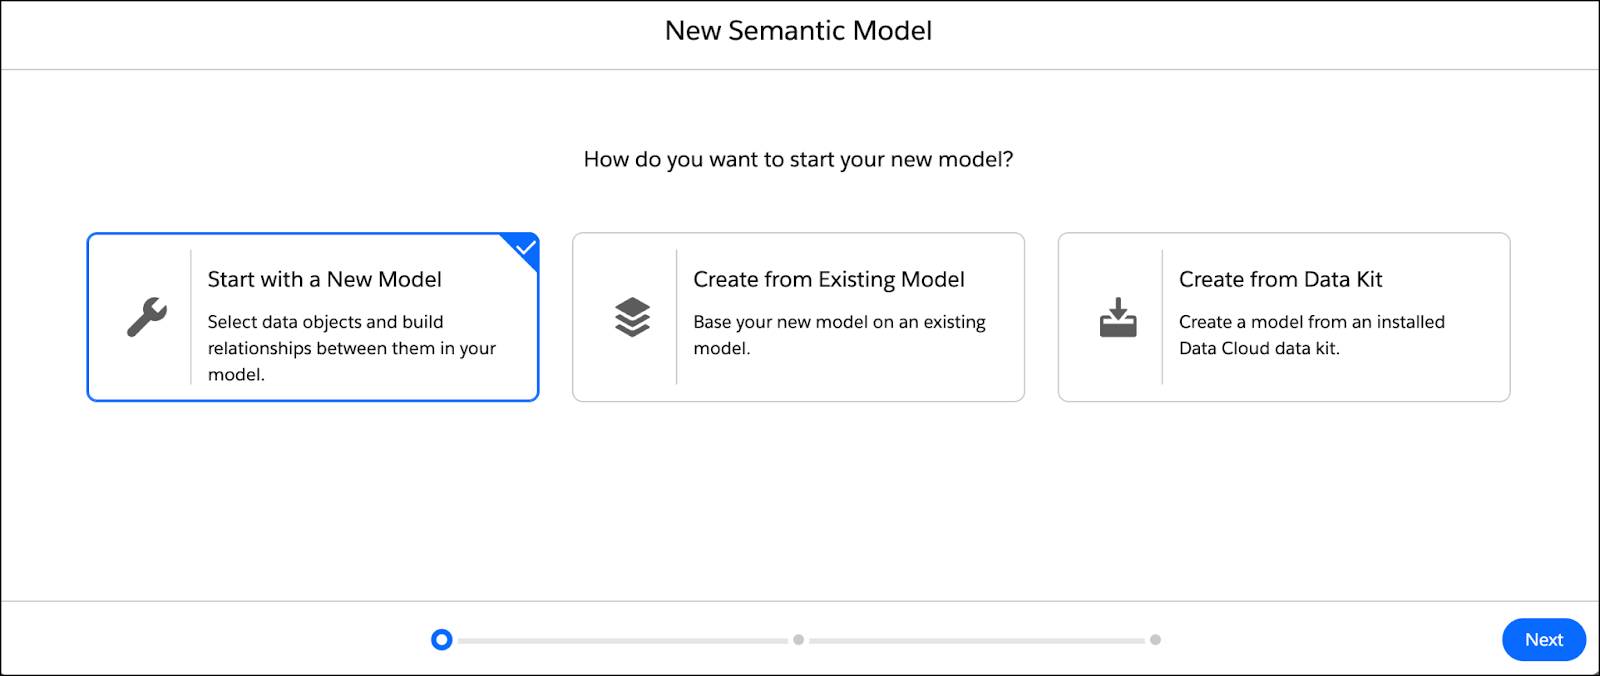
- Click Next.
- (Optional) Select the data space for your data objects. You can only use one data space per model.
- Select the data objects you want to use in your semantic model. You can select data model objects (DMOs), data lake objects (DLOs), and calculated insights (CIs). In this case, select Account, Sales, Product, Product Category, Case, and Case Representative.

- Click Next.
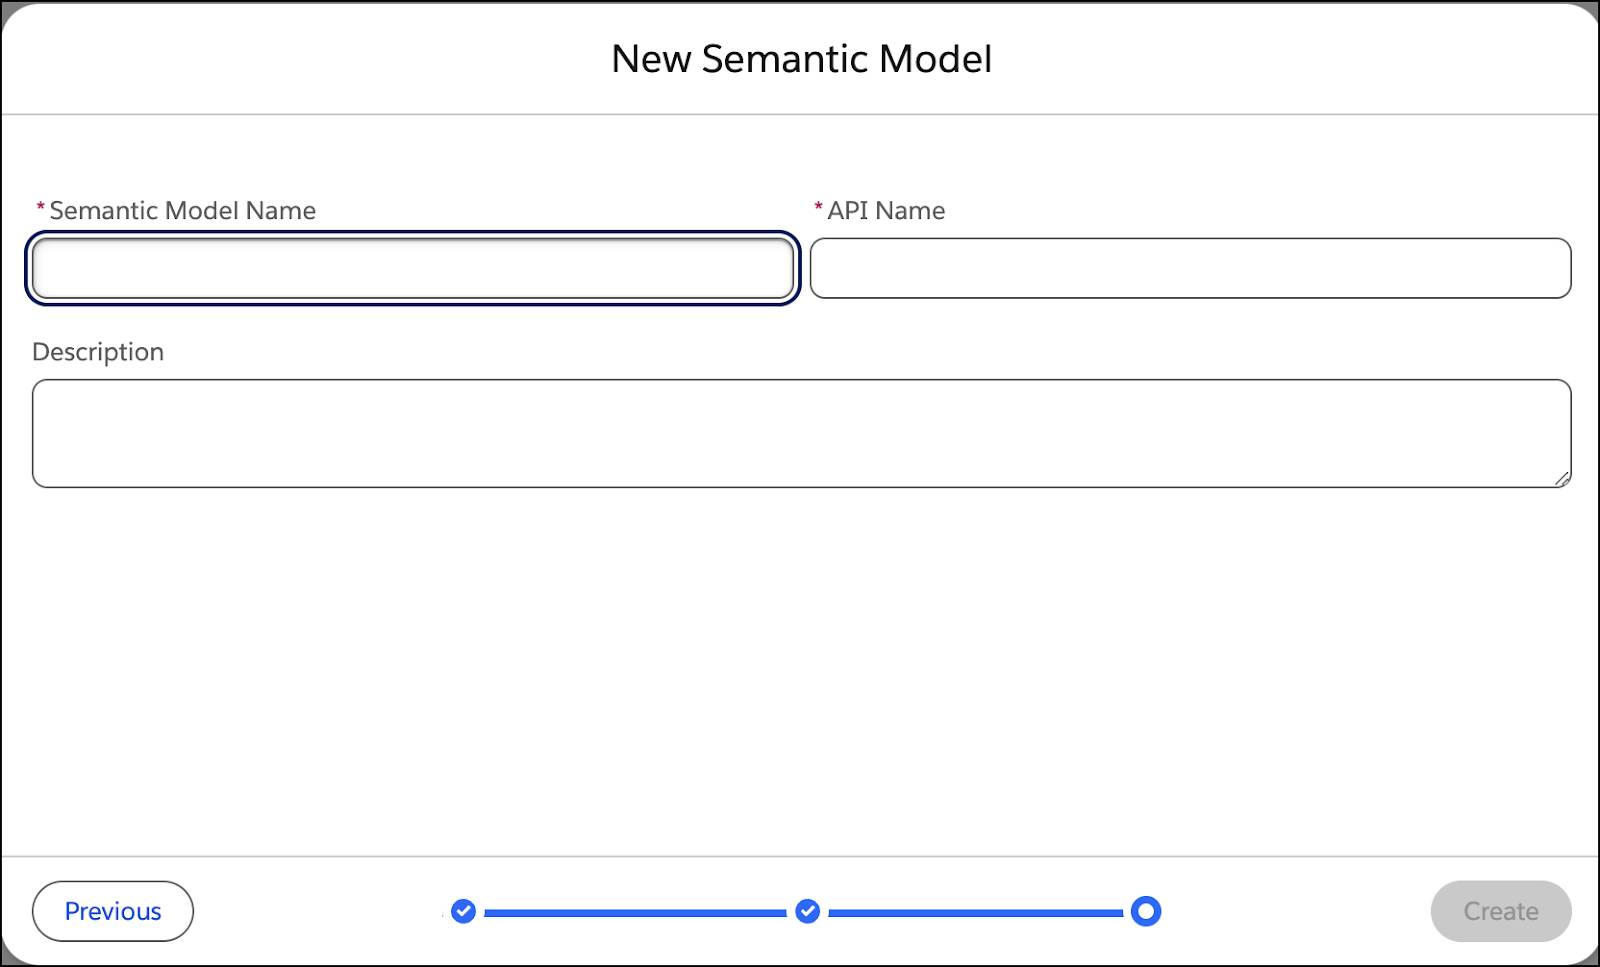
- In the New Semantic Model dialog, enter these details:
- Enter a unique name for the semantic model.
- Define the API name of the semantic model. The API name can’t be edited after the model is created.
- Enter an optional description.
- Enter a unique name for the semantic model.
- Click Create.
The Semantic Model Builder appears and you can see the selected data objects in the middle of the Semantic Model Builder Canvas: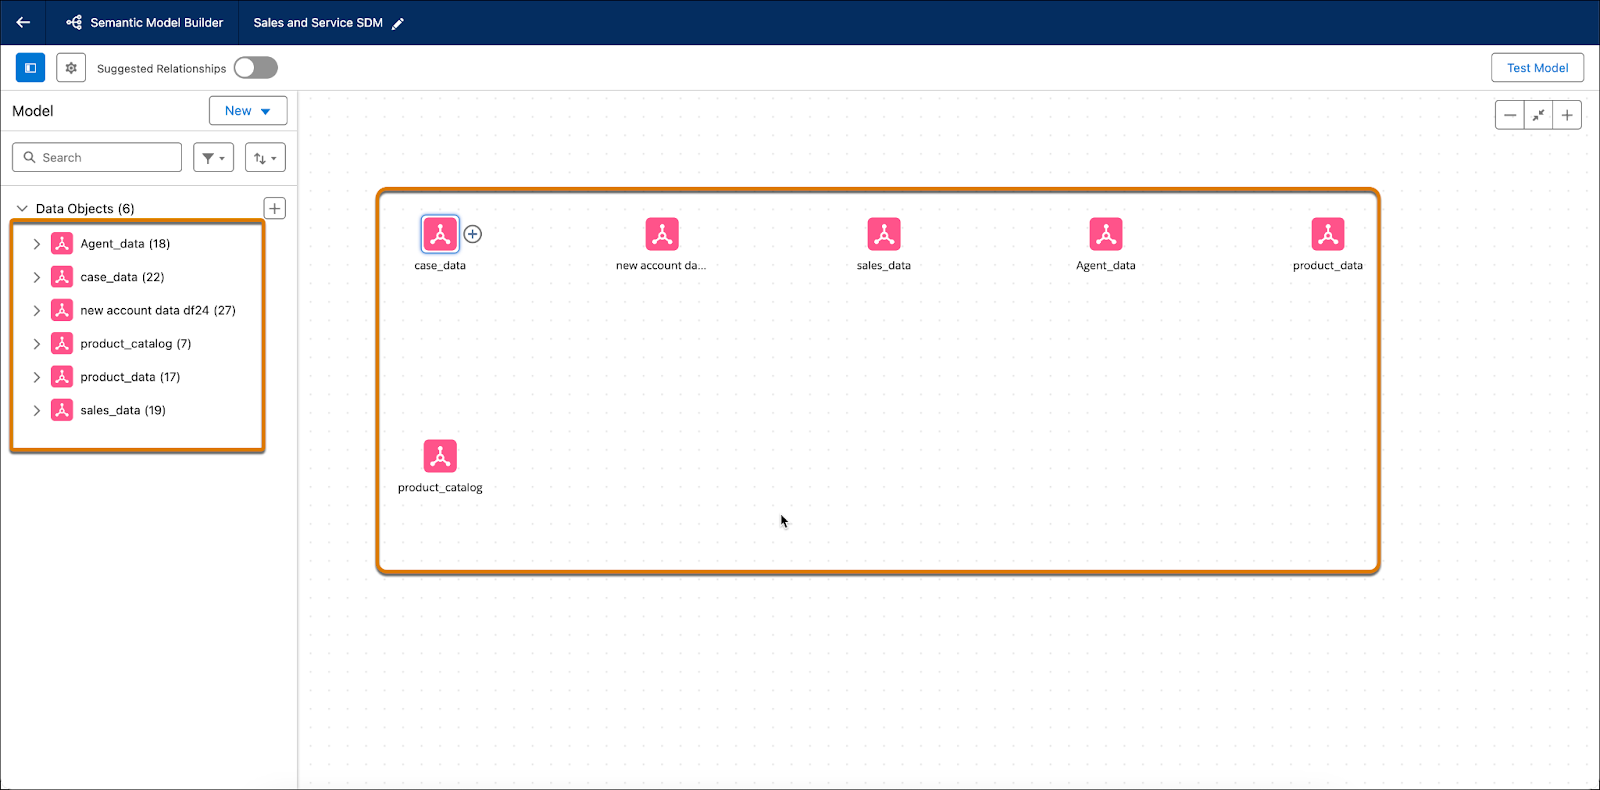
Now that you've added data objects to your semantic model, the next step is to set up the relationships between those objects.
Add Relationships Between Your Data Objects
Relationships are flexible connections between different data objects based on common fields. Use the Semantic Layer to establish relationships between your data objects to enrich your data model without the need to predefine the join type. Think of a relationship as a contract between two DMOs. When you build a visualization with fields from those DMOs, the Semantic Layer uses the contract to decide what join type is necessary for the analysis.

By default, any relationships that were mapped between DMOs in Data 360 are automatically transferred into the model. Any existing relationships that can create circular relationships (relationships that reference the same object multiple times) are automatically removed. You can also remove any relationships you don't want.
If no relationships exist or you need to create new ones, you can do so manually or by using Semantics AI.
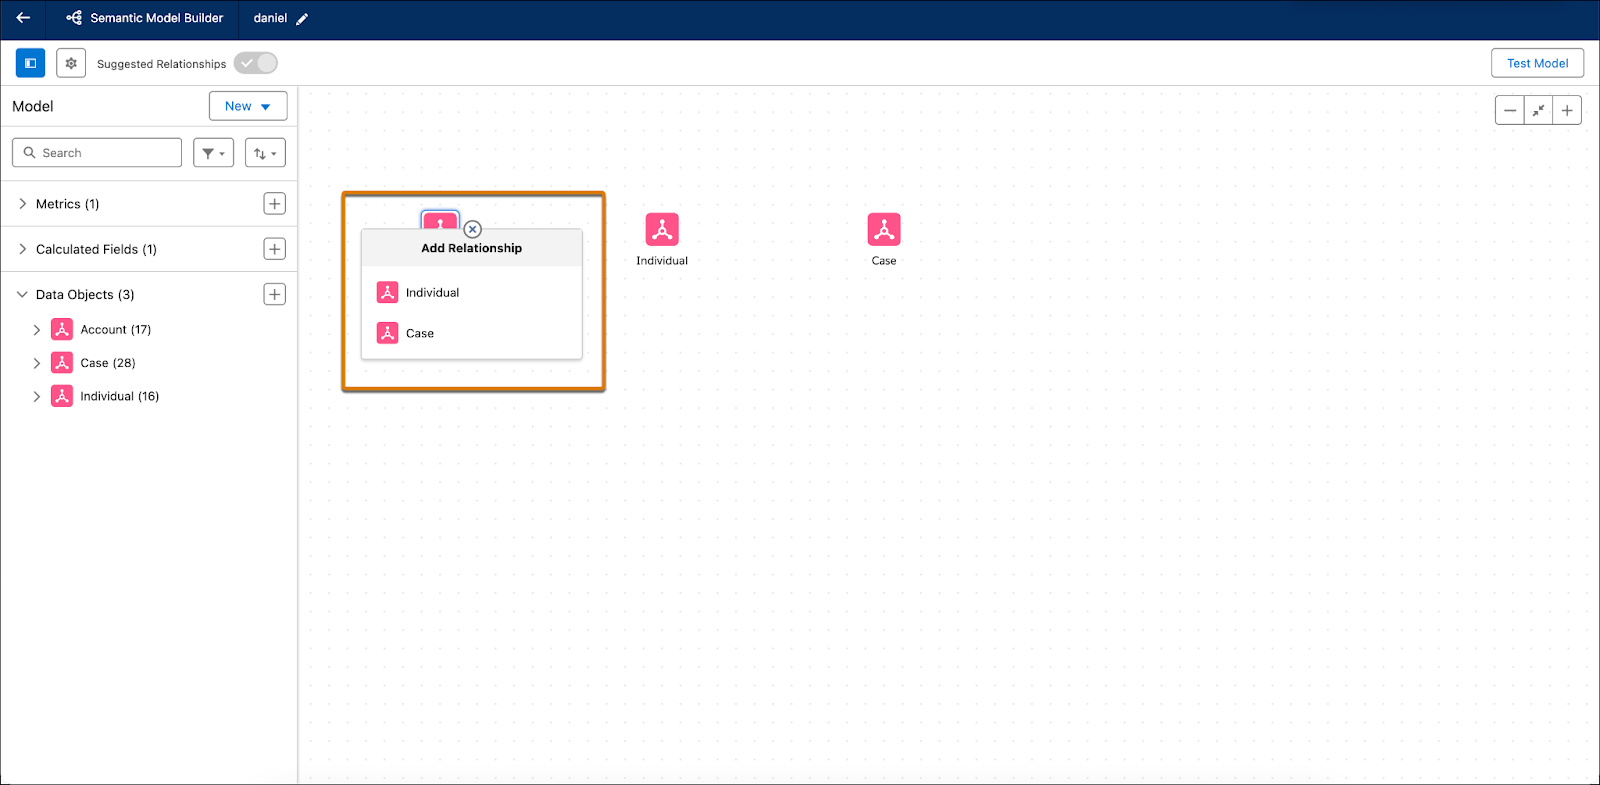
Create a Manual Relationship
- To create a relationship manually, click the plus sign next to a data object then select the object to connect to, such as Account to Individual.
- Next, choose the fields from each DMO that the relationship is built on, such as Account.Account = Individual.Account. If you need additional fields, click the plus icon and add more fields to the relationship.
- When you have all the fields needed to define the relationship, select Apply. The Semantic Model Builder shows a straight black line, indicating that the relationship is configured correctly.
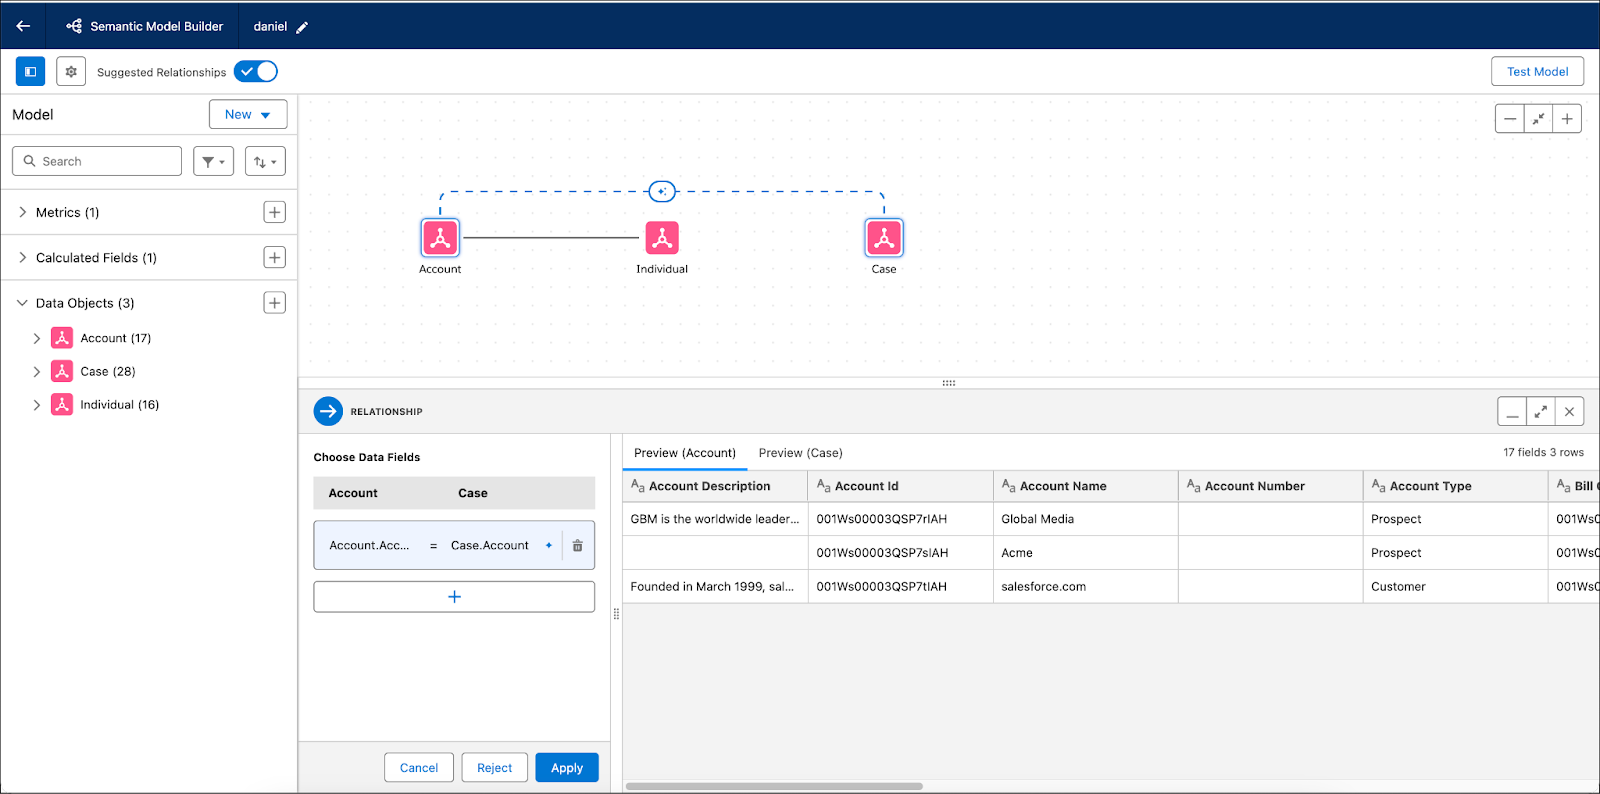
Use Semantics AI to Create Relationships
You can also use Semantics AI to help create a relationship, such as between the Account and Case data objects.
- In the Semantic Model Builder, click Show Suggestions.
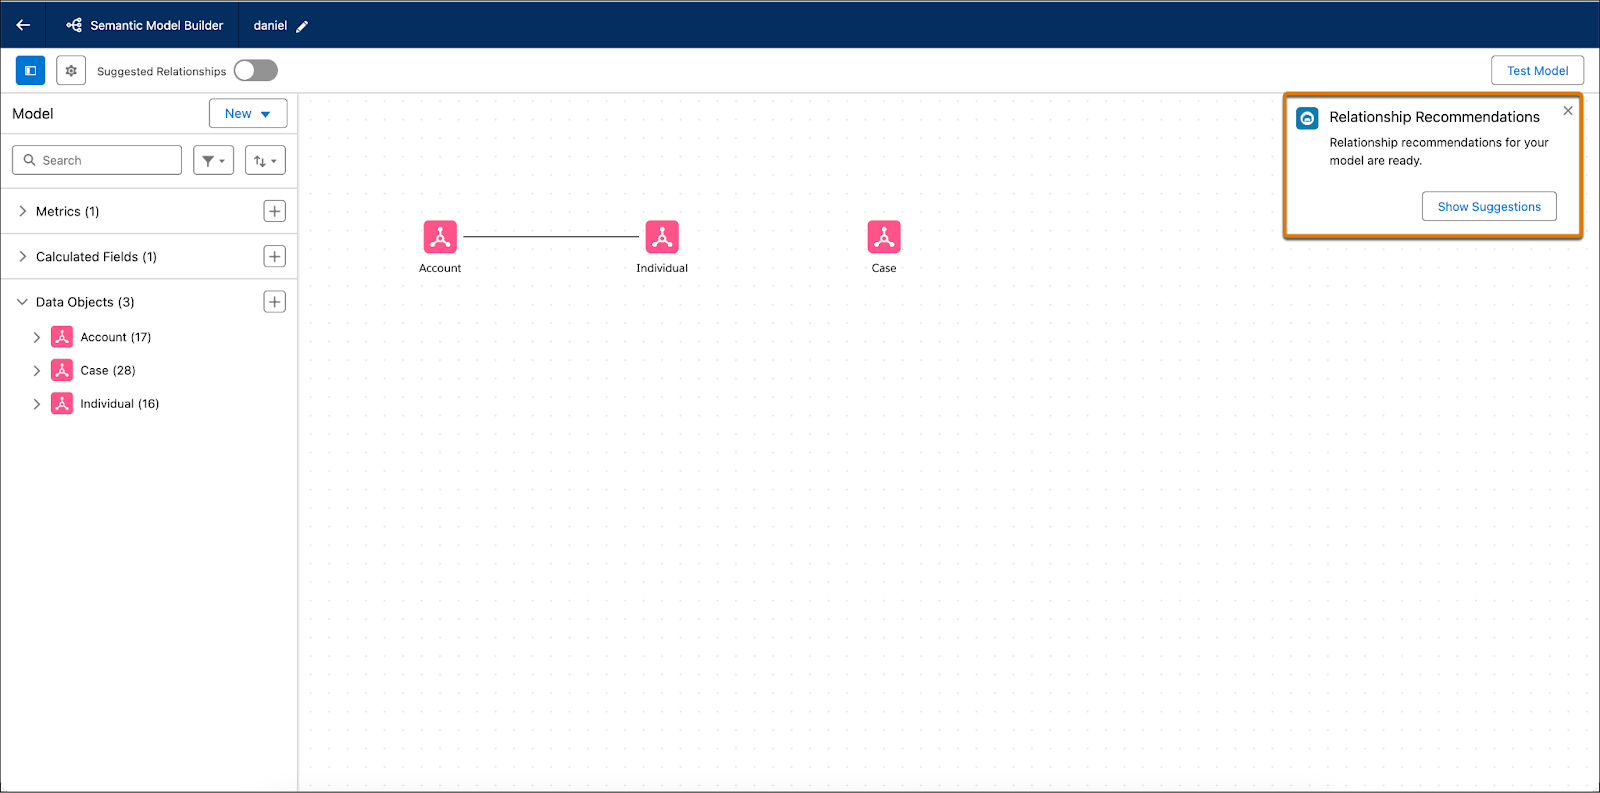
Here you can see that Semantics AIfound a relationship between Account and Case using the Account ID.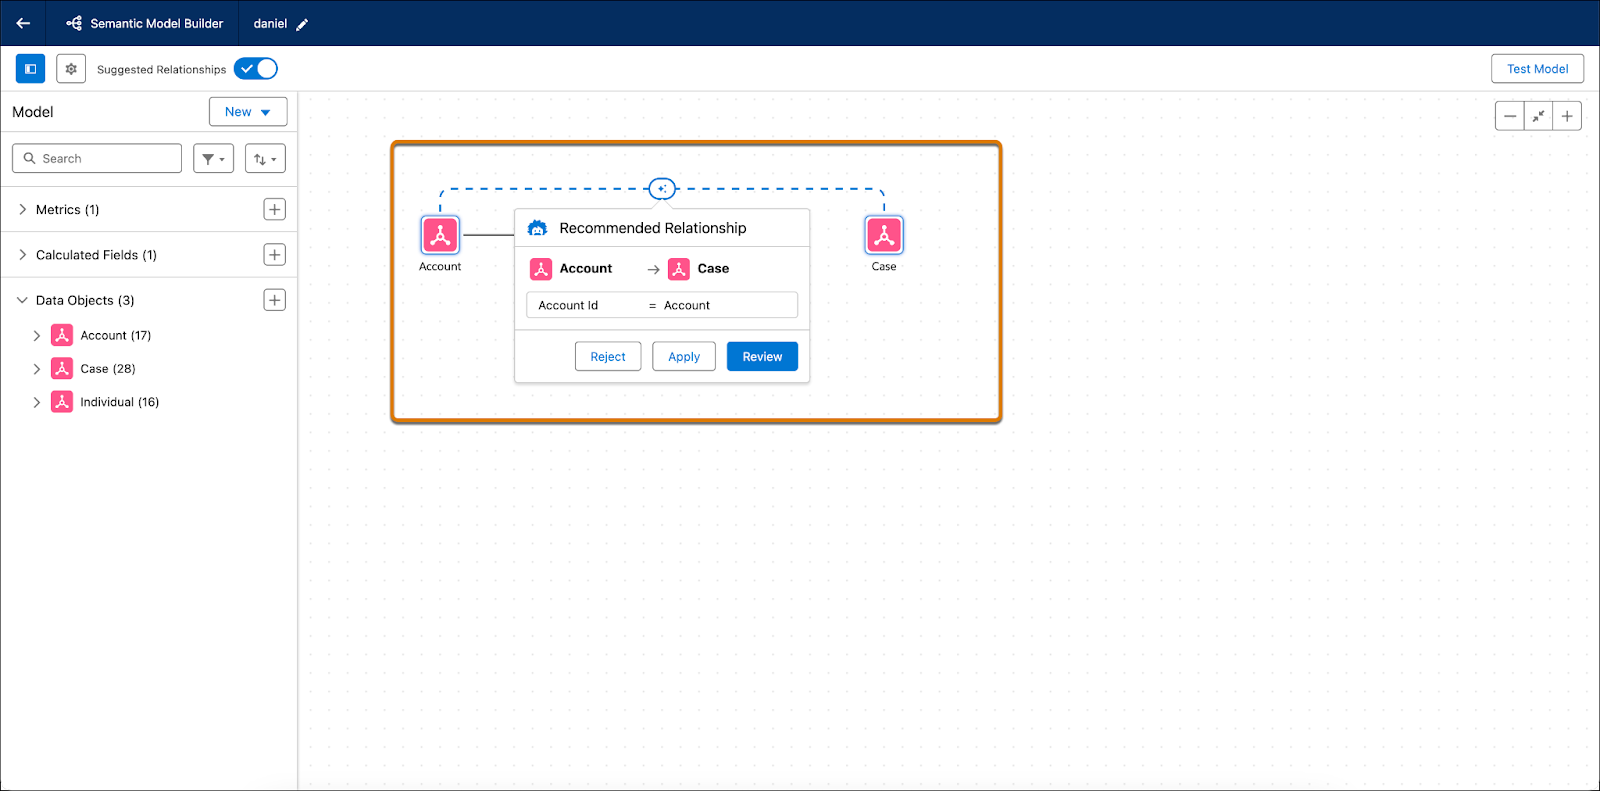
- You want to make sure this is what you’re looking for, so click Review.
- Once everything looks good, select Apply.
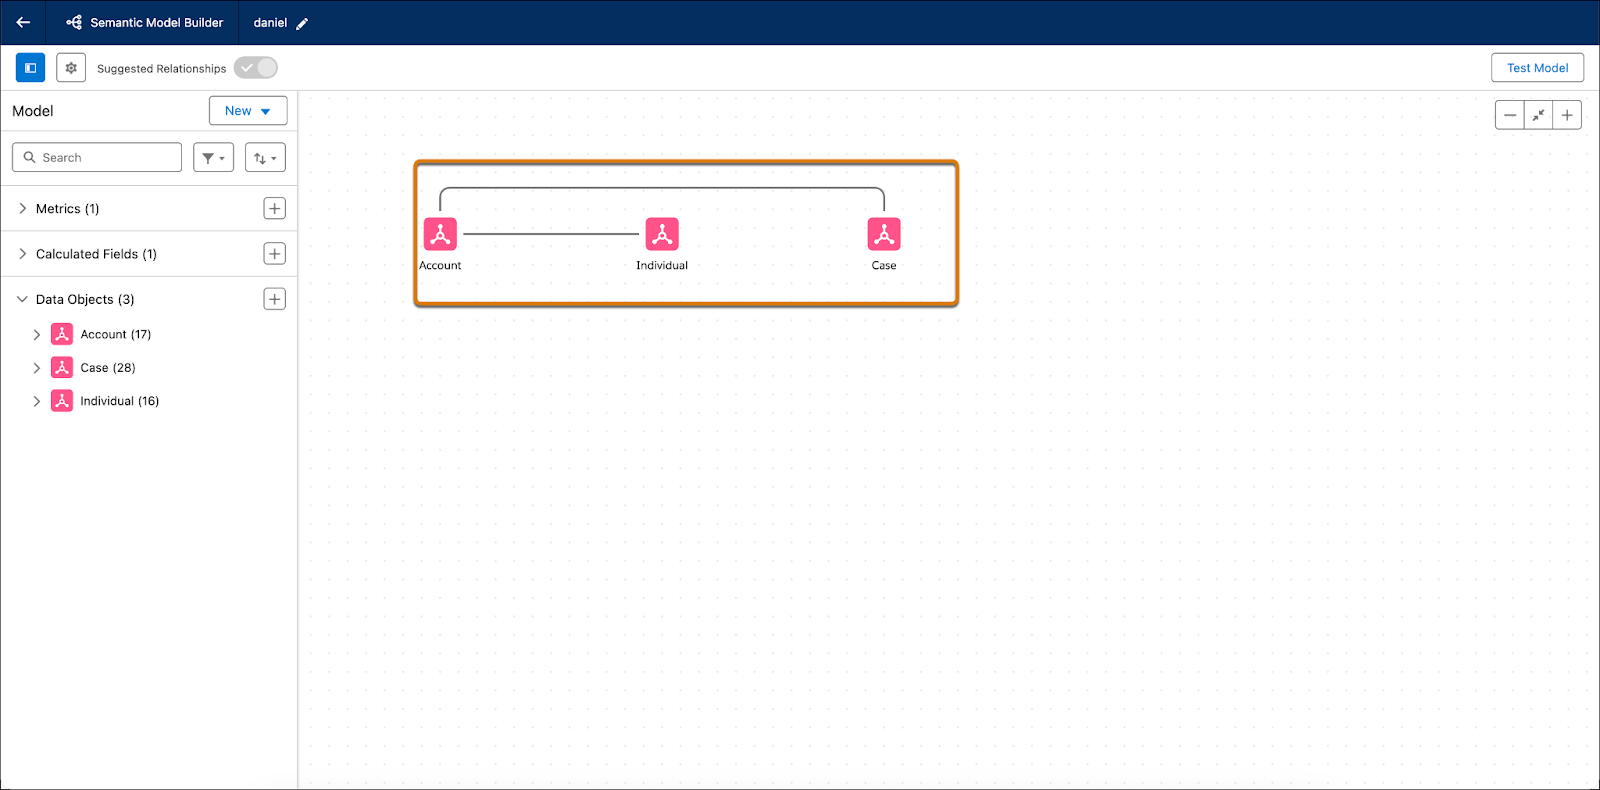
- The Semantic Model Builder shows a straight black line, indicating that the relationship is configured correctly.

Now your semantic model has three objects and two relationships—a relationship between Account and Individual, and between Account and Case.
In this unit, you learned about the different ways to create semantic models, how to create a semantic model from scratch, and how to add relationships between your data model objects. Head over to the next unit to see how to create a logical view when you have multiple tables and need one single view of your data.