Discover Attributes
Learning Objectives
After completing this unit, you’ll be able to:
- Explain how to create attribute categories.
- Describe the process for creating attributes.
Determine Attributes
In this unit, learn how to create attribute categories and attributes using the Digital Insurance Platform. An attribute defines product specifications. You can define attributes for root products and child specs.

[Alt text: The relationship between child specs and attributes.]
Attributes serve different purposes depending on the spec. Before defining attributes in Salesforce, you must first understand how they relate to the different specs.
Insured Attributes
Insured attributes collect relevant facts about the insured party or insured item. For insured attributes, a relevant fact drives the rating, supports rules, and describes the item in a distinguishing way.
This table describes each type of relevant fact.
Type |
Description |
Example |
|---|---|---|
Rating Attributes |
They’re facts about the insured that serve as inputs in the rating procedure that determines a policy’s premium. |
In an auto policy, details about the car, such as its total mileage and age, impact the premium and must be collected as insured item attributes. Details about the driver, such as age and driving experience, also affect the premium and must be collected as insured party attributes. |
Rules Attributes |
They are facts about the insured that are needed for eligibility or underwriting rules. |
In business owners insurance, only certain kinds of businesses are eligible for certain policies. To screen out these ineligible businesses, create a business type insured item spec, and then build a rule that defines the eligible types. |
Identifying Attributes |
They are facts about the insured that identify them both legally and practically. |
For auto insurance, insurers collect attributes such as model and serial number. For business owners, insurers collect the name, address, and other identifying details. Focus on collecting the essential, distinguishing details for the insured item. This is especially important when you’ve set up a product that can have multiple instances of an insured item or party. |
At the time of the quote, insured item attributes are typically fixed. If you want to adjust an attribute to achieve a desired price or benefit, model the attribute on the coverage, not the insured item.
Coverage Attributes
Coverage attributes contain the terms on which the protections and benefits are offered. These terms can be constants, driven by rules, or user-configurable.
A term specifies the conditions and extent of the coverage. The most common coverage terms are listed here. Flip each card to read a short definition of each.
Root Product Attributes
Add an attribute directly to the root product when the term applies across all coverages.
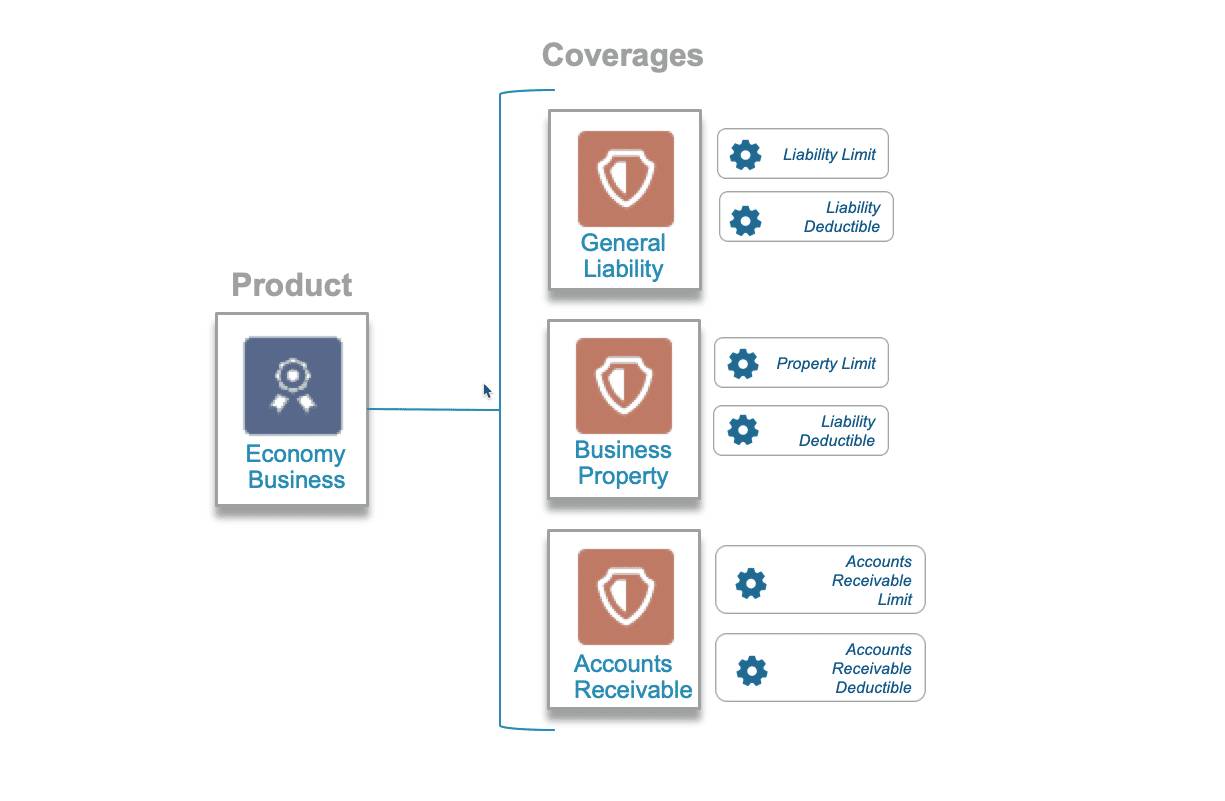
Justus identifies such an attribute when modeling an Economy Business product for Cumulus. This product contains three coverages: General Liability, Business Property, and Accounts Receivable. Each of these coverages has its own limit. He adds these attributes to their coverages. The product also contains a single deductible that applies across all the coverages. To support this, he adds this deductible to the root product.

[Alt text: A business policy with product-level deductible attribute.]
When configured this way, the policyholder receives the benefit of any coverage after the policywide deductible is met. Contrast that with a model where each coverage contains its own deductible.
[Alt text: A businessowners policy with a deductible attached to each coverage.]
In this configuration, the policyholder must reach a specific deductible for each coverage before they receive any benefits for that coverage.
Now that you have a good idea of the different types of attributes, it’s time to learn how to create them in Salesforce.
Create Attribute Categories
Attributes belong to attribute categories. Before you create an attribute, you must first have an attribute category.
The attribute categories logically group attributes. This table shows you a few examples.
Attribute Category |
Attributes |
|---|---|
Medical |
|
Driver |
|
Justus always makes sure to have a plan for categorization before creating attributes. He considers the criteria that makes the most sense for the product model, business model, and business needs. The categories affect the grouping of attributes when he views and selects them.
Use an attribute designer to create attribute categories and attributes. In the designer, find and select a category to review or create attributes.
When viewing the list of attribute categories, click New to create a new category. A couple of fields are required.
-
Name: This field represents the display name for the attribute.
-
Display Sequence: This field determines the default order in which attribute categories list. The lowest numbers are first.
You’re not required to change or configure other settings before you save, but some are important. Here’s an example.
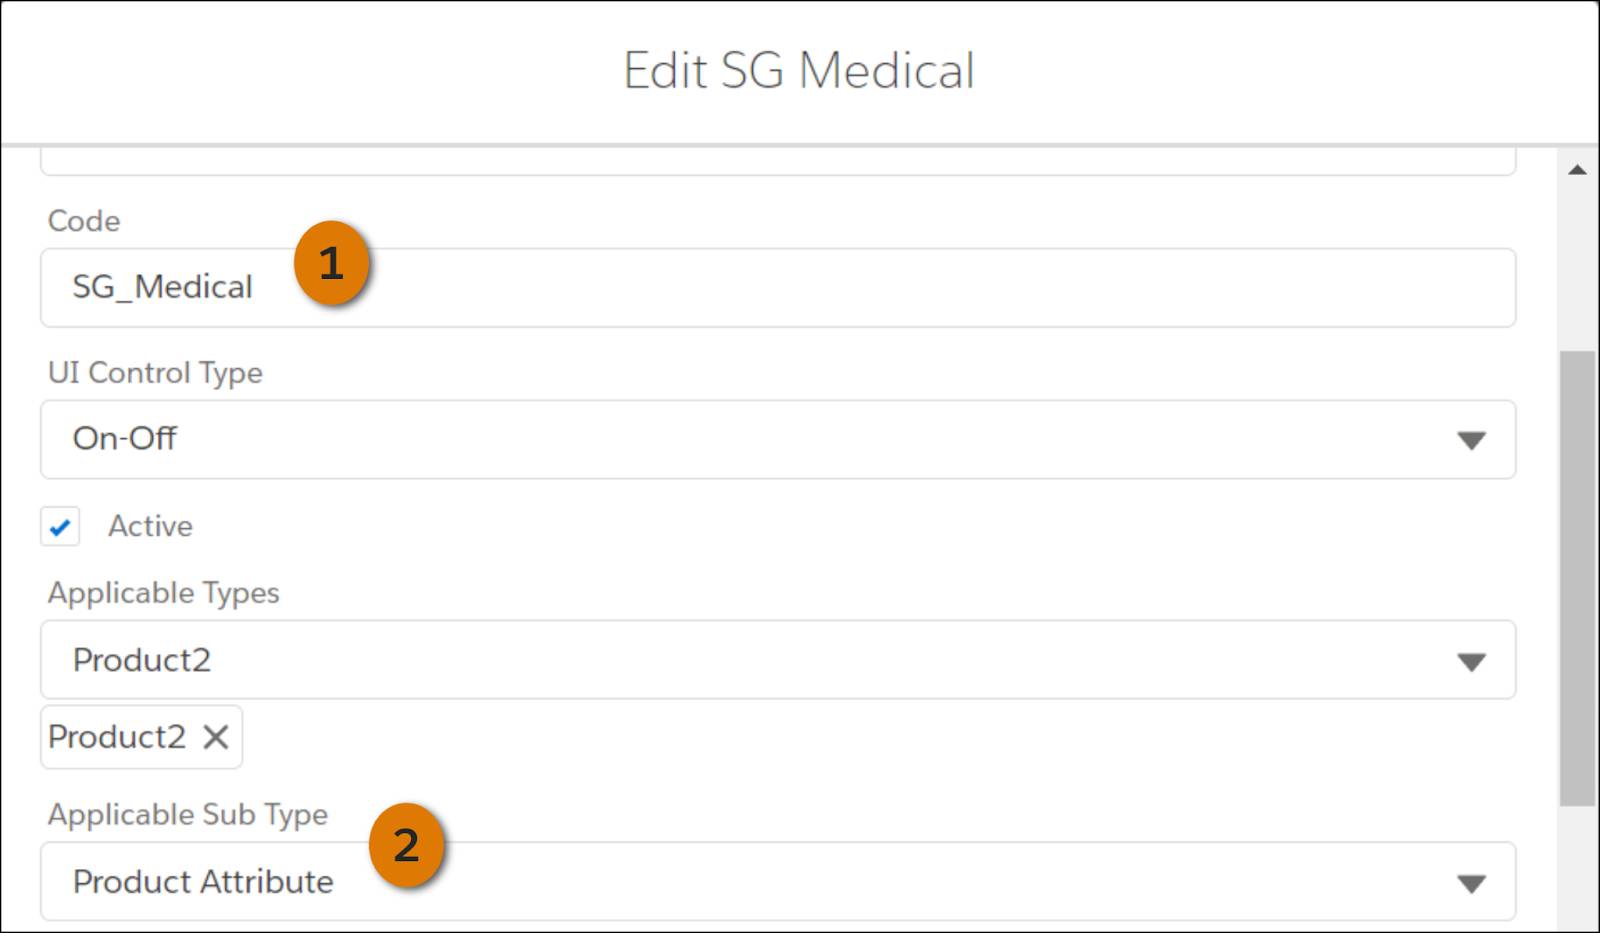
[Alt Text: The Edit record page of the Attribute Category screen.]
-
Code (1): This must be a unique value. It appears elsewhere in Salesforce, and it’s helpful if you make it descriptive. If you don’t enter a code, a value automatically fills in, such as fe59aabf-4f38-33a9-2087-cd7f7604ba4d. That’s fine for a computer, but, for you, something like SG_Medical is easier to understand. Therefore, be sure to plan for and set this value. If you miss your first chance, you can edit it.
-
Active: Leave this box checked to keep the category usable.
The category’s attributes are for use in products, so these are also important.
-
Applicable Types: Set this to Product2. The default is All, and that works fine, too.
-
Applicable Sub Type (2): Set this to Product Attribute. The default value is Profile Attribute, which doesn’t allow the category to work with product modeling.
Configure Attributes
Next, Justus proceeds to configure attributes.
In the attributes designer, select an existing attribute category or create a new attribute category to get access to its attributes.

[Alt text: The Vlocity Attribute Designer page before and after selecting Add New Attribute.]
You add a new attribute in the category by clicking + Add New Attribute (1) in the list panel. The list panel (2) lists the existing attributes in the category. For a new category, the list panel is initially empty for a new category.
When you create or select a new attribute, the right panel shows the attribute properties.
These are the required attribute fields.
-
Name: This is the descriptive name you select when assigning the attribute to child specs and root products. This name also appears in end-user interfaces. Consider these points when establishing your naming conventions.
-
Code: This differentiates one attribute from another and must be a unique value. It’s a good idea to keep these short and descriptive. You reference and type these elsewhere such as in rules. When referencing attributes, typically
<Product Code>.<Attribute Code>is used. Here’s an example attribute for Deductible.

[Alt text: The Attributes Designer record page for the Deductible attribute.]

You’re not required to set other fields, but to learn more about them, visit Create Attributes.
Nice work! You have the attributes ready. In the next unit, you move on to creating specs and assigning attributes to them.