Explore the New Agent Builder
Learning Objectives
After completing this unit, you’ll be able to:
- Access the new Agentforce Builder.
- Describe the elements in the new Agentforce Builder that help you create and configure an agent.
A Big Upgrade
If you’ve been using Agentforce for a while, then you’re probably already familiar with the legacy Agentforce Builder. The legacy builder was a game changer, allowing teams to create and customize AI agents using a no-code and low-code interface.
And now… drumroll, please… you have a different tool in your agentic AI toolbox: the new Agentforce Builder! We reimagined the agent-building experience from the ground up, and you can finally get your hands on the new builder. We think you’ll love the new builder because it helps you create AI agents that are more predictable and reliable.
Meet the New Agentforce Builder
But what’s so different and special about the new Agentforce Builder? Here are some of the highlights before you explore the new experience in more detail.
-
More determinism: We upgraded the Atlas reasoning engine to give you more control over how your AI agents behave. Previously, all agent behavior was subject to interpretation by a large language model (LLM). The graph-based engine is more structured, so the agent can follow a defined, predictable path when needed.
-
Programmatic control: Agent Script is the new language for building agents in Agentforce Builder, and it combines the flexibility of natural language with the reliability of programmatic expressions. You can either build in natural language in Canvas view, or toggle to Script view to access the scripting language with syntax highlighting and real-time validation.
-
Built-in assistance: Build your agent conversationally with the help of Agentforce embedded right into the user interface. Just tell Agentforce what you want your agent to do, and it converts your request directly into Agent Script on your behalf. Create, test, troubleshoot, and refine, all with the help of Agentforce.
-
Improved user interface: Navigating your agent is simpler, flatter, and more transparent. The new builder has a file-based explorer, so there’s less digging and searching for the information you need. That also makes it easier to copy, paste, and reuse an agent’s metadata.
-
Powerful agent previews: When you simulate and test an agent conversation, you also get detailed tracing and debugging. You can view interaction summaries and dig into the steps the agent performed.
Excited about the changes available in the new Agentforce Builder? Ready to take a look for yourself? Roll up your sleeves, and get started!
A New Home in Agentforce Studio
The first change you may notice when taking the new Agentforce Builder for a test drive is that it has a new home in Agentforce Studio.
- Open the App Launcher
 .
.
- Search for and select Agentforce Studio.
- If you don’t see the All Agents page, click Agents.
Agentforce Studio is your central hub for creating and managing AI agents. It provides all the tools you need to build, customize, test, and monitor your AI agents.

Create a New Agent
From the Agents page, you can open an agent or create a new one to access the new Agentforce Builder. Let’s see how easy it is to spin up an agent in the new builder, which gives you a huge headstart with the agent development process.
- To create a new agent, click New Agent.
- Describe what you want your agent to do. Include details like the agent’s role and the type of company it works for, the types of tasks you want it to complete, and any other information critical to its job.

- Click
 to submit the prompt and start creating the agent.

- If Agentforce asks any follow-up question, answer them to further flesh out your agent. You can also choose to start from scratch and fill in all of the details yourself by clicking Skip Ahead.
Once it has enough information, Agentforce creates your agent and adds agent details, subagents, and more.

To dive into the agent creation process in more detail, see Create an Agent in Salesforce Help.
Take a Tour of the New Builder
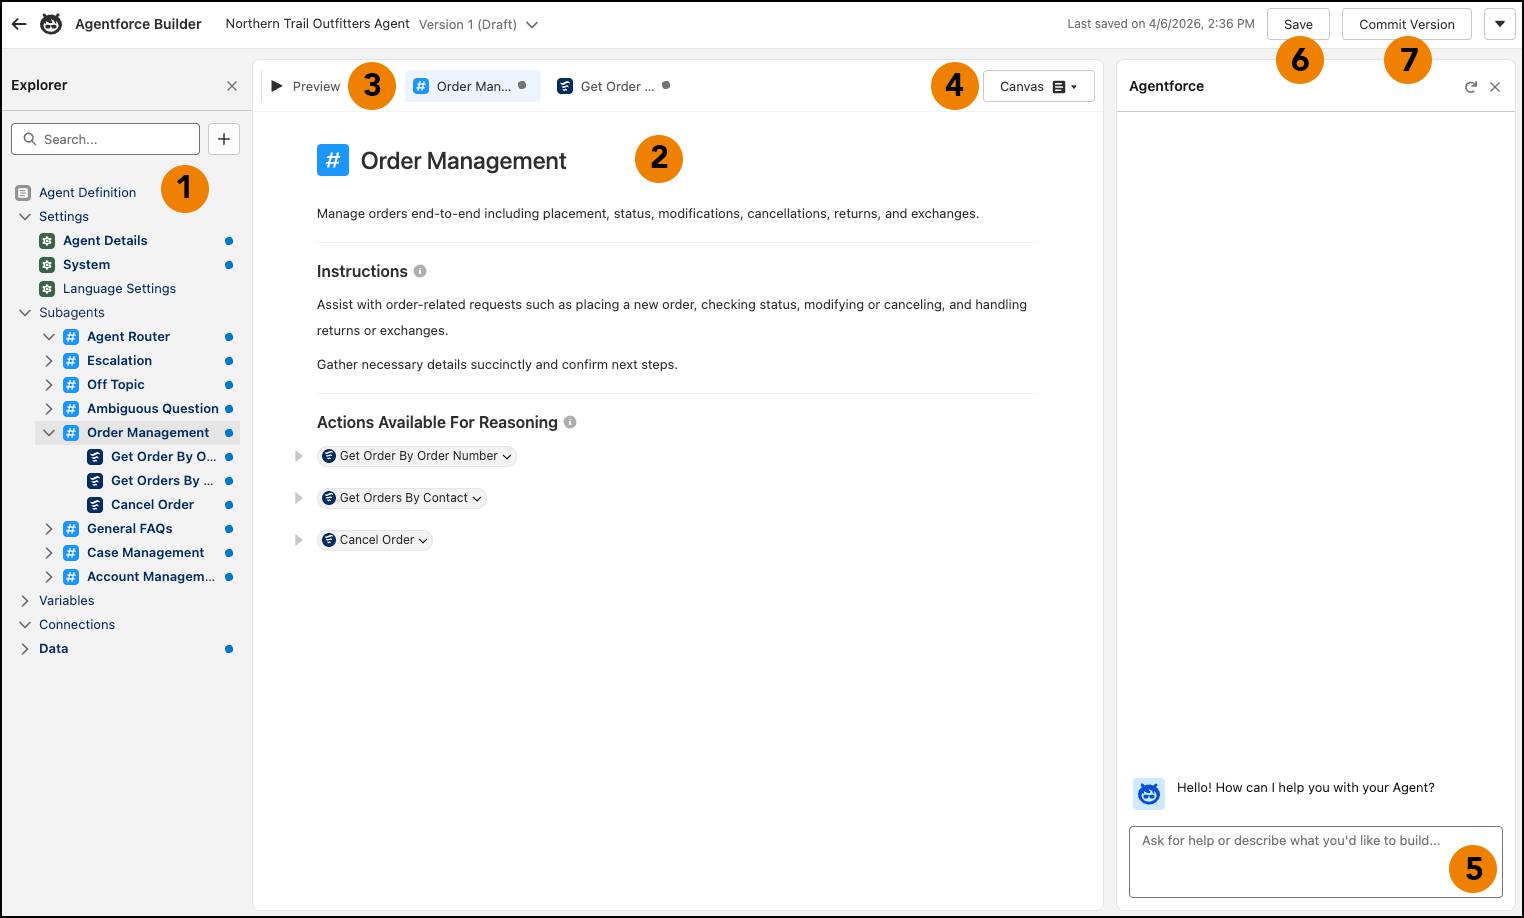
Now that you have a sense of how the new Agentforce Builder works, get familiar with its layout. Here are the main components of the builder and what they do.
-
Explorer (1): View and navigate all the elements and assets of your agent, including the subagents and their actions, in a single place.
-
Canvas (2): Use this document-style editor to modify your agent or view its details.
-
Preview (3): Test your agent by inputting utterances. When previewing a conversation in Agentforce Builder, you can see a summary of your agent’s reasoning and behavior for each message.
-
Canvas/Script (4): Switch between the natural-language based Canvas and the code-based Script views.
-
Agentforce Assistant (5): Query or direct your assistant to help you build and debug your agent.
-
Save (6): Save the current version of your agent.
-
Commit Version (7): Save a snapshot of the current version of your agent’s metadata. This locks the version so that you can either activate the agent or create a new draft version from the current version.
To learn more about the new builder, see Explore Agentforce Builder in Salesforce Help.
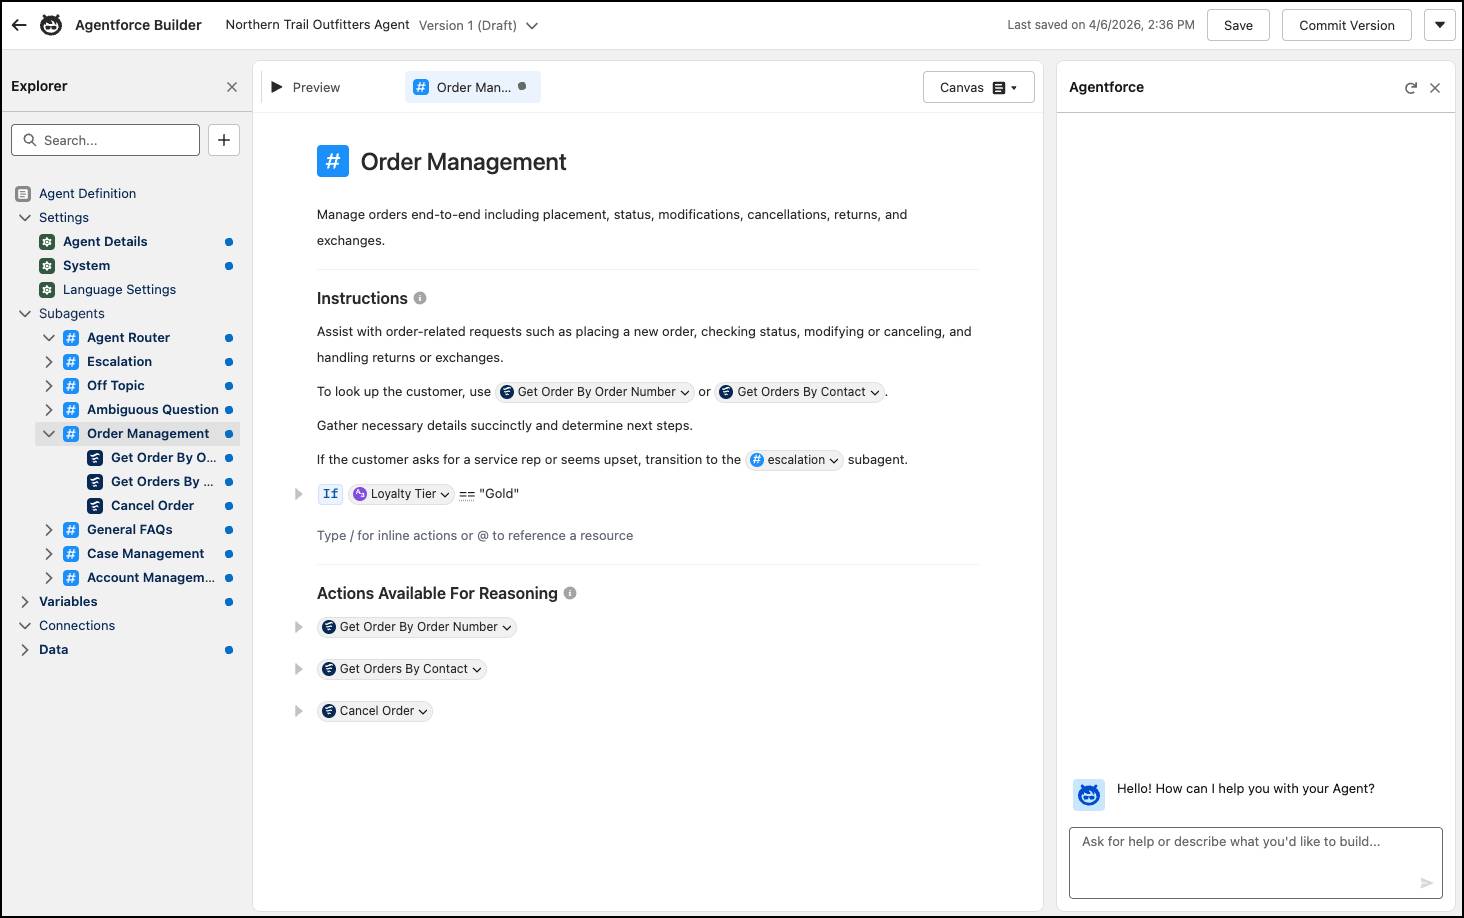
Customize Your Agent
To customize your agent, use the Explorer panel to select existing assets you want to modify, or create new ones. Here are some of the customizations you can make to your agent:
- Edit the agent’s settings, such as the name, description, system messages, and languages.
- Create, edit, and remove agent subagents and instructions.
- Create, edit, and remove agent actions.
- Create and manage variables.
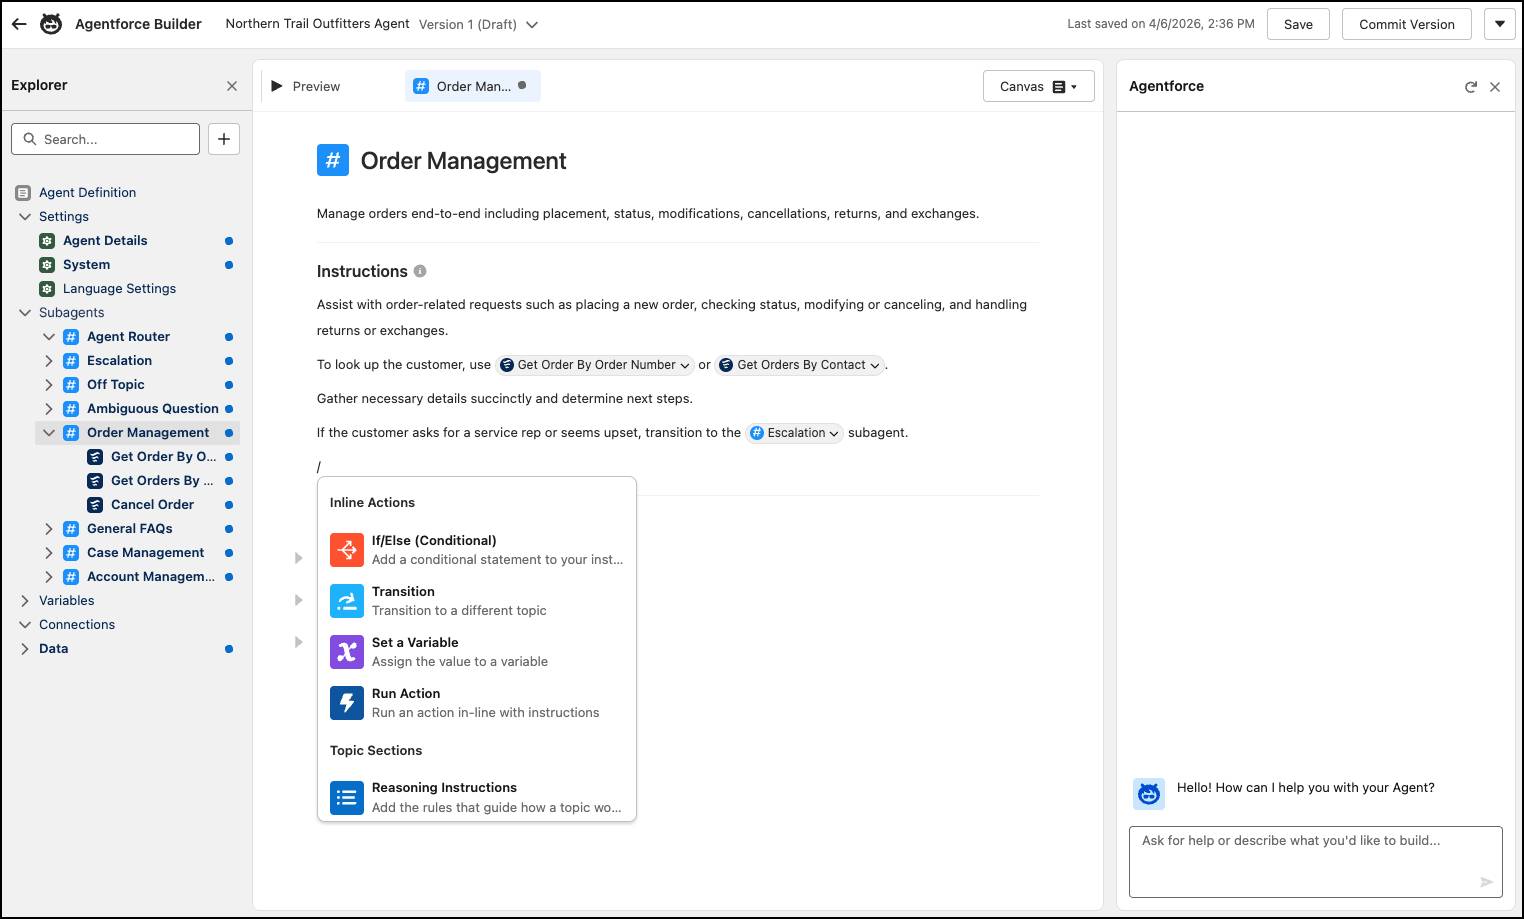
Keep in mind that when you open or create an asset in Agentforce Builder, it opens in Canvas view by default. This low-code view simplifies agent configuration by summarizing Agent Script into easily understandable blocks. The canvas also gives you easy access to common tasks. Use inline actions as shortcuts for adding deterministic logic, such as if/else conditionals, to your agent. There’s also a resource picker for subagents, actions, and variables. For pro-code control over your agent, switch to Script view to use the scripting language.
Whether you build your agent in Canvas or Script view, your agent’s configuration and any edits you make are consistent across both views. For example, if you use Canvas view to modify your agent using natural language, the builder writes Agent Script for you in the background so the views stay in sync.
As you’re building and customizing your agent in the new builder, you can also test it to make sure it’s behaving as expected.
Test Your Agent
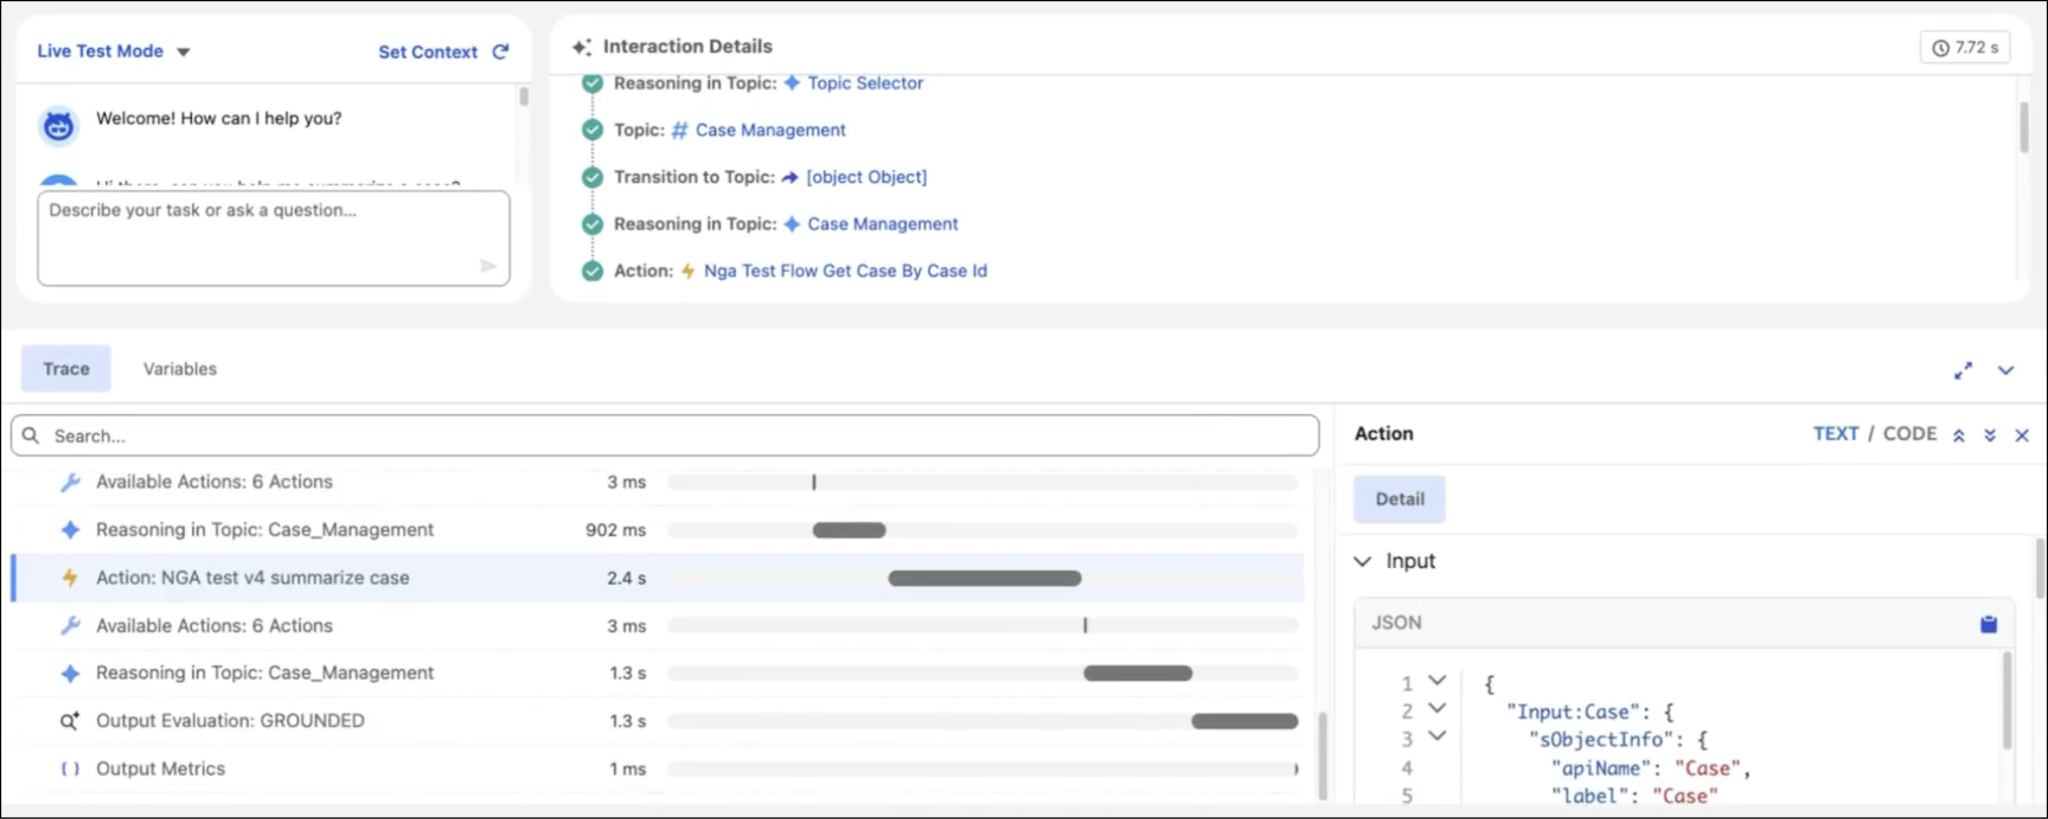
Testing your agent is an essential step in creating an agent that you can trust. With the new Agentforce Builder, you have a few ways to test your agent and tools that help you understand the test results and make changes.
To get started with testing in Agentforce Builder, click Preview. The Preview panel includes two different modes: Simulate and Live Test. Simulate mode offers a risk-free testing space. It’s designed to validate your agent’s configuration without checking permissions, running actions, or affecting your data. Live Test mode runs the actions and makes changes in your org so you can see how the agent performs when it’s active.
When previewing an agent conversation, you get behind-the-scenes details of how your agent is working, so it’s easier to identify unexpected behavior and improve your agent. View interaction details for current and past messages, which give you a high-level overview of your agent’s reasoning, accompanied by AI-generated explanations.
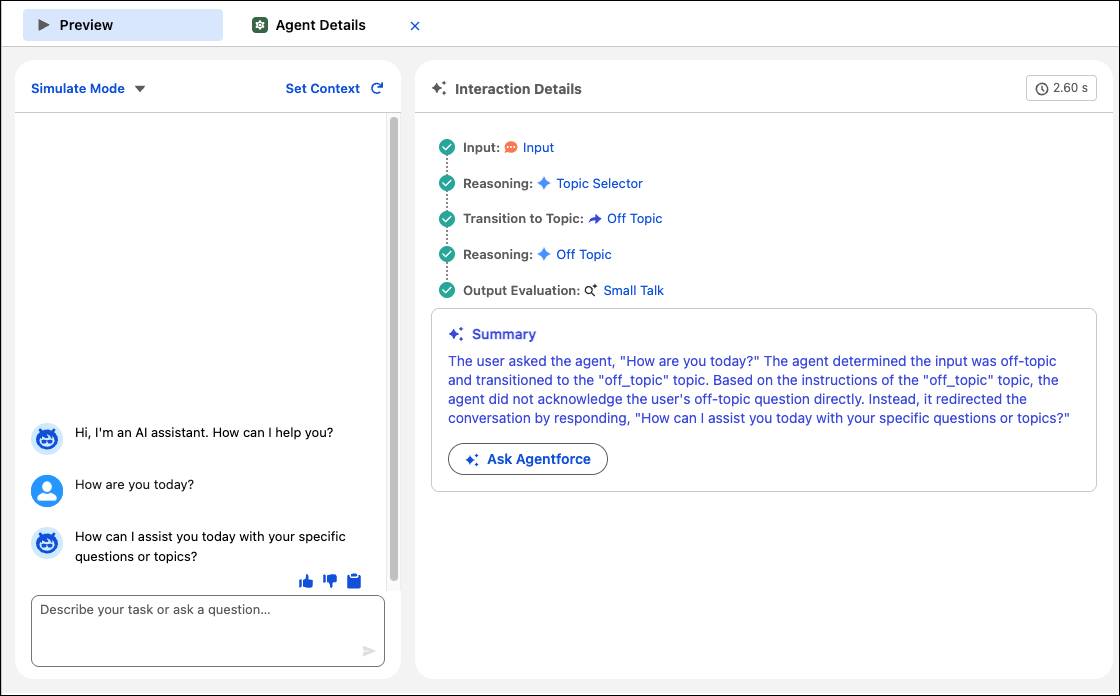
Use trace to dig into the steps the agent performed, and ask Agentforce to help you understand your agent’s behavior at any step. Track the values of all of your agent’s variables throughout the conversation, and review the time elapsed for every single sub-process so that you can reduce latency. Plus, you can chat with Agentforce to update your agent based on your preview findings.
Save Your Agent and Manage Agent Versions
As you customize and test your agent, it’s important to save your changes. And eventually you need to publish the agent and manage different versions of it.
In Agentforce, managing your agent versions has a clear lifecycle. You start in an editable draft state where you modify the agent. When you want to save your changes, click Save. The draft can be edited repeatedly but isn’t live. Once you’re happy with the agent, click Commit Version to save a final snapshot.

After committing, you can activate it to make the agent live for customers or employees. Remember, only one version can be live, so activating a new one automatically switches off the old one. Need to make more changes to a committed agent? Just save it as a new draft to start over. See Versioning and Editing Agents for more information.
Wrap Up
Congratulations! You’re up to speed on the new Agentforce Builder and how it helps you create AI agents that are more predictable and reliable. Next, get hands-on with the new builder by completing the Quick Start: Assemble a Service Agent with Agentforce Builder badge.
For more details about how the new builder works, check out the resources below. Happy building!