Explore a MuleSoft RPA Recorder
Learning Objectives
After completing this unit, you’ll be able to:
- Identify MuleSoft RPA Recorder menu items and options.
- Add Tasks to a flow while a MuleSoft RPA Recorder is running.
- Save a BPMN diagram from the MuleSoft RPA Recorder editor to a local file system.
MuleSoft RPA Recorder Features
A MuleSoft RPA Recorder’s main menu allows you to pause and restart capturing user interactions. While the recorder is paused, you can continue to build out the BPMN diagram. You can specify variables that are stored and set as activity parameters that are available to every activity in the RPA process flow. Additionally, you can add comments to aid developers building the implementation.
The following table describes the options in the RPA Recorder menu.
Menu Icon |
Menu Item |
Description |
|---|---|---|
|
|
Start recording/ Pause recording |
Toggles between starting or pausing the recorder. After the recorder is paused, selecting the Start recording icon restarts the recorder from where it left off. It doesn’t replace existing recorded content. |
|
Stop recording |
Stops the recorder, and saves the result as a BPMN diagram. |
|
Take screenshot |
Adds a screenshot at the current activity being documented in the recording. |
|
Add comment |
Opens an Add comment dialog box for you to add any text you want to document at this point in the recorded flow. |
|
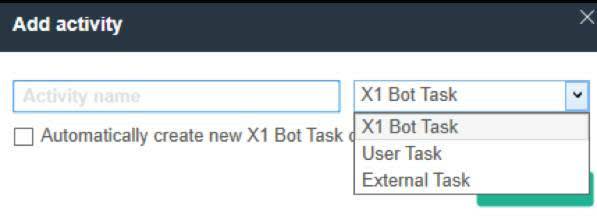
Add activity |
Opens the Add activity dialog box for you to add a new activity. If you add a new Bot Task activity, user actions are saved in this new Bot Task. This helps you to break up user actions into logical steps that are separated visually in the RPA process flow.
|


In addition to capturing user actions for particular Bot Tasks, MuleSoft RPA Recorder lets you continue to separate out activities, Gateways, and other BPMN symbols as you record. The recording process is often a combination of adding an RPA bot activity, starting the recorder, and then carrying out some user actions such as opening a Windows program and then interacting with the program’s UI with the mouse and keyboard.
When it makes sense in the design to break the flow into another activity, you pause the recorder and add another BPMN element to the flow. If the next element is another Bot Task, then the recorder automatically starts again and you can continue to navigate through the application UI, or carry out some other user action.
When you stop the recorder, the BPMN documentation that is created shows every user action in every Bot Task you created. You can also specify where a Gateway should make a decision. If you want to record each branch of the Gateway, you stop the recorder, set up the Windows environment to match one condition in the Gateway test, and then restart the recorder to carry out the next steps for that condition.
For example, suppose a Gateway is asking if a user is already logged in to a website. In this case, you would pause the recorder, log in to the website, then restart the recorder. To capture the other branch where you aren’t logged in, you can pause the recorder, log out of the website, restart the recorder, and then carry out the steps to log in to the website.
When you stop the recorder in the autogenerated BPMN flow, it records the two alternative scenarios in the series. In the next unit, you learn how you can separate out the captured activities and merge them with the initial BPMN design that includes the Exclusive Gateway branching point.
As a best practice, break up the flow into logical Bot Tasks and name them appropriately. This makes it easy to see which Bot Task goes with which branch of the Gateway activity.
The documentation that is generated by the RPA Recorder is very detailed and shows the developer the exact strings and mouse movements. It also shows screenshots of where in the UI the user interaction occurred. In many cases, you may not use any of the autogenerated implementations created when you import the BPMN RPA design document. But the captured details help a developer choose the right action steps and know the expected behavior and outcomes at each step in the RPA process.
In a perfect development environment, such as where you run MuleSoft RPA Builder on the same machine as MuleSoft RPA Recorder, the autogenerated implementation should run without any errors. But it’s more common for a developer’s machine to have some differences. These include screen resolution, different Windows application configurations or other settings, and font size or font smoothing settings.
All these factors can cause the autogenerated RPA process implementation to fail. This is why MuleSoft RPA Recorder output is usually referred to as User Requirements documentation rather than fully functional implementation code. The art of being a great RPA developer is knowing how to translate the BPMN documentation captured by MuleSoft RPA Recorder into robust RPA process implementations.
Walkthrough
Now that MuleSoft RPA Recorder is ready, you can go ahead and record the process that you want a bot to perform on a user’s behalf.
Take a look at this video demonstration showing how to use the MuleSoft RPA Recorder for an RPA process. Also, to see how the MuleSoft RPA Recorder generates an implementation, which in this scenario simulates a user navigating to the MuleSoft Community Meetups webpage. If you wish to follow along with text instructions, check out the walkthrough instructions.