Explore MuleSoft RPA Manager’s BPMN Editor
Learning Objectives
After completing this unit, you’ll be able to:
- Describe the RPA BPMN editor menu options.
- Explain how to split up RPA process flows by using Intermediate Events.
The MuleSoft RPA BPMN editor is available in the cloud in MuleSoft RPA Manager and locally on a Windows system in the MuleSoft RPA Builder editor. The features are nearly identical in both tools.
You use the BPMN editor by combining BPMN elements from menus to create RPA flows. Here’s an example of what an RPA flow being edited in the MuleSoft RPA BPMN editor looks like.

The rest of this unit introduces you to all the features and options available in the RPA BPMN editor.
Explore BPMN Editor’s Main Menu
Selecting an RPA process opens the BPMN editor and displays the RPA process with a simple default implementation. The main menu consists of three menu options in the bottom left of the BPMN editor. In the menu, you see icons for the following: save, import a previously saved BPMN diagram, and launch the RPA Recorder.

Selecting the middle icon opens a file browser to import a BPMN file from your local hard drive. This is where you can import a BPMN design you completed on a Windows computer back into RPA Manager. The import is from your local file system, not from the MuleSoft RPA Repository. The import expects BPMN files, not implemented CRPA files.
The remaining icon is the Record BPMN menu item. This menu item tries to launch the RPA Recorder on your Windows system with the current BPMN diagram. If the RPA Recorder isn’t installed, a message appears asking if you want to download the RPA Recorder and install it on your Windows system. This is another way to download the BPMN file to your local Windows system without having to publish the RPA process to the Build phase.
To export the BPMN file after you finish the RPA process design, you promote the completed RPA process to the Build phase. The previous menu is replaced with a menu with a single icon to export the BPMN diagram to your local hard drive.

Start a BPMN Flow
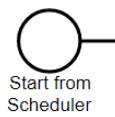
The BPMN flow starts with a Start Event and then connects to an empty Bot Task. In the following example, we renamed our Start Event to Start from Scheduler.
The Start Event responds to signals from a scheduler that are configured when you test or deploy the RPA process to an RPA bot. Double-clicking the Bot Task allows you to change the label. We have set it to Build automated Bot Tasks with the RPA Process Recorder.
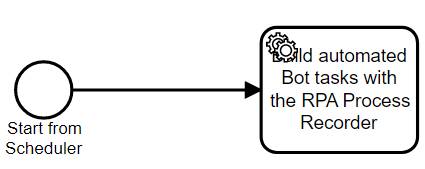
This Bot Task is a placeholder for the results of the RPA Recorder. During development, this Bot Task is replaced with several Bot Tasks as the developer refines the use case.
Main BPMN Editor Menus
There are two types of menus available as you sketch out a BPMN flow. The main menu stays on the left side of the editor and has BPMN elements to help build a flow.

The other type of menu is a context menu. Each element also has its own context menu.

Many of the context menu options let you quickly connect to another element in the flow or add a new element to the flow. Others let you annotate or delete the selected flow element.
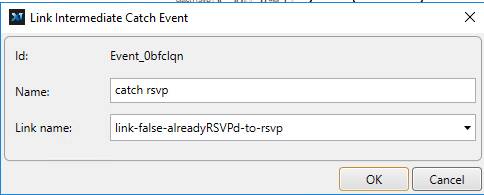
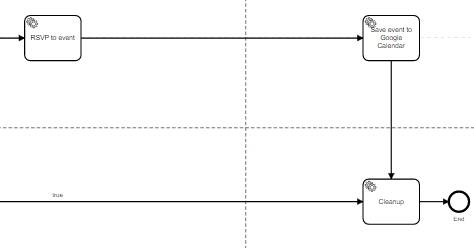
Intermediate Events
An Intermediate Event lets you break up your flow into separate flows that are connected by named links. When your flows have numerous crossing lines and branches, Intermediate Events remove some of the clutter of the connecting lines. They also allow you to separate out different paths and have them end at their own End Event elements. This diagram shows you a Throw Intermediate Event and a Catch Intermediate Event.
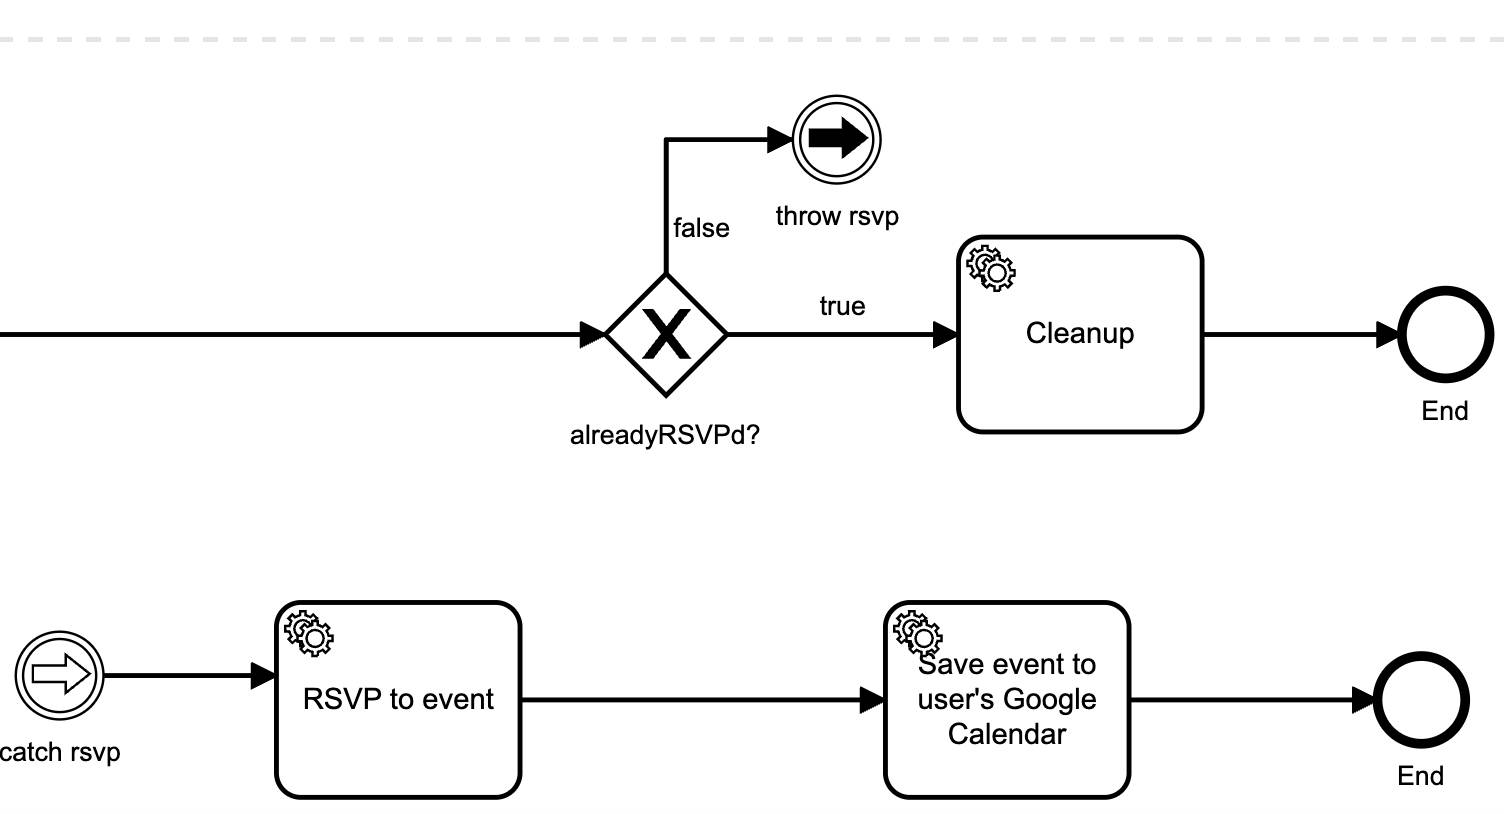
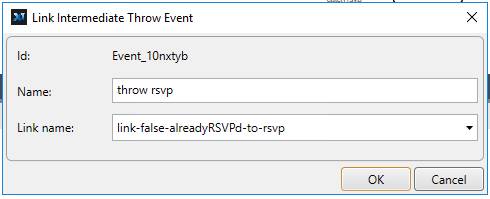
To connect the false path with the lower flow, each Intermediate Event is configured with the exact same link name value.
Editing Tools of the Main Menu
The rest of the main menu contains tools to connect and reorganize flow elements.
| Menu Icon |
Menu Item |
Description |
|---|---|---|
|
|
Hand tool |
This tool is selected by default. It lets you drag the full diagram in the editor canvas. |
|
|
Lasso tool |
This tool lets you select parts of the BPMN diagram to move around. |
|
|
Create/remove space tool |
This tool provides a crosshair that you position in the middle of a BPMN diagram. All elements below or to the right of the crosshair are selected and can move with the mouse. Use this tool to open up space in the BPMN diagram for more elements. Each time you click the mouse with this tool, it only selects and moves elements horizontally or vertically, not both. The selection and movement depend on your initial mouse movement after you click and hold the mouse.
|


Context Menus
The context menu contains items to help you extend the flow.
| Menu Icon |
Menu Item |
Description |
|---|---|---|
|
|
Append Text Annotation |
Adds a text annotation to an element in the BPMN flow. Annotations specify variable names or other technical details needed by an RPA developer to implement the RPA process. |
|
|
Remove |
Deletes the selected element from the flow. The BPMN diagram automatically tries to keep upstream and downstream elements connected. |
|
|
Connect using sequence flow |
Connects the current element with another element. Some elements, such as an End Event or an Intermediate Catch Event, can only have inbound flow, so the connector automatically reverses the arrow. |
|
|
Change type |
Allows some elements to be changed to similar elements. Start Events and End Events can be switched, and Intermediate Event types can be changed between Throw Event and Catch Event types. |


Navigation Menu
The navigation menu helps you move the BPMN diagram around.

| Menu Icon |
Menu Item |
Menu Item |
|---|---|---|
|
|
Search |
Lets you type in part of element labels, then highlights them. |
|
|
Close minimap |
Lets you move around a closeup view of the RPA flow based on a minimap of the entire BPMN diagram.
|
|
|
Fit to viewport |
Shrinks or expands the BPMN diagram so that it fits in the visible canvas. |
|
|
Zoom out |
Makes the displayed part of the BPMN diagram smaller and shows more of the BPMN diagram in the viewport. |
|
|
Zoom in |
Makes the displayed part of the BPMN diagram larger and shows less of the BPMN diagram in the viewport. Use this option with the hand tool to move the diagram around to locate elements you want to inspect with a zoomed-in view. |


You are now ready to sketch a complete RPA process design in the MuleSoft RPA Manager BPMN editor for most use cases.
Walkthrough
Take a look at this video demonstration showing how to sketch a complete RPA process design in the MuleSoft RPA Manager BPMN editor. If you wish to follow along with text instructions, check out the walkthrough instructions.