Manage and Test a Flow
Learning Objectives
After completing this unit, you’ll be able to:
- Manage connections.
- Manage action steps.
- Test a flow.
Manage Connections
When managing connections, you can perform the following tasks.
- Change connections.
- Rename connections.
- Delete connections.
Change Connections
Recall in unit 1, you learned that as a best practice design and test your flows using test systems and data. After you’re done with testing, run the flows using your production systems and data. If you follow this recommendation, you need to know how to change connections.

Let’s say you have a flow in which several steps connect to the NTO sandbox org. After ensuring that everything in the flow works as expected, you want to switch to the NTO production org.
Follow these steps to change from the NTO sandbox org connection to the NTO production org connection.
- In the first step of the flow that uses the NTO sandbox org, click the ellipsis icon, and then click Change Connection.

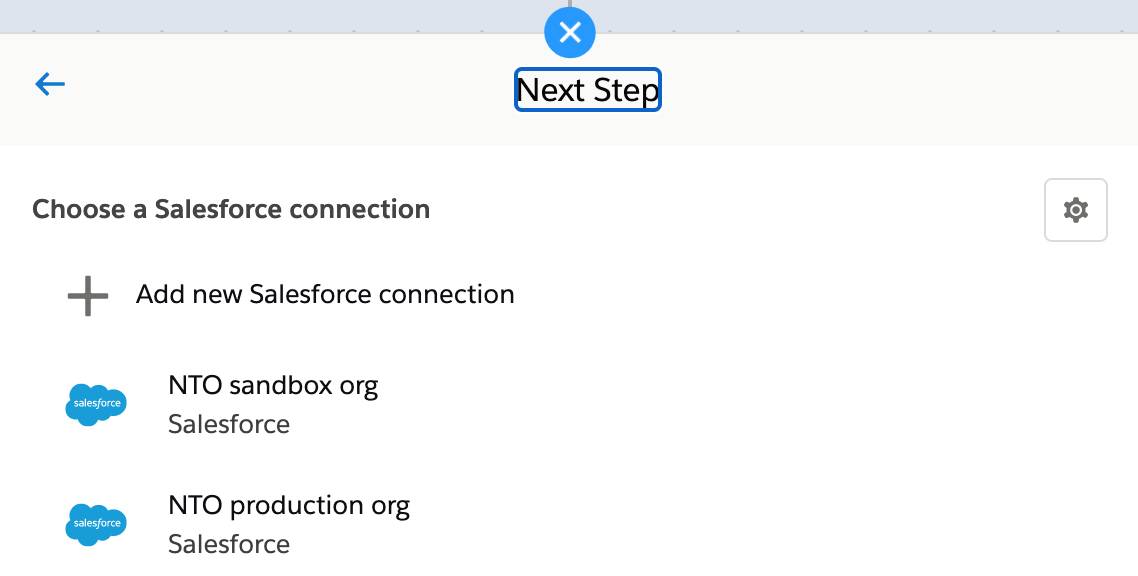
- Click the Connection picklist and select Add New Salesforce Connection.
- Name the connection
NTO production org, leave the checkbox This is a sandbox organization deselected, and click Create.
- Enter your NTO production org’s username and password and click Log In.
- Click Allow to grant MuleSoft Composer the permissions. MuleSoft Composer automatically tests the connection. If no error message appears, you have a successful connection.
- In each of the remaining steps of the flow that must use the NTO production org connection, click the ellipsis icon, and then select Change Connection.
- Click the Connection picklist, select NTO production org, click Change, and then click Confirm.
Rename Connections
If the name of an existing connection doesn’t meet your business needs, you can rename it.
Assume your existing connection is to a Salesforce org. Follow these steps to rename an existing Salesforce connection.
- Go to the end of your flow.
- Click the plus icon to add a step.
- Click Salesforce.
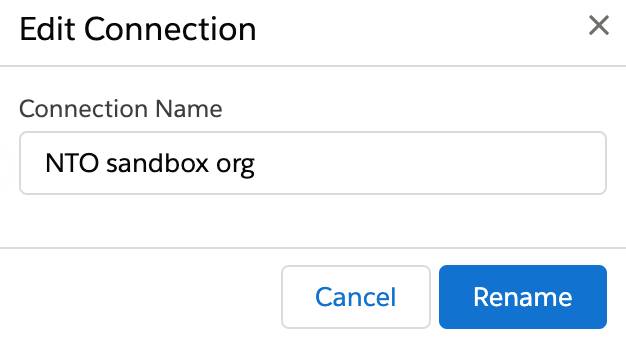
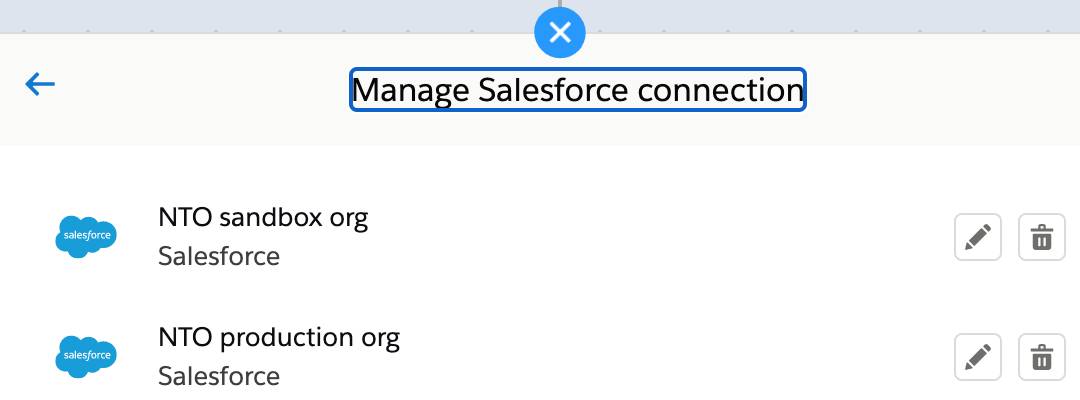
- Click the Settings icon.
- Click the pencil icon next to the connection you want to rename.

- Give the connection a new name and click Rename.
- Click the X icon to exit the Manage Salesforce connection dialog box without adding a new step.
After you’ve renamed an existing connection, the new name automatically appears in all the steps of this flow and all your other flows that use the connection.
Delete Connections
If an existing connection is no longer useful, you can delete it. Keep in mind the following.
If the Connection |
Then When You Try to Delete It |
|---|---|
is used in inactive flows |
MuleSoft Composer lists which flows use the connection, and then you can delete it. |
is used in both inactive and active flows |
|
Let’s say your existing connection is to a Salesforce org. Follow these steps to delete an existing Salesforce connection.
- Go to the end of the flow.
- Click the plus icon to add a step.
- Click Salesforce.
- Click the Settings icon.
- Click the trash can icon next to the connection you want to delete. A message warns you that deleting a connection affects all the flows, including the active ones, that use it.
- Click Delete.

- Click the X icon to exit the Manage Salesforce connection dialog box without adding a new step.
After you’ve deleted a connection used in any of the other steps of this flow or any of your other flows, you must go to each of these steps and change to another connection.
Manage Action Steps
When managing action steps, you can perform the following tasks.
- Refresh data in action steps.
- Duplicate action steps.
- Collapse and expand action steps.
- Rearrange action steps.
- Delete steps.
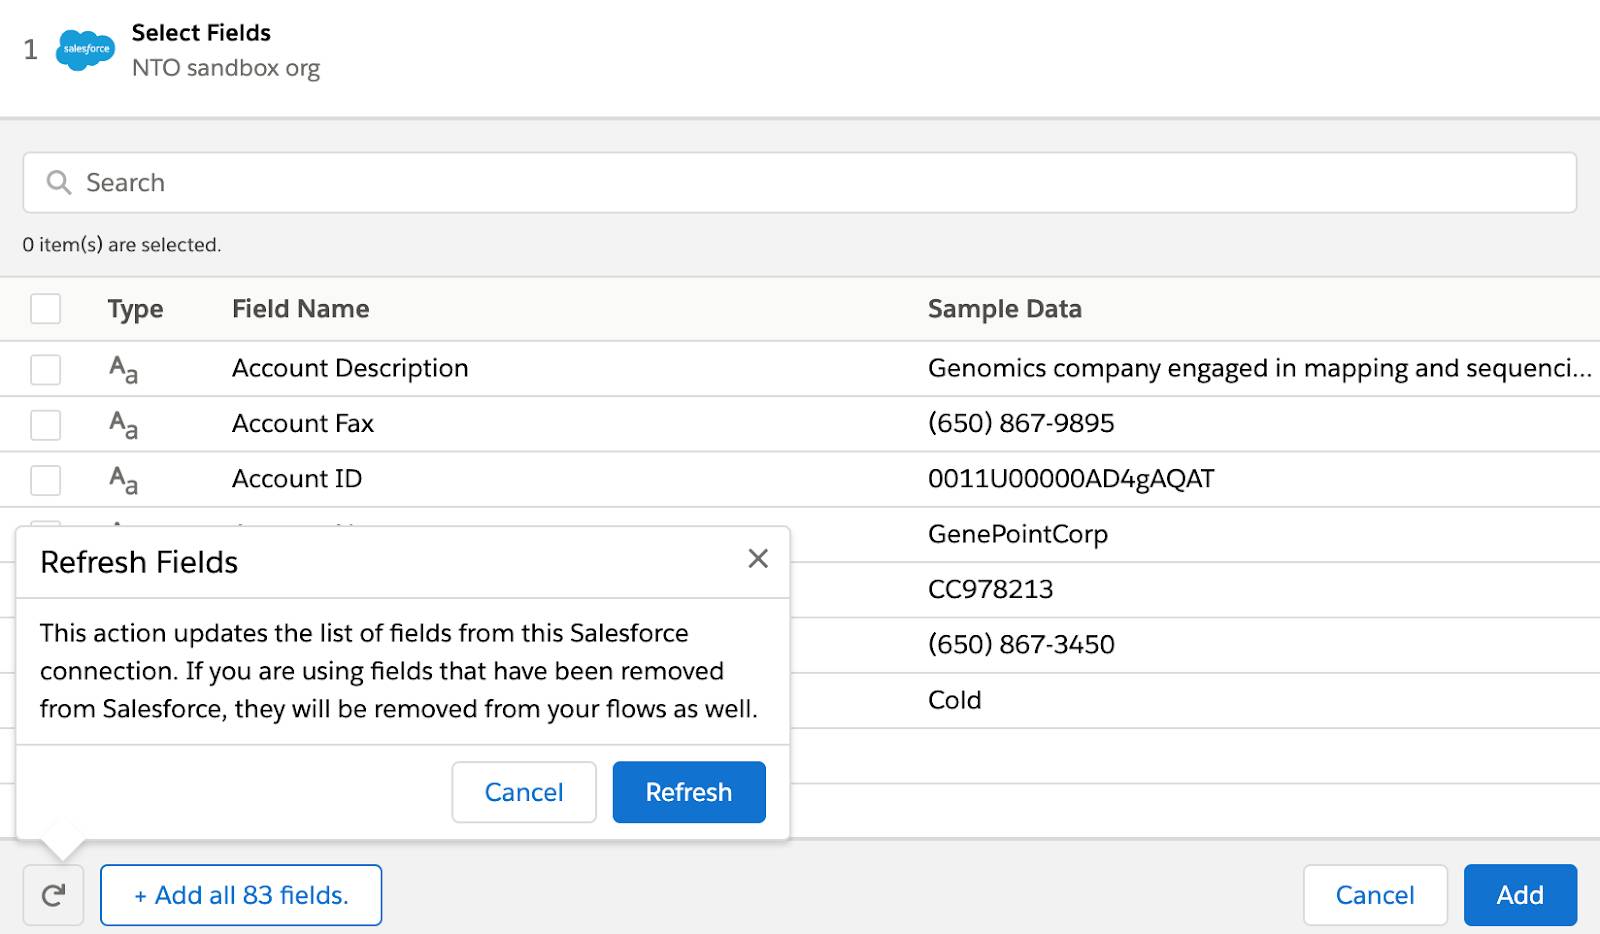
Refresh Data in Action Steps
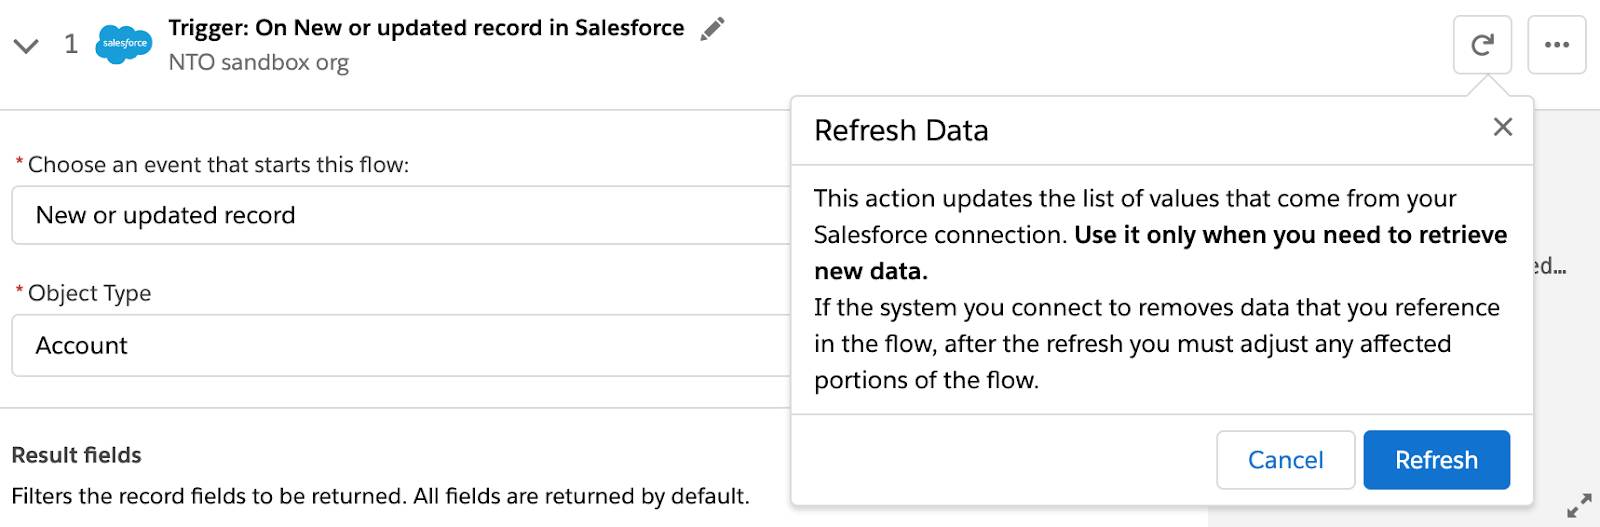
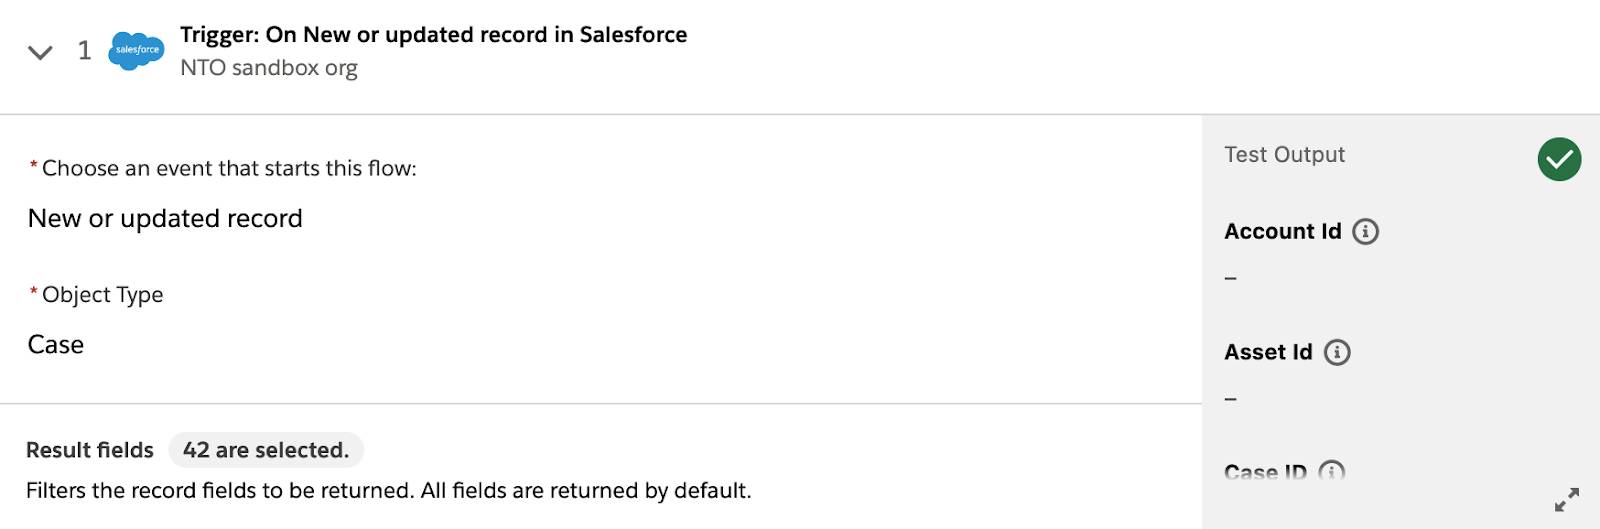
As you work with a flow over time, objects and data in the systems your flow uses might change. It’s important that your flow uses the most up-to-date information from these systems. You can refresh data at the object level or at the field level in action steps.
- To refresh data at the object level, go to each step, click the refresh button, and then click Refresh. The cache for the object type is cleared and the new data is retrieved.
- To refresh data at the field level, go to each step, click Select Fields or Add Fields, click the refresh icon, and then click Refresh. The cache for the fields is cleared, and the new fields are retrieved.
Duplicate Action Steps
If you have an action step that accesses a system and later you need to add another step that accesses the same system, it’s more efficient to duplicate an existing step and modify it to suit your needs than to create a step from scratch. Note that you can’t duplicate the trigger step.
For example, in your flow you get some Account records from Salesforce in one action step, and later you want to update some other Account records in another step. Duplicate the Get records step and change it to an Update record step.
To duplicate an action step, click the ellipsis button on an action step and then click Duplicate Step.

Collapse and Expand Action Steps
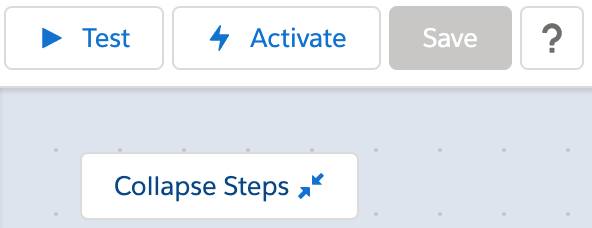
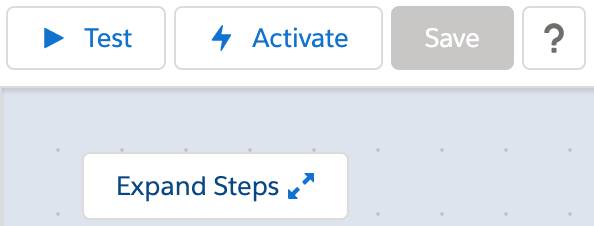
By default, steps in a flow are in expanded form. If your flow has several steps, collapse some or all the steps to get a better view of the entire flow.
- To collapse a step, click the down arrow next to the step number.

- To expand a collapsed step, click the right arrow next to the step number.

- To collapse all the steps of a flow, click Collapse Steps.
- To expand all the steps of a flow, click Expand Steps.
Rearrange Action Steps
There are times when you need to rearrange the steps of your flow into a logical sequence to solve your integration problem. Note that you can’t rearrange the trigger step.
Rearranging action steps affects the logic of your flow, so ensure the rearranged flow actually solves your integration problem. There are two ways you can rearrange action steps.
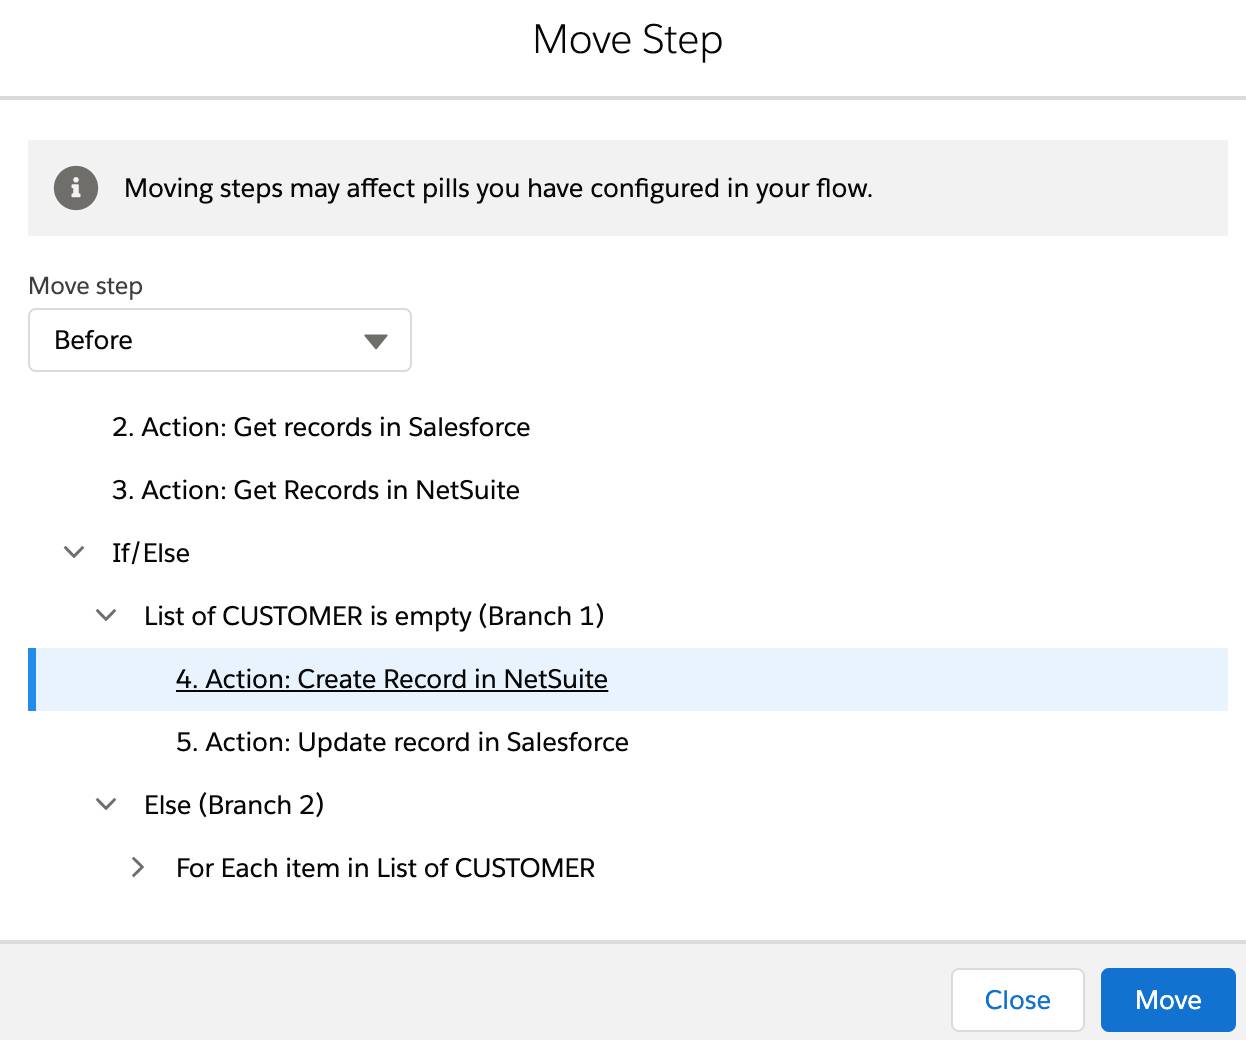
The first way is to drag an action step using the Move Step (four-headed arrow) button to a desired location in the flow.

The second way is as follows.
- Click the Move Step button on an action step you want to move. The Move Step window appears, showing the list of action steps in your flow.
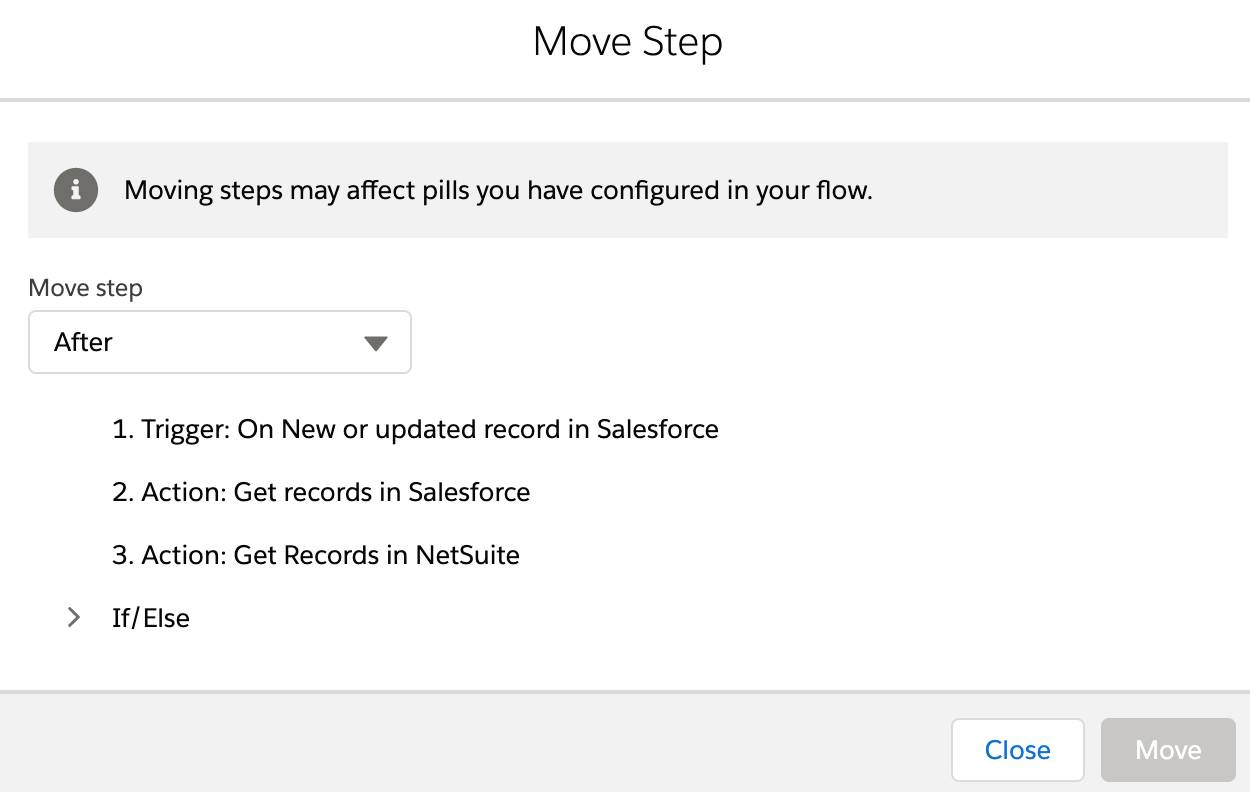
- Expand the collapsed steps, if needed, using the right arrow.
- Select Before or After using the Move step picklist.
- Select the relevant step of a flow to move before or after, and then click Move.
Delete Steps
There are times when certain steps in your flow are no longer useful, and you must delete them. You can delete the trigger step and individual action steps. As a best practice, save your flow before performing any deletes.
Keep in mind the following.
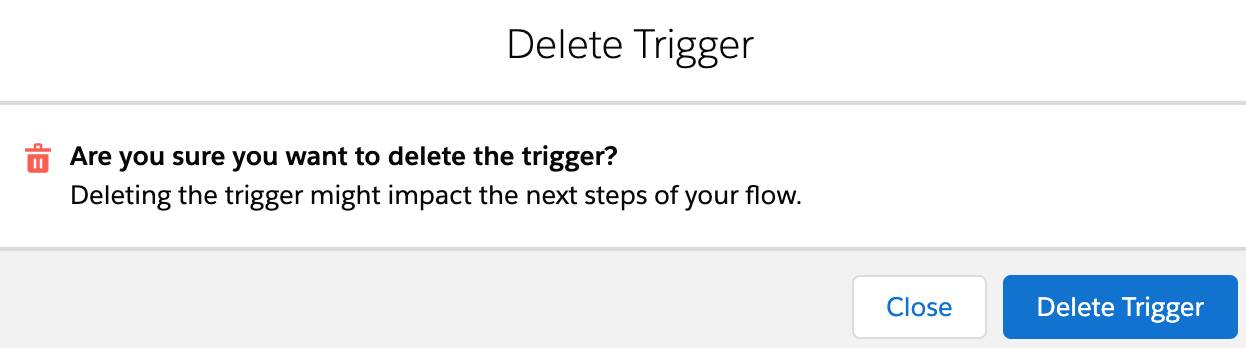
- When you delete the trigger step, MuleSoft Composer warns you about how it impacts the rest of your flow, letting you reverse the delete.
- When you delete an action step, the delete takes effect immediately. If you’ve saved the flow immediately before the delete, you can undo the delete by exiting the flow and discarding all changes.
- After you delete a step, any data from that step that's used elsewhere in the flow is invalid. You must modify your flow accordingly.
Follow these steps to delete steps in a flow.
- To delete an action step, click the ellipsis button on a step and then click Delete Step.
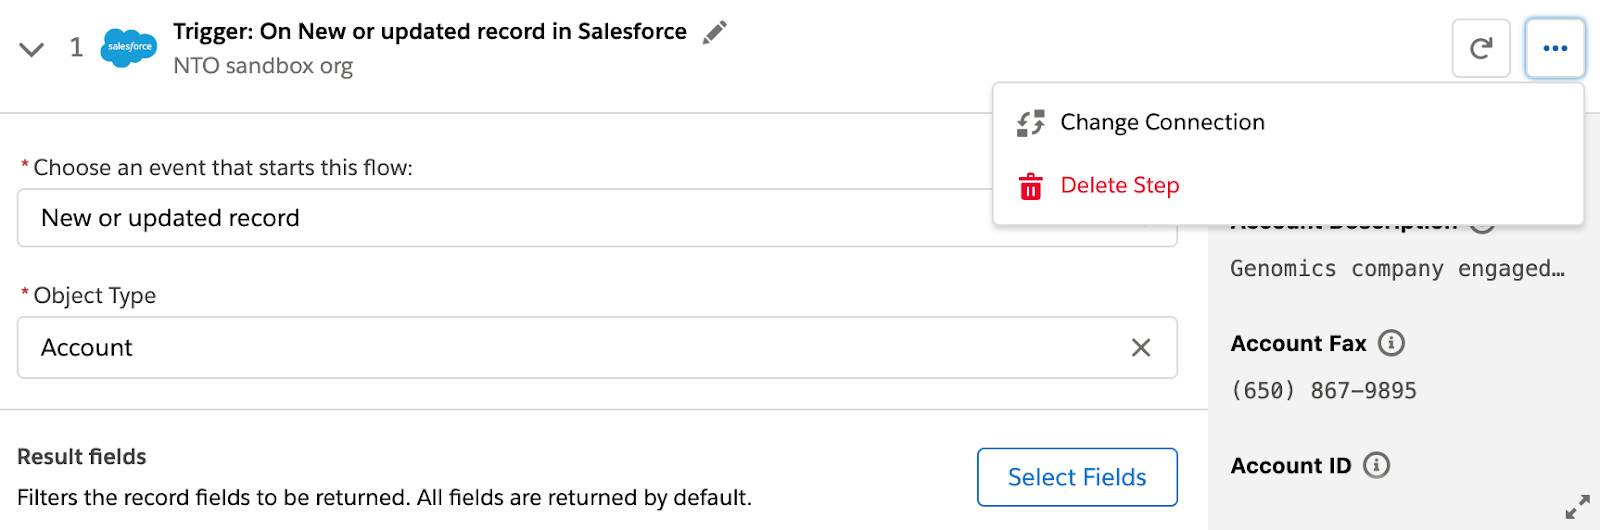
- If the step is the trigger, click Delete Trigger to perform the delete.
- Repeat step 1 for each step you want to delete.
Test a Flow
When testing a flow, you perform the following tasks.
- Prepare to test a flow.
- Test a flow to ensure that it works as expected.
Prepare to Test a Flow
After you’ve designed your flow, you must test it from end to end to ensure it syncs data as expected.
As a best practice, test your flows using your test systems and data. After you’re done with testing, run the flows using your production systems and data. For Salesforce, this means using a sandbox org to test your flows and a production org to run your flows.
Also, as a best practice, test every possible path of your flow. For example, if your flow has an If branch and an Else branch in an If/Else block, ensure to test both branches.
In general, you have up to 10 minutes to complete a test. When the test completes or 10 minutes have passed, the test stops. As a best practice, you should get all required applications and data ready for the test before starting it.
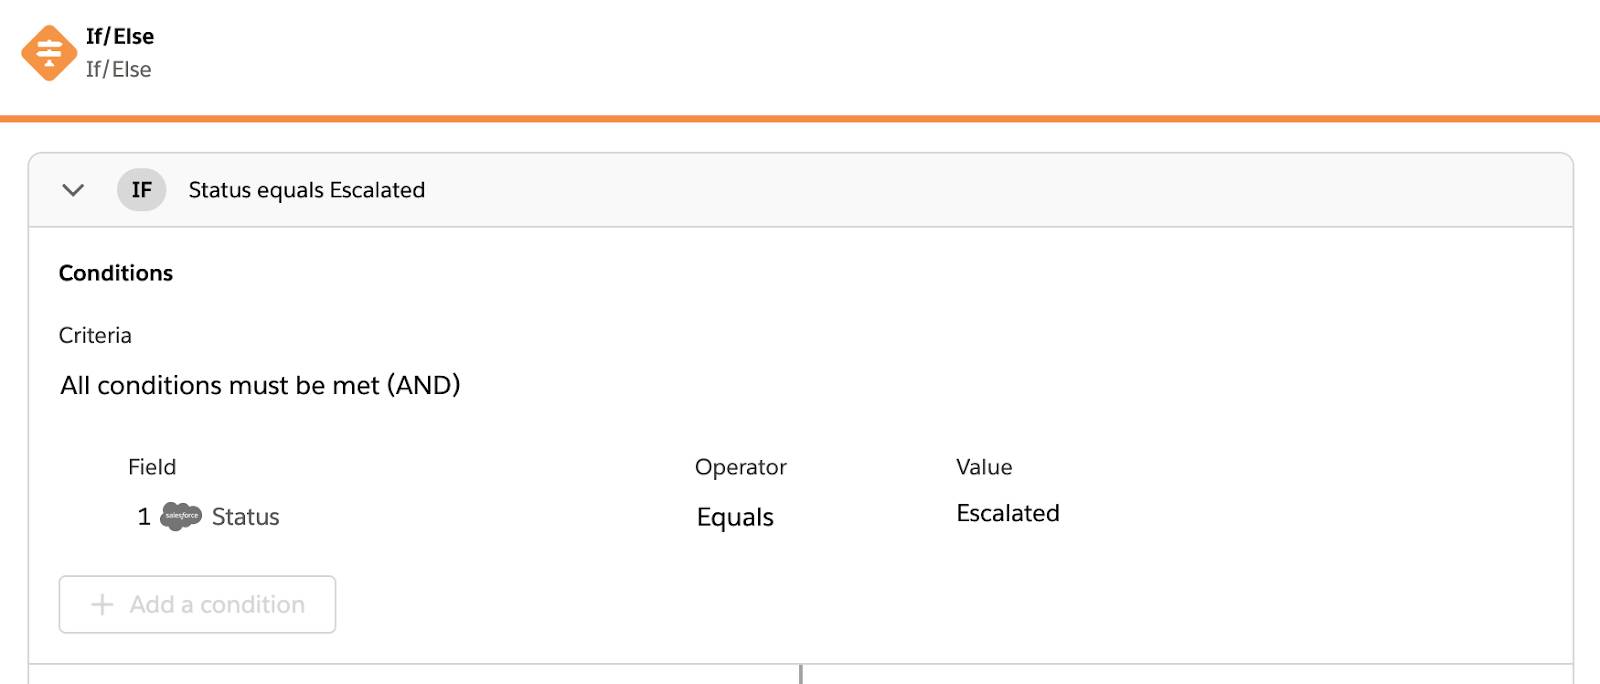
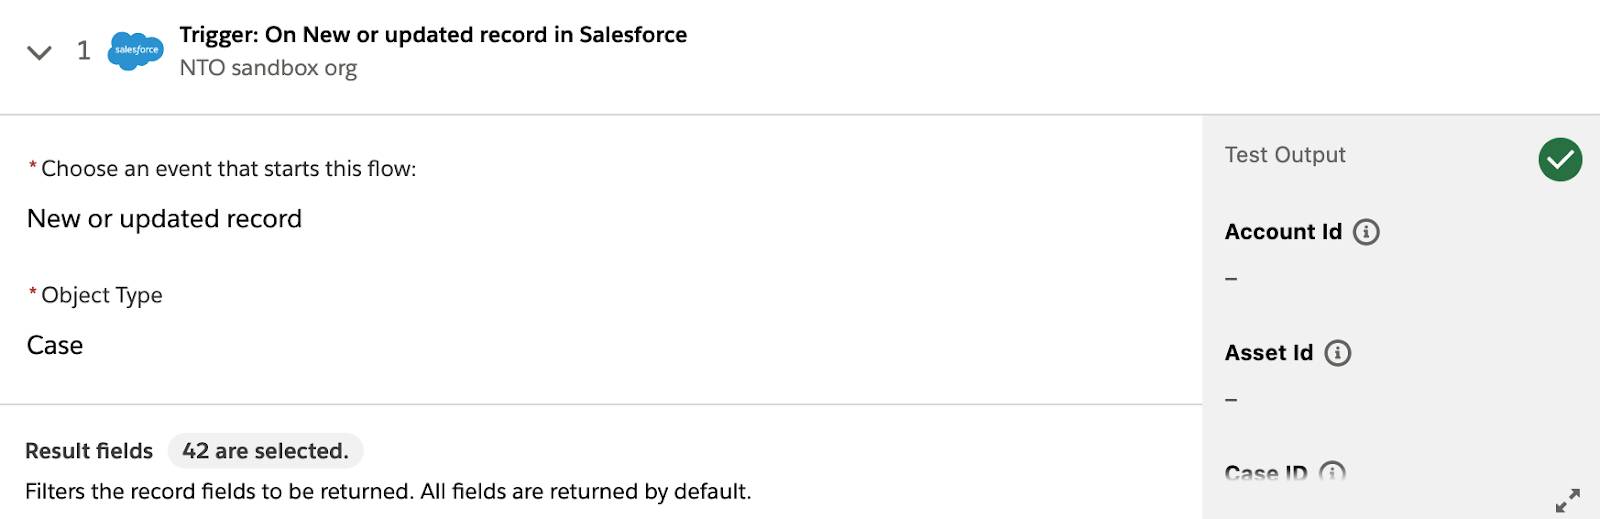
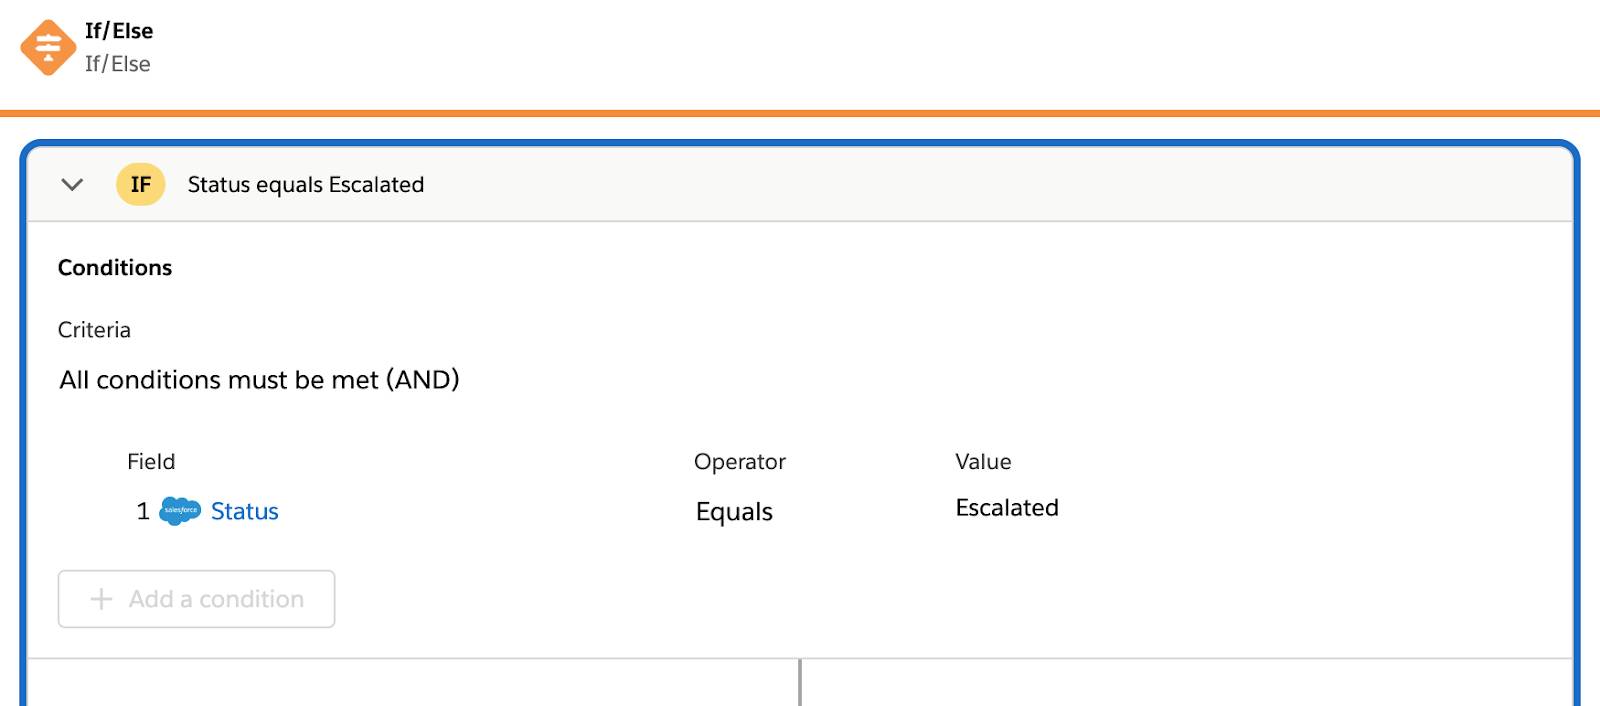
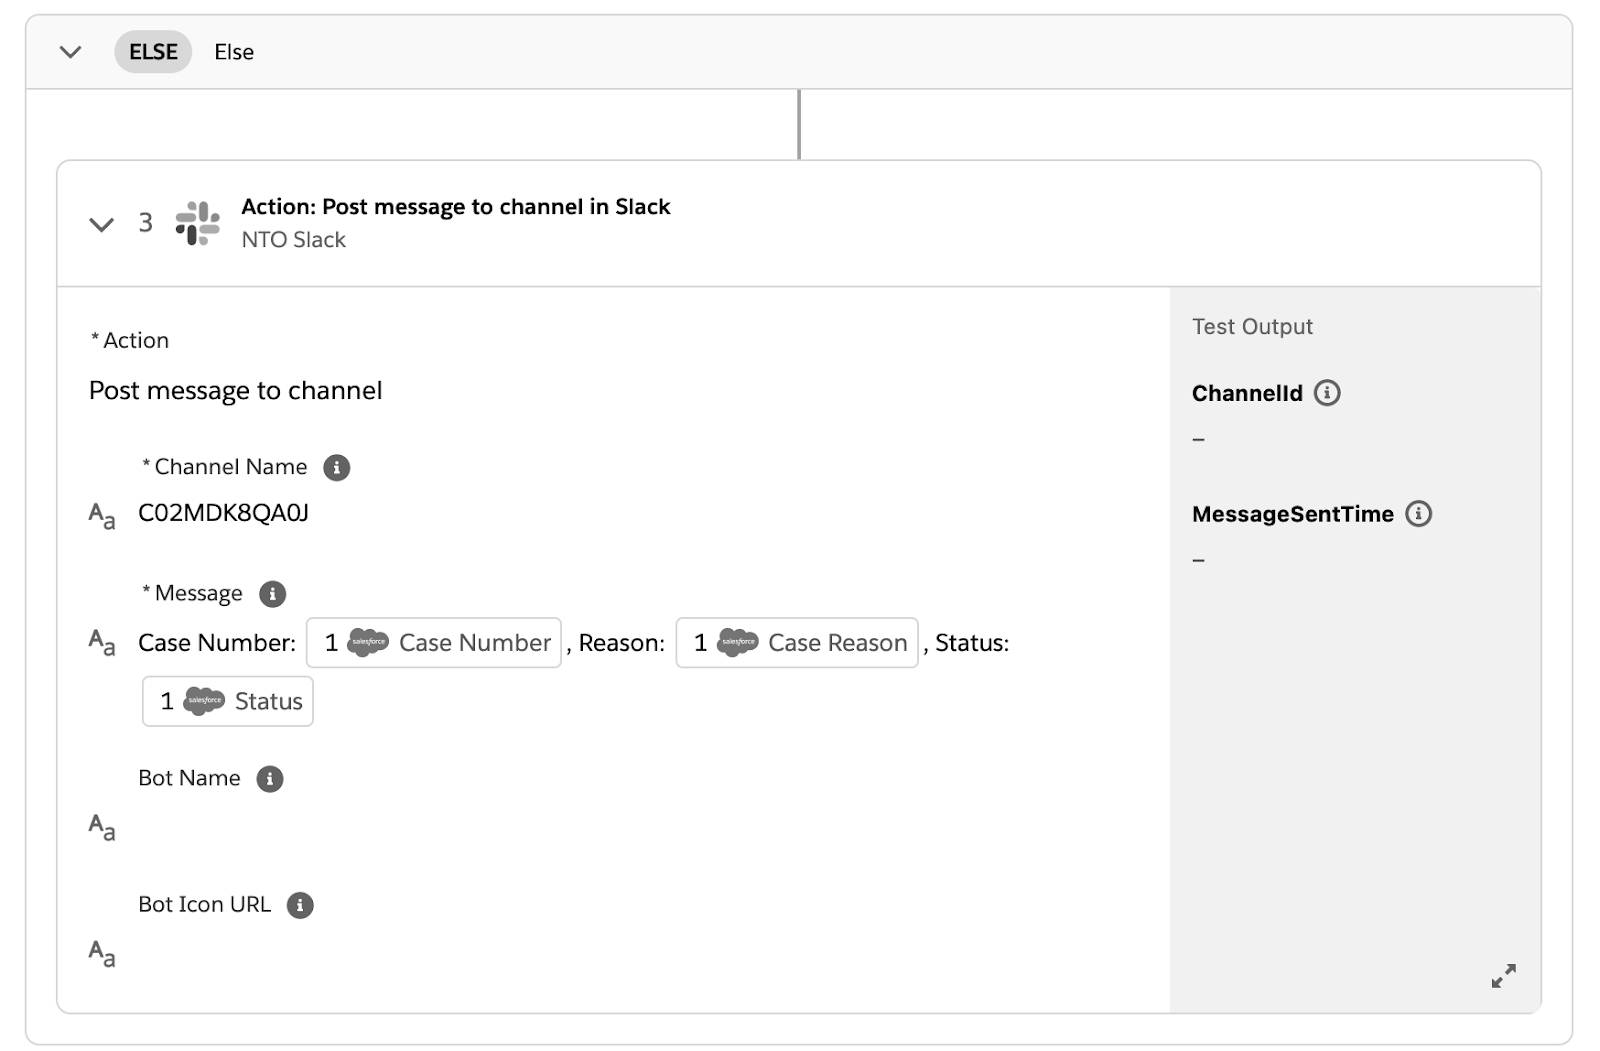
Let’s prepare to test the Sync Service Cases with Slack Notifications flow you learned in unit 3. Recall this flow starts every time a new case is created or updated in Service Cloud. The flow then evaluates if the status of the case fetched in step 1 is set to Escalated.
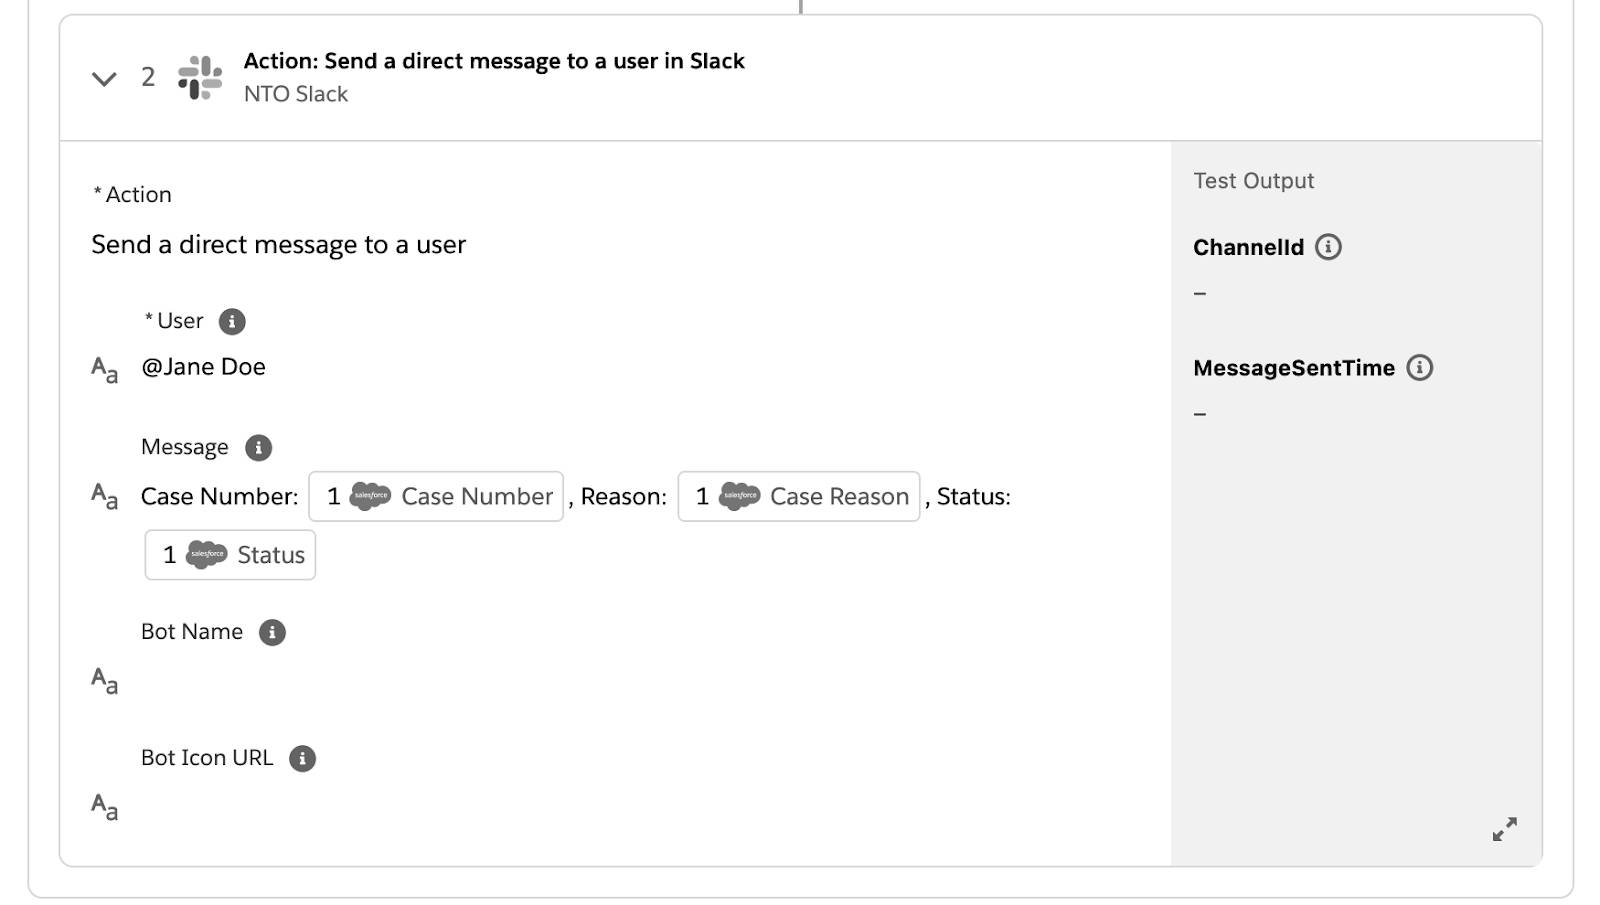
- If it is, send a direct message to the support regional leader, @Jane Doe.
- If it isn’t, send a message to the services-cases channel.
Test a Flow
Follow these steps to test a flow.
- In the Sync Service Cases with Slack Notifications flow, click Test. The flow goes into a read-only mode.
Note: While the test is running, if for some reason you want to stop it, click Stop Test.
- Log in to the NTO org’s Service Cloud, navigate to the Cases tab, and click New.
- Add a case with the following values, and then click Save.
- Case Reason:
Installation - Status:
New - Priority:
High - Case Origin:
Phone
- Go back to your flow and wait for the test to complete. If step 1 and step 3 in the Else branch of the flow show a green check mark, this indicates the flow ran successfully. Because the status of the case is new, the condition in the If branch evaluates to false. So step 2 in the If branch of the flow wasn't executed.
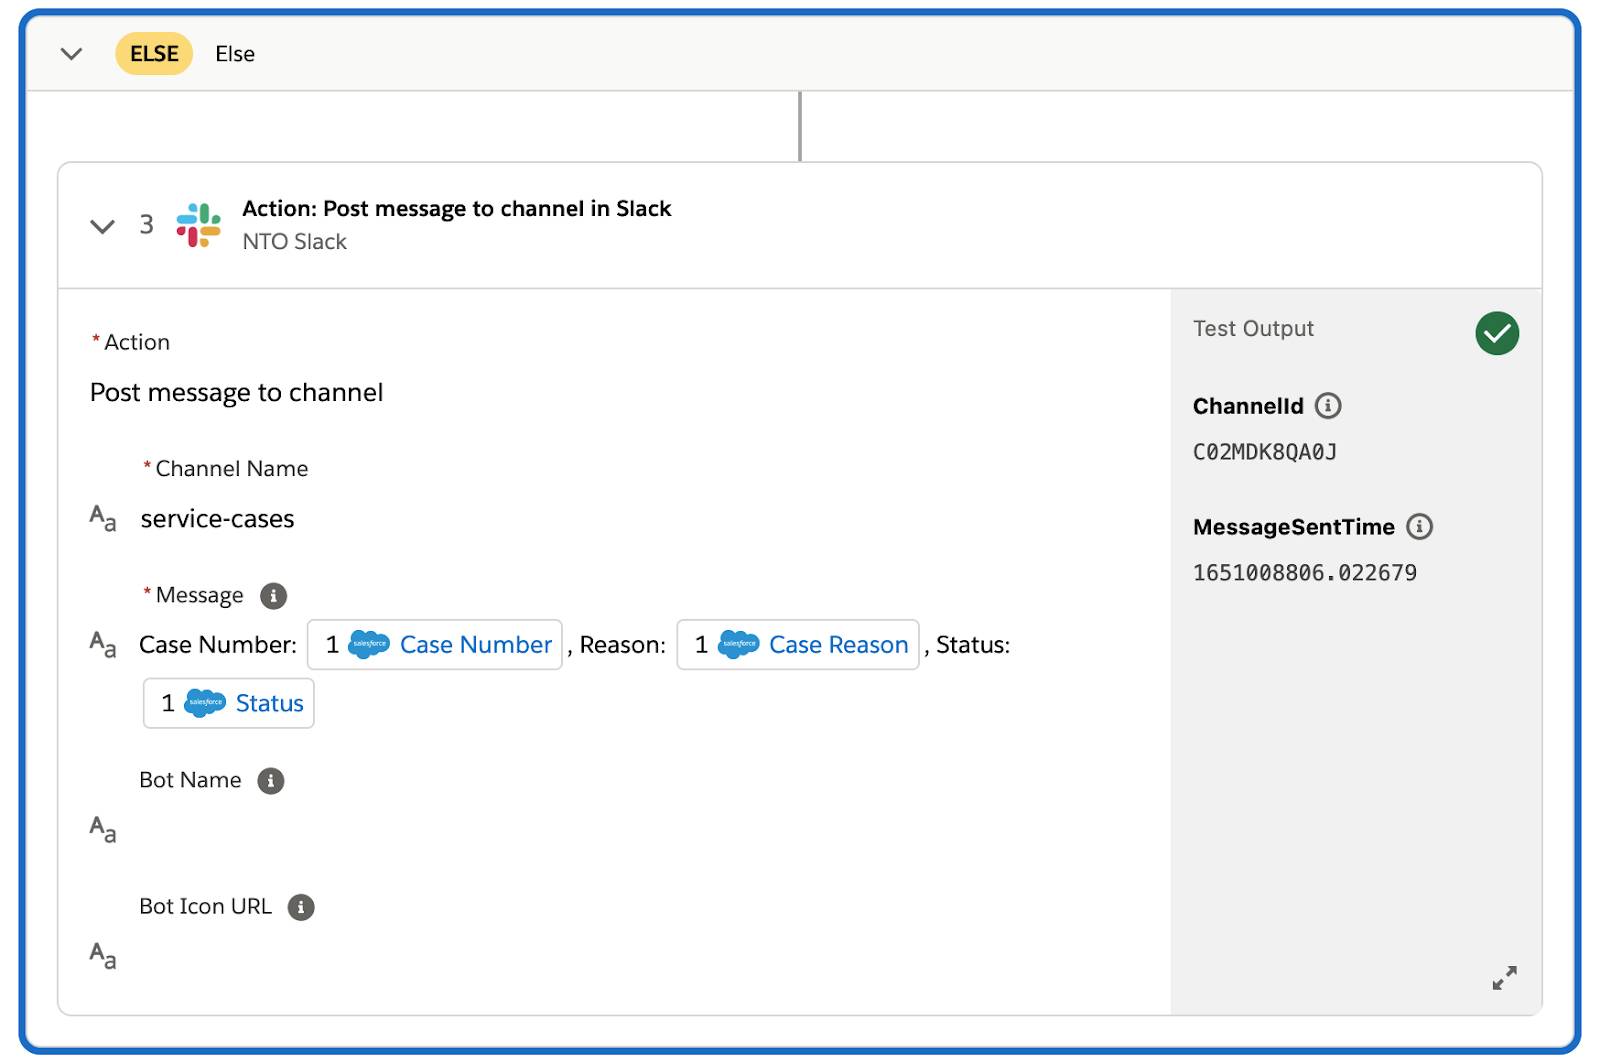
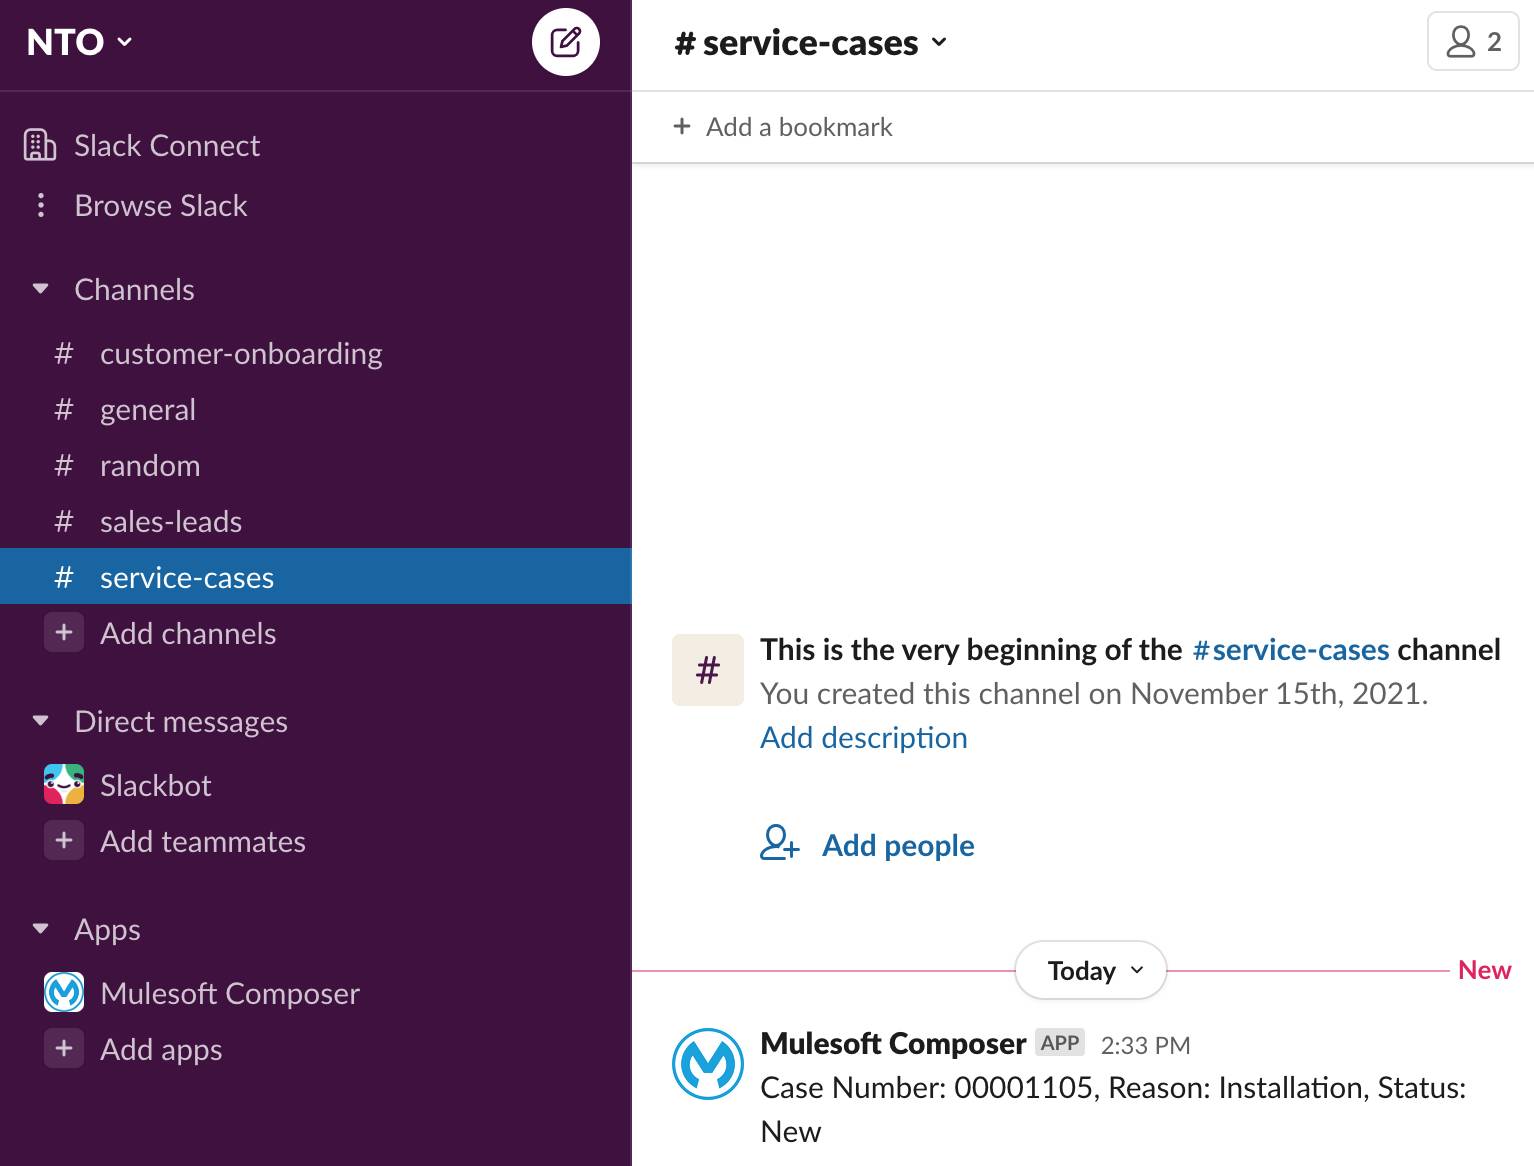
- Open your NTO Slack workspace and verify the case notification appears in the service-cases channel.
- Click Test on the flow again.
- Go back to the NTO org’s Service Cloud, change the status of the previous test case to Escalated, and click Save.
- Return to your flow and wait for the test to complete. If step 1 and step 2 in the If branch of the flow show a green check mark, this indicates the flow ran successfully. Because the status of the case is escalated, the condition in the If branch evaluates to true. So step 3 in the Else branch of the flow wasn't executed.
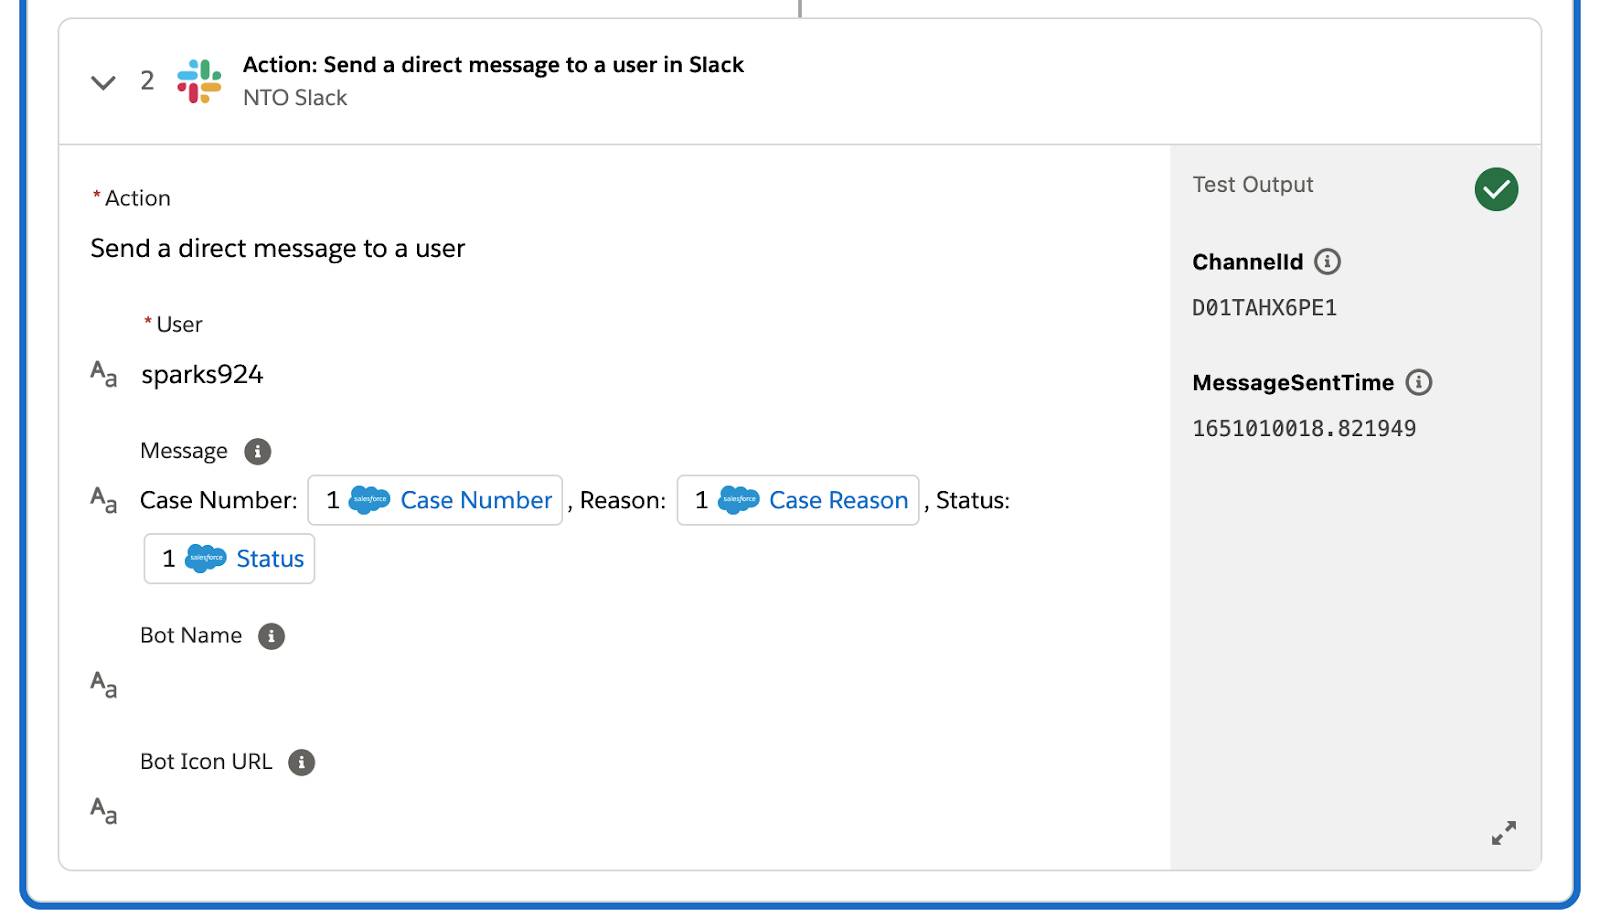
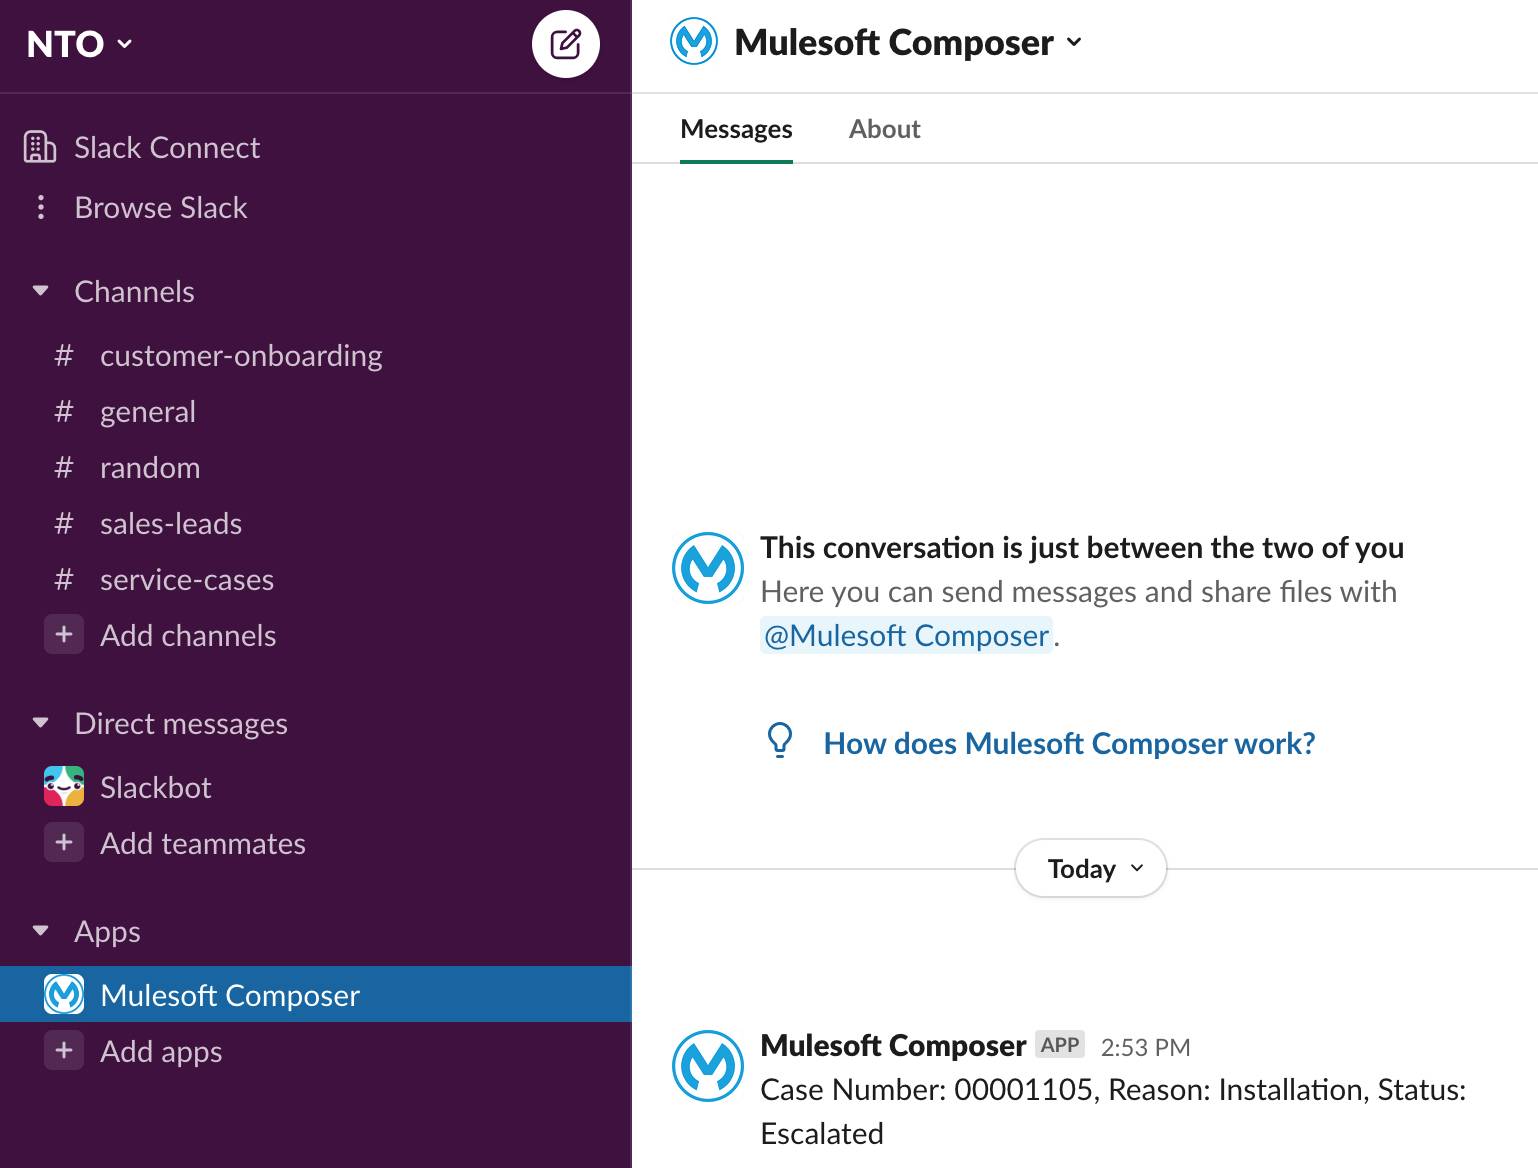
- Open your NTO Slack workspace and verify the case notification appears as a direct message to you.
- Repeat steps 1 through 9 to test another service case of your choice. Your flow should work as expected.
Nice work! You’ve learned how to manage connections and action steps and test your flow to ensure it works as expected. In the next unit, you learn how to activate, monitor, and troubleshoot your flow in the production environment.