Add Products, Inventories, and Action Plan Templates
Learning Objectives
After completing this unit, you’ll be able to:
- Add products for surgical case visits.
- Add inventory information in Life Sciences Cloud.
- Create an action plan template for sales reps.
Set Up Products and Inventories
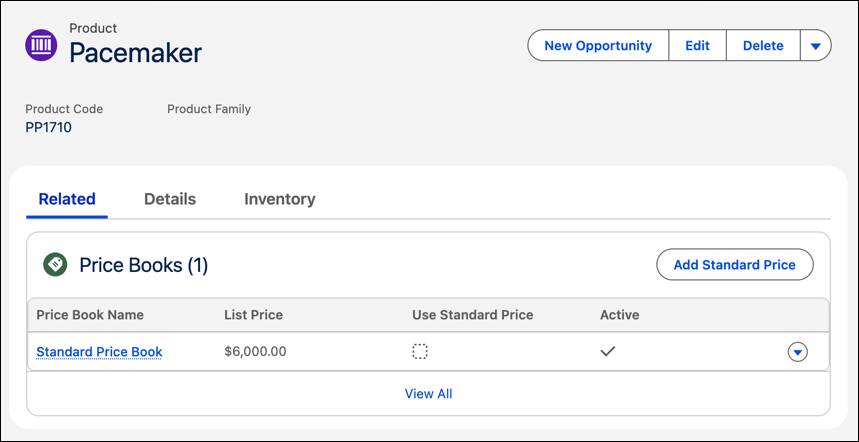
Having easy access to information about products and inventory will make it easier for Leroy to accommodate his clients’ needs. Since Leroy sells pacemakers to StayHealthy Hospital, Soumodip adds information about the device and its price to Life Sciences Cloud.
- From the App Launcher, go to Products, and click New.
- For Product Name, enter
Pacemaker.
- For Product Code, enter
PP1710.
- Select Active.
- Deselect Serialized. A product is marked serialized when you want to track the different parts that constitute the make of an item.
- Click Save.

- On the record page for your new product, go to the Related tab, and click Add Standard Price on the Price Books related list.
- Select Standard Price Book for Price Book.
- For List Price, enter
6000. The org’s default currency is set to USD, which is applied here.
- Click Save.
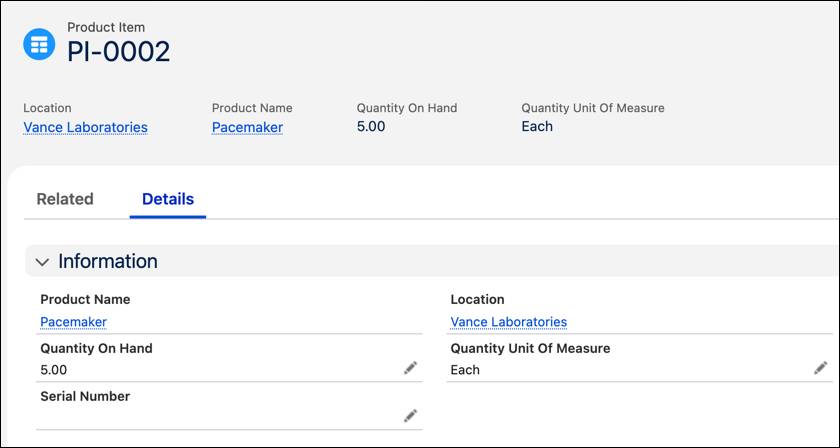
Leroy needs to track the inventory of pacemakers, its usage, and movement. Here’s how Soumodip adds inventory data.
- From the App Launcher, go to Product Items, and click New.
- In the Product Name field, search for and select Pacemaker, the product you’re creating an inventory record for.
- In the Location field, search for and select Vance Laboratories, the location you created for the product’s inventory.
- In the Quantity On Hand field, enter the actual quantity available for that inventory. Soumodip enters
5.
- Under Quantity Unit of Measure, select Each.
- Click Save.
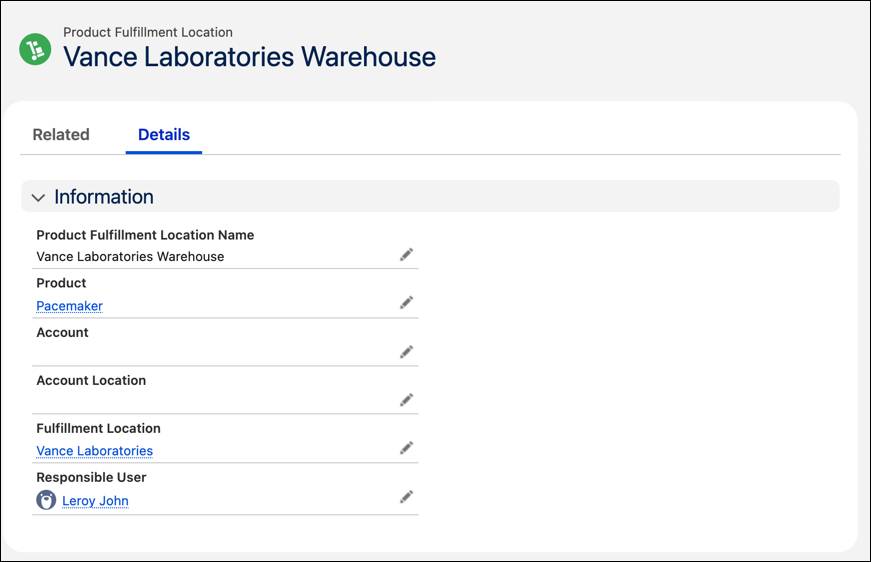
The Product Fulfillment Location object associates sales reps with the inventories they own and the accounts they are responsible for. Soumodip creates a product fulfillment location to associate Leroy with the inventory of pacemakers at Vance Laboratories.
- From the App Launcher, go to Product Fulfillment Locations, and click New.
- Enter a name for your product fulfillment location. Soumodip enters
Vance Laboratories Warehouse.
- In the Product field, search for and select Pacemaker.
- Select the inventory location in the Fulfillment Location field. Soumodip selects Vance Laboratories.
- In the Responsible User field, search for and select the sales rep in charge of this inventory, Leroy John.
- In the Account field, select the account the sales rep is responsible for. Since the fulfillment location is a warehouse, Soumodip leaves this field blank. If the product fulfillment location is a truck or consignment location that is used to fulfill customer demand, then the Account field should indicate the customer account that is being serviced by the fulfillment location.
- Click Save.
Action, Set, Go
When Leroy does a surgical case visit, he takes care of several different things, such as inventory availability, ordering, billing, patient registration, provider education, and consent.
It can often be overwhelming for sales reps to keep track of the many tasks that they perform, and that’s where action plans help. An action plan template helps sales reps define different types of visits, and the tasks they need to do during each such visit. At the end of the visit, they can simply check those tasks off on the app.
Before you set up action plan templates, make sure you have the task flows that your sales reps need for their tasks.
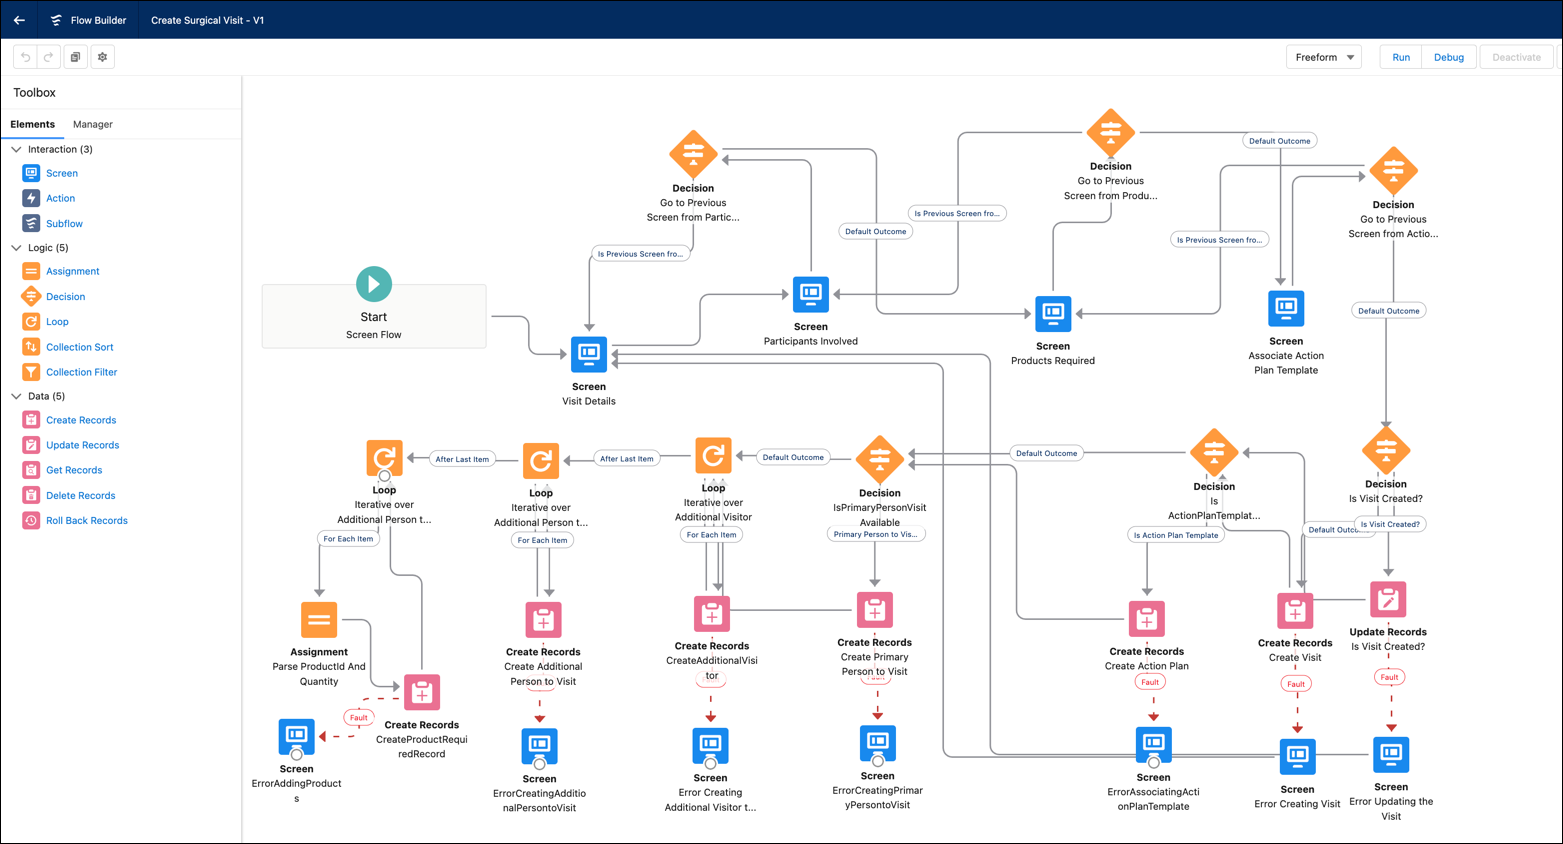
You can either build your own flows using Flow Builder, or you can use the out-of-the-box Patient Registration and Order Authorization flows provided with Intelligent Sales. If you create your own flow, make sure that it accepts VisitId and AssessmentTaskId as inputs. Soumodip has already set up a flow named Create Surgical Visit.
Here’s how he creates an action plan template.
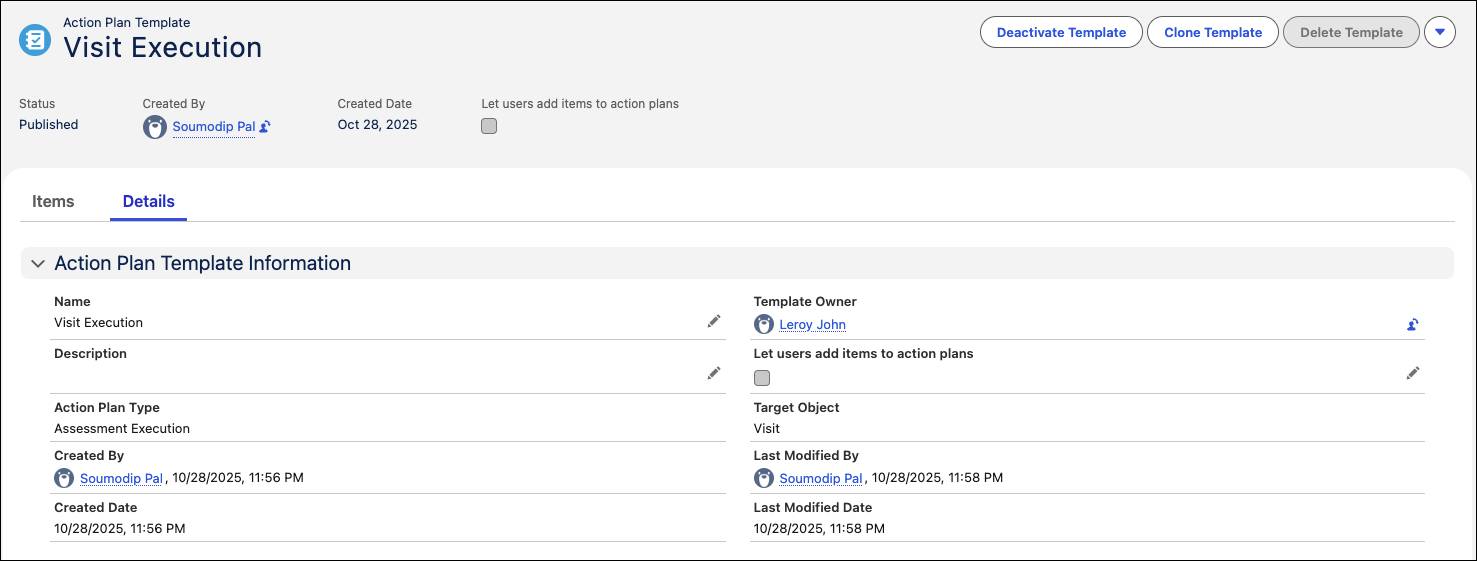
- From the App Launcher, go to Action Plan Templates, and click New.
- Under Name, enter
Visit Executionand select the template owner, Leroy John.
- Make sure that Lets users add items to action plans is deselected.
- In the Action Plan Type field, select Assessment Execution.
- In the Target Object field, select Visit.
- Click Save.
Next, Soumodip adds the flow Create Surgical Visit to the template.
- In the Items tab of your action plan template, click Add Flow under Task Flows.
- In the Task Flow picklist, select the flow you want to add to your template. Soumodip selects Create Surgical Visit.
- Enter
1as the Display Order for the sales rep to see this as the first task on the mobile app.
- If you want this task to be a mandatory one during visits, select Required.
- Click Save.
- Add more task flows as per your business requirements. After you add all the task flows you need in your template, click Publish Template.
Leroy thanks Soumodip for setting up the org and adding the data. In the next unit, we follow along as Leroy schedules visits and product transfers.
Resources
- Salesforce Help: Set Up Your Products and Inventories
- Salesforce Help: Set Up Action Plan Templates for Surgical Case Visits
