Dig Into the First Notice of Loss
Learning Objectives
After completing this unit, you’ll be able to:
- Describe the basic business process for submitting the first notice of loss.
- Discuss how provided services and components support the claim-creation process.
Building Blocks of the First Notice of Loss
The first notice of loss is generally the first contact a policyholder has with a claims system. This notice contains the steps where a claimant enters the initial information about the claim.
Because claims are inherently associated with loss, policyholders aren’t usually in a good mood when they initiate a claim. So it’s important to make the process as painless as possible by providing a smooth and simple user experience.
Claims Management for Insurance enables insurers to do just that. It comes equipped with a number of prebuilt first notice of loss flows for different lines of business. These processes are easy to customize and tailor to the specific needs of each business.
This diagram shows the general task flow for the first notice of loss.

The key steps in the first notice of loss include get policy data, enter basic loss details, verify coverage, add additional loss details, create the claim, evaluate rules.
And here’s a summary of each stage.
Stage |
What happens? |
|---|---|
Get policy data |
A service retrieves information about the policy, policyholder, and the insured items. |
Enter basic loss details |
The claimant enters basic information about the loss, such as the vehicle involved, the time of the accident, and the type of damage. |
Verify coverage |
A service verifies whether the claimant is eligible to file the claim based on the basic loss details. If eligible, the claimant can proceed. |
Add additional loss details |
The claimant adds more information about the incident, including details of the damage, other involved vehicles, witnesses, and police reports. |
Create the claim |
A service creates the claim record using all the information provided with help from the claim product model. |
Evaluate rules |
Another dedicated service evaluates any rules on the claim product. If true, then predefined actions and state transitions automatically trigger. |
To bring this process to life, let’s see Anna Murphy’s experience when she files a claim following an accident.
A Speedy First Notice
Let’s check back in with Anna, who holds an auto policy at Cumulus for her two vehicles, an Audi and a Jeep Wrangler. Yesterday, another car collided with Anna while she was driving her Audi. Thankfully, nobody got hurt, but Anna’s car is pretty banged up and needs some serious repairs.

Launching the Flow
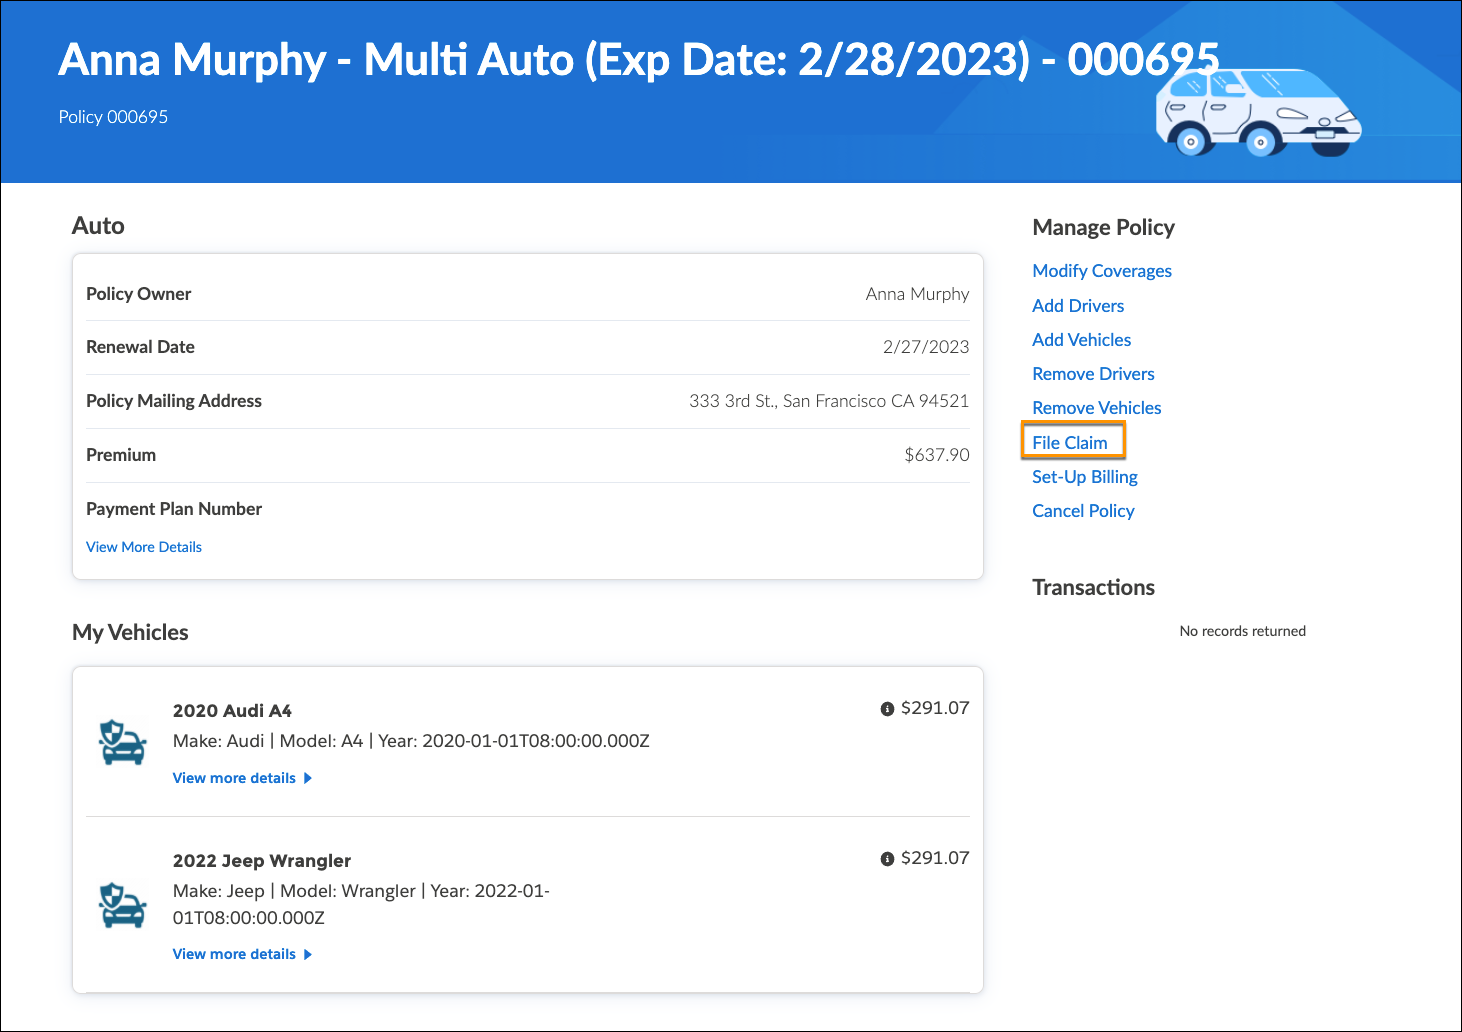
Immediately following the accident, Anna signs into her Cumulus policyholder portal, a one-spot stop where she can review key policy information and complete actions, including filing a claim.
She navigates to her auto policy and clicks the File Claim button, which launches a guided flow designed to process an auto claim.
Entering Basic Details
On launch, the flow automatically retrieves Anna’s policy details, including the insured parties, insured items, and coverages. This information, now stored in the Omniscript data, plays a role throughout the flow.
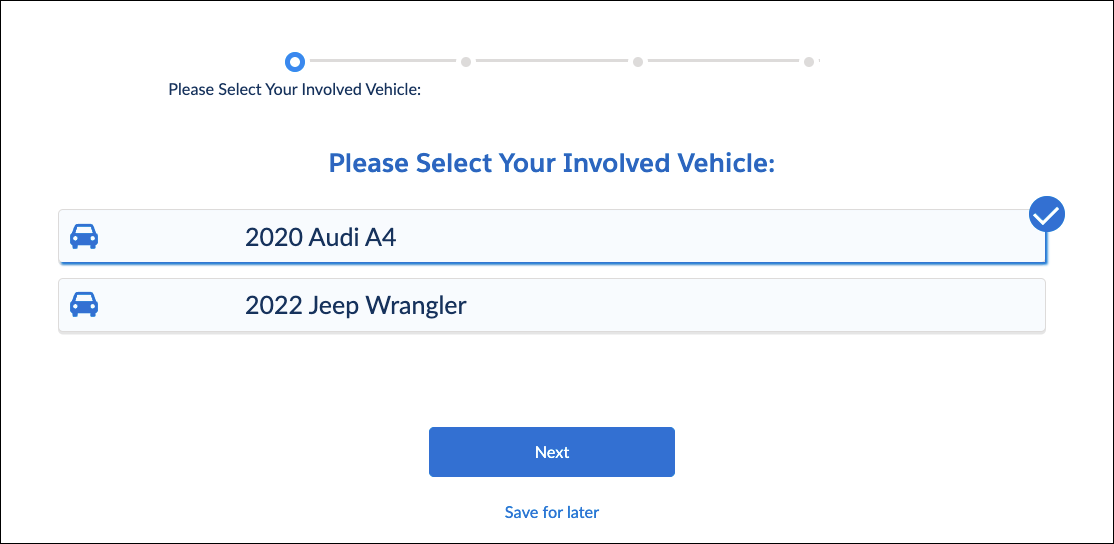
The system knows Anna has two autos insured on the policy, so it first asks her to choose which insured vehicle was involved in the accident. Anna selects the Audi and continues.
The Omniscript asks her what happened.
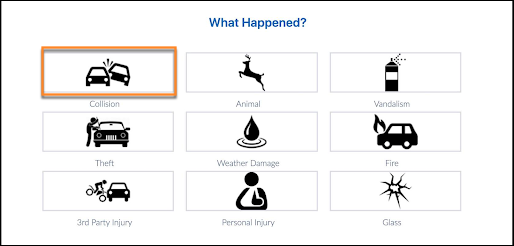
Anna specifies the peril for the accident, which is Collision.
Next, it’s time to add details about the accident.

Anna provides some basic information about the accident, including the date and time, and whether she was driving or injured. This information helps determine coverage eligibility.
Checking Anna’s Eligibility
Behind the scenes, the claims system initiates a lookup to a rating table, also called a Decision Matrix. The table takes the peril input and returns the information to the guided flow.
Another service uses the loss and peril information to evaluate whether Anna’s policy covers the loss. She has an active policy at the time of loss that covers her for Collision, so she’s good to carry on and file the claim!
Here’s a screen capture of the coverage evaluation notification.

The notification tells Anna she’s covered for collision losses and asks if she wants to file a claim. She clicks Yes to proceed.
Providing Additional Information
Next, Anna adds more specific information about the accident.
This screenshot shows the Your Vehicle web page.
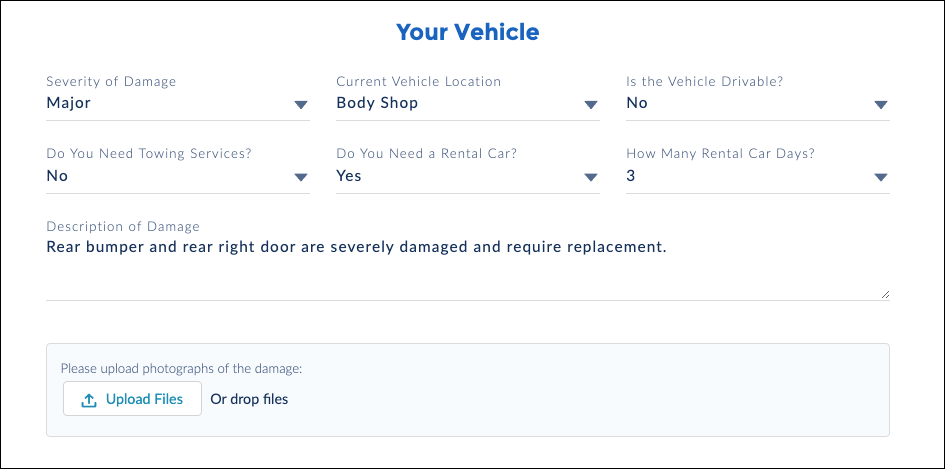
On this page, she specifies the vehicle damage, other involved vehicles, injuries, and witnesses. She also uploads some images to supplement the report.
Creating the Claim
After Anna adds these details, a dedicated service creates the claim and all the associated records. Another service evaluates each active rule on the claim product. Based on the information Anna provides, the Rental Car and Collision coverages automatically open on the new claim record. The adjuster now has a serious head-start when he begins to adjust the claim.
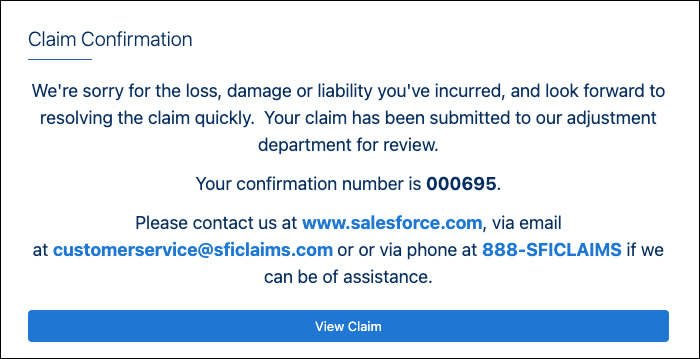
After these services run, a confirmation screen displays key information about the new claim.
Assigning the Adjuster
Using assignment-based rules, the system automatically assigns the claim to a claims adjuster, Phil Sagad, auto claims expert at Cumulus.

Phil receives a notification and views the claim record. The new record contains all the information he needs to get started.
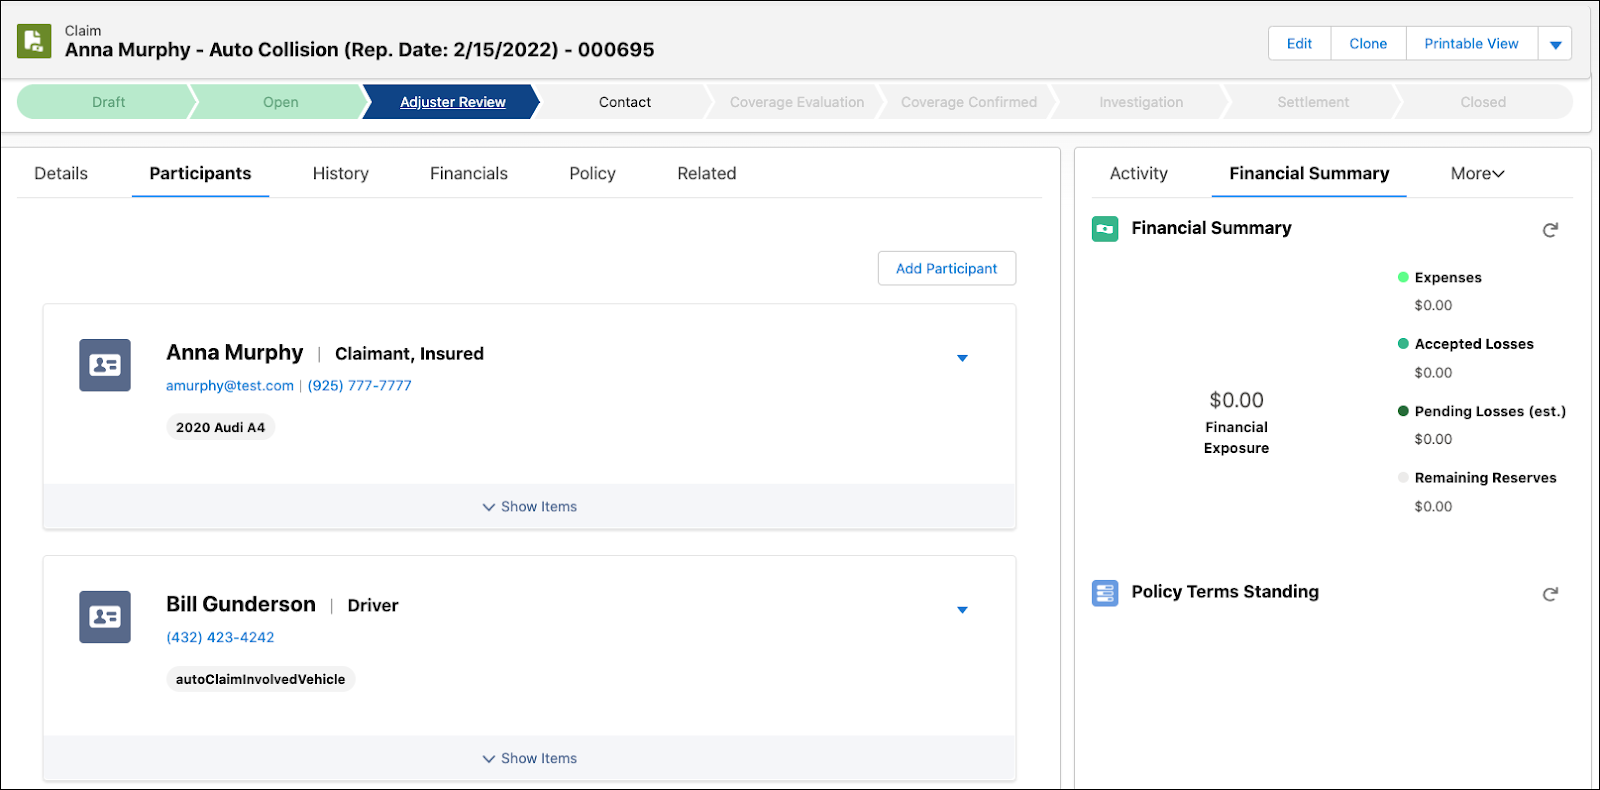
Anna’s job, for now, is complete. She can sit back and wait while Phil takes over to manage the claim and determine the appropriate payments.
In the next unit, let’s learn how claim adjusters like Phil use the Adjuster's Workbench to investigate, adjust, adjudicate, and close claims.
Resources
- Trailhead: Digital Insurance Platform Foundations
- Trailhead: Omniscripts in Omnistudio for Managed Packages