Create a Qualification Context Rule
Learning Objectives
After completing this unit, you’ll be able to:
- List the key steps for implementing context rules in Industries Configure, Price, Quote (CPQ).
- Create a context dimension.
- Use context mapping to compare context dimensions with data stored in Salesforce objects (sObjects).
- Create a qualification context rule, and add rule conditions to it.
Implement Context Rules
Say you want to create a rule to make a product only available to businesses with over 1,000 employees. Do this using a qualification context rule. Here are the key steps. Click each step to learn more.
These steps may seem like a lot of work now, but you’ll build up a bank of prebuilt components over time. Putting context rules together then becomes a matter of connecting existing components rather than creating new ones.
In this unit, you create new components for most steps. So, without further delay, let’s jump right in.
Sign Up for a Training Playground
We don’t have any hands-on challenges in this module, but if you want to practice and try out the steps, you need a special training org that contains Industries CPQ and our sample data. A regular Trailhead playground doesn’t have Industries CPQ or our sample data.
Here’s how to get the training org now.
- Sign up for an Industries Training Playground.
- Fill out the form.
- Enter your first name and last name.
- Enter an active email address.
- Enter your company name.
- Click Sign me up. A confirmation message appears.
- Enter your first name and last name.
- When you receive the confirmation email (sometimes this takes a few minutes), log in to your training playground using the credentials in the email.
Get Started
The marketing team at Infiwave has launched a promotion called InfiStream Kids First to increase the company’s new customer base. The promotion introduces a new streaming channel, InfiStream Kids. However, they want to limit the promotion to new customers only.
Eliza, our CPQ developer, knows the best way to tailor a promotion is to use a context rule. For this promotion, the rule should determine whether a customer is new before offering them the promotion. Follow along with Eliza in your training playground.
Create a Picklist for Account Status
First, you create a new Industries picklist to ensure the Account Status value is accurate. Industries picklists work like Salesforce picklists but are custom objects with the API name: vlocity_cmt__Picklist__c. They’re designed to be globally reusable across the shared catalog, including within a context dimension.
The picklist you’ll create is called Account Status. It contains the account statuses displayed on the Salesforce accounts, as shown in the example screen.
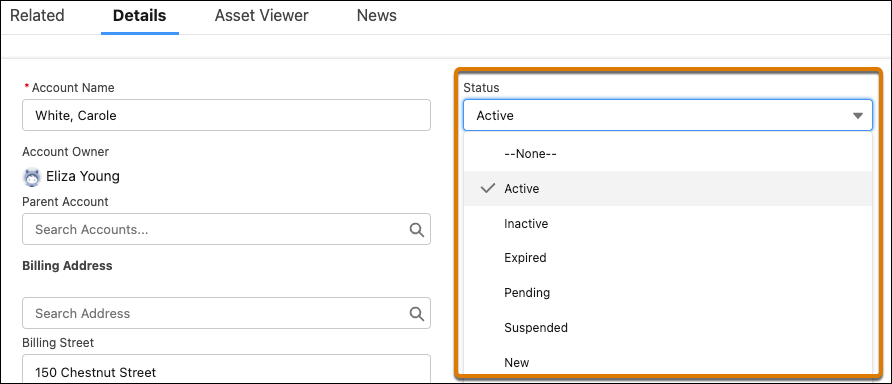
This picklist provides values for the context dimension you create later in this unit. Here’s how to create the picklist.
- From the App Launcher, find and select Vlocity Product Designer.
- From the navigation menu, select Vlocity Picklists.
- Click New.
- Add the new picklist details:
- Picklist Name:
Account Status
- Code:
PKL_ACCT_STATUS
- Version Label:
V1
- Data Type: Text
- Description:
Picklist for account status
- Active: selected
- Effective From: today’s date
- Click Done.
Next, create the picklist items. They appear in the context dimension used by the context rules engine to match against the picklist items for the Status field of the Account sObject.
- In your new Account Status picklist, scroll down to the PICKLIST VALUES section and click New Picklist Value.
- In the GENERAL PROPERTIES pane, enter these details:
- Value:
New
- Label:
New
- Code:
PLI_NEW - Active: selected
- Effective From: today’s date
- Click Done.
- Repeat the previous step to create picklist values for Active, Inactive, Expired, Pending, and Suspended.
- When you’re finished, close the Account Status picklist tab.
Here’s a screen capture that shows the picklist values you created.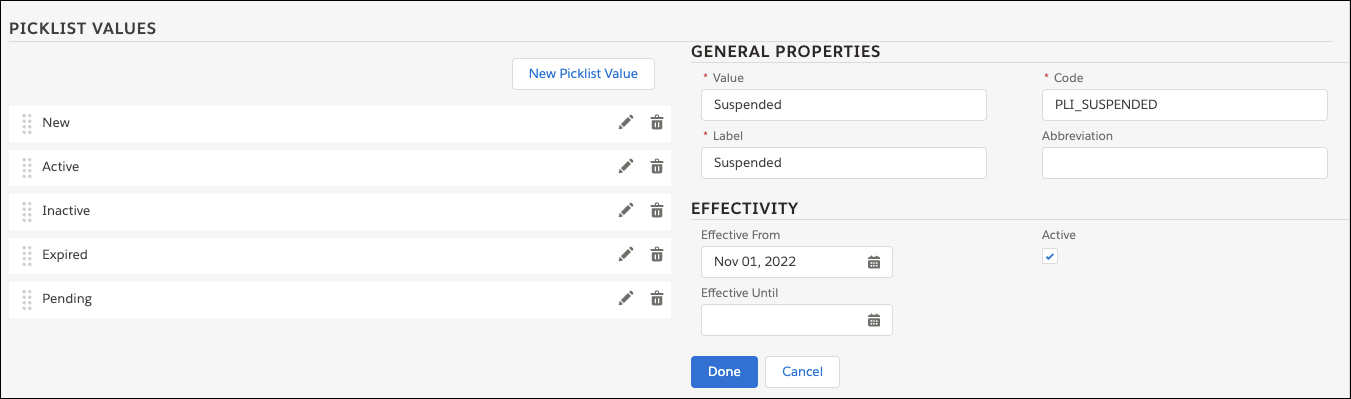
Under PICKLIST VALUES, you can see New, Active, Inactive, Expired, and Pending. With your picklist ready, you’re all set to use it in a context dimension.
Review Context Scopes
Next, you set up the context scopes required to create the context dimension and context mapping.

View the Any.Account context scope, which you’ll use to create the context rule.
- From the App Launcher, find and select Vlocity Product Console.
- In the Vlocity Product Console dashboard, under Rules, click
 next to Context Scope.
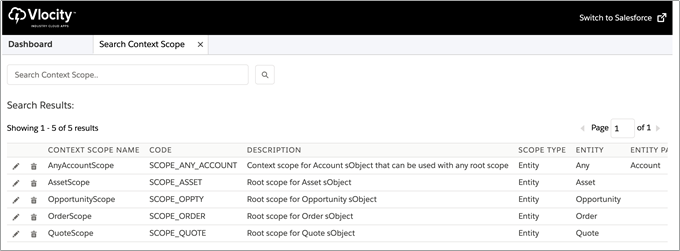
- In the Search Context Scope… box, press Enter or click
 . Your training playground has five context scopes.
- Click
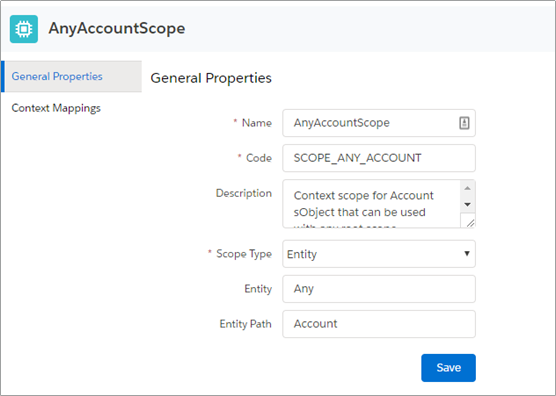
 beside the AnyAccountScope context scope to view it.
- Notice that the Entity is Any, and the Entity Path is Account. This allows the account context scope to be used for orders, quotes, opportunities, and assets.
- In the Vlocity Product Console navigation bar, click X to close the AnyAccountScope and the Search Context Scope tabs.
With the context scope defined, you’re ready for the next step.
Create a Context Dimension
Next, you create a context dimension to store picklist item values for account status. This is then matched against the account sObject Status field through context mapping.
- On the Vlocity Product Console dashboard, under Rules, click
 next to Context Dimension.
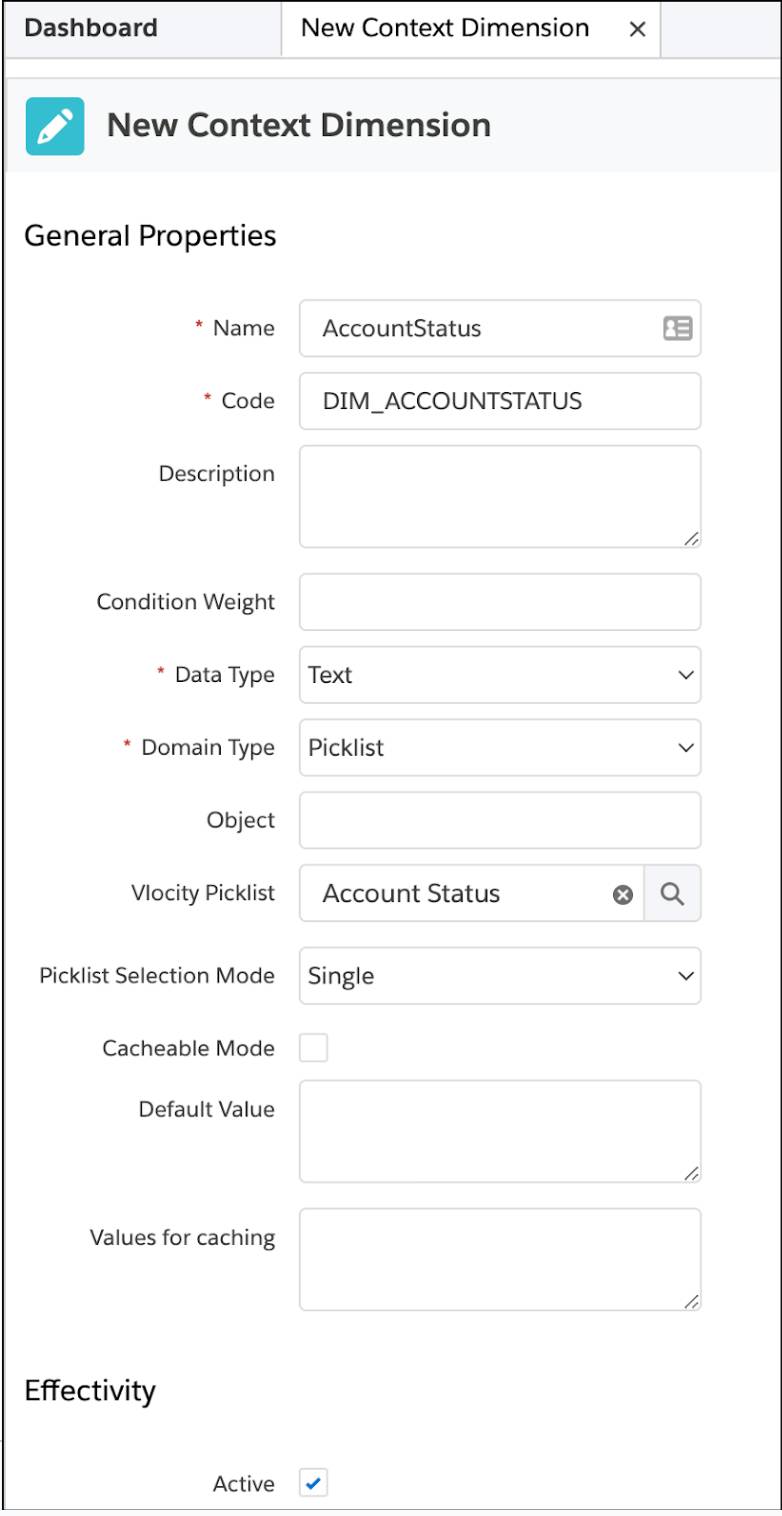
- Add these details:
- Name:
AccountStatus
- Code:
DIM_ACCOUNTSTATUS. This is used while creating custom expressions and must be unique with no spaces.
- Data Type: Text
- Domain Type: Picklist
- Vlocity Picklist: Account Status. This is the picklist you created at the start of this unit.
- Picklist Selection Mode: Single
- Active: selected
- Effective From: today’s date
- Click Save.
Now, you have a context dimension that stores the possible values to use in a rule condition.
Complete the Context Mapping
With your context scope and context dimension in place, you can now create the context mapping. Here’s how to create it on the AccountStatus context dimension. Remember to follow along in your training playground.
- On the left sidebar of the open AccountStatus context dimension, click Context Mappings.
- Click New Context Mapping to show the Context Mapping dialog.
- Enter these details:
- Context Scope: AnyAccountScope
- Initialization Policy: Always Reinitialize
- Initialization Type: Source Expression
- Source Expression:
Status__c
- Sequence:
10
- Active: selected
- Effective From: today’s date
- Click Save.
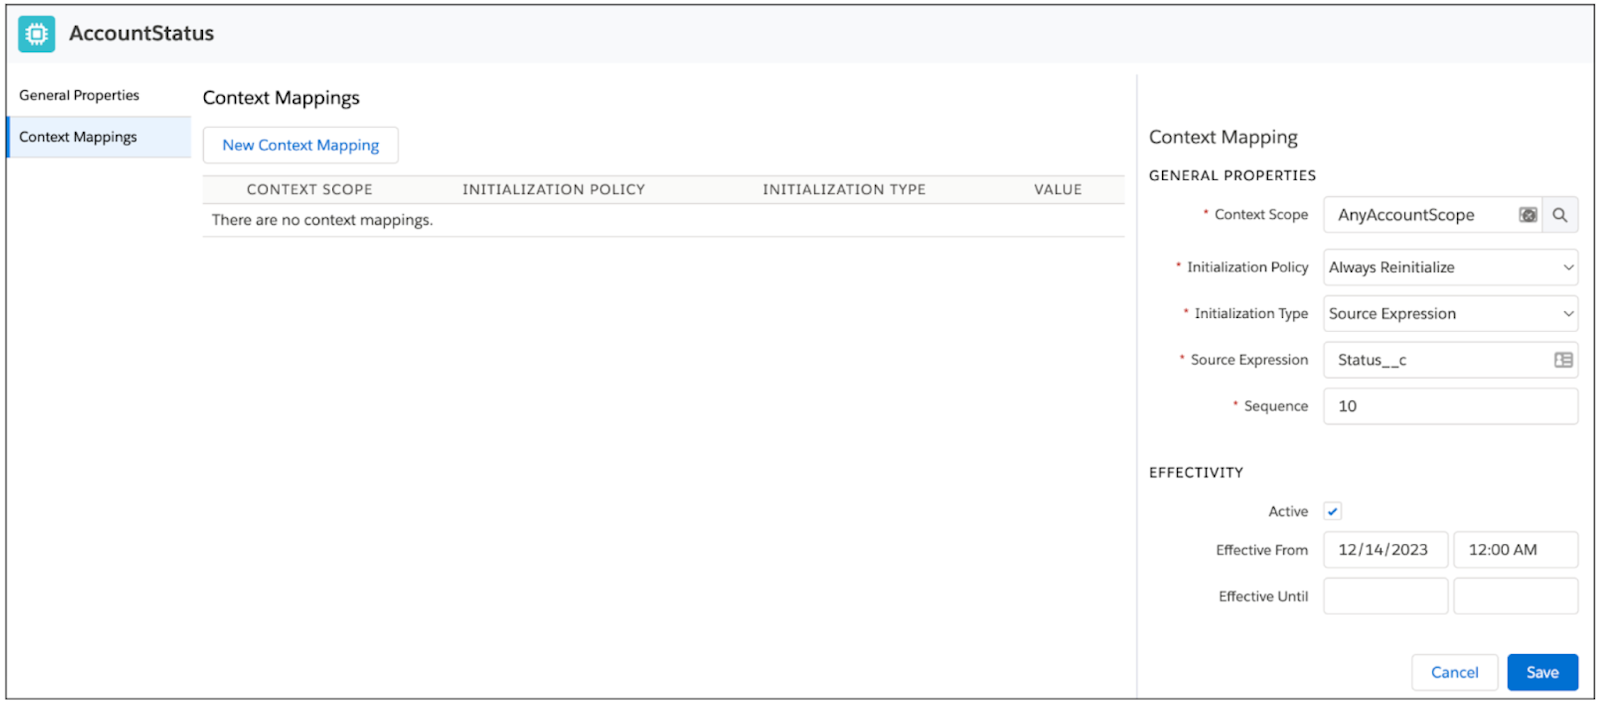
You’ve created a context mapping that uses the AnyAccountScope to compare the Account Status selected in the rule against the Salesforce Account Status field. The magic link is in place.
Create a Qualification Context Rule
You are ready to create your first context rule. This new rule will contain one or more rule conditions that describe when the rule must apply in the Cart. Here’s how to create it.
- On the Vlocity Product Console dashboard, under Rules, click
 next to Rule.
- Add these details:
- Name:
New Customer Accounts
- Code:
RULE_NEW_ACCTS. The Code is unique and must not contain any spaces.
- Description:
Selects new customer accounts
- Expression Mode: And. When you create multiple rule conditions, it’s important to specify whether they’re evaluated as AND, OR, or a CUSTOM combination.
- Active: selected
- Effective Start Date: today’s date.
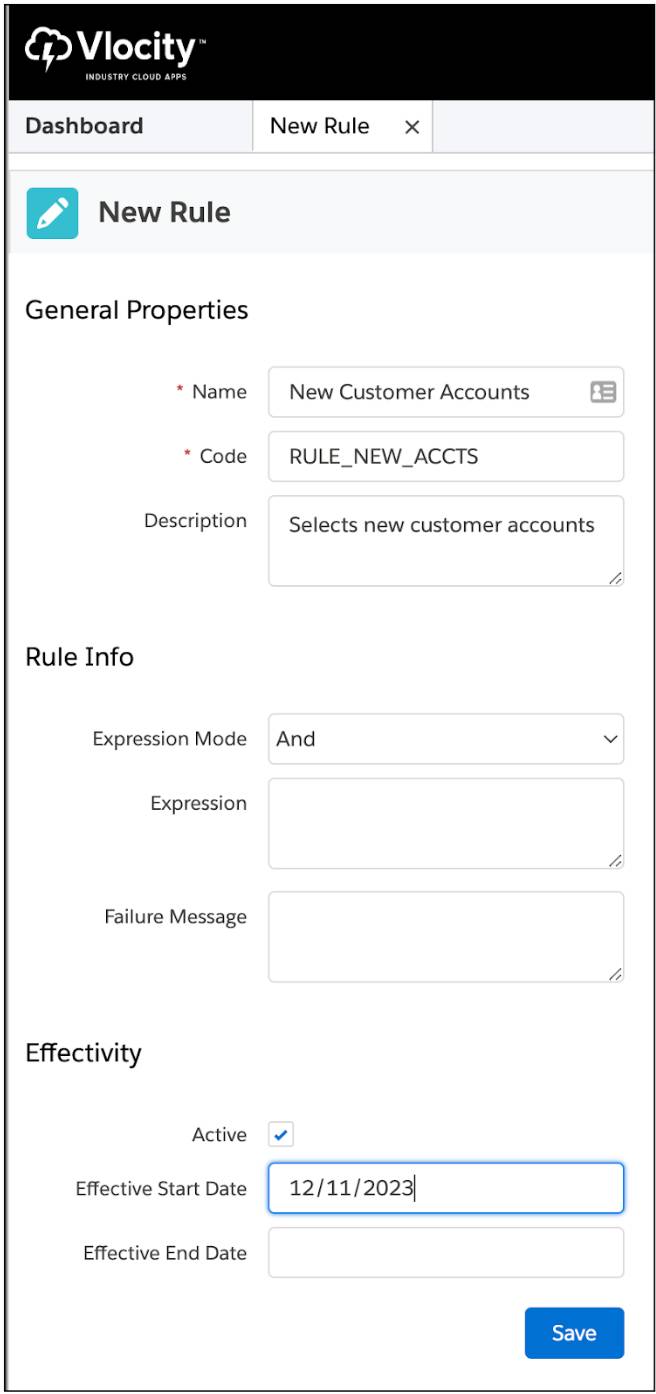
- Review and save your changes.
Add the Rule Conditions
Context rules contain rule conditions, which are made up of context dimensions, context scopes, and context mappings. To see how rule conditions work, create a rule condition on the New Customer Accounts context rule that filters by account status to show only new accounts.
- On the left sidebar of the open New Customer Accounts context rule, click Rule Conditions.
- Using the Add Condition dropdown menu, select Simple.
- In the Rule Condition pane, enter this:
- Code:
RC_NEW_ACCTS.
- Context Dimension: AccountStatus. You created this context dimension earlier in the unit.
- Operator: ==
- Value: New. These values come from the AccountStatus Vlocity picklist items you created earlier.
- Fail Level: Hard Fail.
- Click Save.
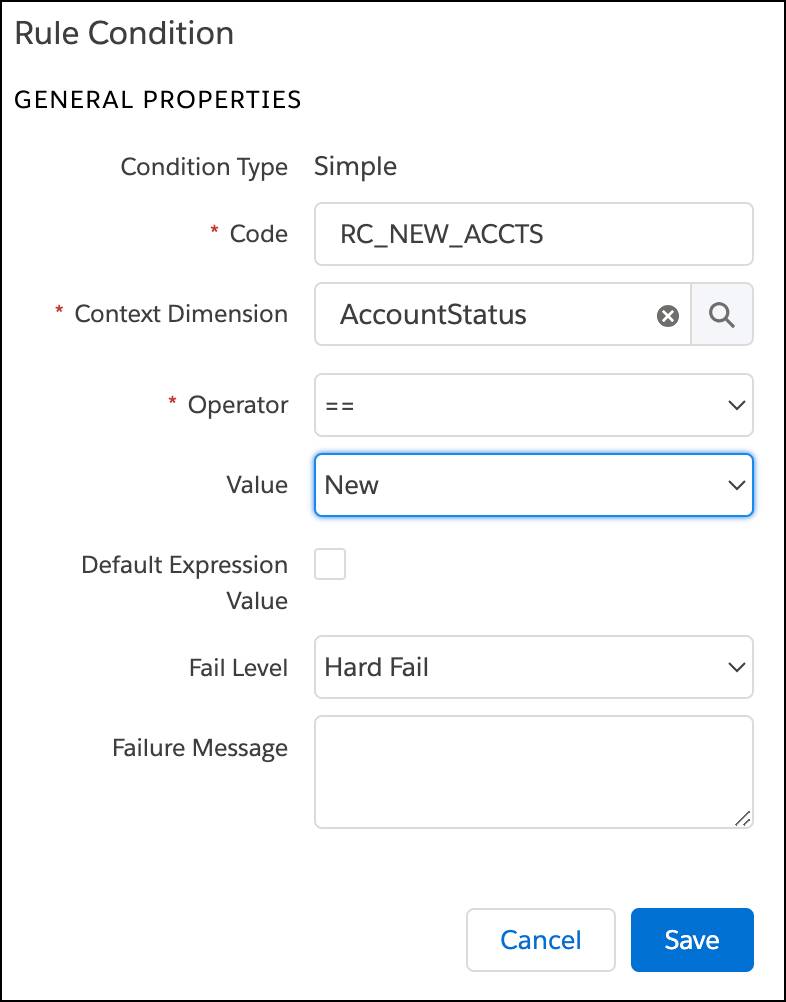
You’ve successfully created a qualification context rule and added the required rule condition. Good job!
Next, you create a rule set and add it to the promotion. That’s coming up in the next unit.