Generate Billing Schedules
Learning Objectives
After completing this unit, you’ll be able to:
- Explain the purpose of the Asset, Billing Schedule, and Billing Schedule Group objects.
- Activate an order to automatically generate billing schedules and billing schedule groups.
- Describe the details of generated billing schedules and billing schedule groups.
Meet Billing Schedules and Billing Schedule Groups
All the work billing admin Hannah completed so far helps her send a final invoice to the customer. Before that, meet the key objects that bring your invoice data together so Billing can track each order product and create accurate invoices.
-
Asset represents a product or service that a customer purchases, either a single product or a bundle.
-
Billing Schedule defines the timing and method to invoice each order item. Think of a billing schedule as a detailed plan for an order product that determines when and how it is billed. Billing schedules inherit details from an order product and the related records Hannah’s created so far, such as billing treatment items.
-
Billing Schedule Group is an organizing container for billing schedules and helps make updates to billing details across a group of schedules. Billing schedule groups give you additional controls to group and split order products into one or more invoices. Billing also creates billing schedule groups for the bundled products and their child products to establish a hierarchy.
Billing automatically creates these records in the flow of your Agentforce Revenue Management processes. When you activate an order, Billing creates a billing schedule group and billing schedules aligned with your settings in an order product’s related billing treatments.
This process is completed by the provided Order to Asset and Order to Billing Schedule flows. In this unit, you follow along with Hannah at InfinitraBytes to create a quote, then create an order from that quote, and finally activate the order to experience how these flows work.

Create a Quote
Creating a quote is a key step in the Billing process because it starts all of the quote-to-cash automations and produces key information for an order and later invoices. Follow along.
- From the App Launcher (
 ), find and select Quotes.
- Click New Quote.
- Specify these details.
- Quote Name:
Burlington USA Quote - Account for Quote: Burlington Textiles Corp of America
- Quote Name:
- Save your work.
Now add products to the quote and, finally, create an order from the quote.
- Click Browse Catalogs.
- In the Choose Price Book window, if prompted, make sure Standard Price Book is selected, and click Save.
- In the All Catalogs list, select Hardware Catalog, and click Next.
- Under Categories, click Laptops.
- From the displayed products list, select Laptop Basic Bundle and click Add.
- Under Categories, click Accessories.
- From the displayed products list, select Keyboard and click Add.
- Click Save Quote.
Wait a moment for your Quote Line Items to update.
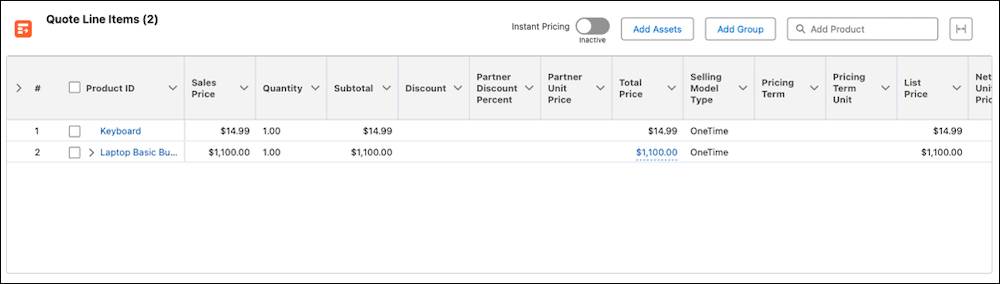
After the quote updates, select Create Order in the quick actions dropdown ( ), then select Create Single Order and click Finish.
Let’s move on to the order. Click the order number on the confirmation message that appears, or select it in the Orders related list on the quote’s Related tab.
Update the Order
Hannah’s new order gets some details from the quote, but she must add some more information before she can generate billing schedules and billing schedule groups.
- Edit the order and specify these details.
- Billing Street:
123 Main Street - Shipping Street:
123 Main Street - Bill To Contact: Jack Rogers
- Legal Entity: USA Business
- Billing Street:
- Save your changes.
Update the legal entity, billing treatment, and tax treatment on each order product.
- In the Order, select the Lines tab.
- In the Order Products component, click Laptop Basic Bundle.
- In the product pane that appears, click
 .
.
- Specify these changes in the Edit Order Product window.
- Legal Entity: USA Business
- Billing Treatment: USA Advance Billing Treatment
- Tax Treatment: USA Tax Treatment
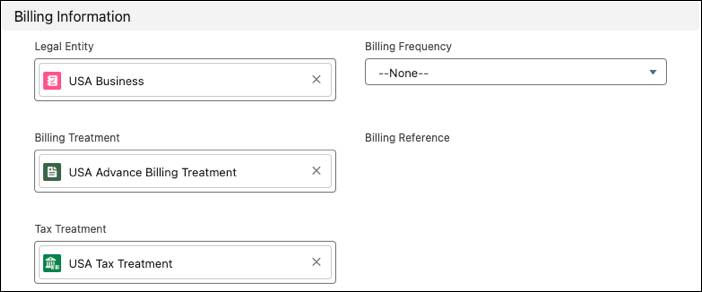
- Legal Entity: USA Business
- Save your changes.
- Repeat these steps to update the legal entity, billing treatment, and tax treatment for the Laptop, Antivirus, and Keyboard order products.
- If prompted, select Refresh Prices and confirm your choice.
InfinitraBytes now has the basic details to create billing schedules and billing schedules groups.
One important point about a field the instructions skipped: The Payment Terms field on an order specifies the payment due date. Payment terms help you manage collections and forecast cash flow accurately. You usually negotiate payment terms with a customer during contract negotiation or order generation. We don’t go into details about that in this module, so read Create Payment Terms for more information.
Activate the Order
Hannah activates the order to kick off the flows that create billing schedules and billing schedule groups.
- On the order record, select Activate in the quick actions dropdown.
- Click Activate.
The flows run and create the assets, billing schedules, and billing schedule groups to invoice the order.
Examine the Billing Schedules and Billing Schedule Groups
Go to the Related tab on the order and find the Billing Schedules related list. Check out all those billing schedules!
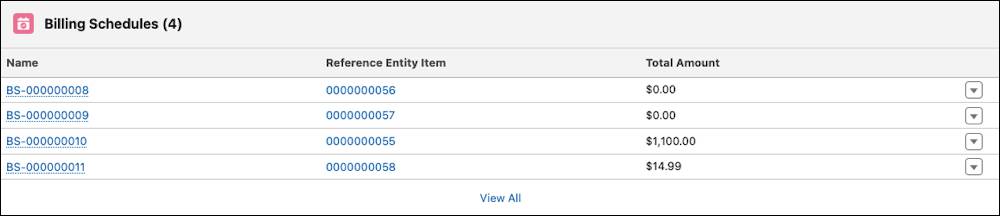
Because the order had four order products—the bundled laptop with two child products, plus the keyboard—Billing’s flows created four billing schedule records. Click the billing schedule for the laptop bundle, the one with a Total Amount value of $1,100. Browse through the details on the record.
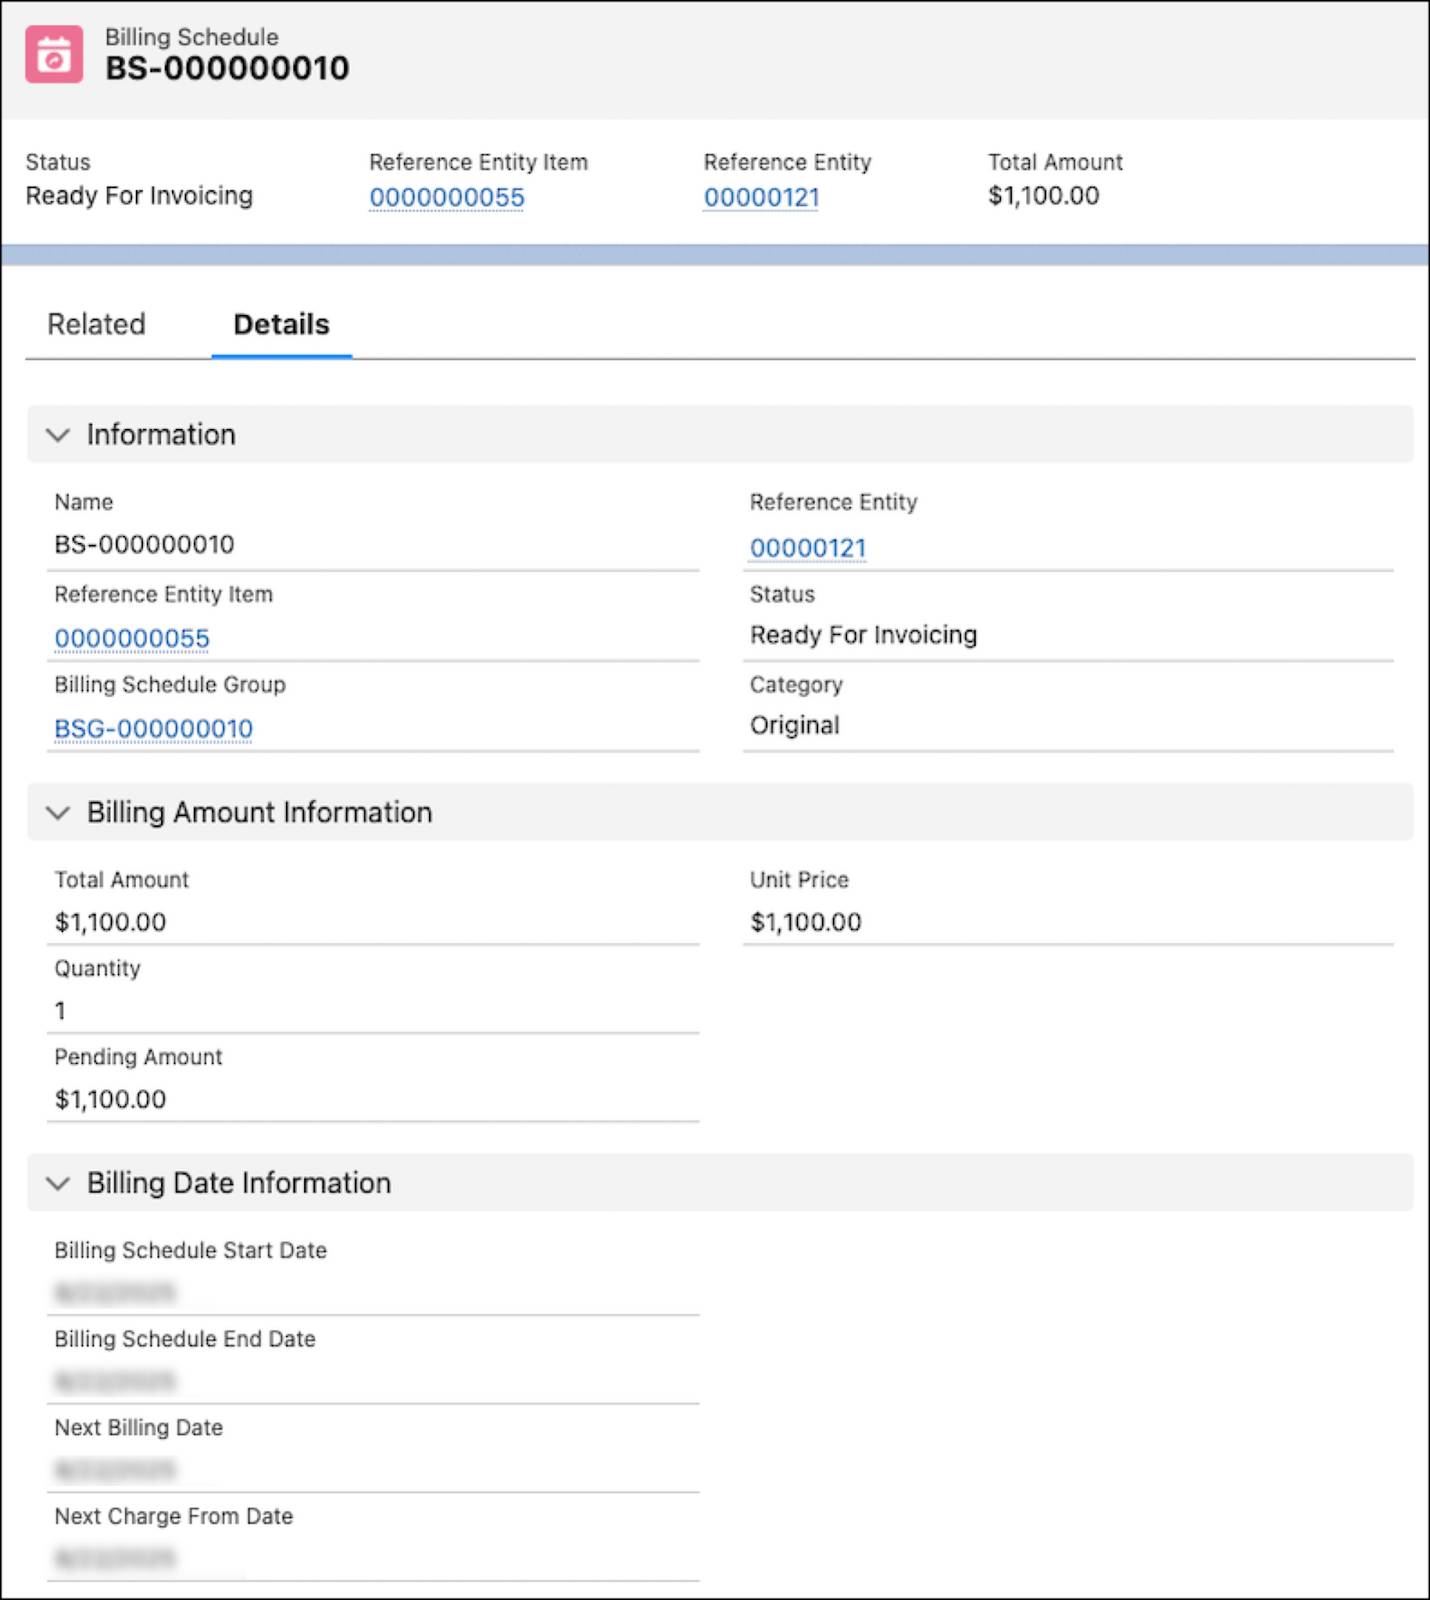
The fields in the Information section include links to the related billing schedule group, order, and order product, and show that the status of this billing schedule is Ready for Invoicing, which means it can be included in an invoice. Other sections on the page show the total amount of the invoice, pending amount, and the billing dates.
Also check out the related tax treatment used for the billing schedule—the one Hannah set up earlier.
And there’s a Billing Changes section that tracks amendments to this billing schedule. If you add or change products on the order, the Order to Billing Schedule flow creates additional billing schedules and relates them back to this original billing schedule to give you an audit trail. Read Manage Billing Schedules and Billing Schedule Groups in Salesforce Help for details.
Let’s check out the related billing schedule group. Click the billing schedule group name—BSG followed by numbers—on the billing schedule.
Here you can see more details about the products ready to be billed. Go to the Related tab and find the Associated Billing Schedule Group related list.
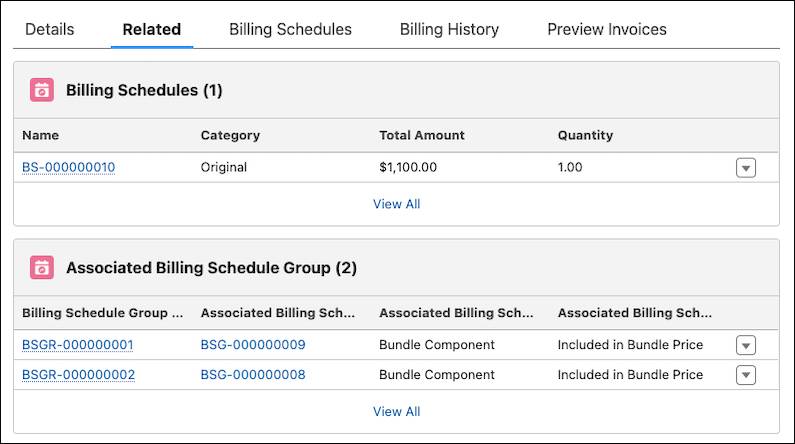
Notice here that there are two other billing schedule groups that represent the bundle components. Cool, right?
What’s Next
In this unit, you learned about the Asset, Billing Schedule, and Billing Schedule Group objects and how they work together to track, bill, and invoice order items. You followed along with Hannah and created a quote, used it to create an order, and activated the order to automatically generate assets, billing schedules, and billing schedule groups. Finally, you examined the details of billing schedules and billing schedule groups.
Now you’re ready for the main event: generating invoices. You practice that in the next unit.
To pass the challenge and move on to the next unit, make sure to check the challenge.