Create Qualifiers
Learning Objectives
After completing this unit, you’ll be able to:
- Describe the three types of coupons.
- Describe the three types of customer groups.
- Explain how source codes work.
- List three ways you can use source codes.
Introduction
Brandon Wilson, the Cloud Kicks merchandiser, wants to offer exciting promotions in his Spring campaign. He wants to target Loyalty Program members and shoppers who haven’t purchased for a while. It’s great that he’s identified his audience. Now he must figure out how they can qualify for discounts.
That’s where qualifiers come in. As a reminder, these are the qualifier types.
-
Coupons: Multiple or single-use codes that shoppers can use to get a discount.
-
Customer groups: A list of specific customers or customers who meet criteria such as geographic location.
-
Source codes: A code on a browser cookie that results from the shopper clicking a link on an affiliate website. They automatically navigate to the storefront.
Brandon wants to configure multiple qualifiers for some of his promotion experiences. He does that using qualifier settings for each promotion experience within a campaign. He configures campaigns in a later unit.
Let’s follow along with Brandon as he learns how to configure his qualifiers.
- Merchant-defined single code coupon
- Static customer group
- Dynamic customer group
- Source code
Coupons
Brandon can create coupons in Salesforce B2C Commerce or import them from an external system. They can also exist outside of a campaign or a promotion. If you configure a coupon as a promotion qualifier, then the promotion expires, the coupon expires, too.
You can assign a coupon to one or more promotions and associate an individual promotion with multiple coupons. When you associate a coupon with a campaign, all promotions in that campaign automatically inherit the coupon. You can also disinherit a coupon within a promotion.
Coupon Types
Here are the types of coupons you can create in Business Manager.
Type |
Definition |
Source |
|---|---|---|
Merchant-defined single code |
One fixed coupon code per coupon can be used by multiple shoppers. |
Maintained by the merchant. Can be added and deleted in Business Manager. |
Merchant-defined multiple codes |
List of codes per coupon, typically imported from an external system. Each code can be used by multiple shoppers. |
Maintained by the merchant. Can be added and deleted in Business Manager. |
System-generated |
Codes generated by B2C Commerce. Each code can be used by multiple shoppers. |
Issued through export or the scripting API. You can manage the format in Business Manager. |
Brandon uses the redemption limit to limit how many times each shopper can use the coupon in a transaction.
Create Coupons
In this module, we assume that you are a B2C Commerce merchandiser with the proper permissions to perform these tasks. If you’re not a B2C Commerce merchandiser, that’s OK. Read along to learn how your merchandiser would take these steps in Business Manager. Don't try to follow our steps in your Trailhead Playground. B2C Commerce isn't available in the Trailhead Playground.
It’s a best practice to test campaigns and promotions on a B2C Commerce staging instance. If you have a staging instance, you can try out these steps on it. If you don't have a staging instance, ask your manager if there is one that you can use.
Brandon starts with a merchant-defined single code coupon. Here’s what he does.
- In Business Manager, click App Launcher, and select Merchant Tools | Online Marketing | Coupons.
- Click New.
- Enter an ID:
spring-code - Select if the coupon is case-sensitive. He leaves it at No.
- Select the coupon type: Single Code
- Enter the coupon:
SPRINGSPORTS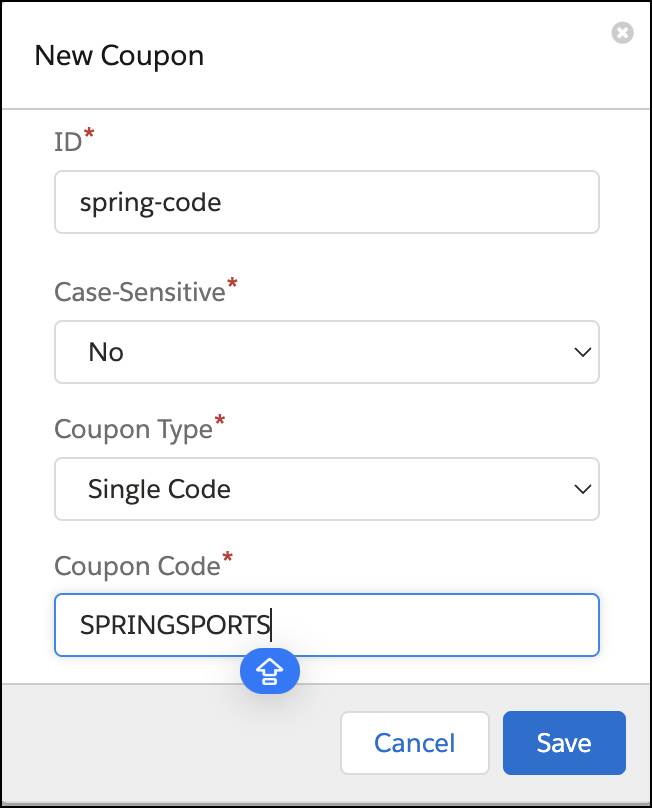
- Click Save.
- On the General tab (already open):
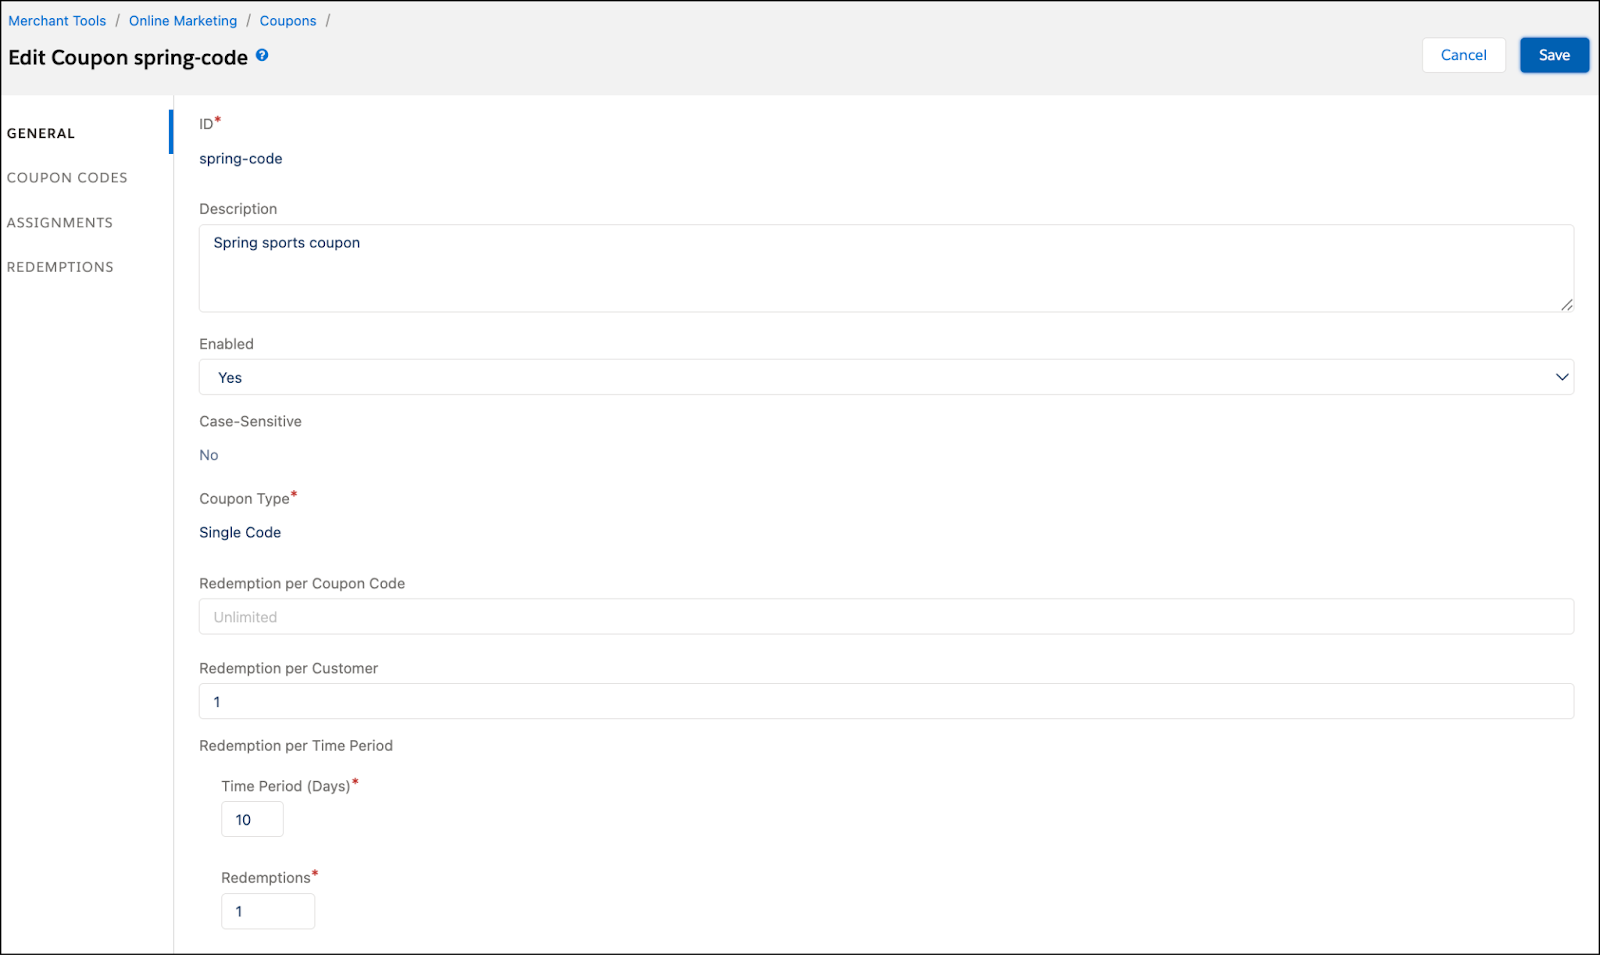
- Enter a description:
Spring sports coupon - Enable the coupon.
- Enter redemption limits per coupon code. Leave it unlimited.
- Enter the redemptions per customer:
1(This is the number of times the coupon can be redeemed per customer as represented by an email address.)
- Enter the redemptions per time period:
10 days, 1 redemption(This is the time period in days in a rolling window. For example, if the limit is 1 per week and the shopper uses the coupon on the 16th, they can use it again on the 23rd.)
- Click Save.
Brandon can assign the coupon to a campaign in the Coupon module. But remember, he wants to create all the qualifiers and promotions first, and then add them to the campaign.
Customer Groups
Brandon uses customer groups to show content slots, promotions, and sorting rules to specific customers, providing them with an awesome experience.
Customer Group Types
Here are the types of customer groups he can configure.
-
System: Pre-existing groups already available in Business Manager. They are Everyone, Registered, and Unregistered. You cannot change them.
-
Static: Add shoppers to the group manually one by one, or upload a list of shoppers from your customer relationship management (CRM) system.
-
Dynamic: Create a membership rule to place customers in a particular group. The rules are based on customer data attributes, for example, a customer’s birthday in 30 days.
He wants to configure these customer groups.
-
Static: Logged-in Loyalty Program member
-
Dynamic: Lapsed shoppers.
Lapsed shoppers have created a profile but haven't shopped for a while.
Create Customer Groups
Here’s how he creates the Loyalty Program customer group.
- In Business Manager, click App Launcher, and select Merchant Tools | Customers | Customer Groups.
- Click New.
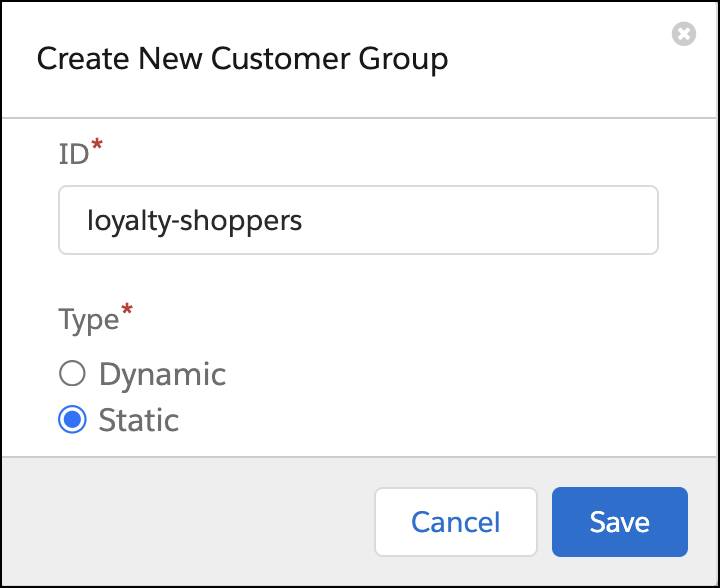
- Enter the ID:
loyalty-shoppers - Select the Type: Static
- Click Save.
- Click the Members tab.
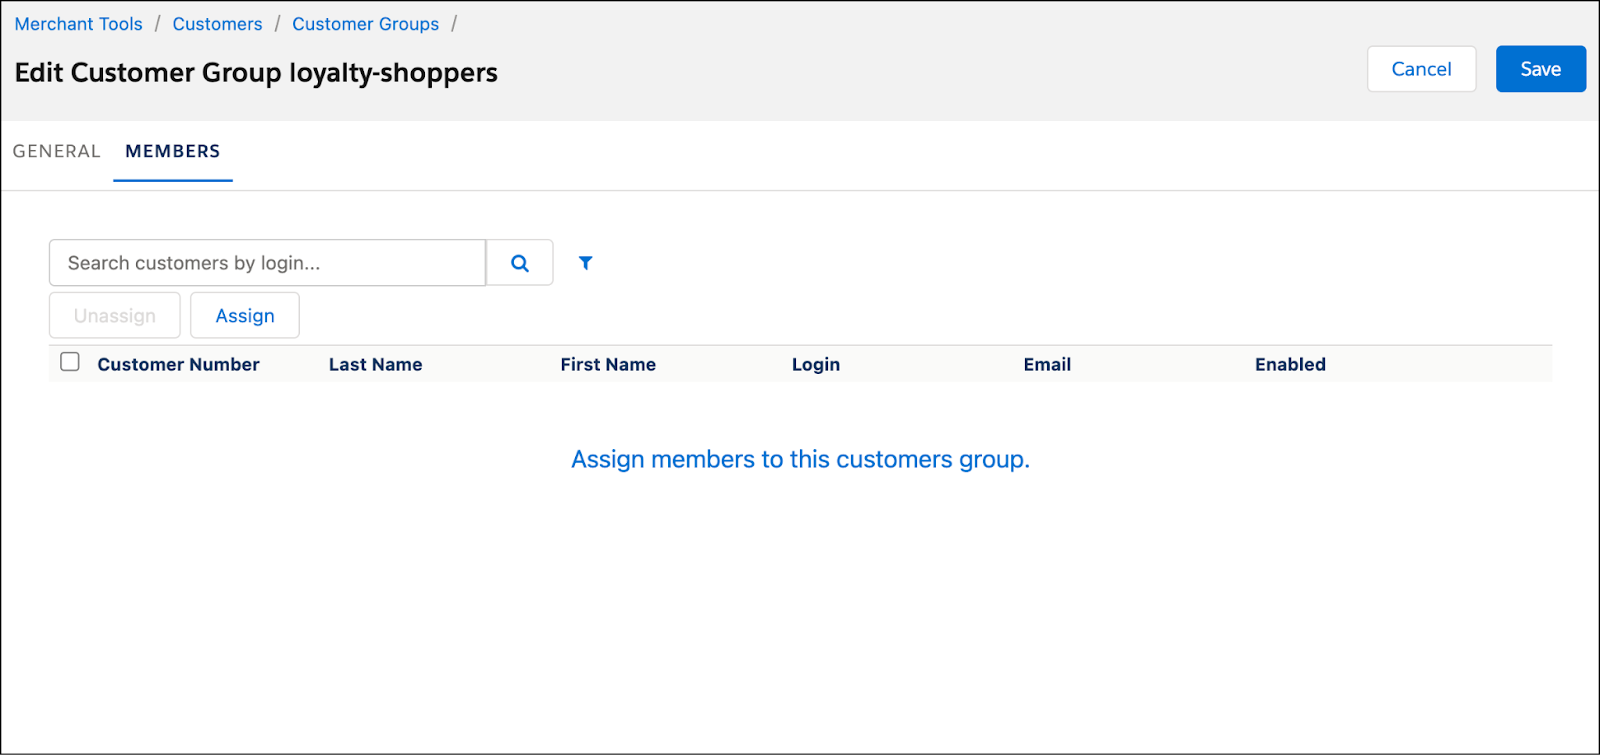
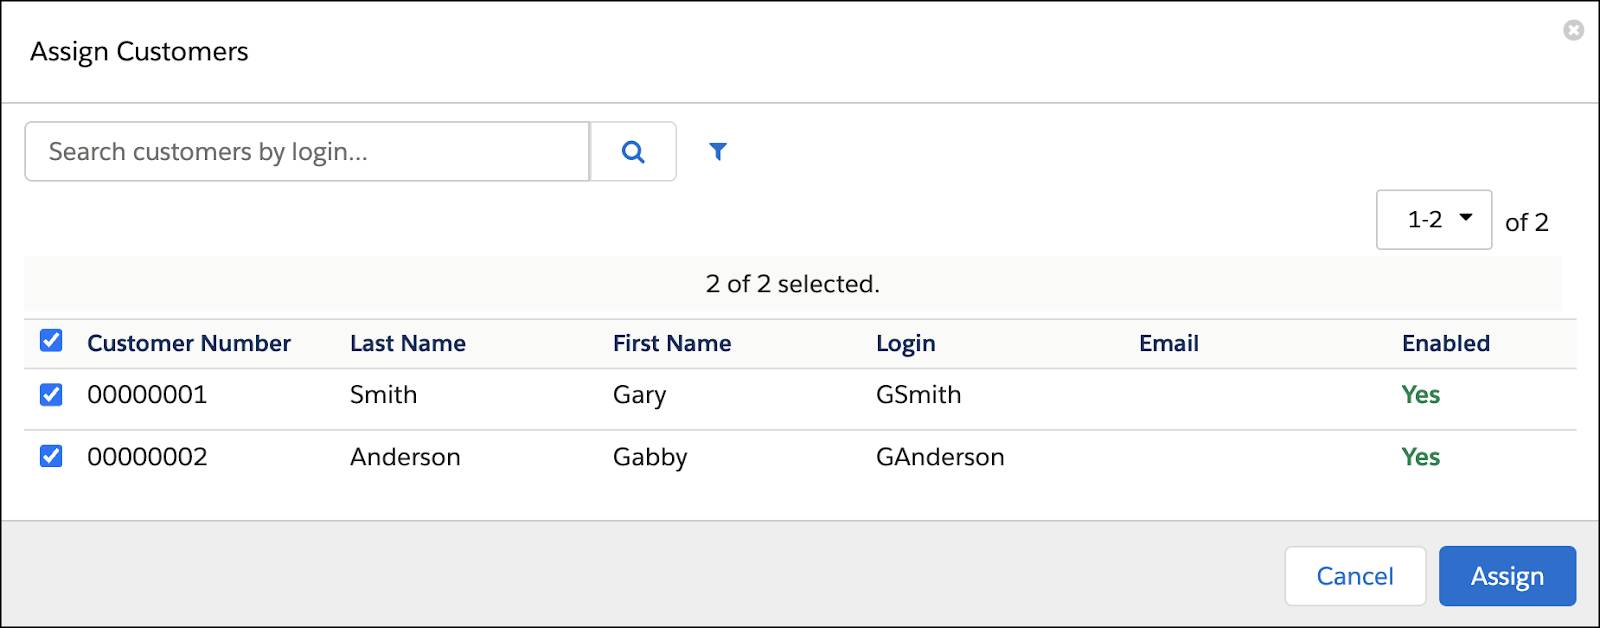
- Click Assign.
- Select the customers you want to add to the group and click Assign again. The customers listed added their credentials when they purchased products. For some merchants, the data is imported from a CRM system.
- Click Save.
Here’s how he creates the lapsed-shoppers customer group.
- In Business Manager, click App Launcher, and select Merchant Tools | Customers | Customer Groups.
- Click New.
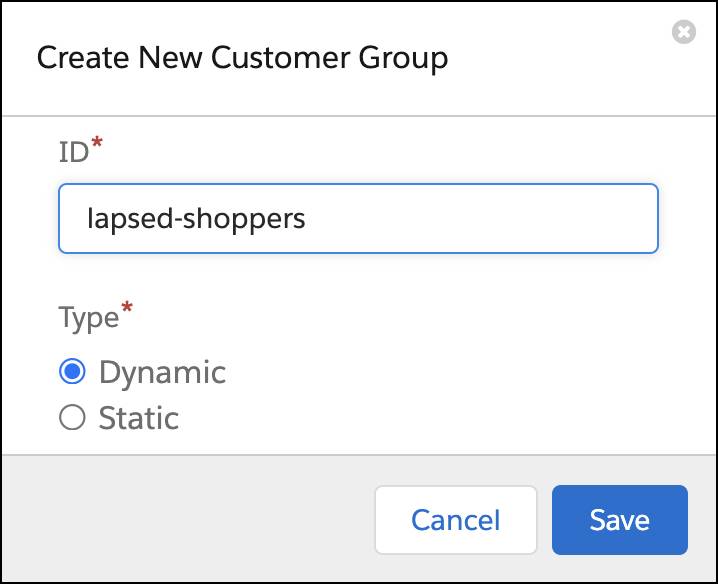
- Enter an ID:
lapsed-shoppers - Select Dynamic.
- Click Save.
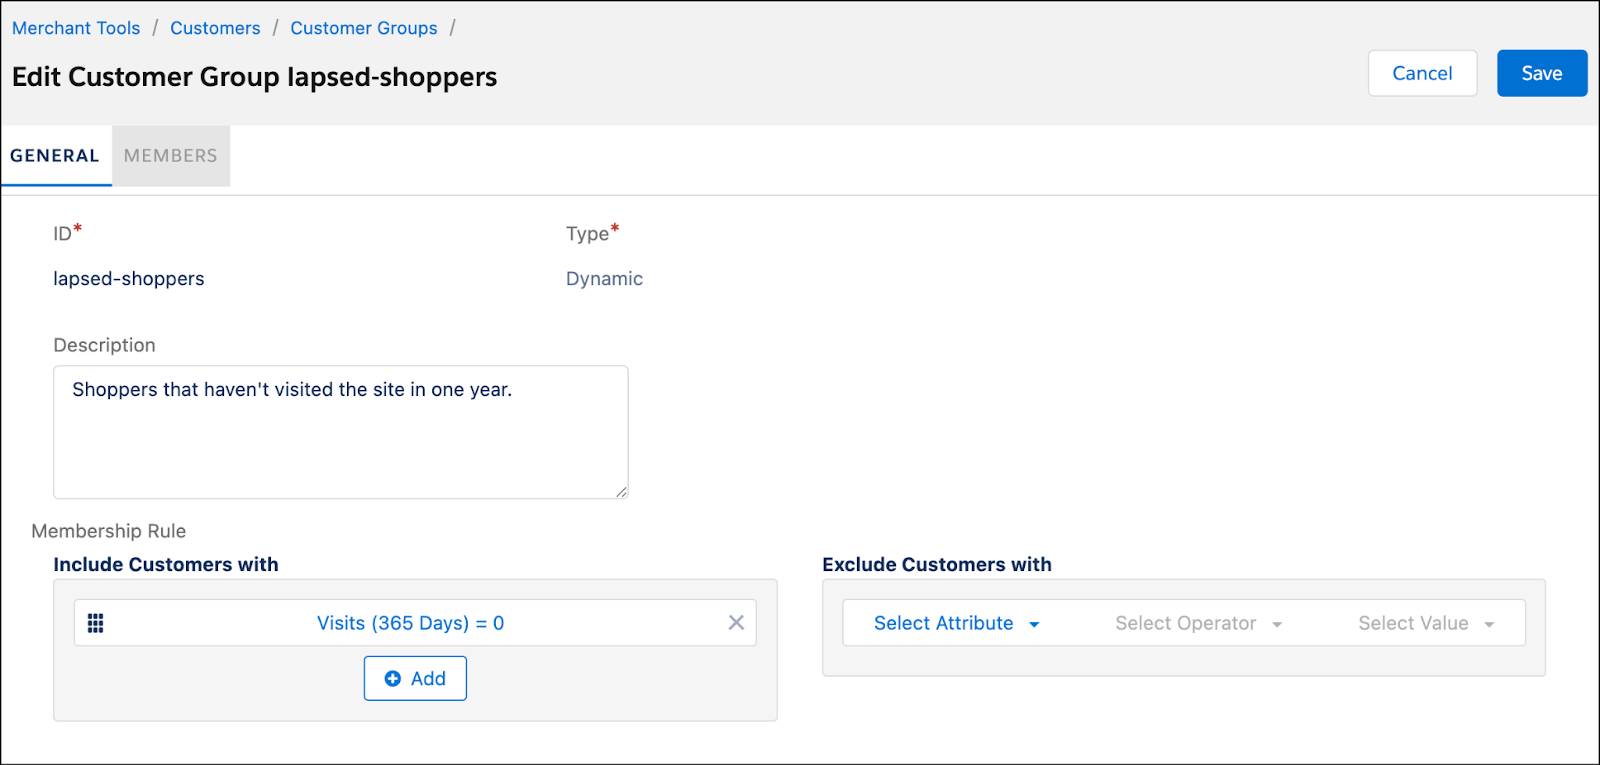
- On the General tab, enter a description:
Shoppers that haven't visited the site in one year. - In the Membership Rule: Include Customers with section, click Select Attribute.
- Select and enter the following: Attribute: Visits (365) Operator: is equal Value: 0
- Click Save.
Source Codes
When shoppers type coupon codes in a storefront to qualify for a promotion, the source codes can trigger different actions behind the scenes. They can:
- Direct customers to specialized landing pages, featured product detail pages, category lists, and URLs.
- Redirect them to other sites.
- Activate price books.
- Enable promotions.
What makes source codes special is that they can do different things. A source code can activate a price book, or you can use one as a qualifier in a campaign to activate promotions, sorting rules, or content slots.
Brandon wants to use a source code to activate a promotion when a shopper clicks a newsletter email. From a link in the email, the shopper navigates to the Cloud Kicks storefront, which stores the source code in a cookie on the shopper’s machine. Lucky them—they get free shipping on orders over US$100.
Brandon learns that he can create a source code group to contain one or more literal codes or patterns that match multiple codes. He uses SPORT[1..10] as the code, which means that shoppers can enter SPORT1 but not sport1.
He can map multiple codes to the same set of rules (price books, promotions, and redirects). He does this by defining them as part of a source code group, while still tracking results on a per source code basis. He can assign one or more source codes to a campaign, so that all the promotions within that campaign use those source codes.
Create Source Codes
Here’s how he creates a source code.
- In Business Manager, click App Launcher, and select Merchant Tools | Online Marketing | Source Code Groups.
- Click New.
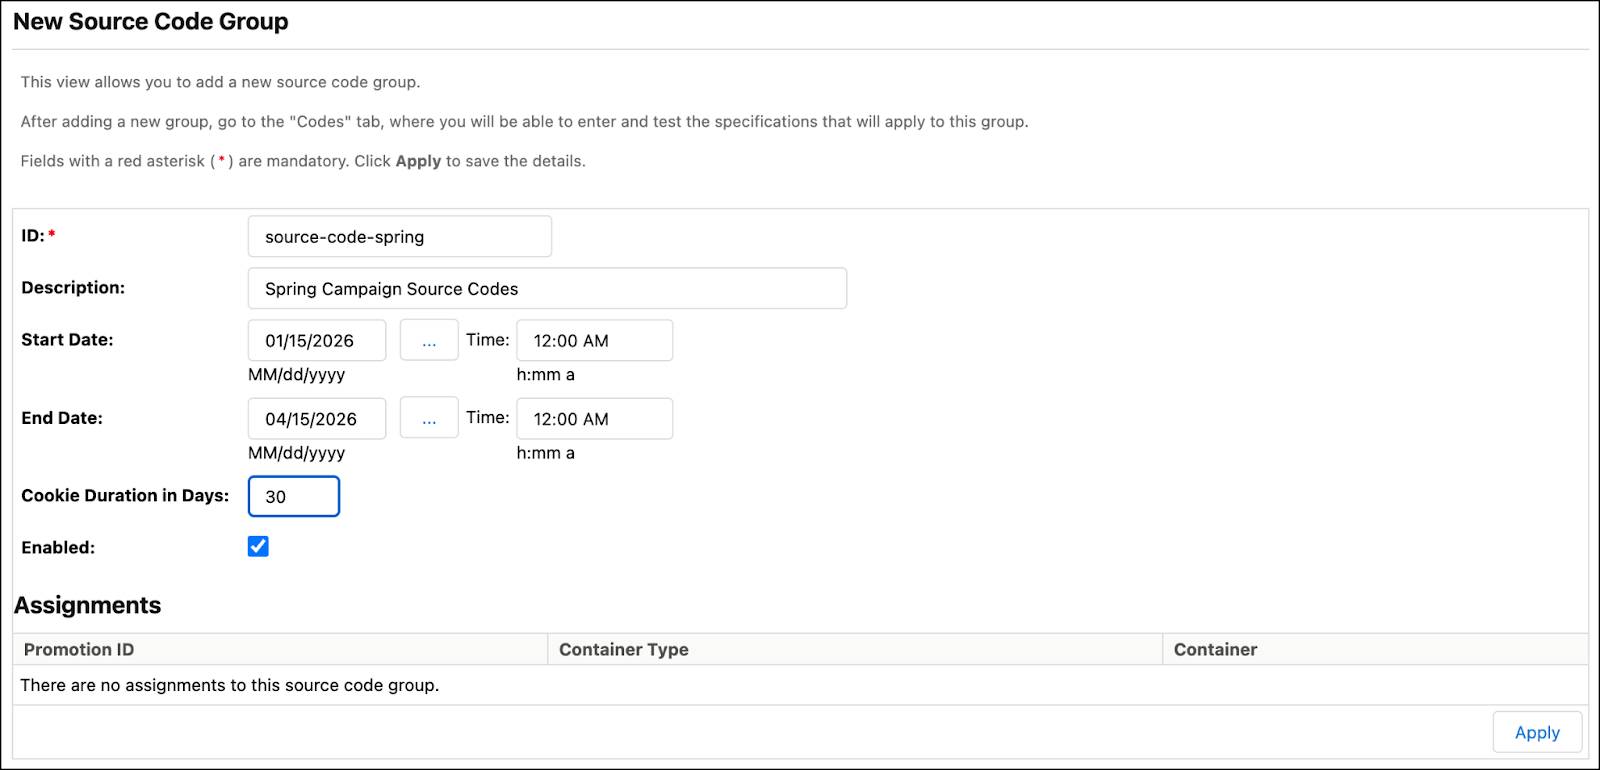
- Enter the ID:
source-code-spring - Enter the description and the start and end dates. Since Brandon’s adding it to a campaign, his dates must fall within the campaign’s schedule.
- Enter the cookie duration in days:
30 - Enable it.
- Click Apply.
- Click the Codes tab.
- Enter a code in the source code specification:
SPORT[1..10] - Click Add.
- Test your code.
- Enter
sport1in the Source Code file and click Test Match. You get an error message saying that it doesn’t match.
- Enter
SPORT1in the Source Code file and click Test Match. You get a message saying that it matches.
Next Steps
In this unit, Brandon learned about promotion qualifiers, including coupons, customer groups, and source codes. You followed along as he created qualifiers for his Spring campaign. Next, he learns how promotions work.
Resources