Configure Actionable List Definitions
Learning Objectives
After completing this unit, you’ll be able to:
- Create actionable list definitions.
- Explain how to select the default visible columns for actionable lists.
- Set the display format for actionable list columns.
- Activate actionable list definitions.
Current Requirement at Cumulus
In this module, we assume you’re a Salesforce admin who’s authorized to set up Actionable Segmentation. If you’re not an admin, that’s OK. Read along to learn how your admin would take the steps in a production org. While this module focuses on wealth management, Actionable Segmentation works equally well with other Agentforce Financial Services subverticals, including insurance, retail banking, and commercial banking.
Cumulus Bank just announced its quarterly targets. Ryan and the other financial advisors at Cumulus get Assets Under management (AUM) target of $50 million. Perfect timing! After hearing about Actionable Segmentation from Matt, Ryan decides to use the solution to create actionable lists and sell the financial products to the prospective customers.
Matt decides to help Ryan, and gets started with configuring Actionable Segmentation in the org.
Assign Permission Sets
Matt begins by giving financial advisors access to the Actionable Segmentation feature. To learn how to assign permission sets, check out Assign Permission Sets for Actionable Segmentation.
Enable Actionable Segmentation
Matt then enables the Actionable Segmentation feature in Setup to create actionable list definitions. To learn how to enable Actionable Segmentation, check out Enable Actionable Segmentation.
Set Tab Visibility and Assign Object Permissions
Matt sets the tab visibility and then enables permissions for the Actionable List, Actionable List Member, and Actionable List Column objects to create, edit, and view actionable lists.
To learn how to set the tab visibility and assign object permissions, check out Set Tab Visibility and Assign Object Permissions.
Create an Actionable List Definition
You use actionable list definitions to build datasets containing records that join information across multiple objects. For Cumulus, Matt builds datasets that contain records of high-net-worth individuals by performing cross-object joins of Account, Opportunity, and Asset objects.
- From Setup, in the Quick Find box, enter
Actionable Segmentation, and then select Actionable Segmentation Settings.
- Click New List Definition.
- In the New Actionable List Definition window, provide the following details.
- Name:
High Net worth Individuals - Object: Select Account

- Click Save & Next.
- In the Configure data process engine definition window, click Launch Data Processing Engine.

- On the Data Processing Engine page, create data source nodes for all the objects that are required to create the list definition.
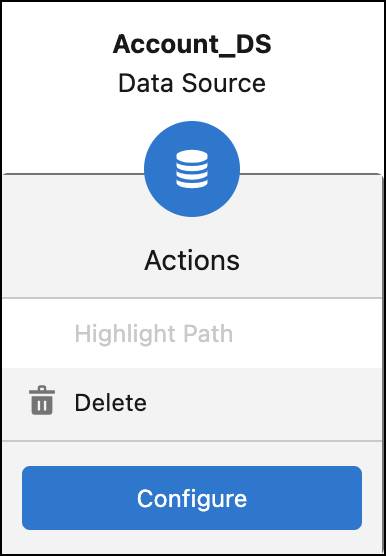
- Click Data Source Node.
The first node - Account_DS is created.
- Click Configure.
- The Select Source and Fields field is populated with
Objectand the Source Object field is populated withAccount.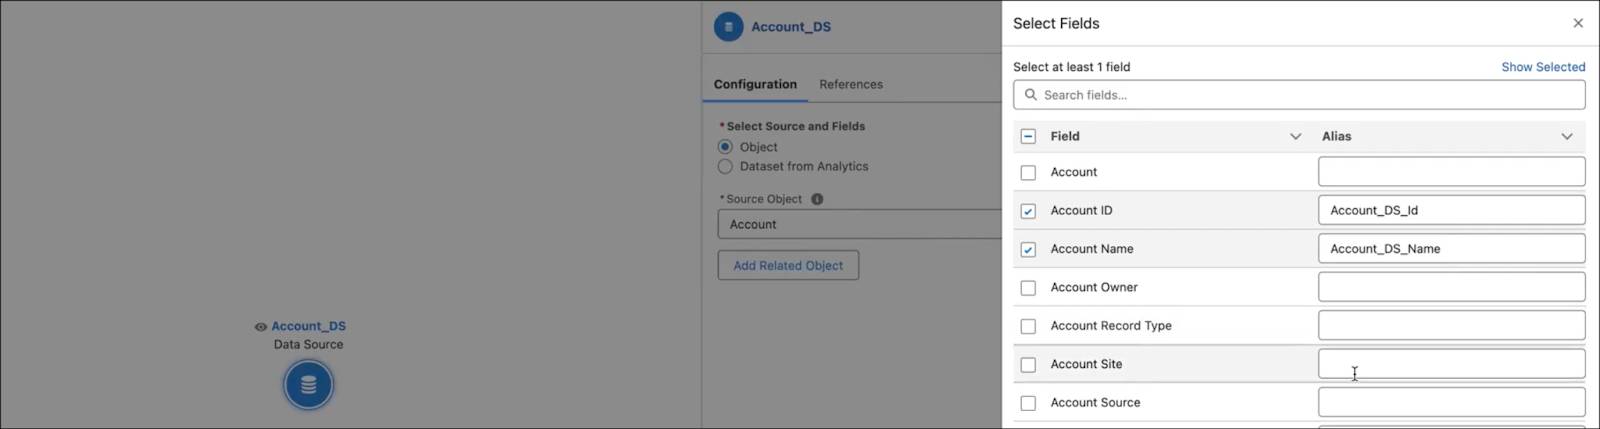
- To add the data source nodes for Opportunity and Asset objects, repeat the previous steps.

To learn about data sources, check Data Sources.
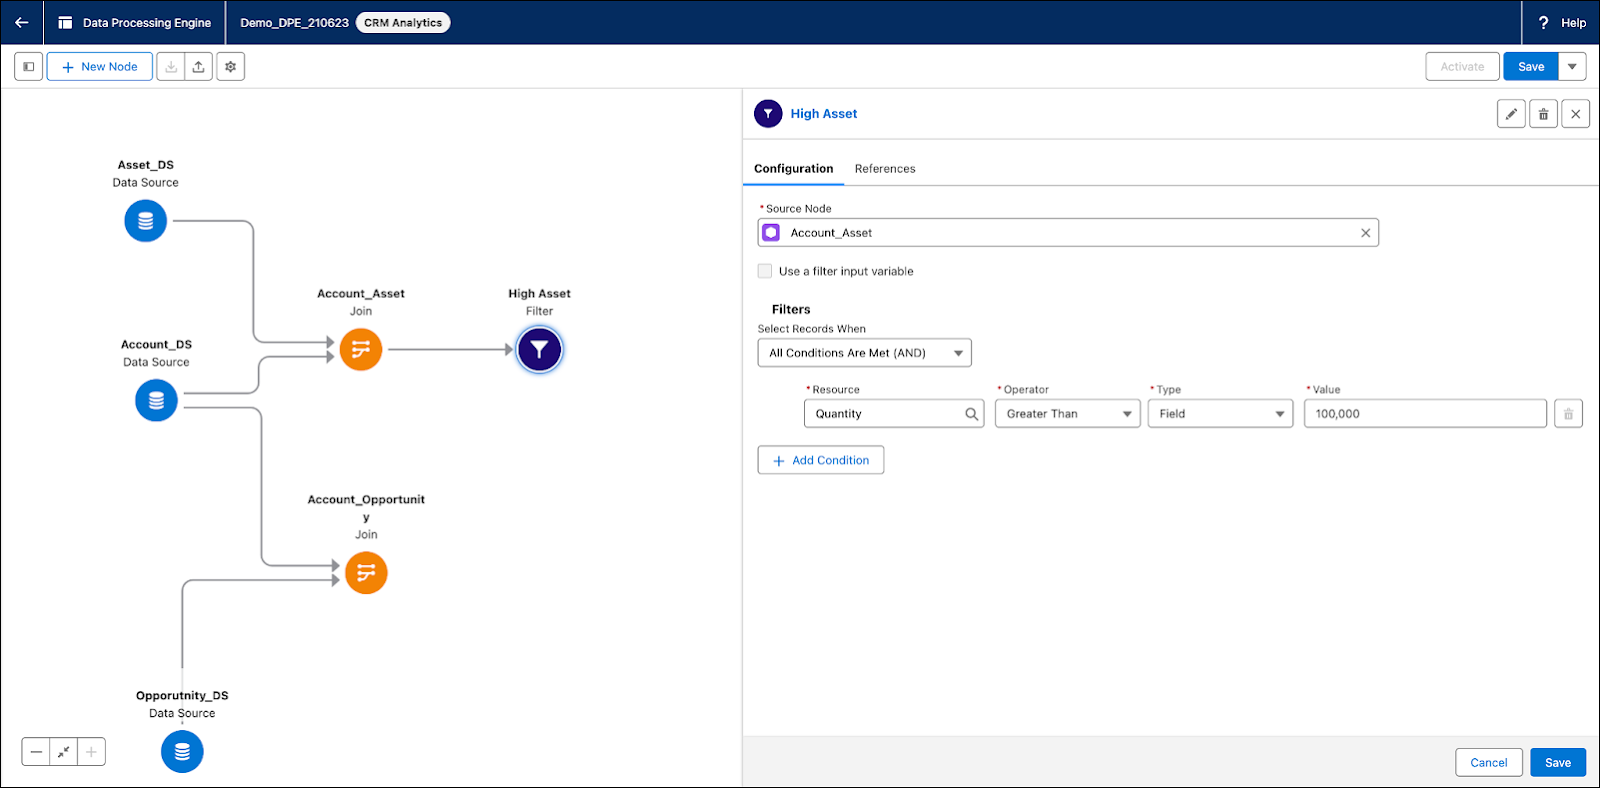
7. The next step is to join and filter the data source nodes to create a desired dataset.
Matt joins Account with Assets, and then Account with opportunity datasets. This action creates a consolidated dataset containing entries of Account-Asset and Account-Opportunity. 
To learn about creating joins and filters, see Joins and Filters.
8. Next, create a condition to filter records from Account_Asset source where the quantity of assets is greater than $100,000.
9. Aggregate the total quantity of assets under Account node using the Sum function. Remember, the Grouped By field must always point to the account ID from which the Actionable List Definition form is created.
- In the Source Node field, select High Asset.
- In the Aggregate Function field, select Sum.
- In the Field field, select Quantity.
- In the Alias field, enter
Total_Asset.

10. Aggregate the total quantity of opportunities under the Account node.
- In the Source Node field, select Account_Opportunity.
- In the Aggregate Function field, select Sum.
- In the Field field, select Quantity.
- In the Alias field, enter
Total_Opportunity.
Matt has completed the aggregation configuration, and the data is now available in two silos: Account-Asset information and Account-Opportunity information. Matt joins this data to get a holistic view. To learn more about creating Joins, check out Joins.
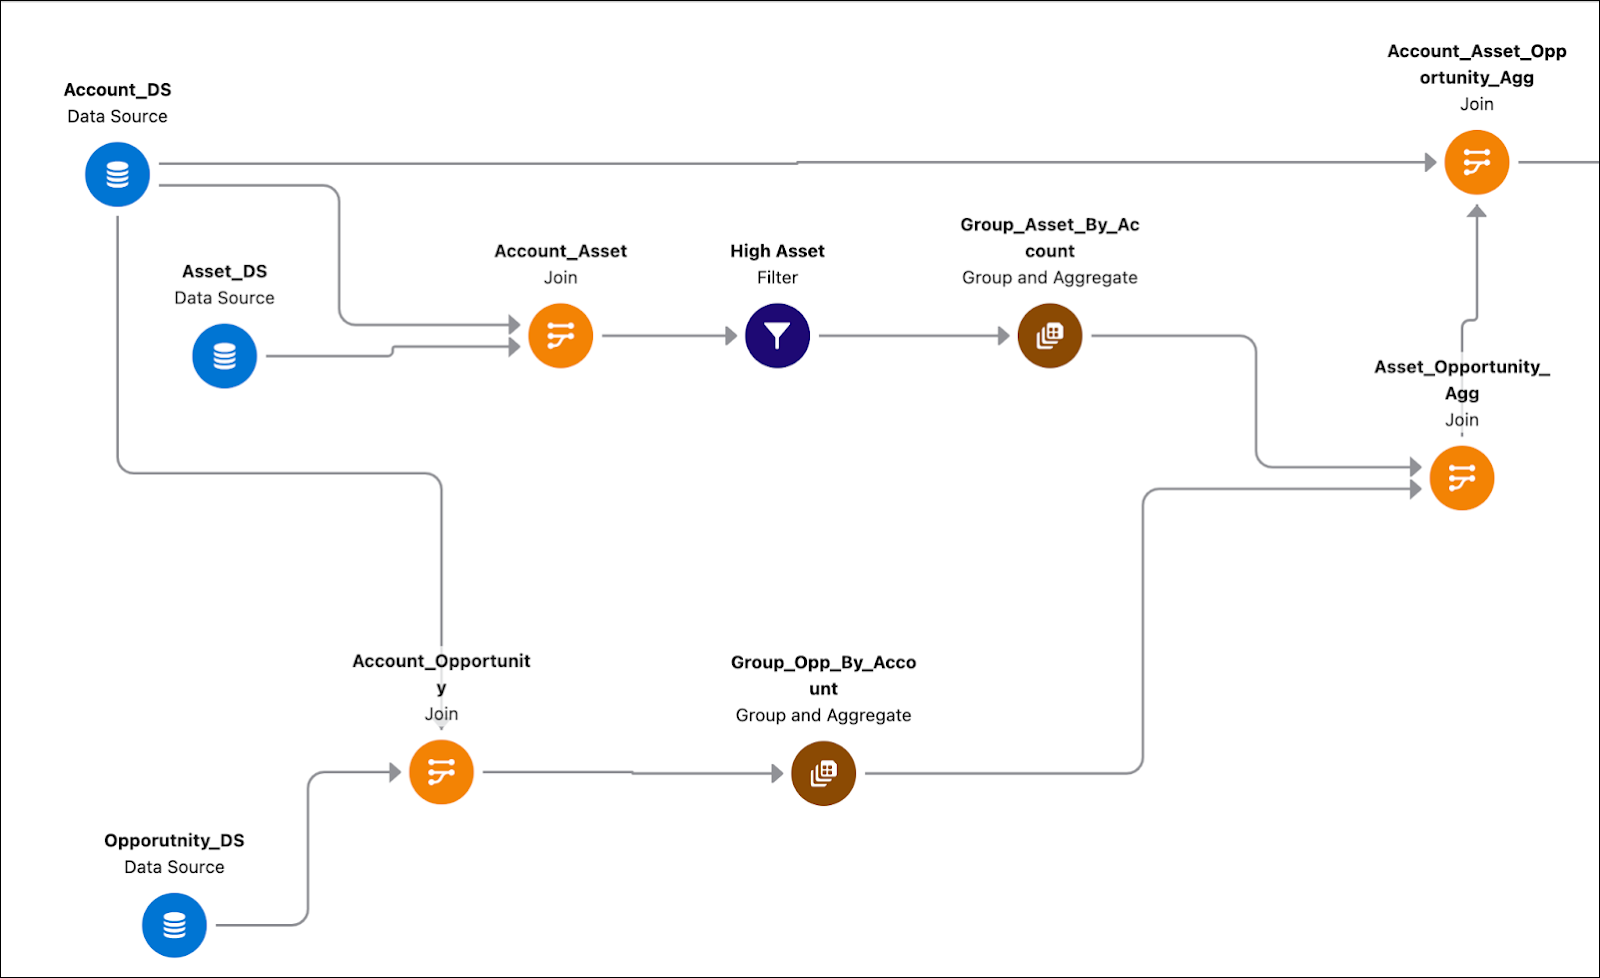
11. Matt is glad that the data he needs is ready. He now creates a write-back node to save this entire data in a dataset.
- In the Source Node, select Account_Asset_Opportunity_Agg.
- In the Target Type field, select Save as dataset in Analytics.
- In the Dataset Name field, select HighNetWorthClients.
- In the Field Mapping section, select Account_DS_Id, Account_DS_Name, AnnualRevenue, Industry, Total_Asset, and Total_Opp_Amount.
- In the Folder Name field, select ActionableSegmentation.

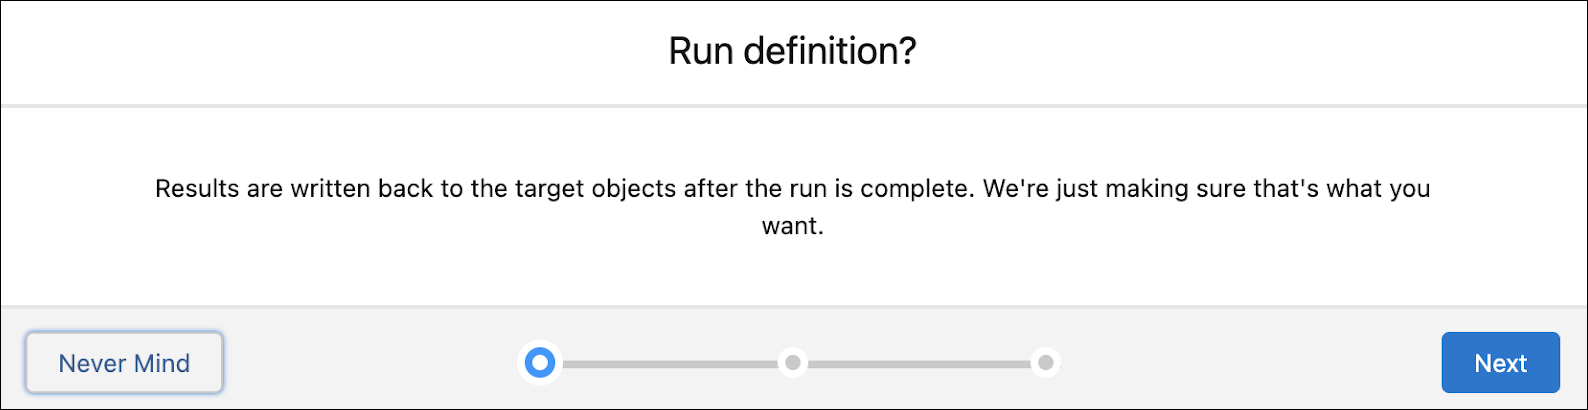
12. Save the definition, activate it, and then run it.
13. From Setup, in the Quick Find box, enter Actionable Segmentation Settings, and then select Actionable Segmentation Settings. Notice the new actionable list definition, and its associated dataset name and status.

Select Default Visible Columns for Actionable Lists
Matt wants to create actionable lists by using the dataset records that are associated with the High Net Worth Individuals actionable list definition. So, he sets the fields from this dataset to be visible as default columns in the actionable list and sets their display order.
- On the Select visible columns window, in the Available Fields section, select AccountName, Industry, AnnualRevenue, TotalAsset, and TotalOpportunityAmount.
- Use the right arrow to add the fields, and up and down arrows to change their order of appearance.
- Save the changes.

To learn more about selecting default visible columns for actionable lists, check out Select Default Visible Columns for Actionable Lists.
Set the Display Format for Actionable List Columns
Matt wants his list creators to interpret data easily, so he sets the format of dataset fields, and changes the order in which these fields appear in actionable lists.
- From Setup, in the Quick Find box, enter
Actionable Segmentation, and then select Actionable Segmentation Settings.
- For an actionable list definition, click
 , and select Edit Column Display Format.
- Check the suggested column formats and click Apply Suggestions. You can also select a different column format for each of these fields. Make sure you select the appropriate format to avoid uninterpretable or empty fields.
- Save the changes.
Configure Actionable List Member Statuses
Next, Matt sets the statuses of client engagement activities planned for list members.

Activate Actionable List Definition
So far, Matt has created the dataset, and configured default visible columns and list member status values. Next, he activates the actionable list definition so that it’s available for Ryan to create an actionable list.
To learn how to activate an actionable list definition, check out Activate Actionable List Definitions.
Add Actionable List Engagement to a Page
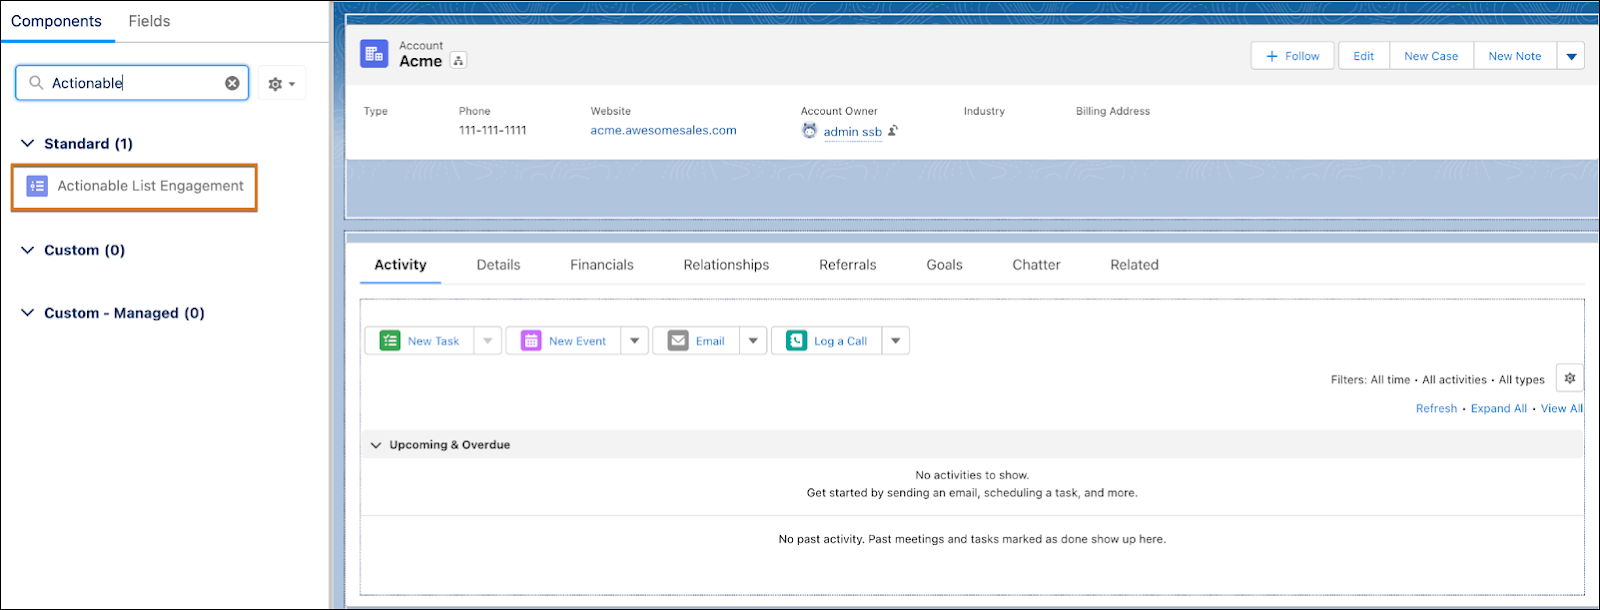
Financial Advisor Ryan and his teammates are always looking to engage more efficiently with their prospects. The Actionable List Engagement component helps them do just that. So, Matt adds the component to account and contact record pages.
- Edit an account or contact record page in Lightning App Builder.
- Drag the Actionable List Engagement component onto the page.
- Save your changes, and then activate the page.
Provide Access to OmniScripts
As the final step, Matt gives Ryan access to OmniScripts, so that they appear in the Actionable List Engagement component. Ryan needs OmniScripts while assigning an actionable list to a service agent.
- From Setup, in the Quick Find box, enter
Profiles, and then select Profiles.
- Click Edit next to the appropriate user profile.
- In the Standard Object Permissions section, enable the required permissions for the Actionable Lists object.
- Save your changes.

What’s Next?
Matt has successfully configured Actionable Segmentation for Ryan, and Ryan is thrilled with all the possibilities. Follow along as he creates actionable lists in the next unit.
Resources
- Salesforce Help: Set Up Actionable List Definitions
- Salesforce Help: Configure Actionable List Member Statuses
- Salesforce Help: Data Processing Engine Nodes
- Salesforce Help: Data Sources
- Salesforce Help: Filters
- Salesforce Help: Groups and Aggregates
- Salesforce Help: Writeback Objects
- Salesforce Help: Permission Sets