Set Up Your Trailhead Playground
Introduction
Get Cloudy Consulting is a Salesforce consulting company that just got a new project from a client of theirs, Books4Everyone, an up-and-coming etailer that is moving their systems to Salesforce for scalability. They sell books, and accept reviews from their customers so they know which books are good to keep stocked. Get Cloudy Consulting previously created a simple application for Books4Everyone that kept track of authors, books and recommendations from their customers. Books4Everyone has decided that they love working in Salesforce and need more functionality on their custom home page.
The .NET developer at Books4Everyone gave Get Cloudy Consulting requirements, including snippets of code SQL queries they use to report on the data. Since you already know SQL, they asked you to convert the functionality to SOQL. SOQL, or Salesforce Object Query Language, is a query language similar to SQL. It was developed by Salesforce to retrieve data for its use in Salesforce code. It provides a SELECT method and allows you to identify the fields and objects you want data from.
Through this project you will take your SQL knowledge and turn it into SOQL skills!
Follow Along with Trail Together
Want to follow along with an expert as you work through this step? Take a look at this video, part of the Trail Together series.
Create a New Trailhead Playground
For this project, you need to create a new Trailhead Playground. Scroll to the bottom of this page, click the playground name, then click Create Playground. It typically takes 3–4 minutes to create a new Trailhead Playground.

Launch Your Trailhead Playground and Install a Package
Let's get started by opening your Trailhead Playground and installing a package. First, scroll to the bottom of this page and click Launch. If you see a tab in your org labeled Install a Package, great! Follow the steps below.
If not, from the App Launcher (![]() ), find and open Playground Starter and follow the steps.
), find and open Playground Starter and follow the steps.
- Click the Install a Package tab.
- Paste
04t8b000001FBRGinto the field. - Click Install.
- Select Install for Admins Only, then click Install.
When the package is finished installing, you see a confirmation page and get an email to the address associated with your playground.
Books4Everyone App
From the App Launcher (![]() ), find and open Books4Everyone. The current books for everyone app has 5 tabs.
), find and open Books4Everyone. The current books for everyone app has 5 tabs.
- Home—Where we will be doing most of our work, updating the home page to be more useful
- Books—Information about all the books Books4Everyone has
- Author—Every book has an author, and this tab shows off all of an author's books
- Recommendations—The reviews left by Books4Everyone readers
-
Data Import—This gives us sample data from Books4Everyone
- Click Data Import, then Initialize Sample Data to load the data.
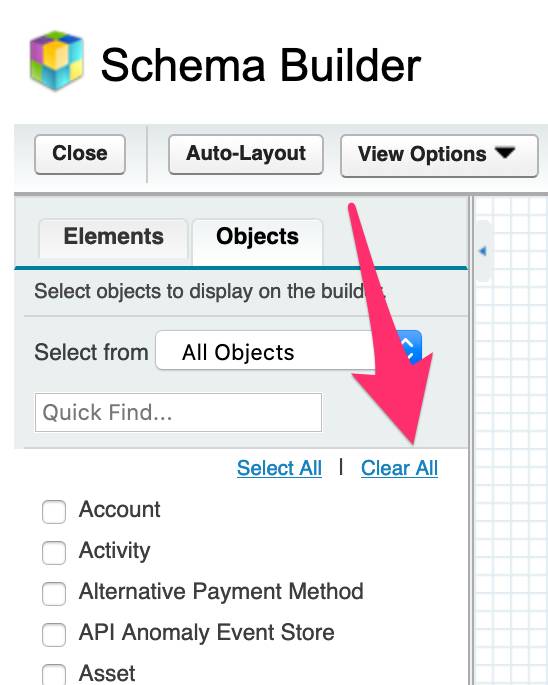
Since you will be working with these tabs throughout this project, it's important to know which objects are represented in each tab and how they are all related. To see this entity diagram in your org, from Setup enter Schema Builder in the Quick Find box and then click Schema Builder.
Once in Schema Builder:
- From the Object Selector on the left, click Clear All.
- For Select from, select Custom Objects.
- Select Author, Book, and Recommendation from the list.
- You may need to drag the objects to be next to each other on the screen.

As we continue to build out our new homepage, refer back to this entity diagram as needed.