Upgrade to Dynamic Forms
Learning Objectives
In this project, you’ll:
- Migrate a record page to Dynamic Forms.
- Format record fields to only appear under specific conditions.
Introduction to Dynamic Forms
Record pages can get quite congested with fields, on fields, on fields. All fields are important, but do they all need to be seen by Salesforce users 100% of the time? The answer is no.
Sometimes it depends on the data. For example, a car dealership enters leads into its Salesforce org. Does the 4-wheel drive field need to be visible all the time? No, it only needs to be seen when an applicable vehicle type is selected, such as SUV or truck. Previously, the best option to achieve such functionality was to create multiple page layouts, which is labor-intensive.
Dynamic forms to the rescue!
Ready to Get Hands-on with Dynamic Forms?
Create a new Trailhead Playground now to follow along and try out the steps in this module. Scroll to the bottom of this page, click the playground name, and then select Create Playground. It typically takes 3–4 minutes for Salesforce to create your Trailhead Playground.
Note: Yes, we really mean a brand-new Trailhead playground! If you use an existing org or playground, you can run into problems completing the steps in this project.
Get Dynamic
It’s time to step into the wonderful world of Dynamic Forms! Use the Lightning App Builder to upgrade the records of the Account object to use Dynamic Forms.
- Click the App Launcher (
 ).
).
- Select the Sales app.
- Click the Accounts tab.
- Click the down arrow next to Recently Viewed, and select All Accounts.
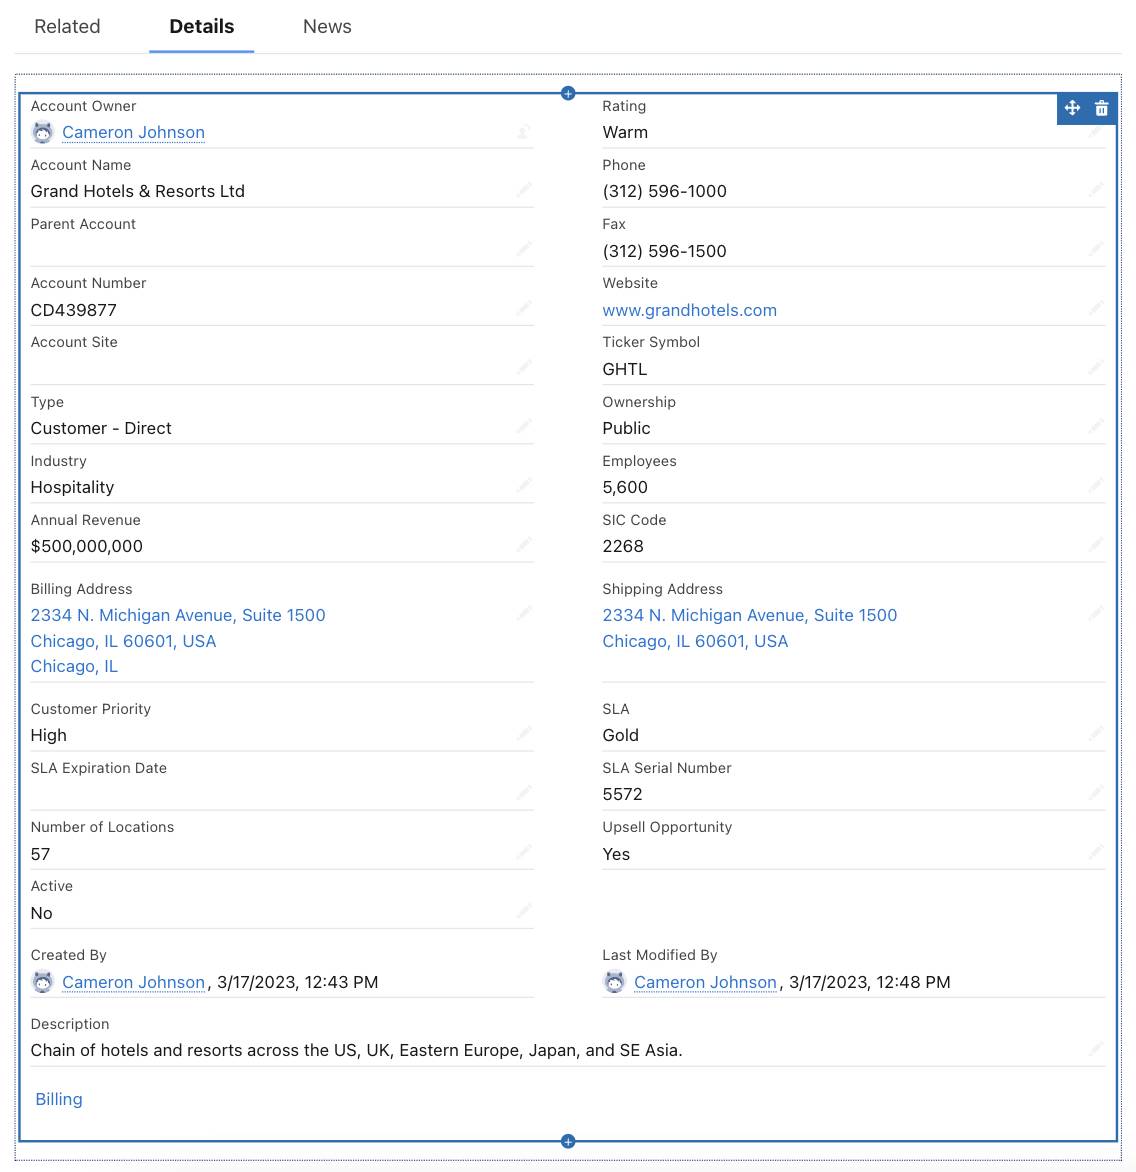
- Open the Grand Hotels & Resorts Ltd record.
- From the Grand Hotels & Resorts Ltd record, click the setup icon and select Edit Page.

- Click the Details tab in the page editor then select the contents of the Details section.

- With the Details section selected, click Upgrade Now in the Record Detail to upgrade to Dynamic Forms.
- Click Next.
- Select the radio button next to Account Layout.
- Click Finish.
Customize the Record with Dynamic Forms
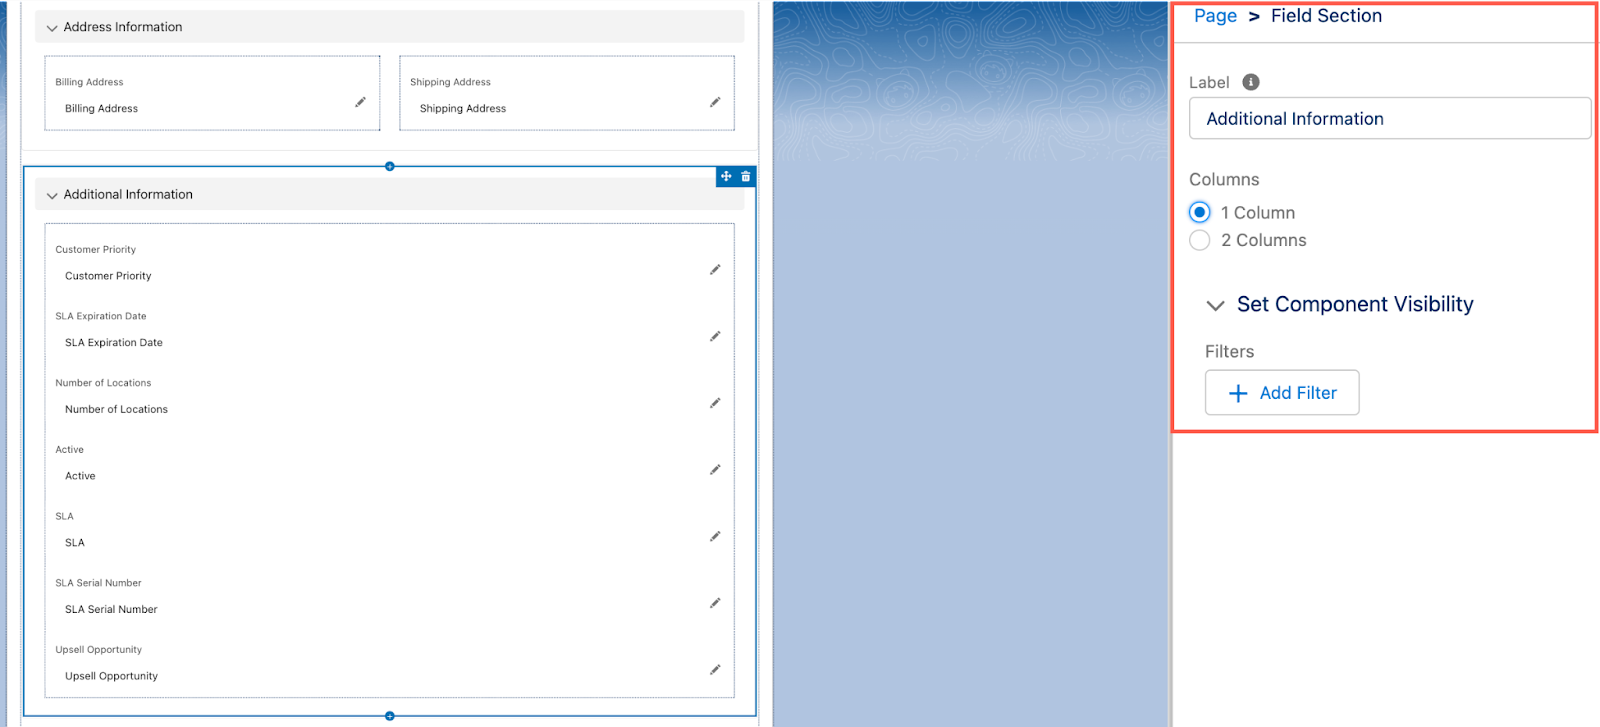
- Select the Additional Information section and select 1 Column in the details panel on the right.

- Drag and drop the SLA Expiration Date field to immediately above the SLA Serial Number field.
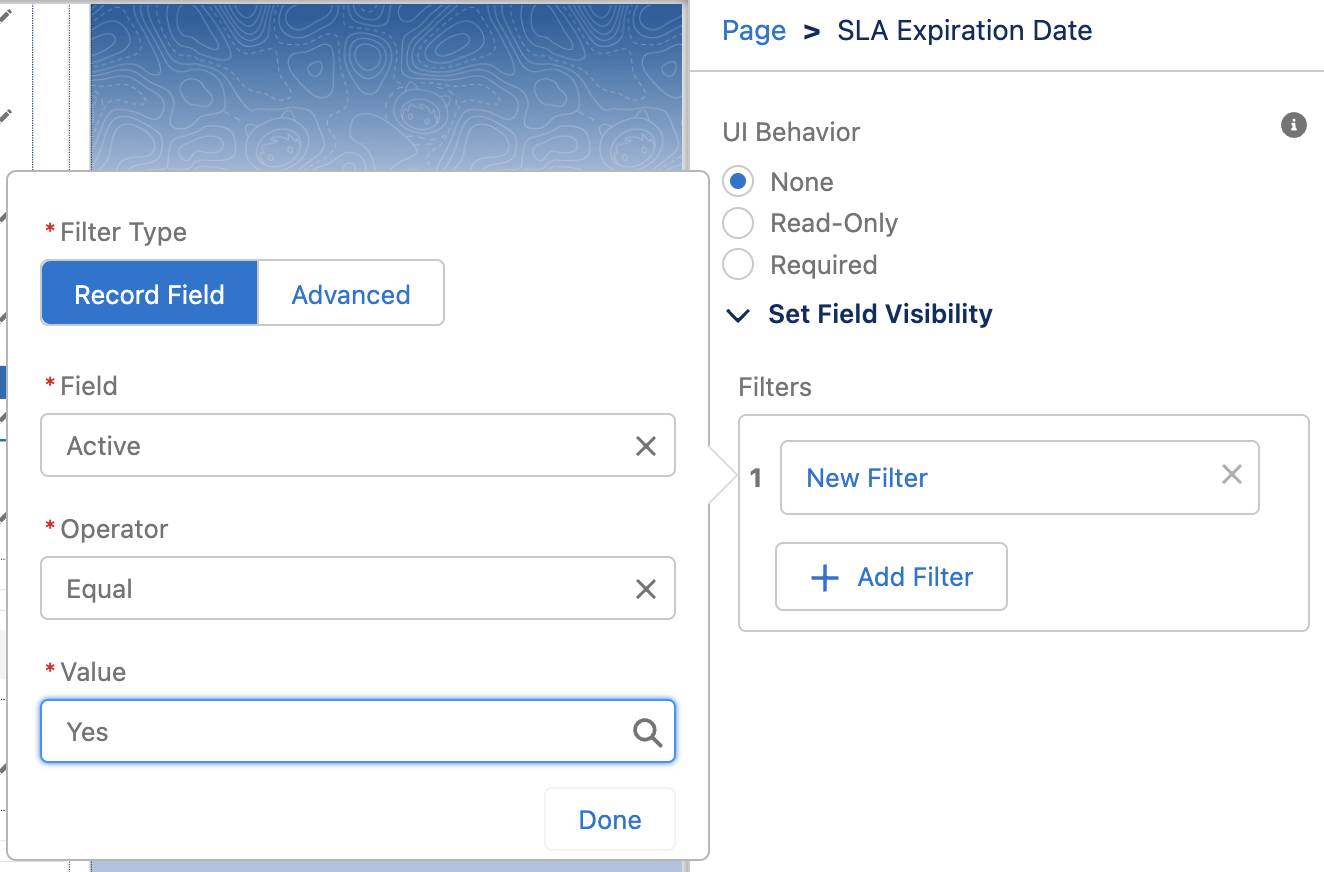
- With the SLA Expiration Date field still selected, click Add Filter in the details panel on the right.
- Enter and select Active in the Field input.
- Ensure operator is set to Equal.
- Adjust the Value to Yes.

- Click Done.
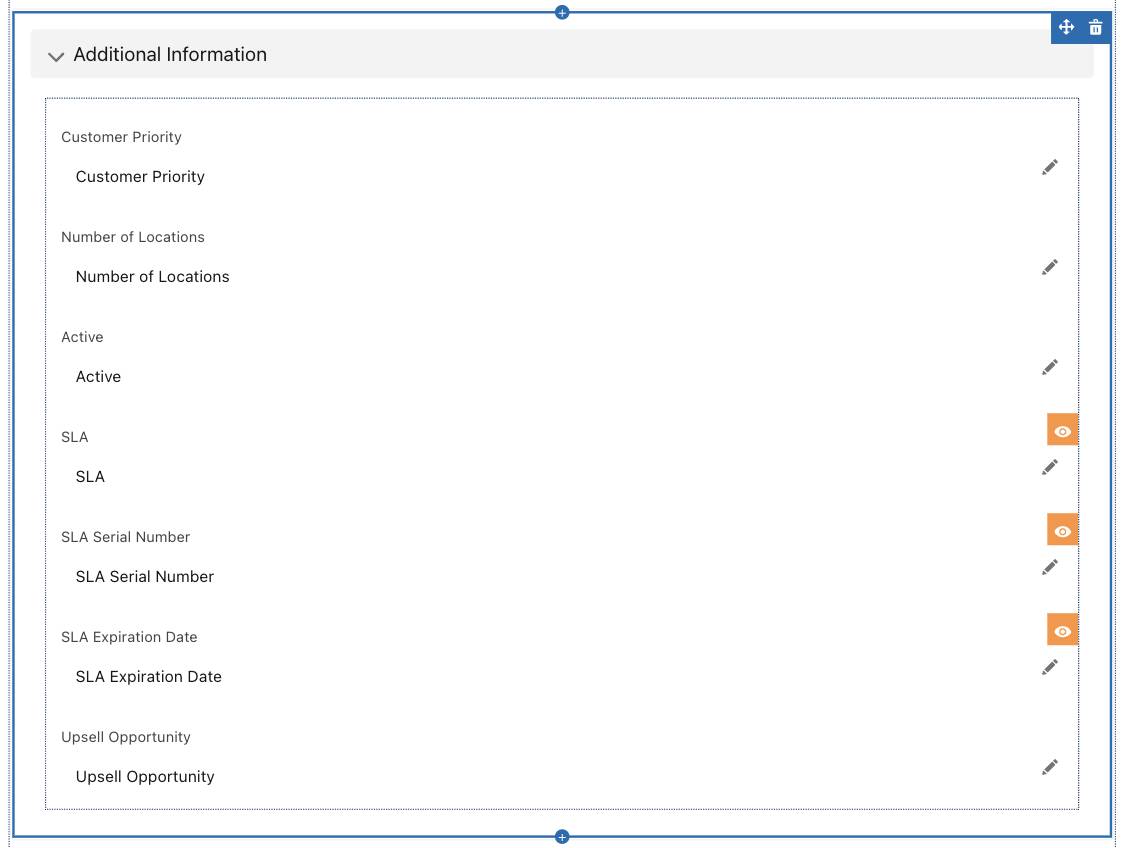
- Repeat steps 4 through 7 to adjust the visibility of two other fields, SLA and SLA Serial Number, to only show when the Active field equals Yes.
 Note: SLA, SLA Serial Number, and SLA Expiration Date fields have orange icons to denote that a visual filter has been applied to these fields.
- Click Save and then Activate.
- Click Assign as Org Default.
- Select Desktop and phone.
- Click Next and then Save.
- Click the back arrow in the upper left to leave the Lightning App Builder.
Test the Dynamic Forms
- If necessary, navigate back to the Grand Hotels & Resorts Ltd record.
- Click the Details tab.
- In the Additional Information section, click the pencil to the right of the Active field to edit.
- Toggle between Yes and No to see the three SLA fields visually appear and disappear. Note: These fields are just visually hidden, not deleted. These fields are still available in reports and dashboards.
- Set the Active field as No.
- Click Save.
And just like that, you’ve converted a standard object’s record pages to use Dynamic Forms and adjusted certain fields in a record to only appear when needed. If this were a Dynamic Form, you’d be seeing a congratulations message because the success checkbox equals true!
Resources
- Salesforce Help: Dynamic Forms Tips and Considerations
- Salesforce Help: Dynamic Forms Limitations
- Salesforce Help: Dynamic Forms and Mobile Using the Record Detail - Mobile Component
