Create an Insight
Learning Objectives
In this project, you’ll:
- Review insight functionality.
- Create a calculated insight with the builder.
- View your insights.
About Data 360 Insights
With a unified and harmonized dataset, Data 360 provides powerful tools for analysis, insight generation, and prediction. There are many ways to query and manipulate your data. In this project, you focus on calculated insights. Calculated insights are used to evaluate performance, understand customer behavior, speed up queries, simplify segmentation, and more. If you’d like to explore the insights builder before you complete these steps, check out the module, Insights Builder in Data 360.
Verify Unification
To make sure the org is ready for this step, let’s verify that the identity resolution ruleset from the previous project has completed. You know it’s done when data shows up in the Resolution Summary section.
- From Data Cloud, select the Identity Resolutions tab.
- Select the ruleset you created in the previous project.
- Verify data is showing. This can take some time. Once it’s displaying information, you can head to the next step.


Create a Calculated Insight from the Builder
In this project, you calculate the number of cases for each unified individual. This is a simple calculation given this org has one source for cases. But if you have connected data from different service systems (for example, Zendesk), having a total number of cases across all orgs and systems can be very useful.
- Go to the Calculated Insights tab and click New.
- With the default data space prechosen, select Calculated Insight and Use Visual Builder and click Next.
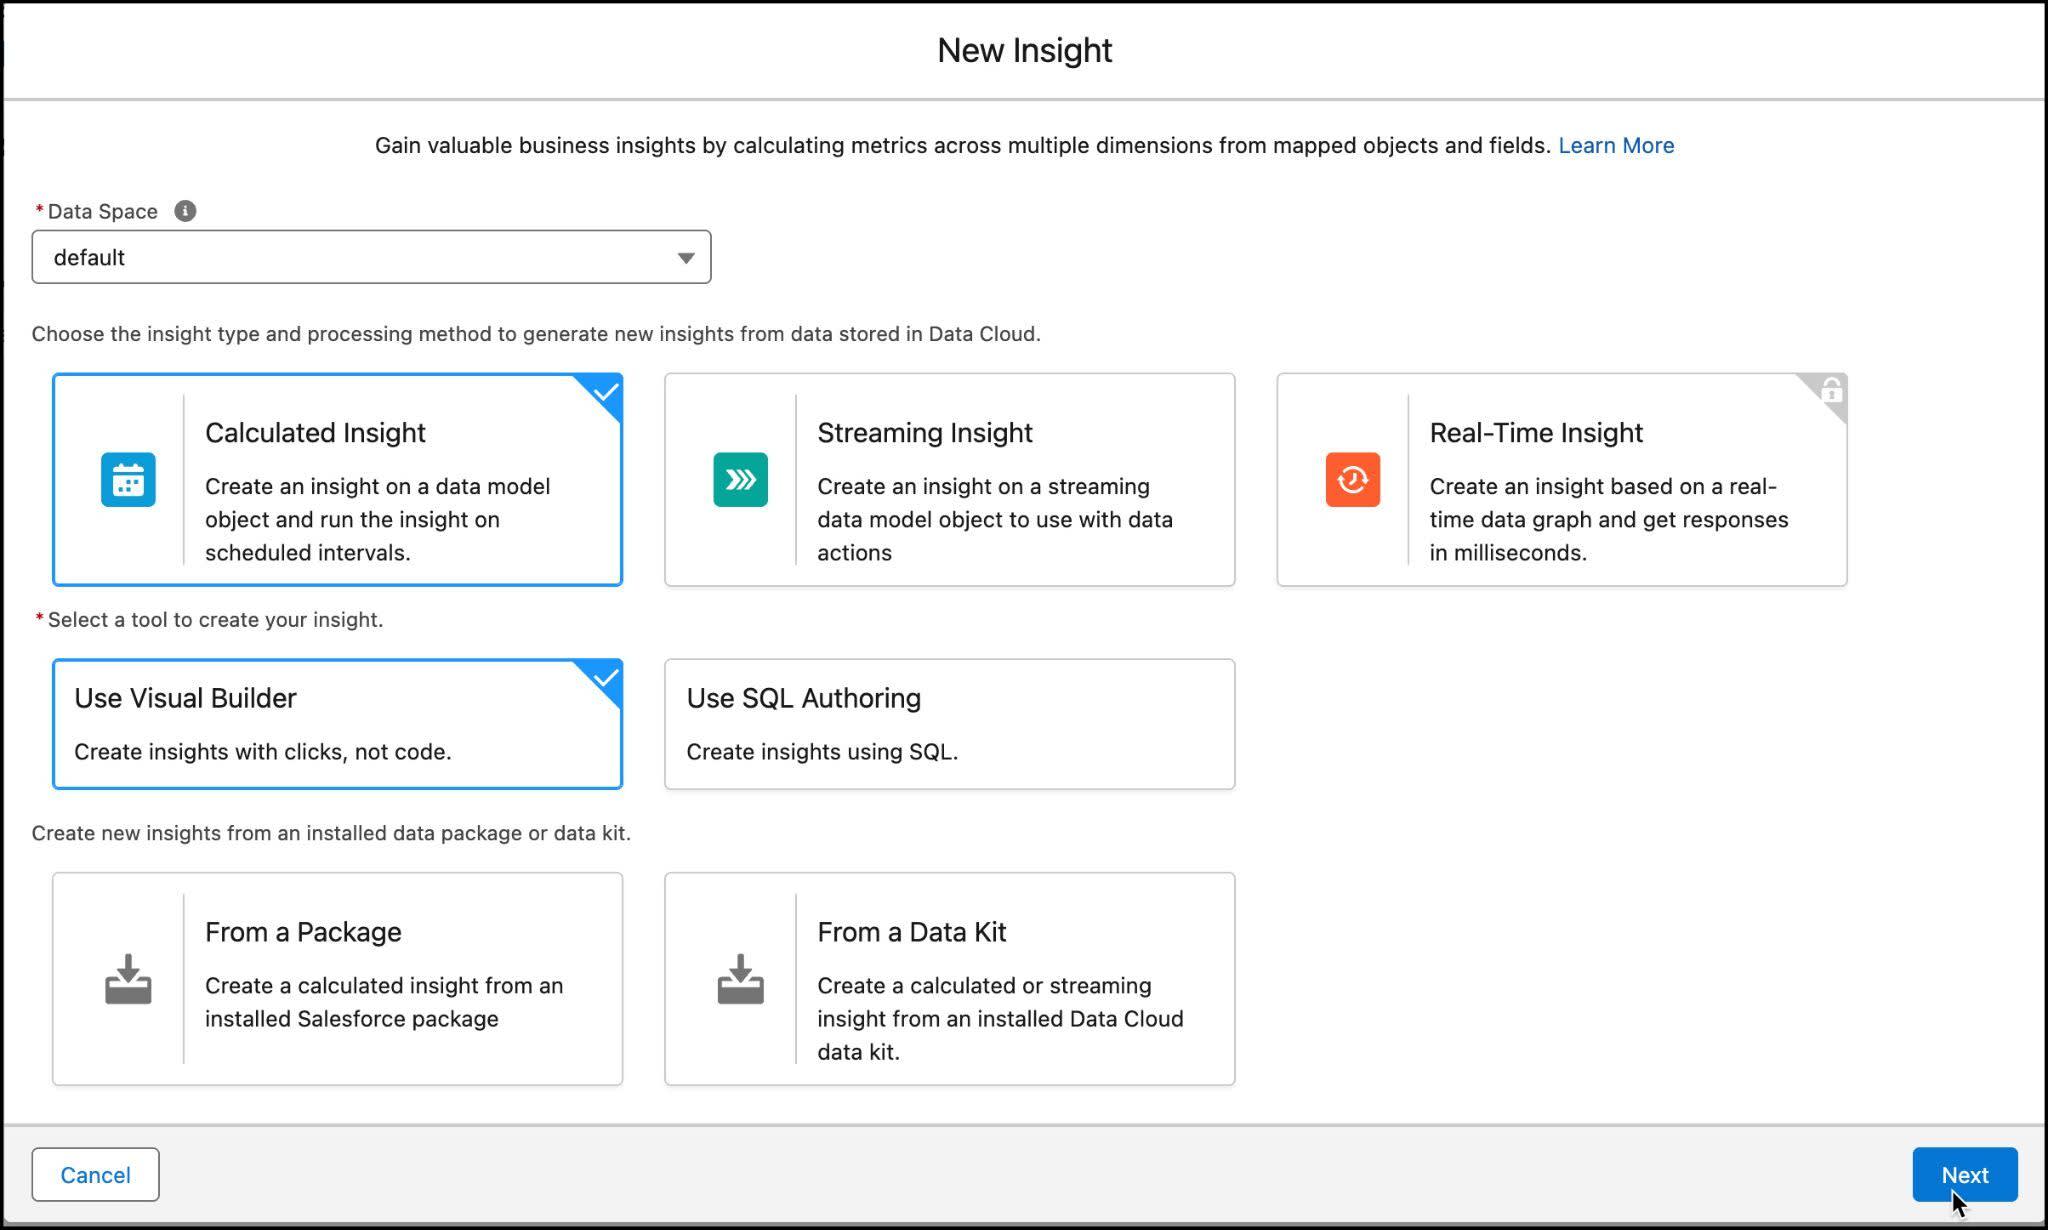
- In the Select Input Data modal, search for and select Unified Individual as your first object in the insight. Unified Individual is the DMO created after running identity resolution rulesets and unifying individual data.

- Click Next.
Add a Join
- In the Visual Insights Builder, click the + next to Unified Individual and select Join.
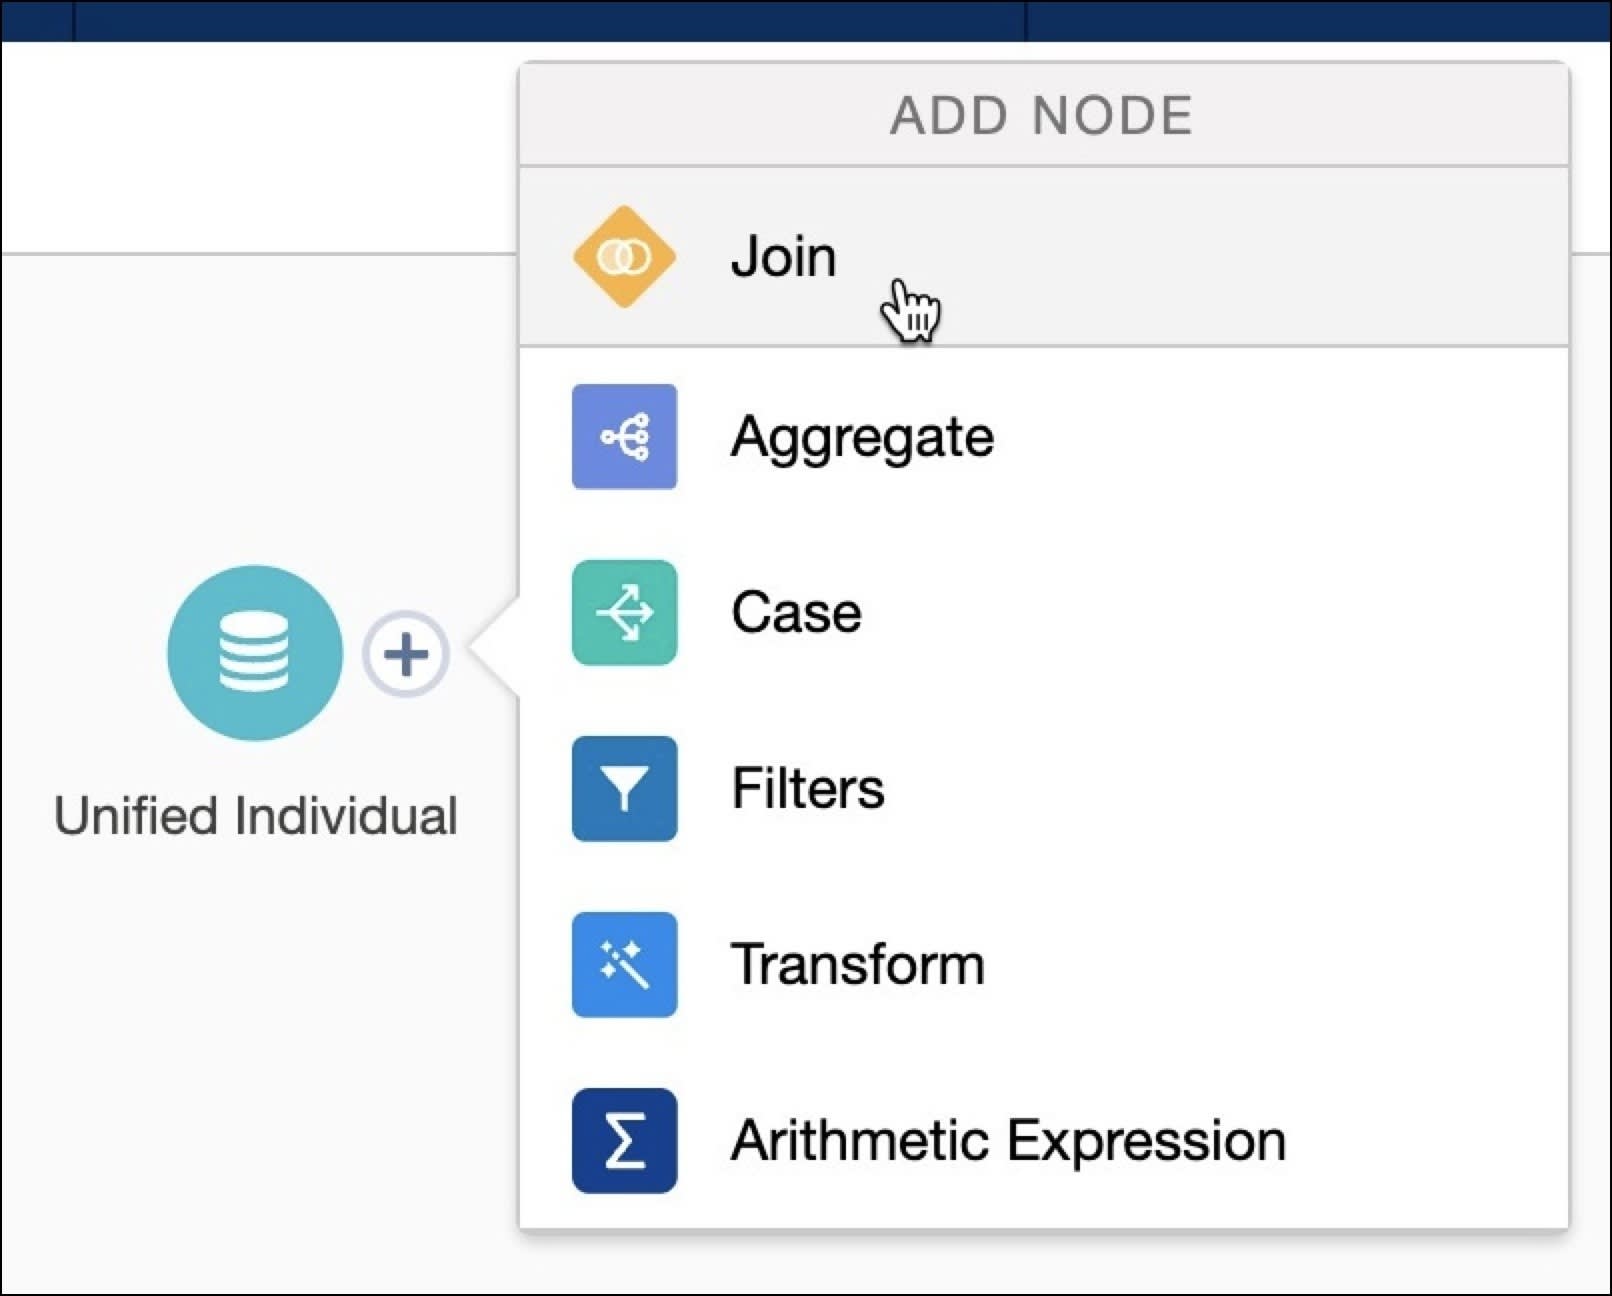
- Select Case and then click Next.
Notice that this automatically adds and joins multiple objects to create a proper join from Unified Individual to Case.
- Click Apply (1) to verify your selection. (Note: Nothing changes on-screen but selecting Apply helps save your work).

On the same canvas, you can continue building your insight.
Add an Aggregate
Let’s now add the metric you want to calculate. In this case, it’s the number of cases.
- Click the + on the last Join. If the + doesn’t work, click the ellipses.
- Select Aggregate.
- For Measures, click + (1). From the Count section, search for and select Case Id (2).
- Click Next (3).

- For Metric Name enter
Count Case ID. Notice Metric API Name automatically populates withCount_Case_ID.
- Click Apply.
Add Dimensions
Next, you group the data in the insight by adding a dimension.
- Under Dimensions, click + and add Unified Individual Id from the Unified Individual source (the first one listed).
- Click Next.
- For Dimension Name enter
Unified Individual.
- Click Apply.
- Follow the previous steps 1–4 to add Case Status named
Case Statusas a dimension.
- Follow steps 1-4 to add Last Name from the Unified Individual source, named
Last Name.
- Click Apply for the Aggregate selections.
Save Your Work
- Select Save and Run.
- Name your calculated insight
Unified Individual Case Countsand click Next.
- Leave the schedule to the default, Not Scheduled, and click Enable.
- On the Calculated Insights tab, click Publish Now from the dropdown menu.
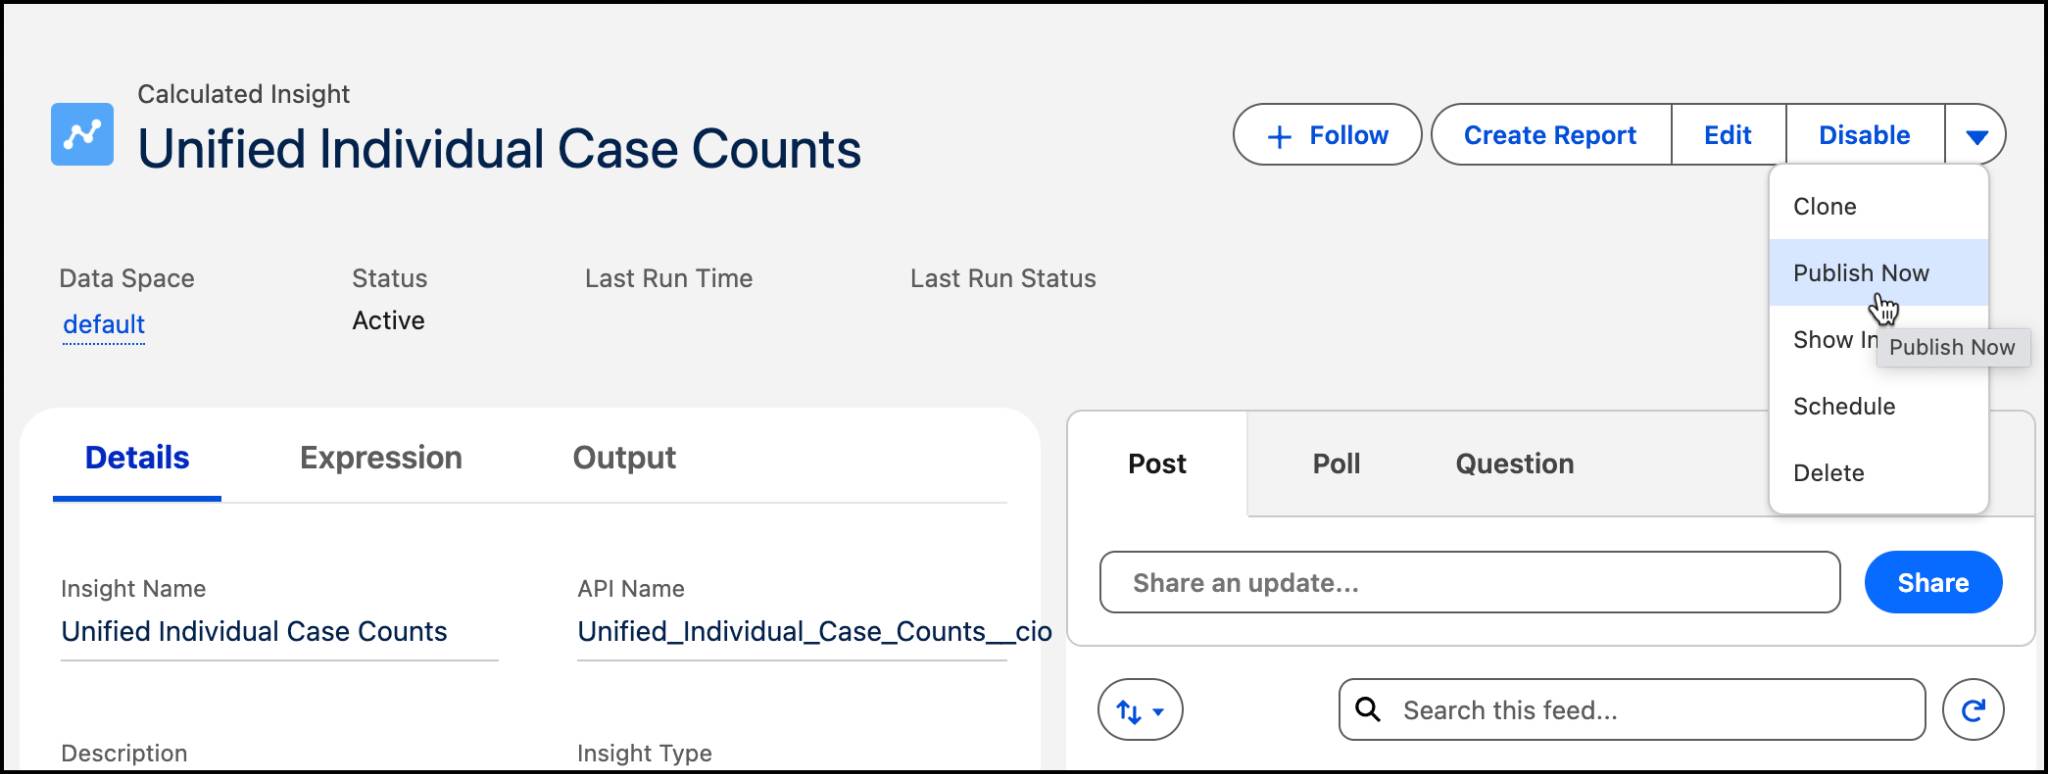
If you don’t see Publish Now, refresh your browser and then select Publish Now from the dropdown found on the Insights home page.

After you publish your calculated insight, you may need to wait for it to be available. After that, Data 360 automatically manages your published insights. The insight is ready to use when the Status changes from Processing to Active.
By creating this calculated insight with a join and an aggregate, you have defined complex metrics to enrich your data. Calculated insights can be used to define segment criteria and personalization attributes for activation using metrics, dimensions, and filters. Use these direct and related attributes to build segments, or even clean data before you segment. You can also add them to activations to enable journey decisions and for message personalization in Marketing Cloud Engagement.
View Results
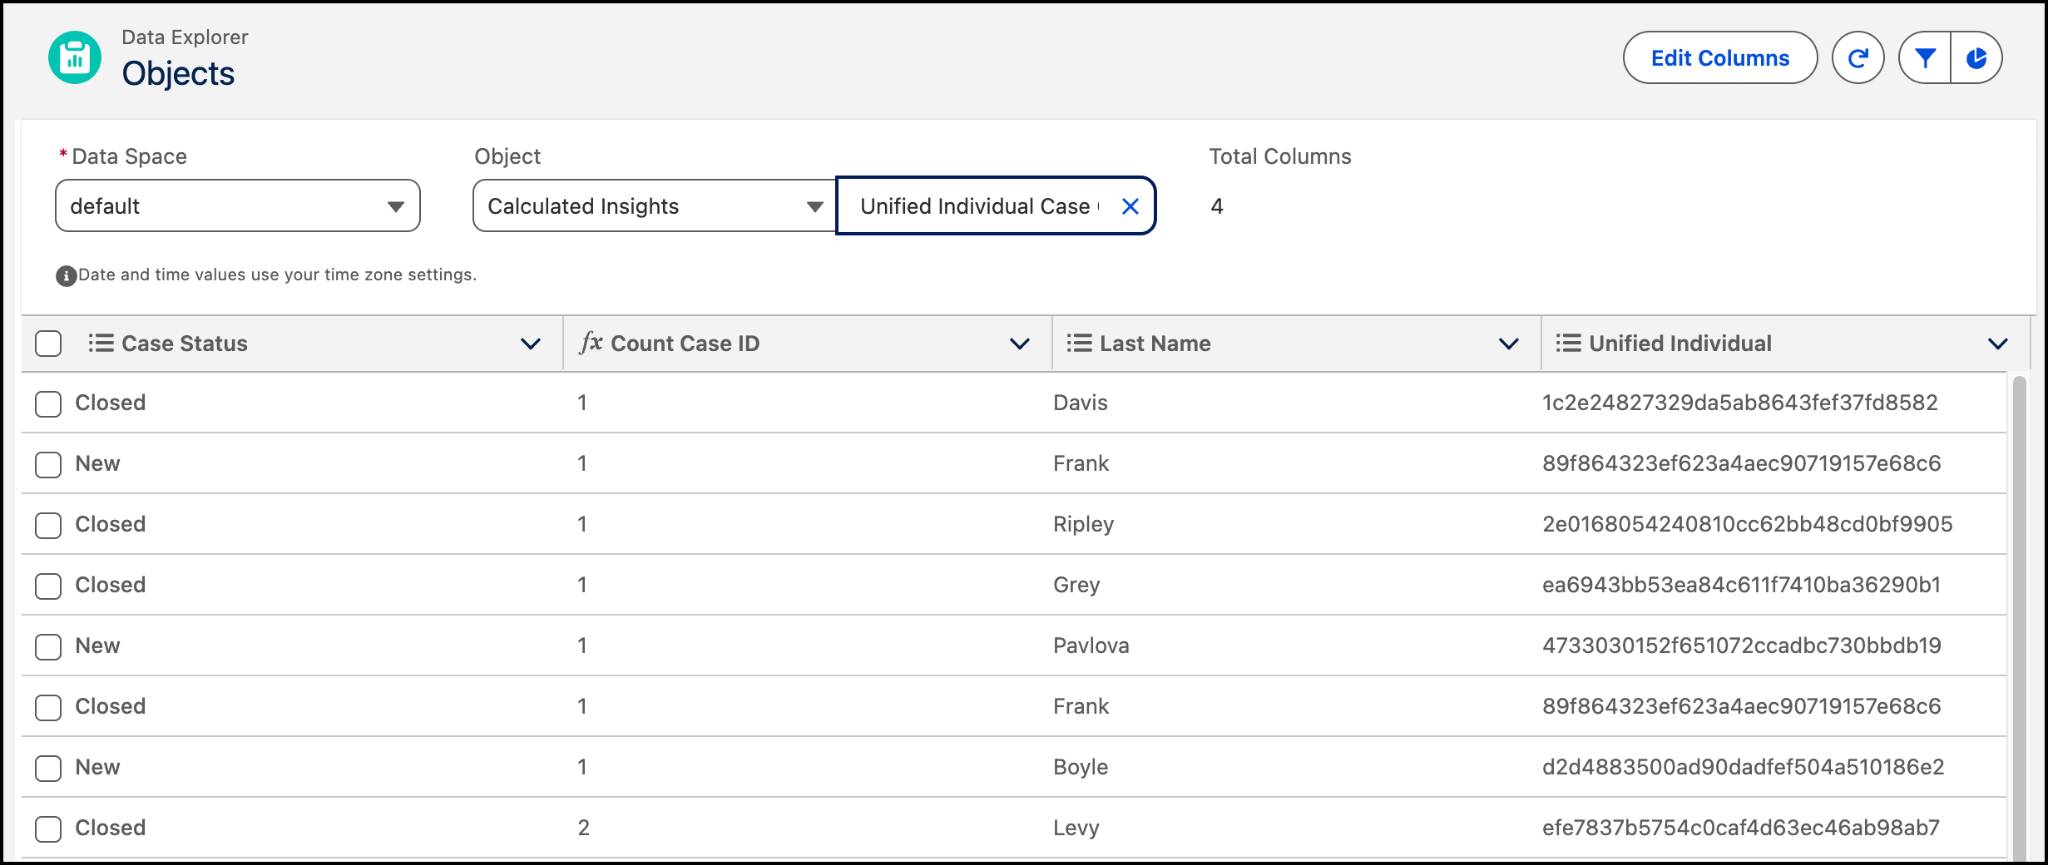
Once your insight has been processed, you can view the results in Data Explorer. Note that even after the Calculated Insight is active, it still may take a few minutes for Data Explorer to return results. You don’t need to wait for this before verifying your work and moving on.
- Go to the Data Explorer tab.
- Select Calculated Insights from the dropdown.
- Then select the corresponding insight, Unified Individual Case Counts.
Verify Your Work
Now that you have an insight created, check your work and click Verify. For this exercise, we’re just checking that the insight was set up correctly. In the next step, you further manipulate data by creating a segment and a report.
Resources
- Trailhead: Data 360 Insights
- Trailhead: Insights Builder in Data 360
- Salesforce Help: View Your Data in Data Explorer