Tour the Data Mapper Designer
Learning Objectives
After completing this unit, you’ll be able to:
- Navigate the Data Mapper Designer.
- Describe how to use the Data Mapper Designer to extract, transform, and map data.
The Data Mapper Designer
The Data Mapper Designer is a declarative development tool that you can use without coding knowledge.
To get to the designer from the App Launcher ( ), find and select Data Mappers. Alternatively, you can find and select Omnistudio from the App Launcher (
 ), then select Data Mappers from the navigation menu. On the list view, select an existing Data Mapper or create one to go to the designer.
You use the Data Mapper Designer to create all four types of Data Mappers: Turbo Extract, Extract, Transform, and Load. You learn about all four types of Data Mappers and what they each do in the next unit. We focus on a sample Data Mapper Extract in this unit as you tour the designer.
When you open a Data Mapper, you see the basic tools you use to build one in the designer.
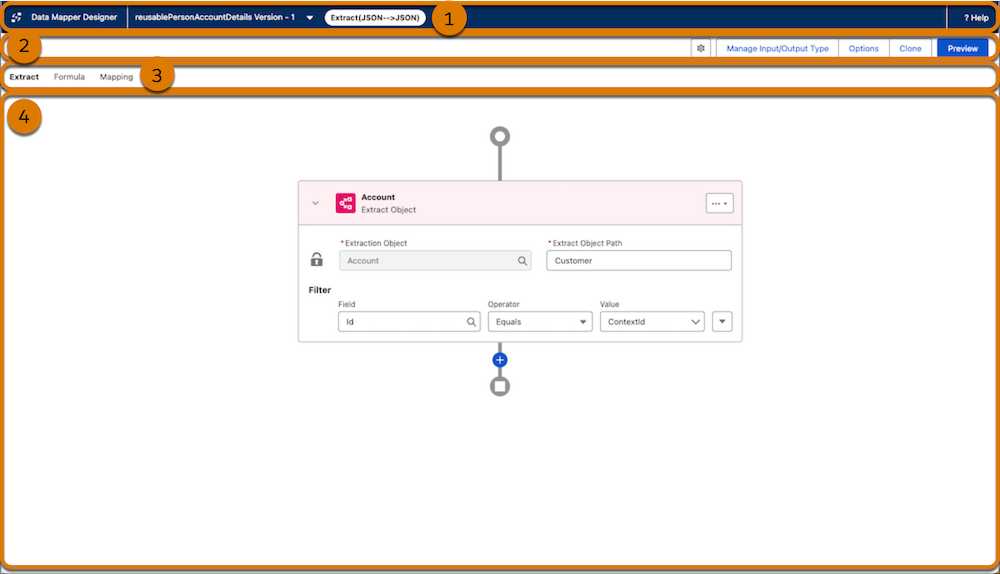
Let’s explore each of these areas.
- The header (1) shows the Data Mapper’s name and version.
- The toolbar (2) includes options to manage the Data Mapper’s settings, edit and view data input and output, and configure caching and security. This is also where you can clone the Data Mapper or enter Preview mode.
- The tab bar (3) is where you switch between the tabs to configure your Data Mapper. What tabs appear in this bar depends on the type of Data Mapper you’re building. The screenshot here shows Extract, Formula, and Mapping because the Data Mapper is a Data Mapper Extract type.
- The canvas (4) is where you build your Data Mapper. The screenshot shows an Extract tab configured to get data from an account record where the record ID matches a variable passed to the Data Mapper.
The tabs are where you do most of your work. So let’s explore the Extract, Formula, and Mapping tabs you see in the Data Mapper Extract screenshot here.
The Extract Tab
The Extract tab is where you define the Salesforce objects you want to extract data from, label the extracted data JSON for use in the Data Mapper, and filter which data to return. In this example, data is extracted only from the Account object.
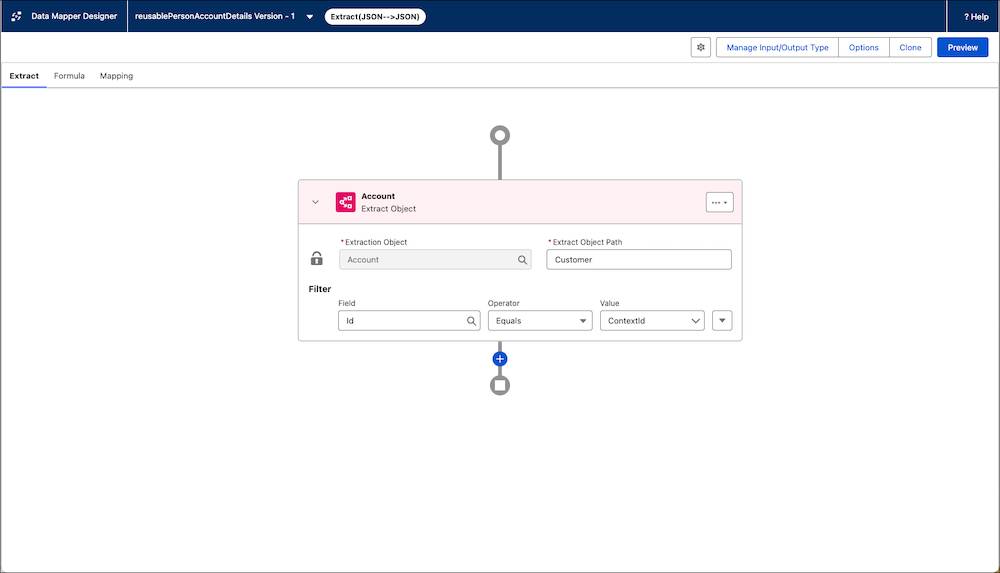
The Extraction Object field here is set to Account.
The Extract Object Path field is where you label the data you use in formulas and mappings in the Data Mapper. In this example, the extracted data is labeled Customer. You can retrieve fields using that path, such as Customer:Name to return the value in the account’s Name field.
The extract filter controls which data to include from the object defined in the extraction step. The extract filter setting in this example returns records where the account Id value equals the ContextId variable. This variable can be passed to the Data Mapper by another Omnistudio component, such as an Omniscript.
To add another Extraction Step, select  . You can also configure more complex filters with multiple criteria in each step. You can drag each Extract Object to reorder them, as well, and extract data in a particular order.
The Formula Tab
The Formula tab is where you optionally manipulate data values to the fields retrieved in the Extract tab. Each result is stored as a key-value pair, where the Formula Result Path defines the key and the formula defines the value. You can then reuse these results in other formulas or mappings within the Data Mapper.
In this example, two formulas are defined.
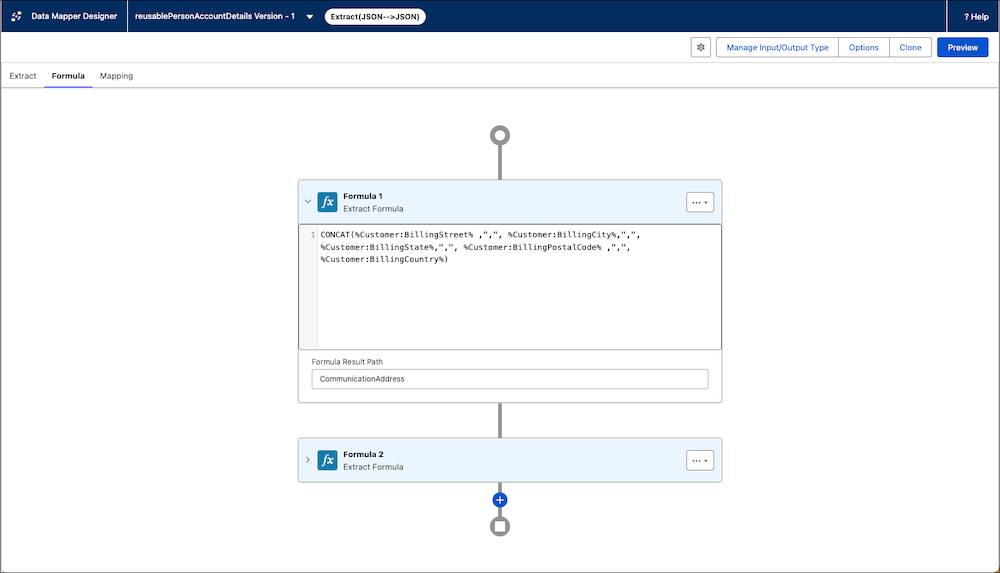
The first formula uses a concatenate (CONCAT) function to create a string from several extracted billing address fields. The formula stores the result in a new path called CommunicationAddress specified in the Formula Result Path field. The second formula—which is collapsed in the screenshot—performs a similar function using shipping address fields and stores the result at the path PermanentAddress.
You can drag each formula into order in the designer so they run in the proper sequence, especially when one formula depends on the result of another.
This is a simple example that uses only the CONCAT function. For details about other supported operators and functions, see Omnistudio Formulas and Functions in Salesforce Help. You can also create custom functions if needed.
The Mapping Tab
The Mapping tab is where you connect the data you’ve extracted and prepared–in both Extract and Formula tabs—to the structure you want in your output data.
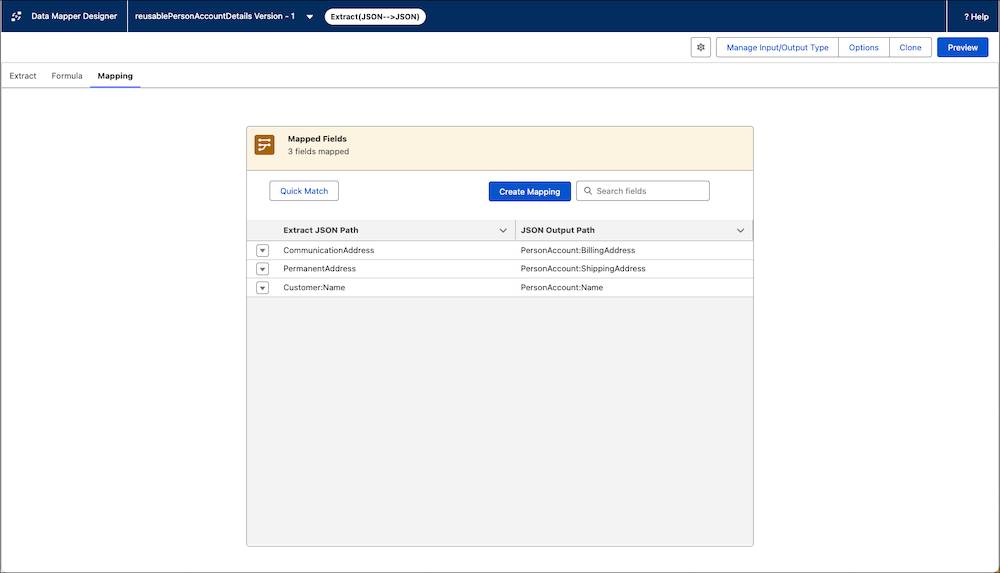
In this example, the Extract’s input and output are both JSON. The mapping takes each input path, such as a field from the extracted data or a formula result, and assigns it to a target path in the data output structure.
The data from the formulas are mapped to new paths in the output data—CommunicationAddress to PersonAccount:BillingAddress and PermanentAddress to PersonAccount:ShippingAddress.
You can also map values directly from the extract using the Extract Object Path you set on each Extraction Step. In this example, Customer:Name from the extract data is mapped to PersonAccount:Name in the output data.
Together, these mappings define your output JSON. They name the JSON root node—in this case, PersonAccount—and specify the key-value pairs inside that structure.
The Preview Tool
To check the Data Mapper’s data, select Preview in the toolbar.
In Preview mode, you enter specific input parameters to simulate the Data Mapper output. Here’s an example.
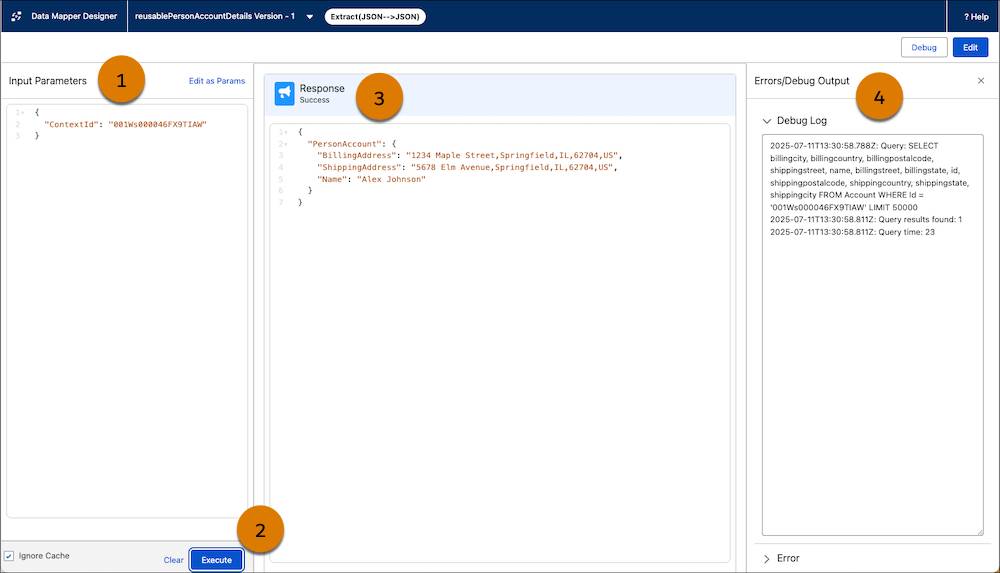
The Input Parameters (1) pane is where you set the test criteria. Here, the key of ContextId is paired with the value of an account record Id. You can also click Edit as Params to enter this key-value pair.
After you enter the input parameters, click Execute (2).
You then check the data output in the Response pane (3). Notice that the names and values in the array match the settings in the Mapping tab in the previous section.
In the Debug Log and Error panes (4), you find that the query returns several fields from an account record with the Id from Input Parameters. If you close this pane, click Debug in the navigation bar to open it.
Now that you understand the basics of how the Data Mapper Designer works, you can learn more about the four types of Data Mappers. Each type works differently to extract, transform, and write data. Get the details in the next unit.