Create and Configure RPA Process Test Plans
Learning Objectives
After completing this unit, you’ll be able to:
- Create RPA process test plans.
- Describe available test plan options.
Before You Start
This module builds on the Get Started with MuleSoft RPA and Get Started with MuleSoft RPA Builder trails, so we recommend that you complete them before you continue. In those trails, you learn how to create design documentation for MuleSoft RPA business processes and how to build RPA processes using MuleSoft RPA Builder.
In this module, we assume your organization has purchased a MuleSoft RPA license. If you don’t have a license, that’s OK. You can still read along to learn how to perform the steps. Don’t try to follow the steps in a Trailhead Playground, because MuleSoft RPA isn’t available in the Trailhead Playground.
In this unit, you learn how to create a test plan for your MuleSoft RPA process in MuleSoft RPA Manager.
Create a Test Plan
After you complete the Build phase of your RPA process, you’re ready to begin the Test phase. It’s important to perform quality assurance to ensure the RPA process operates as expected in production. Test plans allow you to perform quality assurance by setting the run conditions for your deployable RPA processes.
Now that you’ve reached the Test phase of the RPA process lifecycle, two new collapsable sections appear in MuleSoft RPA Manager.
- The Test Plans section is where you create and deploys test plans.
- The Test Results section shows the results of executed test plans.

In the Test Plans section, you click Create New Test Plan, which opens a dialog box that guides you through the test plan creation steps. Let’s review each step.
Settings Tab
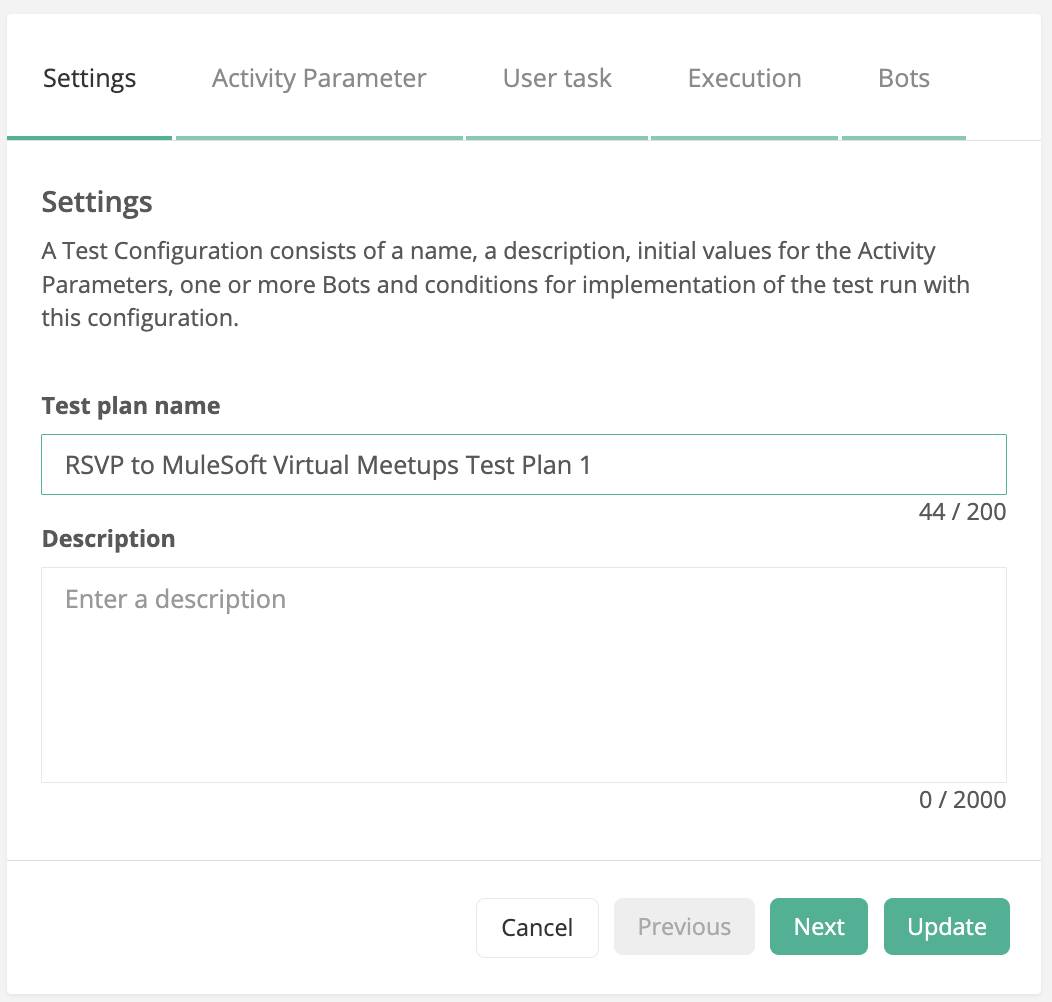
In the Settings tab, there is a field to provide a unique test plan name. Keep in mind that the Test Results section groups results by this name. A description isn’t required but is useful for future reference and for other team members to understand the purpose of this test plan.

Activity Parameter Tab
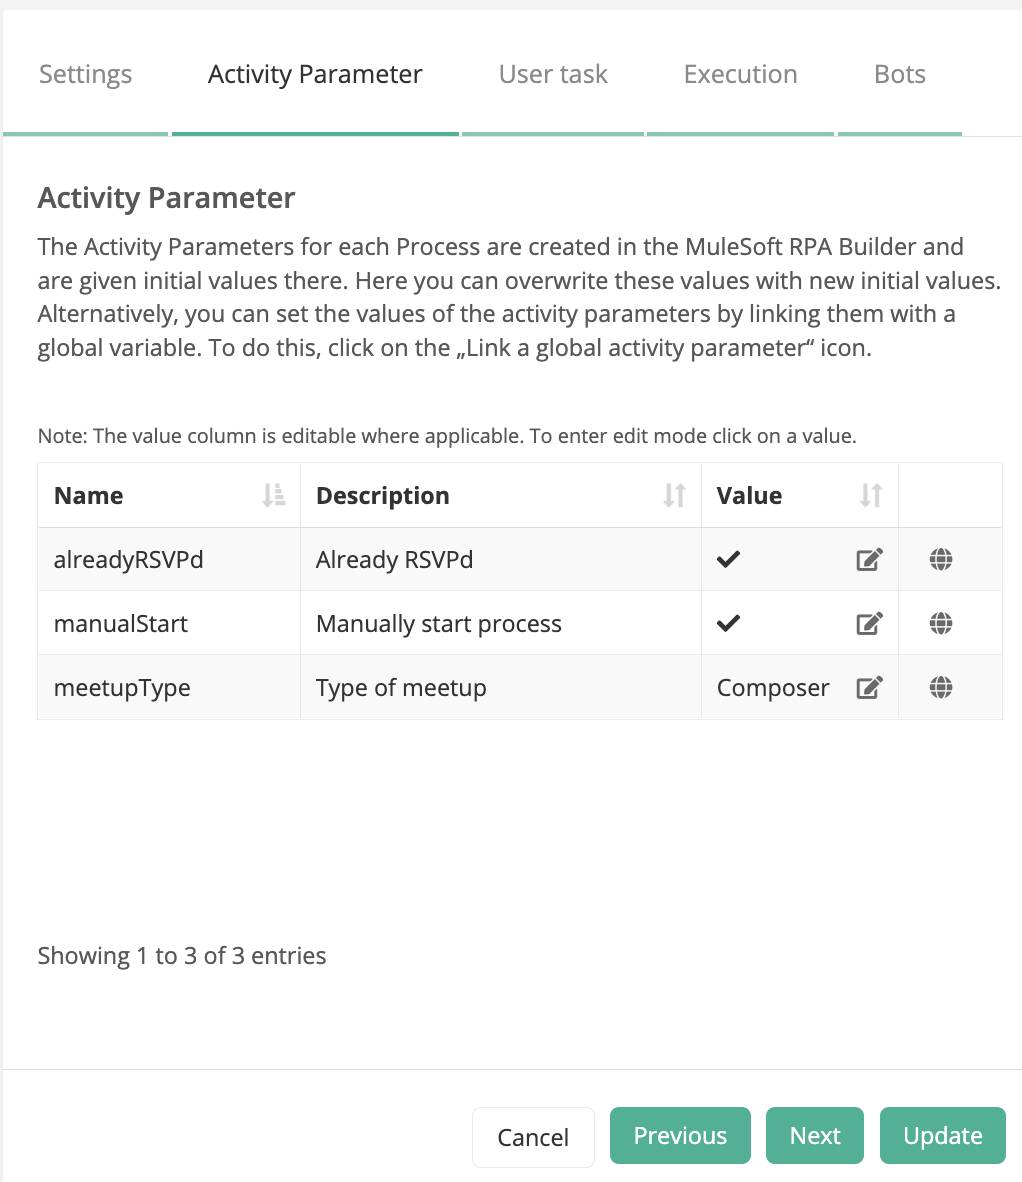
In the Activity Parameter tab, you set the initial activity parameter values for your RPA process. If left undefined, these values default to the values defined in RPA Builder. Activity parameters allow you to test different run conditions without modifying the original implementation. You can manually override a value or link the value to a global variable.

User Task Tab
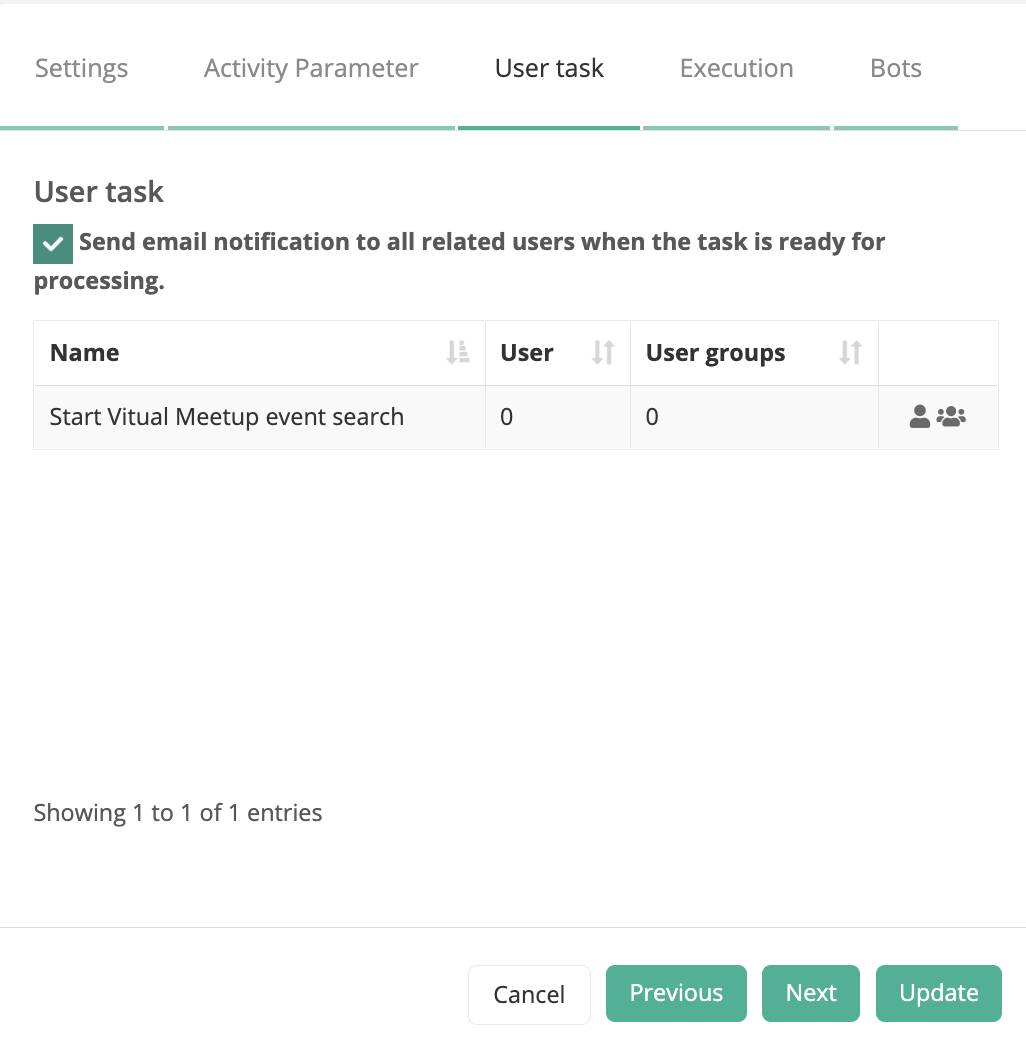
In an ideal world, every process would be entirely automated. But in the real world, some tasks require human intervention. A user![]() or user group
or user group![]() must be assigned to perform these tasks during testing and for deployed RPA processes. For test plans, you assign a user or user group in the User Task tab. Users then receive a notification in the My RPA module under Team Tasks in MuleSoft RPA Manager. A user must claim the task and take action for the RPA process to continue executing.
must be assigned to perform these tasks during testing and for deployed RPA processes. For test plans, you assign a user or user group in the User Task tab. Users then receive a notification in the My RPA module under Team Tasks in MuleSoft RPA Manager. A user must claim the task and take action for the RPA process to continue executing.

Execution Tab
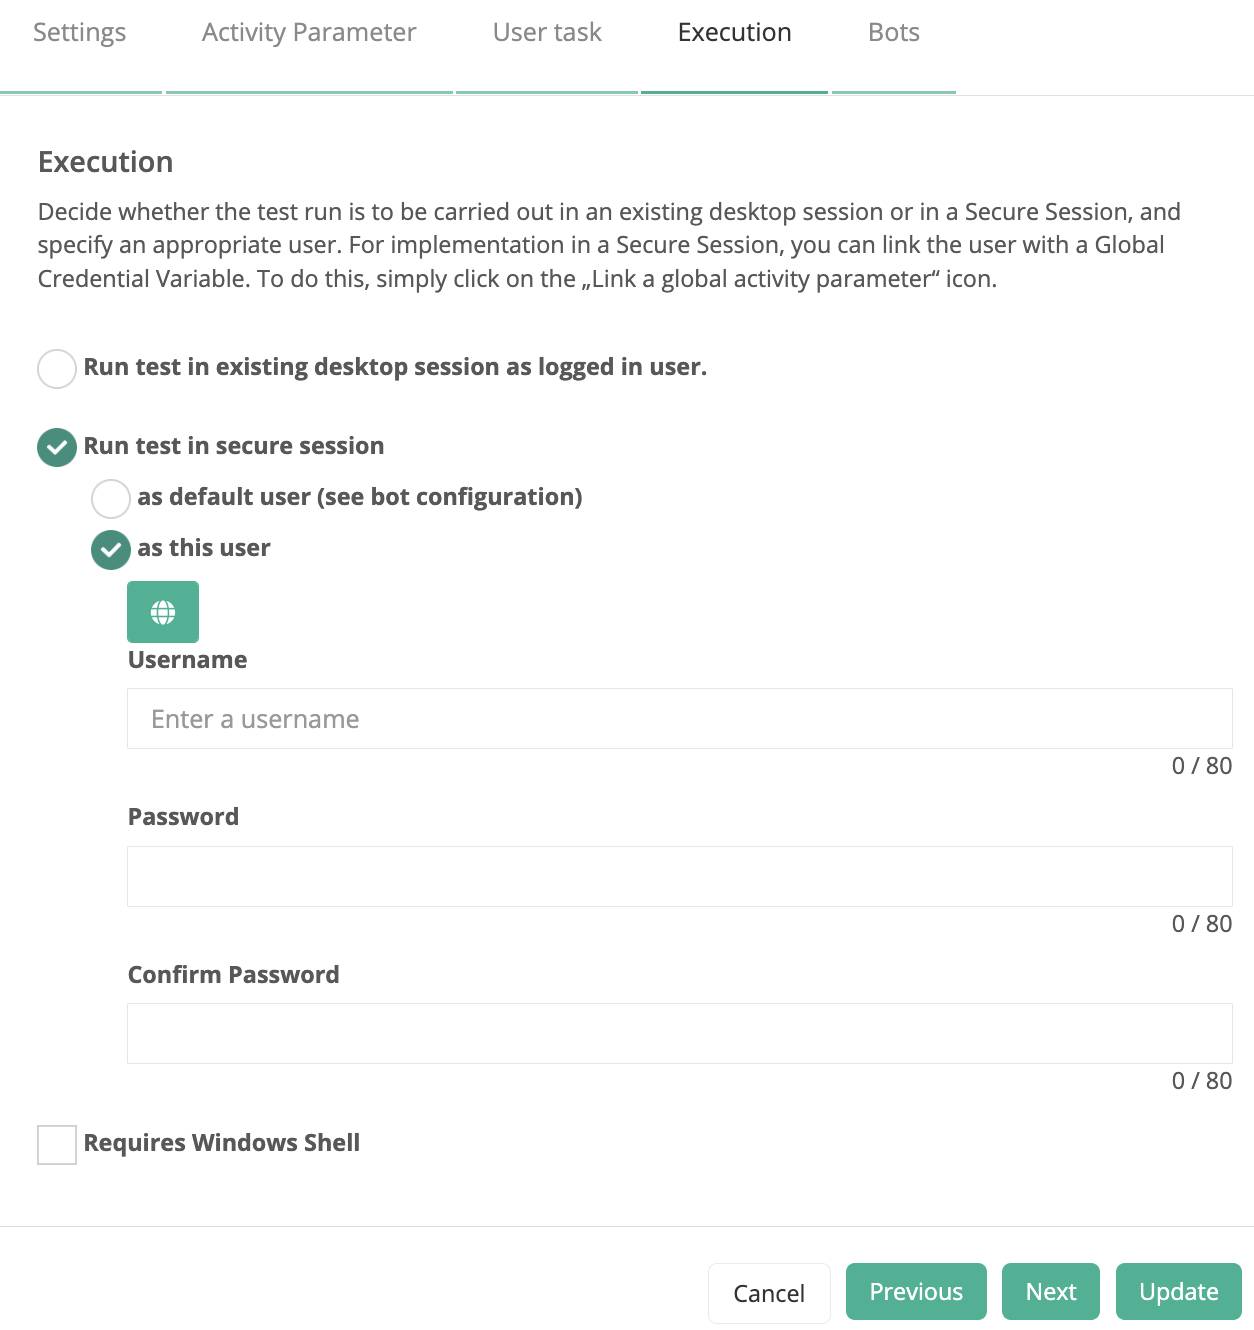
To successfully run a test, you must specify the bot to use, where it runs, and under what conditions. These specifications are set in the Execution tab. You can opt for the bot to run in an existing desktop session or in a secure session. These session types are described in the following table.
| Session Type | Session Description |
|---|---|
|
Existing desktop session |
The RPA bot takes over the desktop to carry out the RPA process as the logged-in user. The actions performed in this mode are visible on the screen. As a result, this mode is considered less secure and should be avoided when working with sensitive information. |
|
Secure session as a default user |
The RPA bot performs the RPA process in an invisible desktop session that isn’t visible or accessible to the screen. There are four main benefits to this session type.
The secure session runs as the user specified in the RPA bot configuration. |
|
Secure session as a specified user |
This mode behaves the same as the previous session type except that user credentials are specified inline or in a global variable. |
Tip: It’s considered a best practice to run processes in secure session mode.
In the Execution tab, you also specify if the RPA bot has access to the Windows shell during execution, which includes the Start menu and taskbar. If you opt out, the desktop appears to the RPA bot as a blank background. You may decide to do this to prevent the bot from unintentionally clicking the Start menu and the taskbar.

Bots Tab
From the Bots tab, select one or more bots to deploy your RPA process to. When selecting a bot, you must ensure its configuration matches your specified session type. Bots have one of the following states.
- Deployable
- Warning
- Not Deployable
View details about the Warning and Not Deployable states by hovering your cursor over the message.
| RPA Bot State | Cause | Example |
|---|---|---|
|
Deployable |
The bot supports all of the RPA process test plan configurations. |
All required applications and session assignments are configured on the RPA bot. |
|
Warning |
The RPA bot configuration is compatible with the test plan configuration. However, some features used by the process may not be available to the bot and may cause the test plan to fail. |
An RPA process requires access to Excel, but the RPA bot doesn’t currently have access to Excel. |
|
Not Deployable |
The RPA bot configuration is incompatible with the test plan configuration. |
The test plan is set to use an existing desktop session, but the RPA bot is configured to only support secure sessions. |

Walkthrough
Take a look at this video demonstration showing how to work with test plans. If you wish to follow along with text instructions, check out the walkthrough instructions.
In this unit, you learned how to create a test plan to assess the readiness of your RPA process for a production environment. In the next unit, you learn how to run the test plan and review the results.
