Make Decisions and Perform Repetitive Actions
Learning Objectives
After completing this unit, you’ll be able to:
- Make decisions using an If/Else Block.
- Perform repetitive actions using a For Each loop.
Make Decisions Using an If/Else Block
So far, you’ve learned to create a flow that proceeds from one step to another. With MuleSoft Composer, you can also make decisions about what actions your flow must perform if the input data from a previous step of the flow satisfies one or more specified conditions.
To do this, add an If/Else Block along with associated actions to your flow.
- In the If branch of the flow, evaluate the input data based on a condition.
- If the condition is met, perform the actions in the If branch.
- If the condition isn't met, perform the actions in the Else branch.
Let’s look at an example use case. Your customer support team at NTO manages and maintains customer service cases in the NTO org’s Service Cloud. For best customer service, the team also collaborates using a Slack channel with other stakeholders such as sales, product, and technical support teams to resolve cases.
To automate the data sync between Service Cloud and Slack, you need to create a flow that automatically syncs the creation or update of customer service cases in Service Cloud with case notifications in Slack.
First, assume you’ve already created a flow that starts every time a new case is created or updated in Service Cloud. In the trigger, all fields of the Case object are selected by default.
Next, let’s add a decision to this flow. In this decision, your flow must evaluate if the status of the case fetched in step 1 of the flow is set to Escalated.
- If it is, send a direct message to the support regional leader, @Jane Doe.
- If it isn’t, send a message to the services-cases channel.
Here’s how to create and configure an If/Else Block and associated action steps for this flow.
- Click the plus icon to add a step.
- Scroll down and click If/Else Block. In the If branch, the All conditions must be met (AND) condition is selected by default.
- Click in the Field name and select Status, click Operator and select Equals, and then enter
Escalatedin the Value field.
- Click the plus icon to add a step to the If branch.
- Click Slack.
- Create and configure a connection to Slack. Upon a successful connection, step 2 of the flow appears.
- Click in the Action field and select Send a direct message to a user.
- Click the search icon of the User field, select Pick from List, and select the Slack username of the support regional leader. In this example, it’s @Jane Doe.
- Click in the Message field and then click Custom Expression. The Custom Expression Editor appears.
- In the Message field, enter
Case Number:, click the Data tab, and then select Case Number from step 1 of the flow.
- Repeat step 10 for Case Reason and Status. Your message looks like this.
Case Number:Case Number from step 1,Reason:Case Reason from step 1,Status:Status from step 1
- Leave the Bot Name and Bot Icon URL blank. By default, MuleSoft Composer uses the MuleSoft Platform Slack app to communicate with Slack.

- Click Add Else.
- Click the plus icon to add a step to the Else branch.
- Click Slack and then click the existing Slack connection.
- Click in the Action field and select Post message to channel.
- In the Channel Name field, click the search picklist, select Pick from List, and then select service-cases.
- Click in the Message field and then click Custom Expression. The Custom Expression Editor appears.
- Configure the message as follows.
Case Number:Case Number from step 1,Reason:Case Reason from step 1,Status:Status from step 1
- Save the flow.
Perform Repetitive Actions Using a For Each Loop
With MuleSoft Composer, you can also perform repetitive actions on a list of items coming from a previous step of the flow. To do this, use a For Each loop to iterate over each item and then perform one or more actions for each item.
Before you can use the For Each loop, ensure a relevant list of items has been fetched from a previous step of the flow, using a Get records action.
Let’s look at an example use case. Your sales team at NTO manages and maintains sales leads in the NTO org’s Sales Cloud. For best leads management, the team needs to identify those leads that have not been contacted by a sales rep in the last 24 hours.
First, assume you’ve already created a flow that starts once a day using a scheduler. In the first action step, all leads that have the status of not contacted are fetched by using the Get records action on the Lead object in Sales Cloud. Your flow should look like this so far.


Next, let’s add a repetitive action to this flow using a For Each loop. In this loop, your flow iterates over each lead. Your flow then creates a corresponding row containing email, first name, last name, lead source, and phone in the Marketing Event Tracker spreadsheet in Google Sheets.
Here’s how to create and configure a For Each loop and an associated action step for this flow.
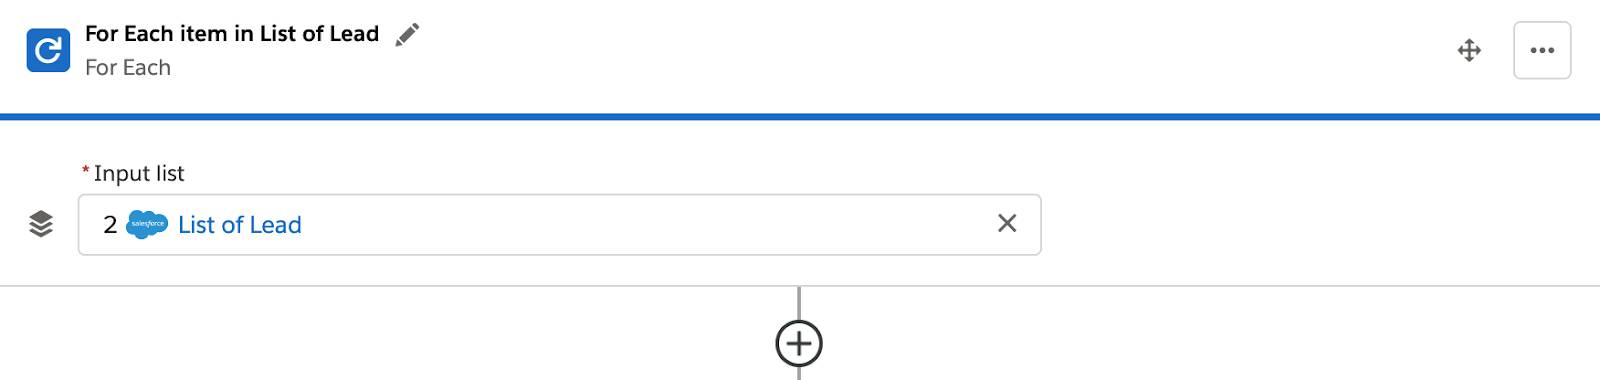
- Click the plus icon and then select For Each.
- In the Input list field, select List of Lead from step 2 of the flow.
- Click the plus icon to add a step to the For Each loop.
- Click Google Sheets.
- Create and configure a connection to Google Sheets.
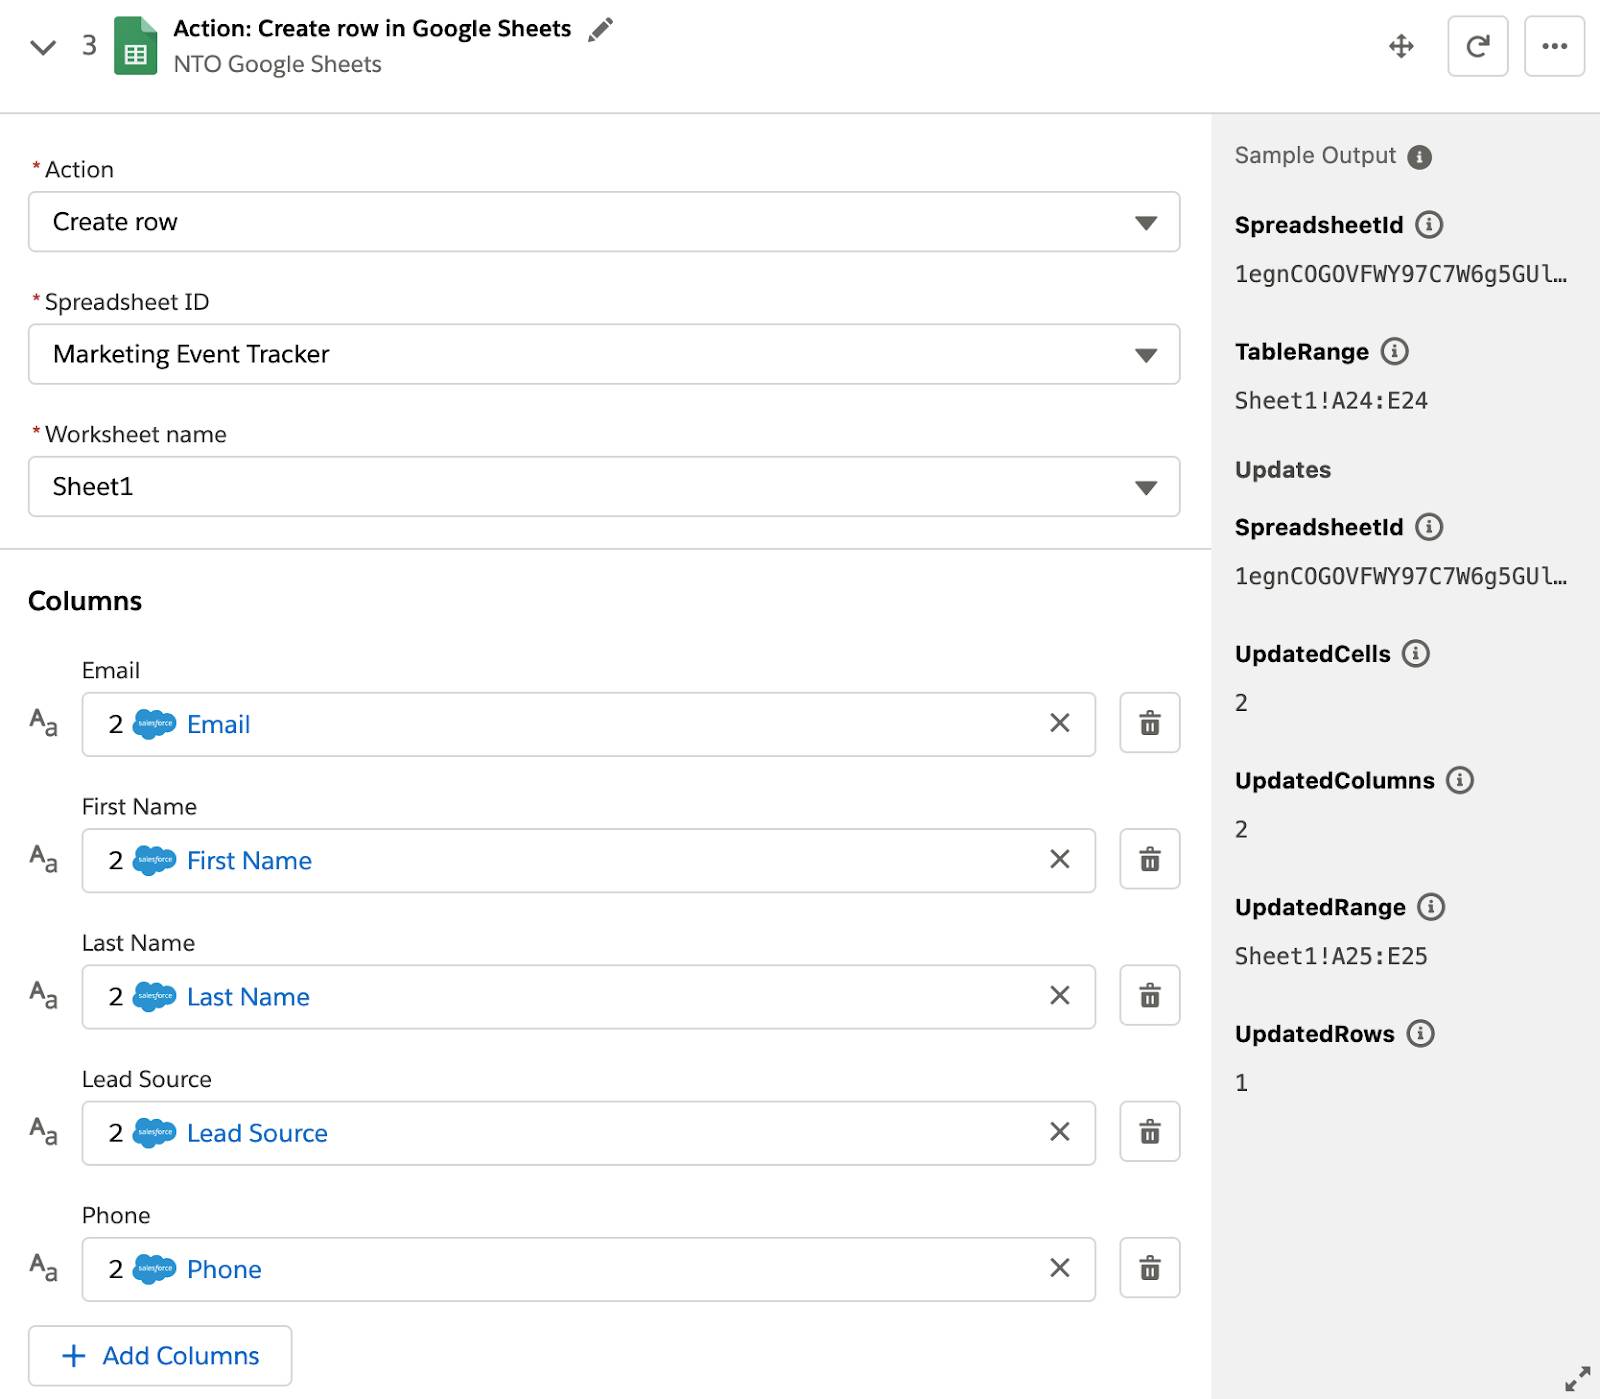
- Click in the Action field and select Create row.
- Click in the Spreadsheet ID field and select Marketing Event Tracker.
- Click in the Worksheet name field and select Sheet1.
- Click Add Columns, select all fields, and click Add.
- Map the Lead fields from step 2 of the flow to their corresponding fields in the Marketing Event Tracker spreadsheet as follows.
- Email = Email from step 2
- First Name = First Name from step 2
- Last Name = Last Name from step 2
- Lead Source = Lead Source from step 2
- Phone = Phone from step 2
Nice job! You’ve learned how to make decisions and perform repetitive actions in your flow. In the next unit, you learn how to transform data using functions and formulas.