Get to Know Agent Builder
Learning Objectives
After completing this unit, you’ll be able to:
- Discuss how Agent Builder’s guided setup helps you create agents.
- Describe Agent Builder elements that help you customize an agent to your business needs.
Before You Start
This module uses Agentforce and artificial intelligence (AI) terminology. It’s a good idea to earn the Introduction to Agentforce and the Autonomous Agents Trailhead badges before starting this module.
Build Your Agent Workforce
While you’re reading this, perhaps your slow cooker is switching on so your dinner is ready when you get home, or maybe the smart lock on your front door just let your dog walker in to take your pup for a jog. Maybe your robotic vacuum cleaner is gliding around your kitchen. Like many people, you curated a smart workforce at home that helps you be more productive and allows you to focus on other things you need to do, or enjoy.
Now, with Agentforce, you can assemble the same kind of smart workforce at work, too. If you’re a Salesforce admin, or simply have Agentforce permissions, you can build a workforce of AI agents to do jobs across your business. This means everyone—from colleagues to customers—can focus on the important stuff. You can configure Agentforce to help sales reps with prospecting, support customer service with help requests, provide feedback in sales role-play scenarios, and so much more.
Meet Agent Builder
To build an Agentforce of agents that can be trusted to handle all sorts of jobs that use your sensitive company and customer data, you need an intuitive and trustworthy tool. Introducing Agent Builder. Agent Builder helps you create and deploy your Agentforce to the places your employees or customers need them, like Slack, your CRM, or your website. Agent Builder’s step-by-step interface guides you through the choices and information-gathering that qualify each agent for its specific role. Once built, you’ll find infinite ways to customize agents in Agent Builder. You can preview and fine-tune your agents in Agent Builder, too.
Let’s take a whirlwind tour of Agent Builder.
First Stop, Agent Studio
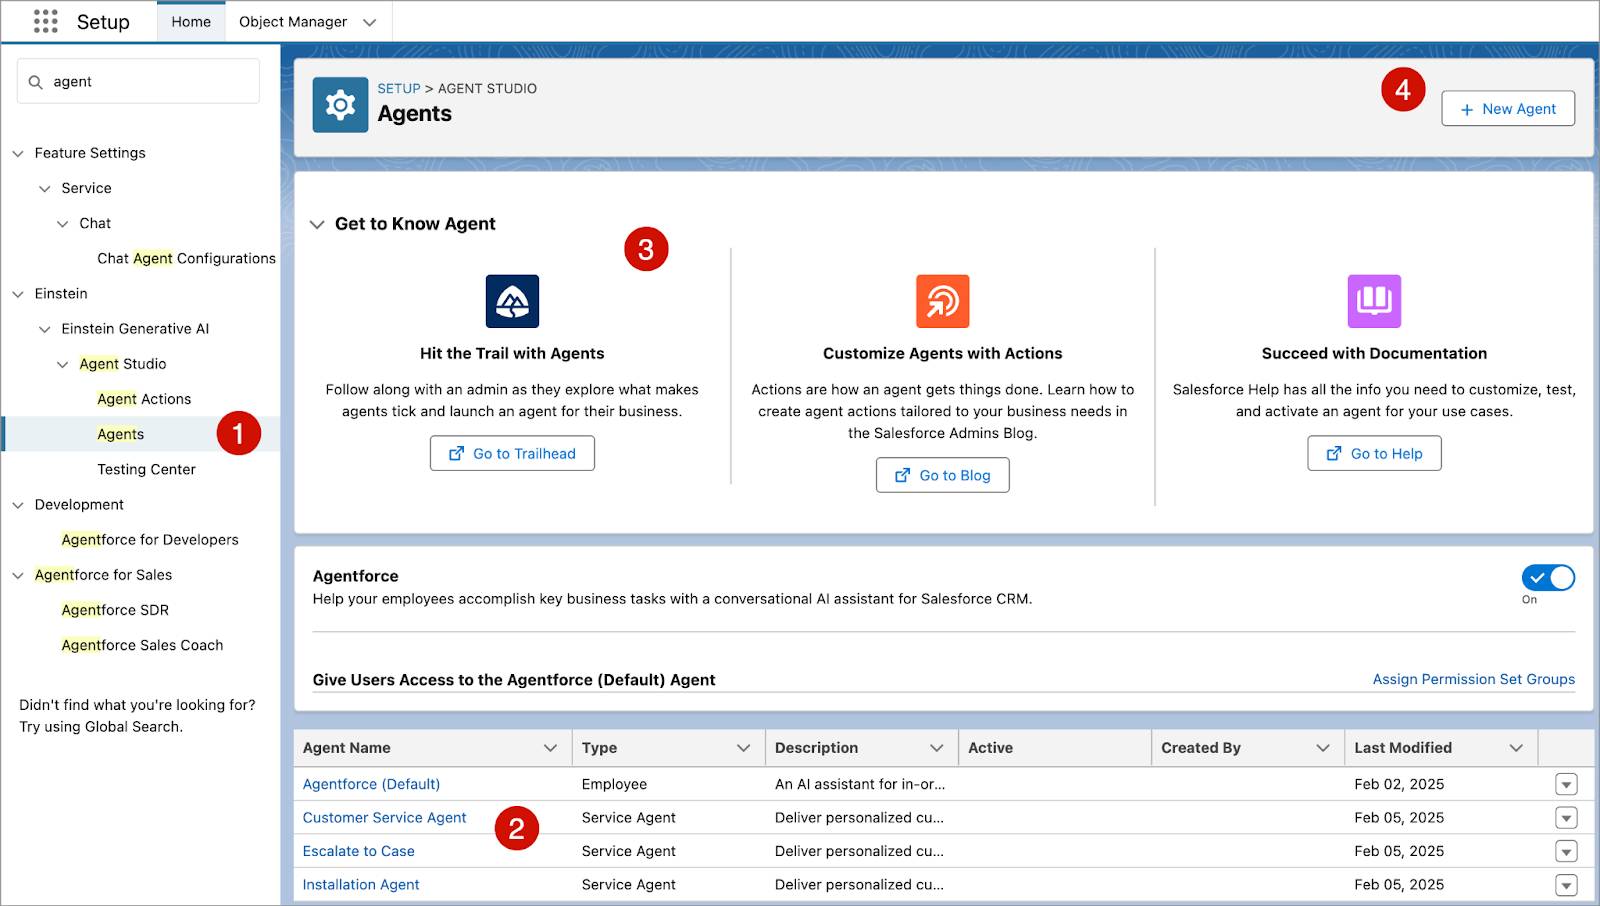
In Setup, Agent Studio is the gateway to Agent Builder. (1) From Agent Studio, you can view your Agent Actions library, access your agents and learning resources, or launch the Agentforce Testing Center.
On the Agents screen you can:
- View a clickable list of all your agents that you can review or edit, including the Agentforce (Default) that you can configure for your employees. (2)
- Skill up with agent resources like Trailhead, blog posts, and Salesforce Help documentation. (3)
- Click + New Agent to open Agent Builder to create a new agent. (4).
Build a New Agent
Not all jobs are the same. Agent Builder lets you create and customize your agents to ensure they're doing the jobs you want them to do, and are qualified to do them. To help build your trusted agent, Agent Builder guides you through four screens.
-
Select Type: Choose a preconfigured agent type that aligns with the skills your agent needs to do its job. Or create a brand-new agent from scratch. The agent type you select influences the topics and actions available to your agent.
-
Review Topics: Add or remove predefined topics, which are the categories of jobs an agent can do. Some topics include predefined actions, which are the individual tasks or jobs your agent is able to perform, like processing an order return, or summarizing an account. Actions can call flows, prompt builder templates, or invocable Apex.
-
Define Settings: Name and describe your agent, define its role, and tell the agent about your company. Select an agent user that has the necessary permissions to access the information it needs to do its job. You can configure permissions for a new agent user in User Settings. You can also enrich event logs with conversation data to help you test and troubleshoot your agent.
-
Select Data: If Data Cloud is enabled in your org, you can choose to upload data like your knowledge articles, or other information for your agents to reference to provide more personalized responses. However, many kinds of agents don’t require data at all.
As you click through the activity below, you see the step you’re on highlighted on the left. In the center panel, you select options or enter details that define your agent. If you need guidance, you can always find contextual help on the right. Once you finish the fourth step and click Create, voila! You have a new agent!
Click Next or Previous to view the four steps to build an agent.
Customize
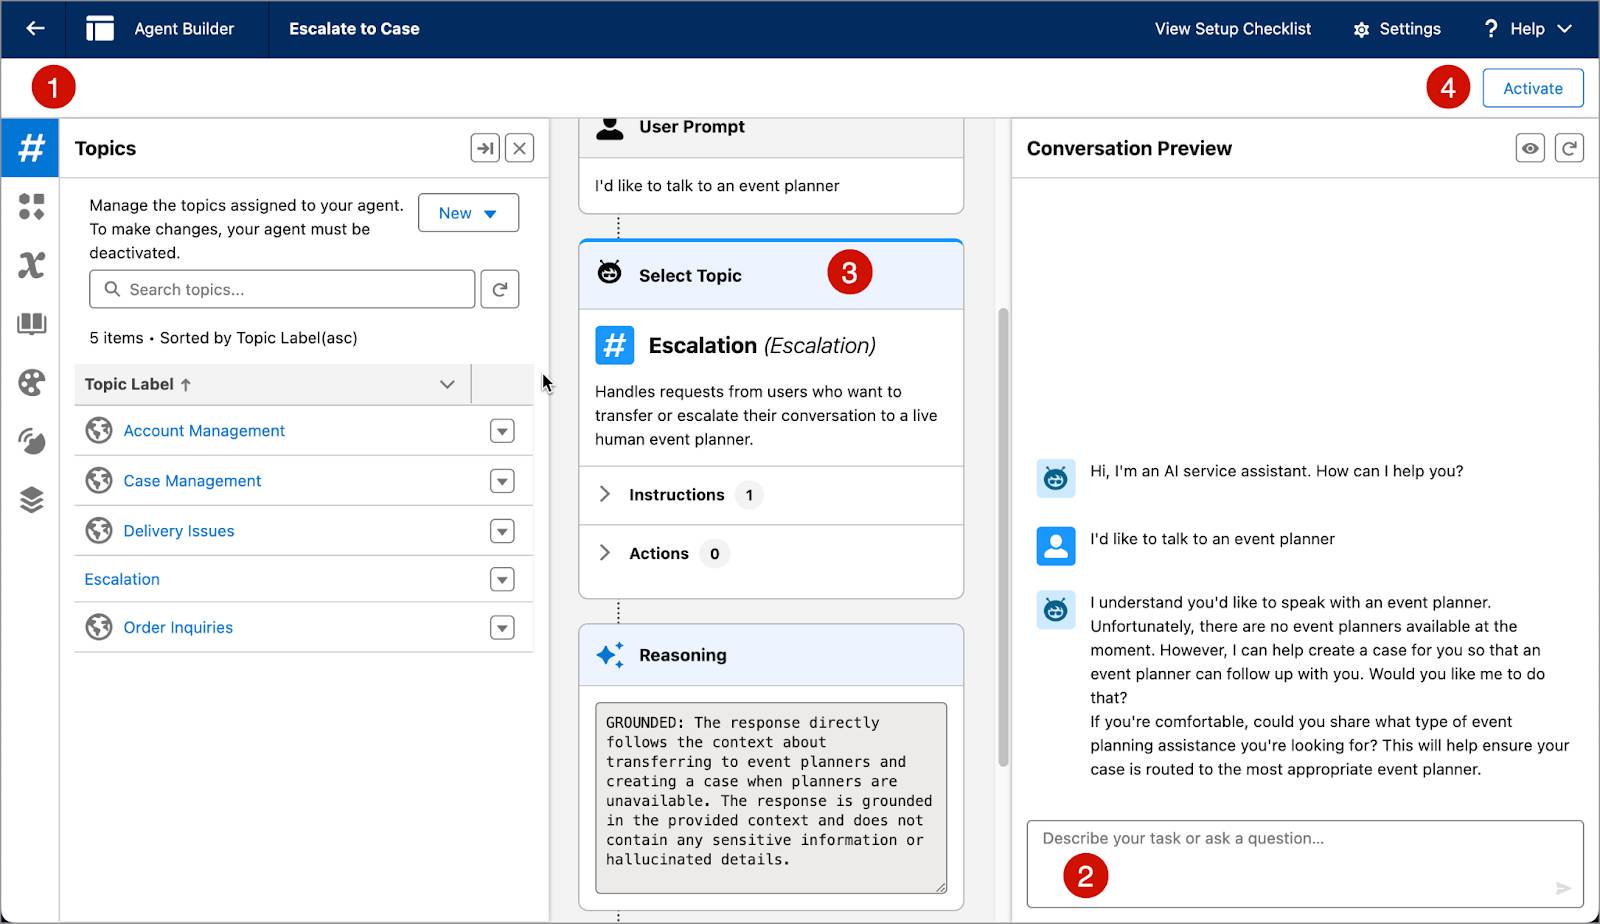
By the time you finish building your agent, it's already well on its way to doing the job you need it to do. But the real magic happens after you click that Create button. Once the agent is created, you’re taken to a screen in Agent Builder where you can:
- Access a tool palette to customize your agent so it meets your exact needs. (1)
- Engage with your agent in the Conversation Preview pane using scenarios it was or was not built to handle to see how it performs. (2)
- View behind-the-scenes conversation details that describe which topics, actions, instructions, and reasoning your agent used to answer your preview queries. Based on your agent's performance, you can go back and forth refining your customizations and previewing your agent until you get it just right. (3)
- Activate your agent to make it available to your users, or deactivate it before customizing or editing it. (4)
Let’s look at a few key elements that can be customized.
Topics and Actions
If you earned the Introduction to Agentforce badge, you learned that topics are categories of actions, and topics have instructions that tell the agent what it does, what actions to call, and what guardrails to work within. You also learned that actions are the individual tasks an agent performs. Adding, editing, or removing topics, topic instructions, and actions are some of the most impactful ways to customize agents.
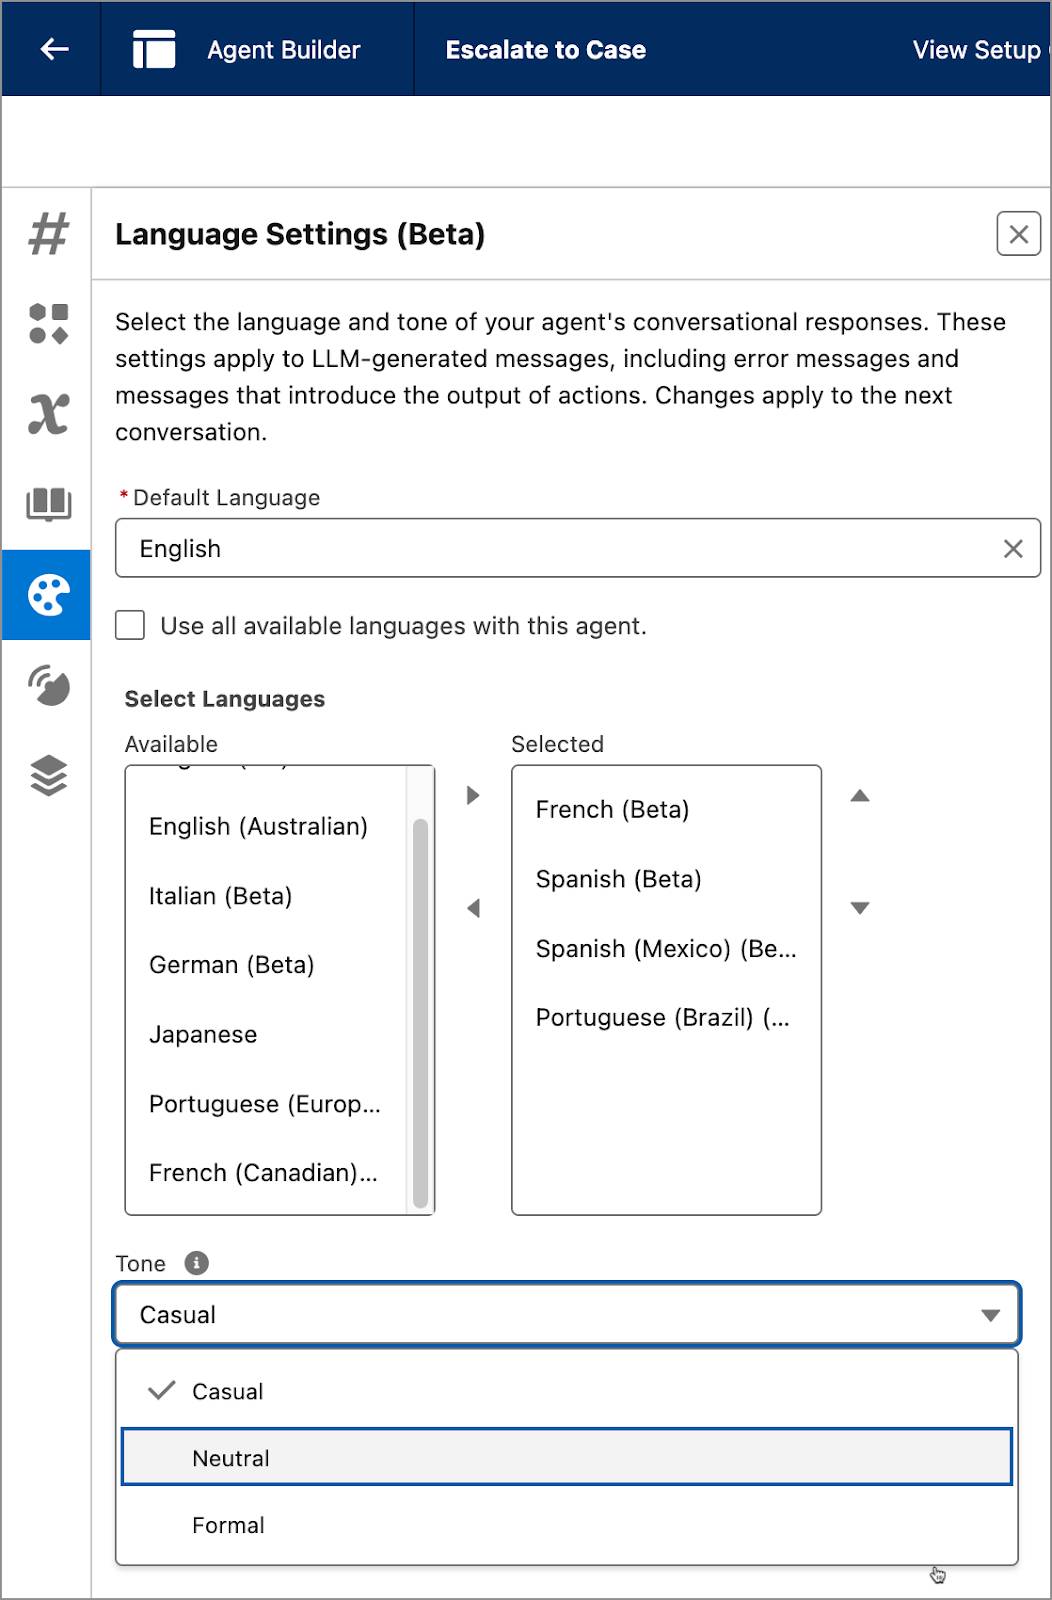
Language Settings (Beta)
Want your agent to respond in French? Japanese? Or maybe English, but with an Australian flair? You can select one default language and a number of other languages that apply to the large language model (LLM)–generated messages your agent responds to, like error messages. Choose a tone—casual, neutral, or formal—that matches your business culture or company’s style.
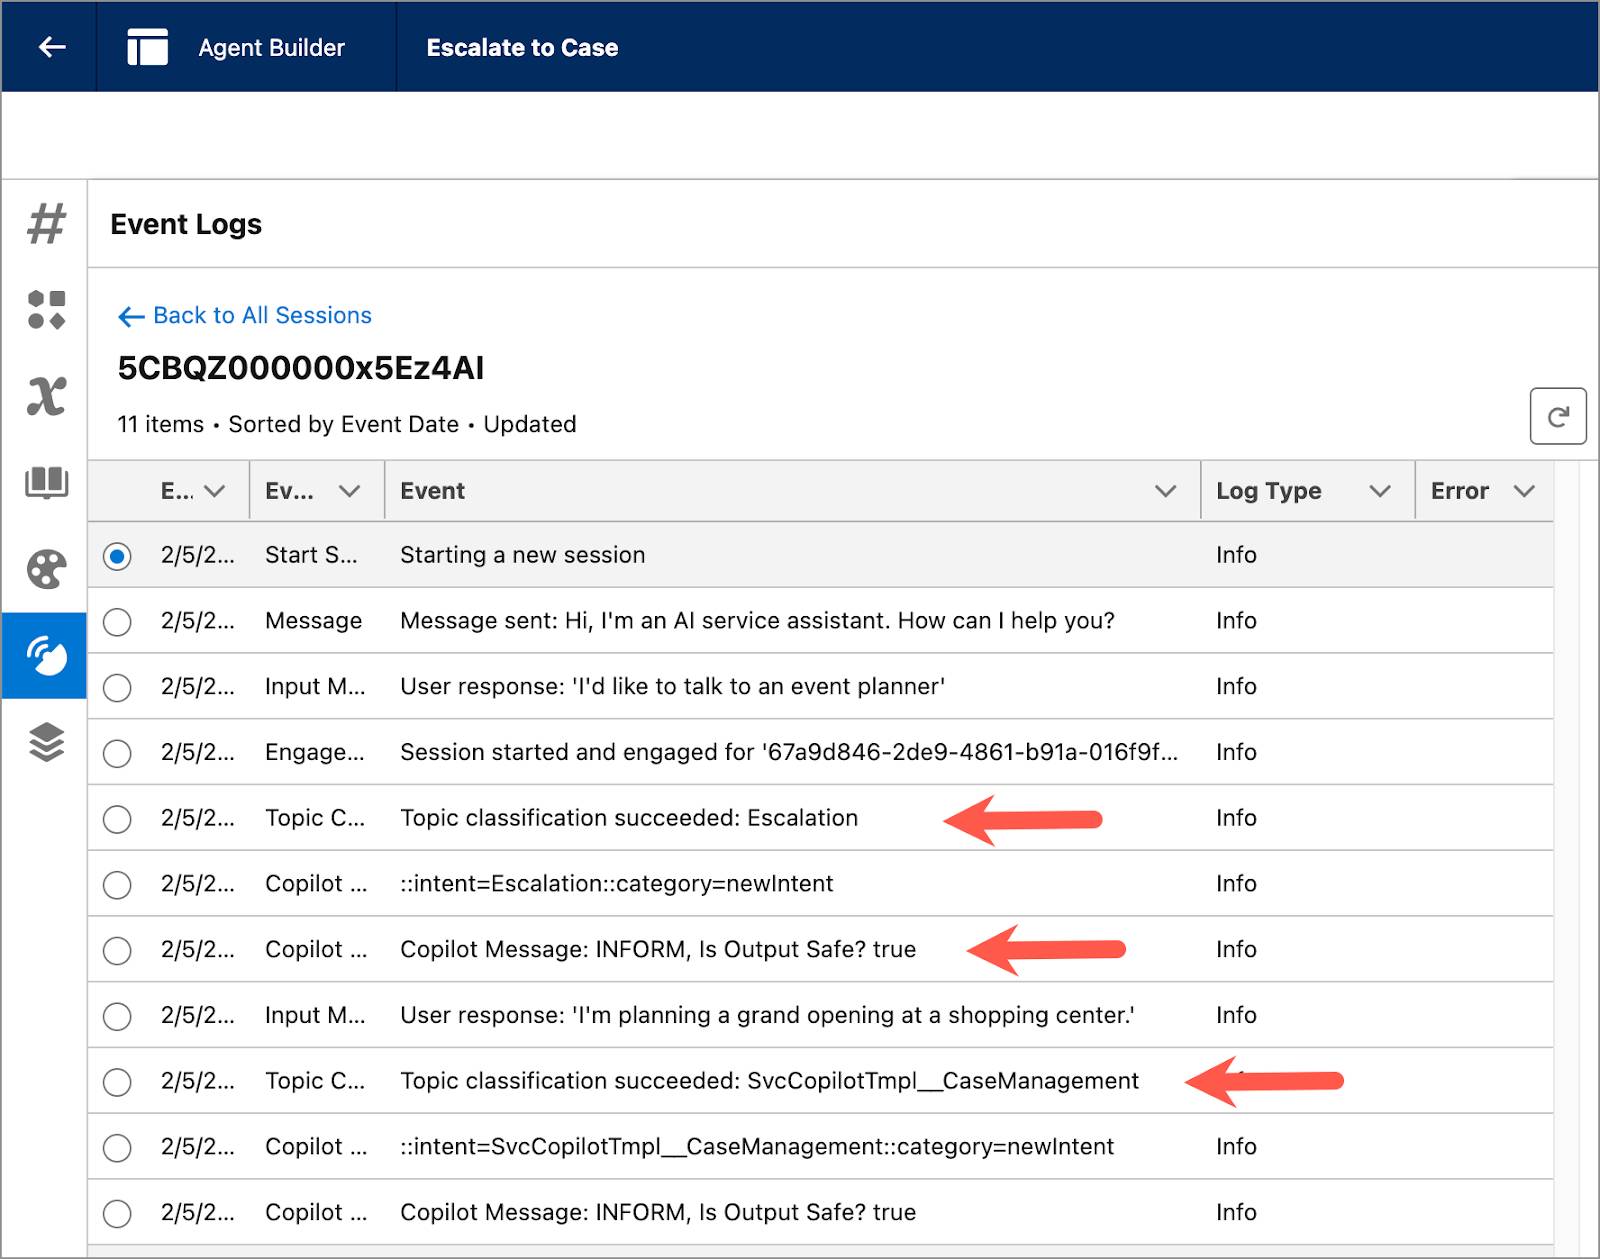
View Event Logs
Enriched event logs capture all of the events in an agent conversation in one place to help admins review, test, and troubleshoot an agent. Click an event log session to view details about how your agent engaged, including whether it called the right topics and actions, and stayed within the guardrails you set up. Information you gather from event logs can help you refine the behavior of your agent and let you know which components, such as instructions, or actions you may need to adjust. You can turn on enriched event logs in the Define Settings step when you build an agent, or enable it later on the Agent Details screen.
Explore Agent Details
There’s one last step before you deploy your agent: Review its details. You can find a list of all of your agents in Agent Studio on the Agents screen. Click an agent and explore the details tabs. You can view and edit many of the detail fields right on the details tabs, or click Open in Builder to edit others in Agent Builder. You can come back to Agent Details to review or edit these details at any time.
Two tabs contain details we haven’t covered, yet.
-
System Messages: Define the greeting users see at the start of a conversation and what to say if a system error occurs.
-
Setup Checklist: Review this checklist before activating so that your agent is deployed. This helps make sure you haven’t forgotten crucial steps.
Click the tabs to explore agent details.
Wrap Up
You just learned about Agent Builder, the intuitive step-by-step Agentforce interface where you can build and deploy agents for handling all types of business tasks. As your Agentforce grows, so does your ability to work more effectively and efficiently, so continue your Agentforce learning journey starting with the Trailhead badges in Resources.