Dive into Advanced Rules
Learning Objectives
After completing this unit, you’ll be able to:
- Describe the advanced rules framework.
- Create product relationships.
Before You Start
How much do you know? We assume you’ve already:
- Created and amended quotes and orders in your workplace.
- Used Product Designer to create products for your company’s catalog offerings.
- Discussed key pricing strategies with the sales team at your office.
Still trying to figure it out? Complete the badges in the following learning path to help with the concepts and tasks you do in this module.
Meet the Advanced Rules Framework
Rules are essential to creating the perfect order. They give you control of all the products and services offered to your customers, including offering them at the correct prices. Built using the Vlocity Rule Builder, advanced rules is Salesforce Industries' original rules framework, used primarily to create rules for product compatibility or configuration. They help determine which products and under what circumstances they apply using entity filters and conditional actions. Advanced rules ensure the correct products are available to eligible customers at the correct price and configuration.
As shown here, the Advanced Rules Framework includes three elements.
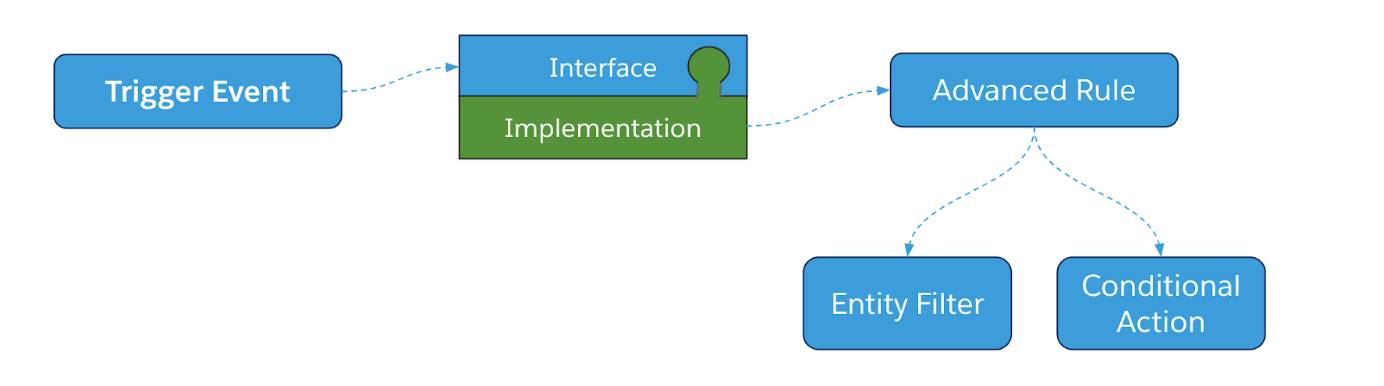
- A trigger event such as adding a new product to the Cart or removing a child entity from the Cart
- An interface and implementation
- An advanced rule based on an entity filter and a conditional action
You learn more about these elements later in this module.
Advanced Rule Types
You can create several types of advanced rules to ensure that the correct products are available to eligible customers at the correct price and in the correct configuration. Click each rule type to learn more.
Each of these rules serves a distinct purpose and plays a significant role in shaping the customer experience. In this unit, you get to know product relationships that form the core of compatibility rules. So, without any delay, jump right in!
Sign Up for a Training Playground
We don’t have any hands-on challenges in this module, but if you want to practice and try out the steps, you need a special training org that contains Industries Configure, Price, Quote (CPQ), and our sample data. A regular Trailhead playground doesn’t have Industries CPQ or our sample data.
Here’s how to get the training org now.
- Sign up for an Industries Training Playground.
- Fill out the form.
- Enter your first name and last name.
- Enter an active email address.
- Enter your company name.
- Click Sign me up. A confirmation message appears.
- Enter your first name and last name.
- When you receive the confirmation email (sometimes this takes a few minutes), log in to your training playground using the credentials in the email.
Explore Product Relationships
Product relationships determine if a product combination is valid. Using product relationships, you can define conditions, such as when customers add a product to the Cart, related products are added with it. You can also automatically add, remove, or recommend products based on other products in the Cart.
You trigger product relationships using compatibility rules. These rules run on order line item objects such as opportunity, quote, or order line items. They use product relationships as rule actions.
This image shows different types of product relationships you can define.

In this example, the Broadband Cable Service product has an Excludes relationship with the Business Video Service product. So, if a customer adds the Broadband Cable Service to the Cart, they can’t add the Business Video Service. Let’s understand this better by creating product relationships and exploring their vital role in defining advanced rules.
A Business Scenario
Eliza Young is the CPQ developer at Infiwave, a communications service provider (CSP). A vital part of her job is ensuring that the CPQ solution runs smoothly.

She’s just returned from a meeting with the Infiwave product managers, who’ve noticed frequent order fallouts for their popular product—the Infiwave Office Internet Solution. They’ve asked Eliza to implement rules to save customers from mistakes during the order capture process.
Eliza knows the best way to achieve this is by using compatibility rules. She plans to create a rule for the Office Internet Solution product that includes product relationships to ensure:
- The customer also orders an Office Hub Modem, which is a required equipment to make the Office Internet Solution work.
- The customer doesn’t order Blast! Pro Internet as this product is incompatible with the Office Internet Solution.
- The customer also buys the Smart Hub Cloud Backup, a great companion product for the Office Internet Solution. However, it’s a recommended product.
Follow along with Eliza in your training playground.
- From the App Launcher, find and select Vlocity Product Designer.
- From the navigation menu, select Product Relationships.
- Click New.
- Provide these details.
- In the Product Relationship Name field, enter
OIS Requires Office Hub Modem.
- For Product, find and select Office Internet Solution.
- In the Relationship Type field, select Requires.
- For Related Product, find and select Office Hub Modem.
- In both the Min Quantity and Max Quantity fields, enter
1.
- Save your changes.
- In the Product Relationship Name field, enter

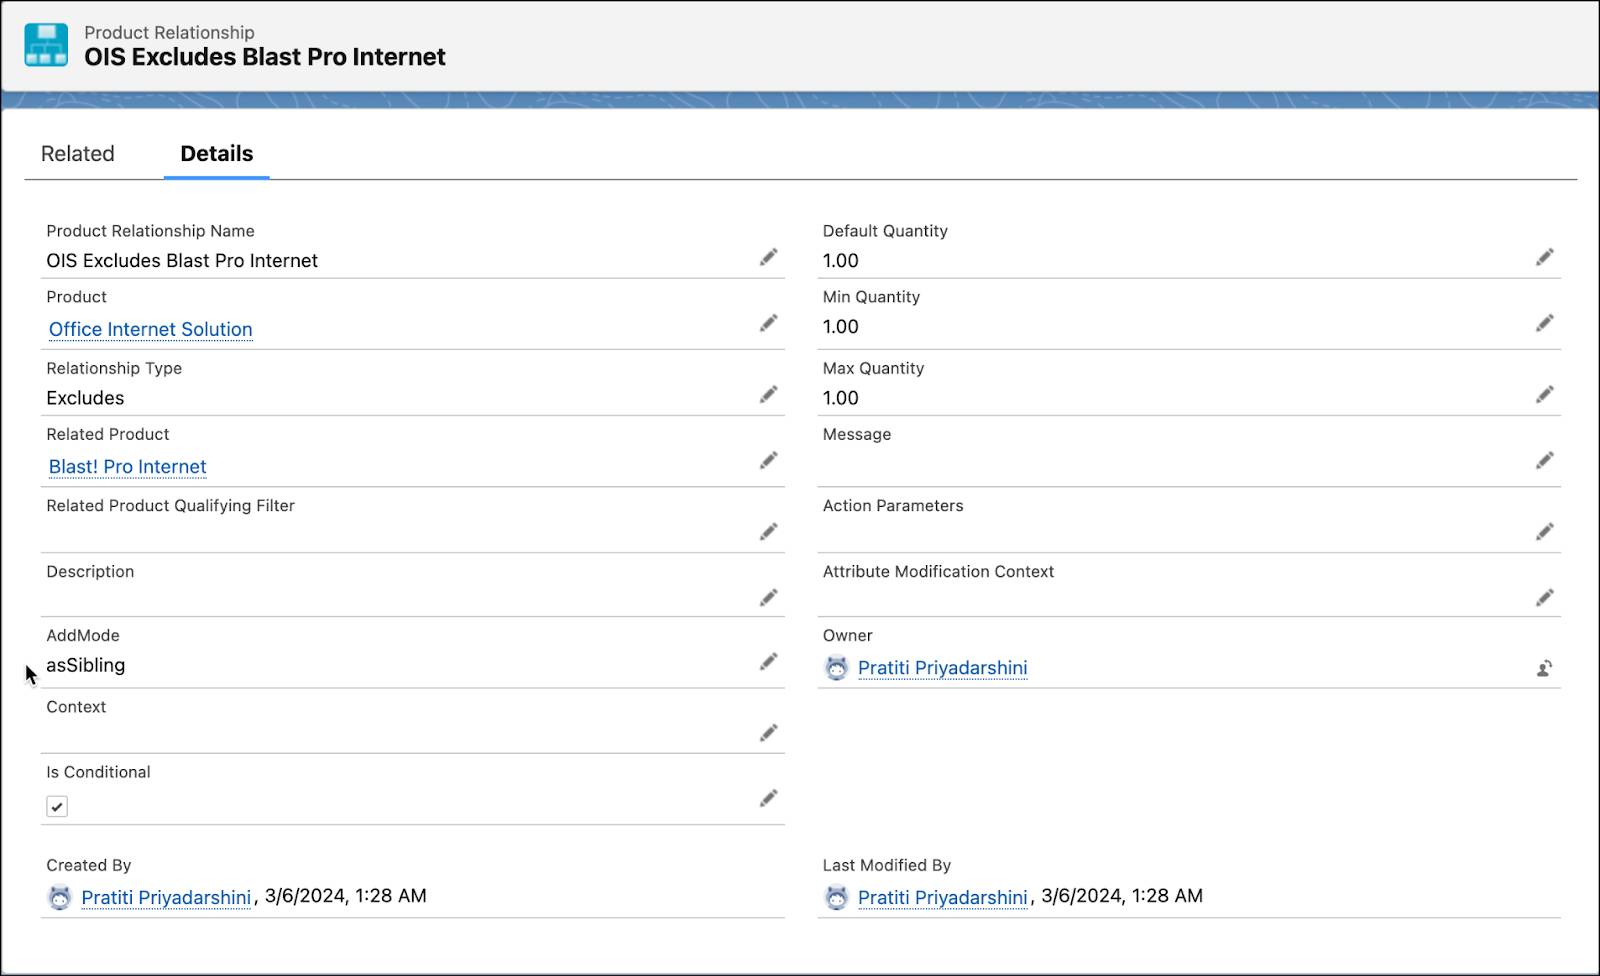
Next, follow the same steps to create two product relationships: OIS Excludes Blast Pro Internet and OIS Recommends Smart Hub Cloud Backup.
For the OIS Excludes Blast Pro Internet product relationship, set the Relationship Type to Excludes.
Similarly, for the OIS Recommends Smart Hub Cloud Backup product relationship, set the Relationship Type to Recommends.

With these three product relationships in place, move on to the next step: creating an advanced compatibility rule using Vlocity Rule Builder.
Create the Advanced Rule
Before creating the rule, ensure that the correct interface and implementation is active. In the Interface Implementations for Industries CPQ Rules module, you learned about the primary interfaces and implementations used by the advanced rules framework. Product relationships and compatibility rules use ProductValidationInterface and its associated ValidationRulesImplementation to execute definitions in the Product Relationship object.
Open the ProductValidationInterface to check if the appropriate implementation is active.
- From the App Launcher, find and select Interface Implementations.
- On the Interface Implementations page, change the Recently Viewed list view to All.
- Search for and open the ProductValidationInterface.
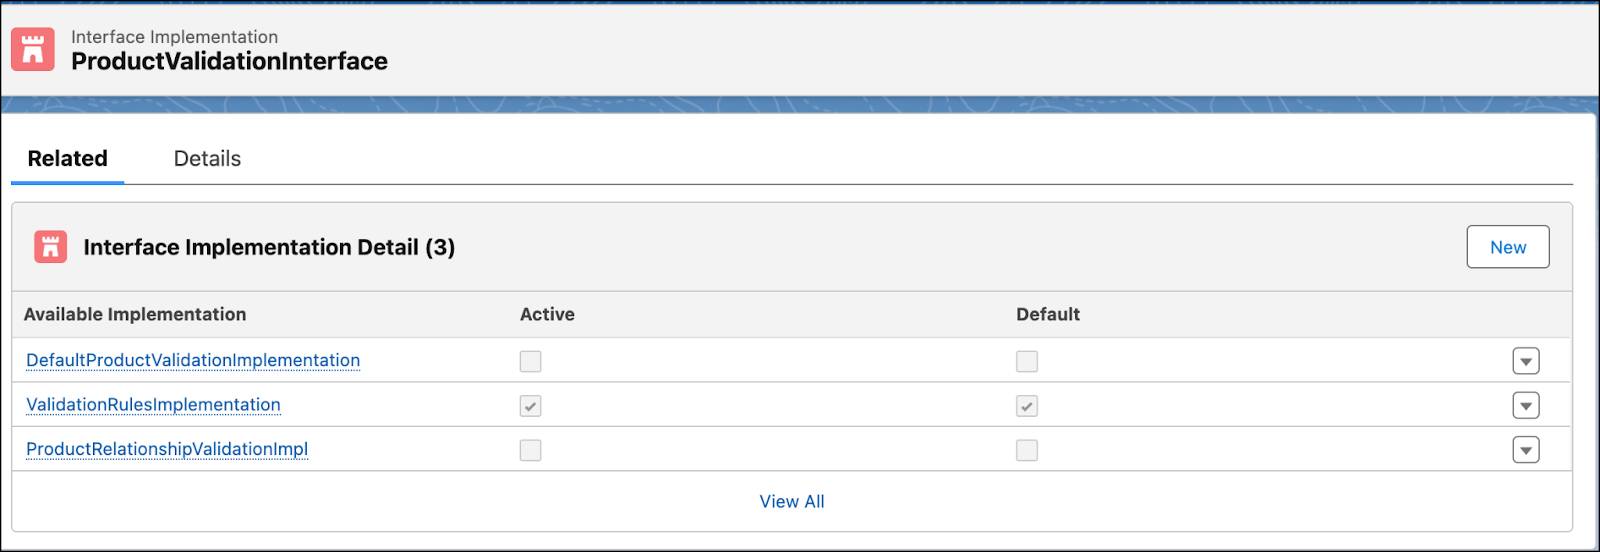
Notice that ValidationRulesImplementation is the Active and the Default implementation.
Having validated the interface implementation, it’s time to create the advanced rule to associate with the Office Internet Solution. This rule uses the three product relationships you created earlier—Requires, Excludes, and Recommends—as rule actions.
Here’s how to create the advanced rule using Vlocity Rule Builder.
- From the App Launcher, find and select Vlocity Rules.
- Click New.
- In the New Vlocity Rule page, provide these details.
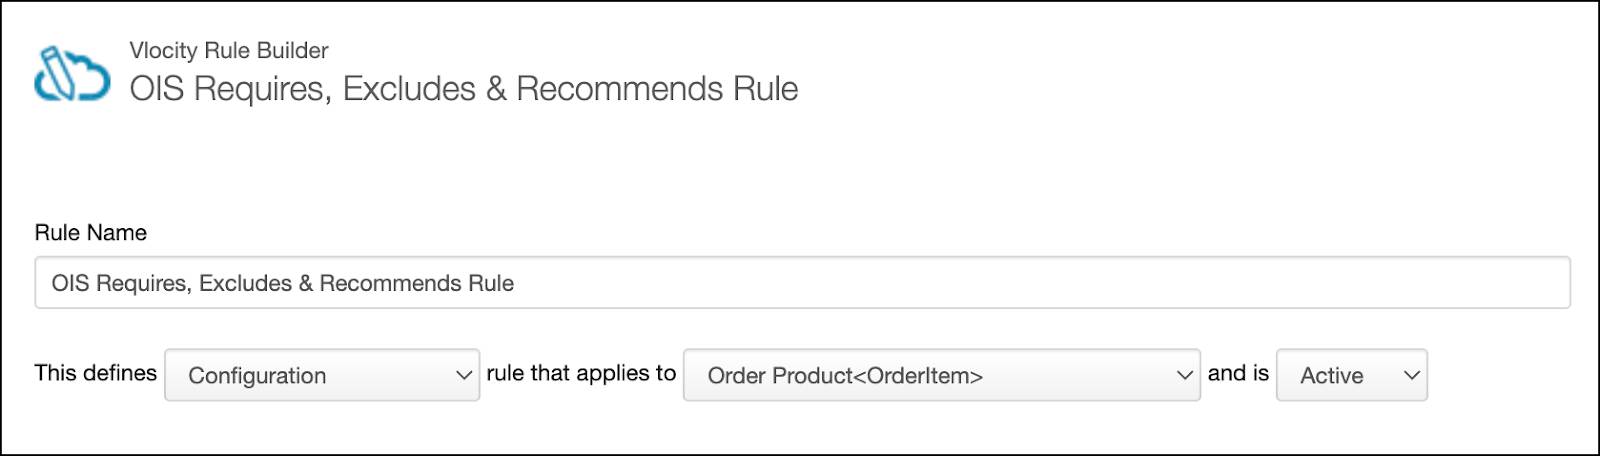
- In the Rule Name field, enter
OIS Requires, Excludes & Recommends Rule.
- In the next line, for the three dropdowns, select Configuration, Order Product<OrderItem>, and Active, respectively.
- In the Rule Name field, enter
Next, add the three product relationships that appear as actions within the Vlocity Rule Builder.
- In the FILTERS AND ACTIONS LIST, click Actions to view all the product relationships.

- Locate OIS Requires Office Hub Modem and click Add To Rule Action. Repeat for OIS Recommends Smart Hub Cloud Backup and OIS Excludes Blast Pro Internet. You now have three actions displayed under the section named And apply these actions.
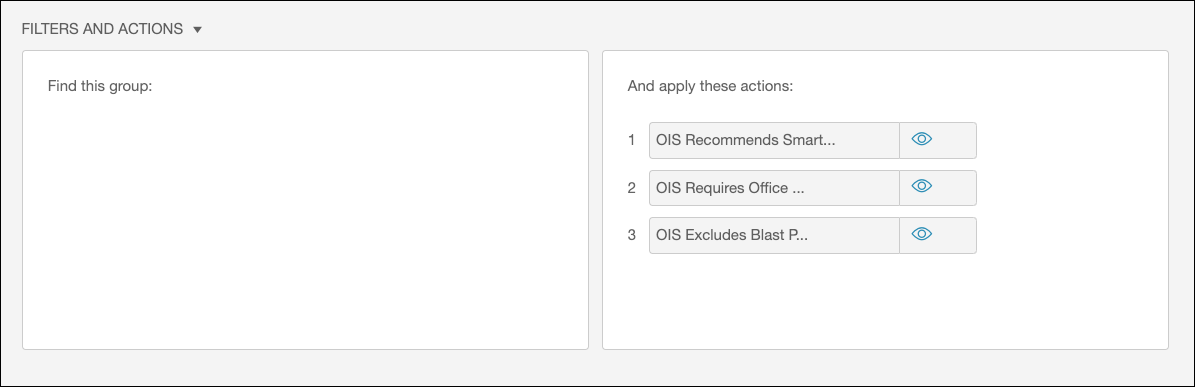
- Save your changes.
You have successfully created the advanced compatibility rule.

Test the New Rule in the Cart
Testing everything before signing off on them is always a good practice. Here’s how to ensure that the advanced rule works as desired.
- Create a new order for the B2B customer, Acme.
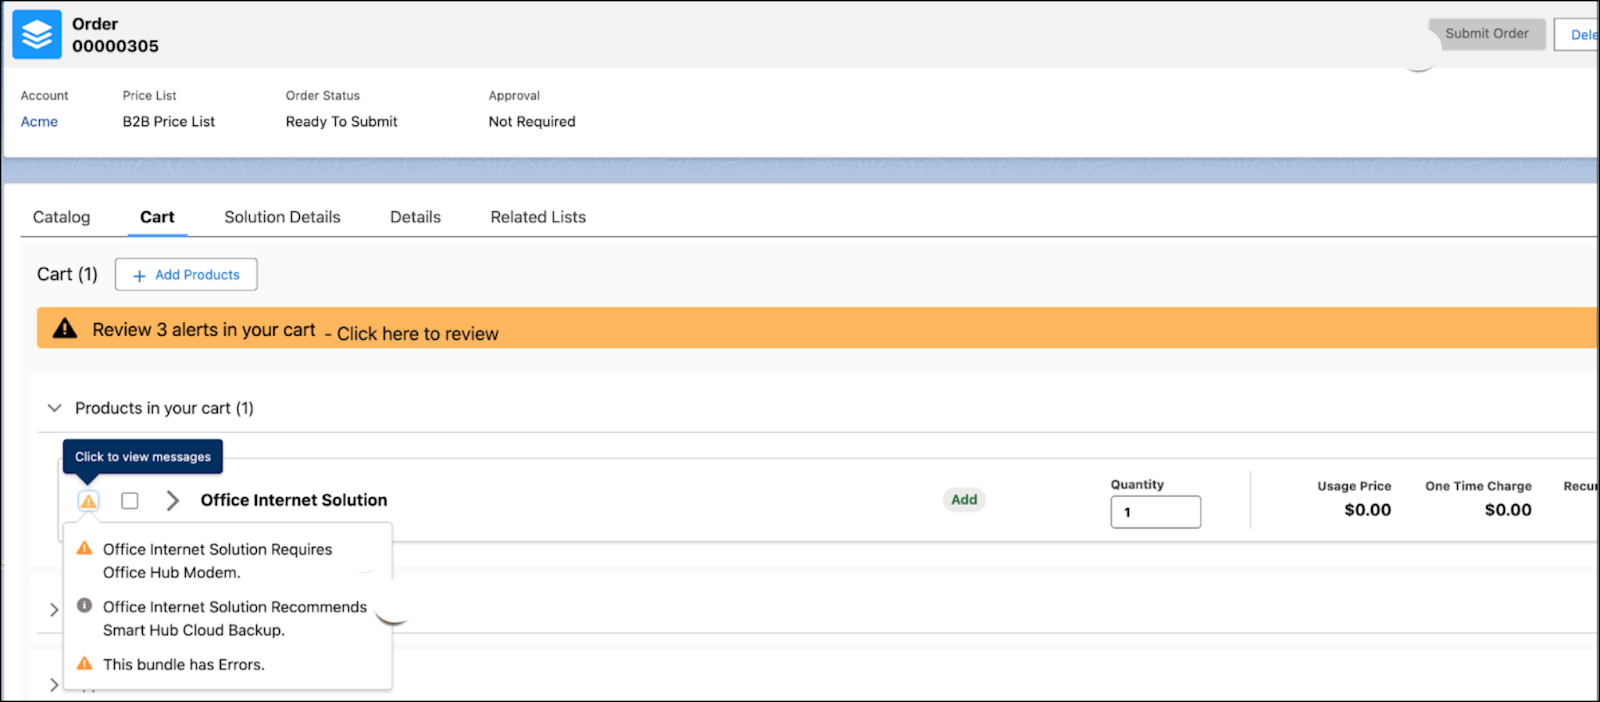
- Then, add the Office Internet Solution to the Cart.
- Click
 , and review the three alerts. The Submit Order button is inactive because you haven’t yet added the required Office Hub Modem product to your Cart.
- Add the Office Hub Modem product to the Cart. This step resolves the first alert.
- Next, select the appropriate Download Speed for the Broadband Cable Service. This step resolves the third alert. Notice that the Submit Order button is also activated now.
- Finally, add the Blast! Pro Internet product to the Cart to review the impact of the Excludes product relationship.
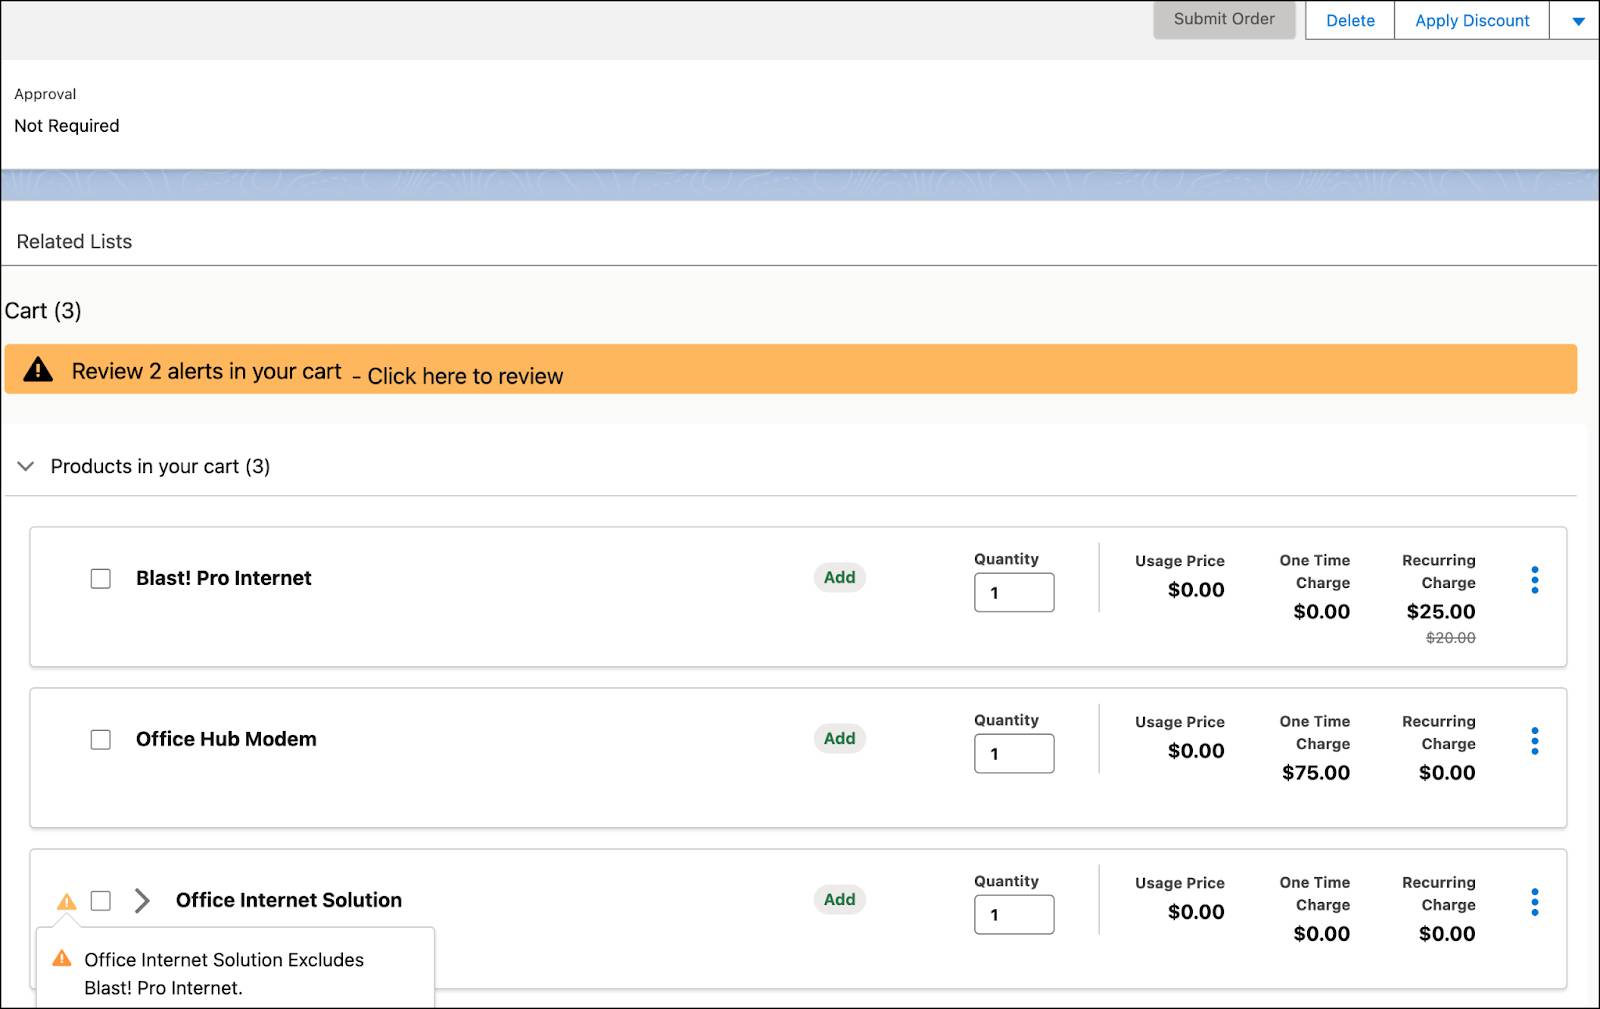
An alert appears and the Submit Order button is deactivated. To submit the order, remove the Blast! Pro Internet product or the Office Internet Solution product. Your advanced rule is working exactly as expected.
In this unit, you learned about the elements in the advanced rules framework. You also learned how products can be related to one another using product relationships. In the next unit, learn to create advanced rules to modify attributes.