Criar um componente Web do Lightning para API de modelos
Objetivos de aprendizagem
Após concluir esta unidade, você estará apto a:
- Criar uma classe do Apex personalizada.
- Criar um componente Web do Lightning.
- Implantar um componente Web do Lightning em seu Playground de IA.
- Editar uma página da organização com o Criador de aplicativo Lightning.
Agora que você configurou seu ambiente, é hora de adicionar funcionalidade ao componente Web do Lightning. Nesta unidade, acompanhamos Maria enquanto ela cria uma classe do Apex personalizada, projeta a interface de usuário, adiciona JavaScript funcional e implanta seu painel de API de modelos no Playground de IA.
Exemplo de caso de uso: redator de documentação para desenvolvedores
Este vídeo mostra como criar um componente Web do Lightning que acessa a API de modelos, usando um exemplo básico semelhante ao deste módulo.

Criar classes do Apex para API de modelos
- No VS Code, clique com o botão direito do mouse na pasta classes localizada em force-app/main e selecione SFDX: Create Apex Class (Criar classe do Apex). Nomeie a classe como
DashboardController.
- As novas classes do Apex no VS Code vêm com cinco linhas de código padrão. Remova este código padrão. Não será necessário qualquer código padrão para este módulo, pois fornecemos exemplos de código completos para classes do Apex e arquivos de componentes Web do Lightning.
- No arquivo de classe do Apex,
DashboardController.cls, copie e cole o código a seguir.
public with sharing class DashboardController {
    @AuraEnabled
    public static String createChatGenerations(String input) {
        String fileContent = HousingData.jsonString;
        // Escape double quotes, newlines, and carriage returns within the JSON string
        String escapedFileContent = HousingData.jsonString
        .replace('\\', '\\\\') // Escape backslashes
        .replace('"', '\\"')   // Escape double quotes
        .replace('\n', '\\n')  // Escape newlines
        .replace('\r', '\\r'); // Escape carriage returns
        // Construct the input string
        String instructions = '[{"role": "user", "message": "Summarize the sample housing data as if you were a real estate broker. Housing Data: ' + escapedFileContent + '"}]';
        // Deserialize the file content into a list of ChatMessage objects
        List<DashboardController.ChatMessage> messages = (List<DashboardController.ChatMessage>) JSON.deserialize(
            instructions,
            List<DashboardController.ChatMessage>.class
        );
        // Instantiate the API class
        aiplatform.ModelsAPI modelsAPI = new aiplatform.ModelsAPI();
        // Prepare the request and body objects
        aiplatform.ModelsAPI.createChatGenerations_Request request = new aiplatform.ModelsAPI.createChatGenerations_Request();
        aiplatform.ModelsAPI_ChatGenerationsRequest body = new aiplatform.ModelsAPI_ChatGenerationsRequest();
        // Specify model
        request.modelName = 'sfdc_ai__DefaultGPT35Turbo';
        // Create a list to hold chat messages
        List<aiplatform.ModelsAPI_ChatMessageRequest> messagesList = new List<aiplatform.ModelsAPI_ChatMessageRequest>();
        // Loop through the input messages and create message requests
        for (ChatMessage msg : messages) {
            aiplatform.ModelsAPI_ChatMessageRequest messageRequest = new aiplatform.ModelsAPI_ChatMessageRequest();
            messageRequest.content = msg.message != null ? msg.message : ''; // Handle null message
            messageRequest.role = msg.role != null ? msg.role : 'user'; // Handle null role
            messagesList.add(messageRequest);
        }
        // Set the messages in the request body
        body.messages = messagesList;
        // Set the request body and model name
        request.body = body;
        String response = '';
        try {
            // Call the API and get the response
            aiplatform.ModelsAPI.createChatGenerations_Response apiResponse = modelsAPI.createChatGenerations(
                request
            );
            // Check that we have a non-null response
            if (
                apiResponse?.Code200?.generationDetails?.generations != null &&
                !apiResponse.Code200.generationDetails.generations.isEmpty()
            ) {
                // Set the variable from the response
                response = apiResponse.Code200.generationDetails.generations[0]
                    .content;
            } else {
                // Handle the case where response is null
                response = 'No content generated';
            }
        // Handle error
        } catch(aiplatform.ModelsAPI.createChatGenerations_ResponseException e) {
            System.debug('Response code: ' + e.responseCode);
            System.debug('The following exception occurred: ' + e);
            // Add error to the output
            response = 'Unable to get a valid response. Error code: ' + e.responseCode;
        }
        return response;
    }
    public class ChatMessage {
        public String role;
        public String message;
        public ChatMessage() {
        }
        public ChatMessage(String role, String message) {
            this.role = role;
            this.message = message;
        }
    }
}- Salve o arquivo pressionando Ctrl+S no Windows ou Cmd+S no macOS.
Criar uma nova classe para dados de fundamentação
Para que o painel de API de modelos de Maria funcione, ela precisa fundamentar o LLM com dados relevantes do mercado imobiliário. Nesta etapa, criamos uma nova classe e a preenchemos com dados para que ela possa ser referenciada pela classe DashboardController.
Para fins de demonstração, os dados são um arquivo local no LWC. Em uma implementação oficial deste painel, os dados nesta etapa seriam recuperados dinamicamente de uma API do mercado imobiliário.
- No VS Code, clique com o botão direito do mouse na pasta classes e selecione SFDX: Create Apex Class (Criar classe do Apex). Nomeie a classe como
HousingData.
- No arquivo de classe do Apex,
HousingData.cls, copie e cole o código a seguir.
public class HousingData {
    public static final String jsonString = '{\n' +
'[' +
'  {\n' +
'    "County": "Adams",\n' +
'    "Sales (SAAR)": 130,\n' +
'    "% Change by quarter": 8.3,\n' +
'    "% Change by year": -7.1,\n' +
'    "Building Permits": 12,\n' +
'    "% Change by year (Building Permits)": -25.0,\n' +
'    "Median Price ($)": 318100,\n' +
'    "% Change by year (Median Price)": 6.9,\n' +
'    "Median Buyer HAI": 83.7,\n' +
'    "First-time Buyer HAI": 59.7\n' +
'  },\n' +
'  {\n' +
'    "County": "Benton",\n' +
'    "Sales (SAAR)": 3060,\n' +
'    "% Change by quarter": 2.3,\n' +
'    "% Change by year": -16.2,\n' +
'    "Building Permits": 447,\n' +
'    "% Change by year (Building Permits)": 42.4,\n' +
'    "Median Price ($)": 426900,\n' +
'    "% Change by year (Median Price)": 0.3,\n' +
'    "Median Buyer HAI": 81.8,\n' +
'    "First-time Buyer HAI": 58.4\n' +
'  },\n' +
'  {\n' +
'    "County": "Chelan",\n' +
'    "Sales (SAAR)": 760,\n' +
'    "% Change by quarter": -3.8,\n' +
'    "% Change by year": -16.5,\n' +
'    "Building Permits": 115,\n' +
'    "% Change by year (Building Permits)": 74.2,\n' +
'    "Median Price ($)": 563500,\n' +
'    "% Change by year (Median Price)": 15.8,\n' +
'    "Median Buyer HAI": 52.5,\n' +
'    "First-time Buyer HAI": 37.5\n' +
'  },\n' +
'  {\n' +
'    "County": "Clark",\n' +
'    "Sales (SAAR)": 4830,\n' +
'    "% Change by quarter": -19.0,\n' +
'    "% Change by year": -34.3,\n' +
'    "Building Permits": 698,\n' +
'    "% Change by year (Building Permits)": -16.1,\n' +
'    "Median Price ($)": 531500,\n' +
'    "% Change by year (Median Price)": 5.8,\n' +
'    "Median Buyer HAI": 72.9,\n' +
'    "First-time Buyer HAI": 52.0\n' +
'  },\n' +
'  {\n' +
'    "County": "Columbia",\n' +
'    "Sales (SAAR)": 80,\n' +
'    "% Change by quarter": 0.0,\n' +
'    "% Change by year": -11.1,\n' +
'    "Building Permits": 2,\n' +
'    "% Change by year (Building Permits)": -86.7,\n' +
'    "Median Price ($)": 228300,\n' +
'    "% Change by year (Median Price)": -13.2,\n' +
'    "Median Buyer HAI": 166.9,\n' +
'    "First-time Buyer HAI": 119.1\n' +
'  },\n' +
'  {\n' +
'    "County": "Franklin",\n' +
'    "Sales (SAAR)": 1030,\n' +
'    "% Change by quarter": 3.0,\n' +
'    "% Change by year": -16.3,\n' +
'    "Building Permits": 138,\n' +
'    "% Change by year (Building Permits)": 29.0,\n' +
'    "Median Price ($)": 426900,\n' +
'    "% Change by year (Median Price)": 0.3,\n' +
'    "Median Buyer HAI": 90.7,\n' +
'    "First-time Buyer HAI": 64.7\n' +
'  },\n' +
'  {\n' +
'    "County": "Garfield",\n' +
'    "Sales (SAAR)": 0,\n' +
'    "% Change by quarter": "NA",\n' +
'    "% Change by year": "NA",\n' +
'    "Building Permits": 0,\n' +
'    "% Change by year (Building Permits)": "NA",\n' +
'    "Median Price ($)": 268000,\n' +
'    "% Change by year (Median Price)": 14.9,\n' +
'    "Median Buyer HAI": 104.1,\n' +
'    "First-time Buyer HAI": 74.3\n' +
'  },\n' +
'  {\n' +
'    "County": "Grays Harbor",\n' +
'    "Sales (SAAR)": 1660,\n' +
'    "% Change by quarter": 0.0,\n' +
'    "% Change by year": -19.4,\n' +
'    "Building Permits": 69,\n' +
'    "% Change by year (Building Permits)": -6.8,\n' +
'    "Median Price ($)": 351300,\n' +
'    "% Change by year (Median Price)": 7.6,\n' +
'    "Median Buyer HAI": 71.1,\n' +
'    "First-time Buyer HAI": 50.7\n' +
'  },\n' +
'  {\n' +
'    "County": "Jefferson",\n' +
'    "Sales (SAAR)": 480,\n' +
'    "% Change by quarter": -5.9,\n' +
'    "% Change by year": -12.7,\n' +
'    "Building Permits": 31,\n' +
'    "% Change by year (Building Permits)": 24.0,\n' +
'    "Median Price ($)": 650000,\n' +
'    "% Change by year (Median Price)": 16.4,\n' +
'    "Median Buyer HAI": 43.2,\n' +
'    "First-time Buyer HAI": 30.9\n' +
'  },\n' +
'  {\n' +
'    "County": "King",\n' +
'    "Sales (SAAR)": 18520,\n' +
'    "% Change by quarter": -0.1,\n' +
'    "% Change by year": -21.1,\n' +
'    "Building Permits": 3110,\n' +
'    "% Change by year (Building Permits)": 4.7,\n' +
'    "Median Price ($)": 931000,\n' +
'    "% Change by year (Median Price)": 13.4,\n' +
'    "Median Buyer HAI": 58.6,\n' +
'    "First-time Buyer HAI": 41.8\n' +
'  },\n' +
'  {\n' +
'    "County": "Kitsap",\n' +
'    "Sales (SAAR)": 3680,\n' +
'    "% Change by quarter": -0.8,\n' +
'    "% Change by year": -20.0,\n' +
'    "Building Permits": 400,\n' +
'    "% Change by year (Building Permits)": -49.0,\n' +
'    "Median Price ($)": 532200,\n' +
'    "% Change by year (Median Price)": 5.6,\n' +
'    "Median Buyer HAI": 76.0,\n' +
'    "First-time Buyer HAI": 54.2\n' +
'  },\n' +
'  {\n' +
'    "County": "Kittitas",\n' +
'    "Sales (SAAR)": 960,\n' +
'    "% Change by quarter": 6.7,\n' +
'    "% Change by year": -13.5,\n' +
'    "Building Permits": 85,\n' +
'    "% Change by year (Building Permits)": -15.0,\n' +
'    "Median Price ($)": 521700,\n' +
'    "% Change by year (Median Price)": -5.1,\n' +
'    "Median Buyer HAI": 49.3,\n' +
'    "First-time Buyer HAI": 35.2\n' +
'  },\n' +
'  {\n' +
'    "County": "Lewis",\n' +
'    "Sales (SAAR)": 970,\n' +
'    "% Change by quarter": -6.7,\n' +
'    "% Change by year": -26.5,\n' +
'    "Building Permits": 110,\n' +
'    "% Change by year (Building Permits)": 80.3,\n' +
'    "Median Price ($)": 413000,\n' +
'    "% Change by year (Median Price)": 5.7,\n' +
'    "Median Buyer HAI": 72.0,\n' +
'    "First-time Buyer HAI": 51.4\n' +
'  },\n' +
'  {\n' +
'    "County": "Mason",\n' +
'    "Sales (SAAR)": 1010,\n' +
'    "% Change by quarter": -4.7,\n' +
'    "% Change by year": -18.5,\n' +
'    "Building Permits": 93,\n' +
'    "% Change by year (Building Permits)": 31.0,\n' +
'    "Median Price ($)": 391200,\n' +
'    "% Change by year (Median Price)": 1.9,\n' +
'    "Median Buyer HAI": 89.0,\n' +
'    "First-time Buyer HAI": 63.5\n' +
'  },\n' +
'  {\n' +
'    "County": "Okanogan",\n' +
'    "Sales (SAAR)": 360,\n' +
'    "% Change by quarter": -2.7,\n' +
'    "% Change by year": -29.4,\n' +
'    "Building Permits": 57,\n' +
'    "% Change by year (Building Permits)": 29.5,\n' +
'    "Median Price ($)": 369400,\n' +
'    "% Change by year (Median Price)": 29.6,\n' +
'    "Median Buyer HAI": 68.4,\n' +
'    "First-time Buyer HAI": 48.8\n' +
'  },\n' +
'  {\n' +
'    "County": "Pierce",\n' +
'    "Sales (SAAR)": 9780,\n' +
'    "% Change by quarter": -2.4,\n' +
'    "% Change by year": -25.6,\n' +
'    "Building Permits": 629,\n' +
'    "% Change by year (Building Permits)": -17.1,\n' +
'    "Median Price ($)": 547800,\n' +
'    "% Change by year (Median Price)": 4.5,\n' +
'    "Median Buyer HAI": 72.5,\n' +
'    "First-time Buyer HAI": 51.7\n' +
'  },\n' +
'  {\n' +
'    "County": "San Juan",\n' +
'    "Sales (SAAR)": 220,\n' +
'    "% Change by quarter": 0.0,\n' +
'    "% Change by year": -8.3,\n' +
'    "Building Permits": 23,\n' +
'    "% Change by year (Building Permits)": 43.8,\n' +
'    "Median Price ($)": 737500,\n' +
'    "% Change by year (Median Price)": -13.2,\n' +
'    "Median Buyer HAI": 41.4,\n' +
'    "First-time Buyer HAI": 29.6\n' +
'  },\n' +
'  {\n' +
'    "County": "Skagit",\n' +
'    "Sales (SAAR)": 1420,\n' +
'    "% Change by quarter": -6.0,\n' +
'    "% Change by year": -24.9,\n' +
'    "Building Permits": 169,\n' +
'    "% Change by year (Building Permits)": 70.7,\n' +
'    "Median Price ($)": 553100,\n' +
'    "% Change by year (Median Price)": 6.7,\n' +
'    "Median Buyer HAI": 53.9,\n' +
'    "First-time Buyer HAI": 38.4\n' +
'  },\n' +
'  {\n' +
'    "County": "Snohomish",\n' +
'    "Sales (SAAR)": 7740,\n' +
'    "% Change by quarter": -2.5,\n' +
'    "% Change by year": -23.1,\n' +
'    "Building Permits": 1060,\n' +
'    "% Change by year (Building Permits)": 20.7,\n' +
'    "Median Price ($)": 737700,\n' +
'    "% Change by year (Median Price)": 6.4,\n' +
'    "Median Buyer HAI": 69.1,\n' +
'    "First-time Buyer HAI": 49.3\n' +
'  },\n' +
'  {\n' +
'    "County": "Spokane",\n' +
'    "Sales (SAAR)": 6010,\n' +
'    "% Change by quarter": 2.6,\n' +
'    "% Change by year": -13.4,\n' +
'    "Building Permits": 736,\n' +
'    "% Change by year (Building Permits)": -31.7,\n' +
'    "Median Price ($)": 426500,\n' +
'    "% Change by year (Median Price)": 4.8,\n' +
'    "Median Buyer HAI": 74.9,\n' +
'    "First-time Buyer HAI": 53.5\n' +
'  },\n' +
'  {\n' +
'    "County": "Stevens",\n' +
'    "Sales (SAAR)": 690,\n' +
'    "% Change by quarter": -1.4,\n' +
'    "% Change by year": -2.8,\n' +
'    "Building Permits": 50,\n' +
'    "% Change by year (Building Permits)": 31.6,\n' +
'    "Median Price ($)": 303600,\n' +
'    "% Change by year (Median Price)": 10.4,\n' +
'    "Median Buyer HAI": 92.4,\n' +
'    "First-time Buyer HAI": 66.0\n' +
'  },\n' +
'  {\n' +
'    "County": "Wahkiakum",\n' +
'    "Sales (SAAR)": 80,\n' +
'    "% Change by quarter": -11.1,\n' +
'    "% Change by year": 14.3,\n' +
'    "Building Permits": 5,\n' +
'    "% Change by year (Building Permits)": 25.0,\n' +
'    "Median Price ($)": 417000,\n' +
'    "% Change by year (Median Price)": 1.1,\n' +
'    "Median Buyer HAI": 71.3,\n' +
'    "First-time Buyer HAI": 50.9\n' +
'  },\n' +
'  {\n' +
'    "County": "Walla Walla",\n' +
'    "Sales (SAAR)": 560,\n' +
'    "% Change by quarter": 1.8,\n' +
'    "% Change by year": -11.1,\n' +
'    "Building Permits": 40,\n' +
'    "% Change by year (Building Permits)": -45.2,\n' +
'    "Median Price ($)": 418700,\n' +
'    "% Change by year (Median Price)": 3.1,\n' +
'    "Median Buyer HAI": 68.2,\n' +
'    "First-time Buyer HAI": 48.7\n' +
'  },\n' +
'  {\n' +
'    "County": "Whatcom",\n' +
'    "Sales (SAAR)": 2460,\n' +
'    "% Change by quarter": 0.8,\n' +
'    "% Change by year": -16.9,\n' +
'    "Building Permits": 279,\n' +
'    "% Change by year (Building Permits)": 16.2,\n' +
'    "Median Price ($)": 650600,\n' +
'    "% Change by year (Median Price)": 12.0,\n' +
'    "Median Buyer HAI": 50.7,\n' +
'    "First-time Buyer HAI": 36.2\n' +
'  },\n' +
'  {\n' +
'    "County": "Yakima",\n' +
'    "Sales (SAAR)": 1710,\n' +
'    "% Change by quarter": -2.3,\n' +
'    "% Change by year": -18.6,\n' +
'    "Building Permits": 82,\n' +
'    "% Change by year (Building Permits)": -33.3,\n' +
'    "Median Price ($)": 341600,\n' +
'    "% Change by year (Median Price)": 1.7,\n' +
'    "Median Buyer HAI": 82.3,\n' +
'    "First-time Buyer HAI": 58.7\n' +
'  },\n' +
'  {\n' +
'    "County": "Statewide",\n' +
'    "Sales (SAAR)": 77990,\n' +
'    "% Change by quarter": -2.3,\n' +
'    "% Change by year": -21.5,\n' +
'    "Building Permits": 9229,\n' +
'    "% Change by year (Building Permits)": -6.4,\n' +
'    "Median Price ($)": 626100,\n' +
'    "% Change by year (Median Price)": 9.3,\n' +
'    "Median Buyer HAI": 63.1,\n' +
'    "First-time Buyer HAI": 45.0\n' +
'  }\n' +
']\n' +
'}';
}- Salve o arquivo pressionando Ctrl+S no Windows ou Cmd+S no macOS.
- Clique com o botão direito do mouse na pasta force-app/main/default novamente e selecione SFDX: Deploy This Source to Org (SFDX: Implantar essa fonte na organização).
- Na guia Output (Saída) do terminal integrado, veja os resultados de sua implantação. Se o comando foi executado com sucesso, é exibida a mensagem Deployed Source (Fonte implantada) listando os quatro arquivos que foram carregados na organização.
Criar um componente Web do Lightning para API de modelos
- No Visual Studio Code, abra a paleta de comandos ao pressionar Ctrl+Shift+P (Windows) ou Cmd+Shift+P (macOS).
- Digite
SFDX.
- Selecione SFDX: Create Lightning Web Component (Criar componente Web do Lightning).
- Insira
modelsAPIDashboardcomo nome do novo componente.
- Pressione Enter para aceitar o padrão
force-app/main/default/lwc.
- Pressione Enter.
- Veja os arquivos recém-criados na pasta
modelsAPIDashboardlocalizada emlwc.
- No arquivo HTML,
modelsAPIDashboard.html, copie e cole o código a seguir.
<template>
    <div
        class="slds-var-m-around_medium slds-grid slds-grid_vertical slds-box slds-theme_default">
        <h1><font size="3"><b>Housing Market Dashboard</b></font>
        </h1>
        <!-- Chat messages container -->
        <div
        class="slds-scrollable_y"
        style="height: 440px"
        lwc:ref="chatContainer"
        >
            <!-- Iterate over each message in the messages array -->
            <template for:each={messages} for:item="message">
                <div key={message.id} class="slds-var-m-around_small">
                    <!-- If the message is from the assistant -->
                    <div class="custom-chat-message_inbound slds-var-p-around_small">
                        <div class="slds-chat-message__body">
                            <div class="slds-chat-message__text">{message.text}</div>
                        </div>
                    </div>
                </div>
            </template>
        </div>
    <!-- Loading indicator -->
    <template lwc:if={isLoading}>
        <div class="loading-container slds-var-m-around_small">
            <div class="loading-text">
                Analyzing data… One moment.
            </div>
        <div class="loading-indicator"></div>
        </div>
    </template>
        <!-- Send button -->
    <div class="slds-grid slds-grid_vertical-align-center send-button-container">
        <div class="slds-col slds-size_1-of-4">
            <lightning-button
            label="Analyze"
            variant="brand"
            onclick={handleSendMessage}
            disabled={isLoading}
            ></lightning-button>
        </div>
    </div>
    </div>
</template>- Salve o arquivo pressionando Ctrl+S no Windows ou Cmd+S no macOS.
- Clique com o botão direito do mouse na pasta
modelsAPIDashboarde selecione New File (Novo arquivo).
- Insira
modelsAPIDashboard.csscomo o nome do arquivo.
- No arquivo CSS,
modelsAPIDashboard.css, copie e cole o código a seguir.
.custom-chat-message_inbound {
    border-radius: 10px;
    max-width: 100%;
    background-color: #f3f2f2;
    align-self: flex-start;
}
.custom-chat-message_outbound {
  border-radius: 10px;
  max-width: 100%;
  background-color: #0070d2;
  color: white;
  align-self: flex-end;
}
.send-button-container {
  padding-top: 10px;
  padding-bottom: 1px;
}
.custom-textarea {
  width: 100%;
}
.loading-indicator {
  width: 50px;
  height: 25px;
  overflow: hidden;
  vertical-align: middle;
  position: relative;
}
.loading-indicator::after {
  content: "";
  display: inline-block;
  width: 50px;
  height: 50px;
  overflow: hidden;
  position: absolute;
  top: 50%;
  left: 50%;
  transform: translate(-50%, -50%);
  animation: loading 1s infinite steps(7);
}
@keyframes loading {
  0% {
    content: ".";
  }
  12.5% {
    content: "..";
  }
  25% {
    content: "...";
  }
  37.5% {
    content: ".....";
  }
  50% {
    content: "......";
  }
  62.5% {
    content: "........";
  }
  75% {
    content: "............";
  }
  87.5% {
    content: "";
  }
}- Salve o arquivo pressionando Ctrl+S no Windows ou Cmd+S no macOS.
- No arquivo JavaScript,
modelsAPIDashboard.js, copie e cole o código a seguir.
import { LightningElement, track } from "lwc";
import createChatGenerations from "@salesforce/apex/DashboardController.createChatGenerations";
export default class HousingMarket extends LightningElement {
  @track housingData = [];
  @track isLoading = false;
  @track error;
  @track messages = []; // Initialize messages
  connectedCallback() {
    this.fetchHousingMarketData();
  }
  // Get Housing Market Data
  fetchHousingMarketData() {
    this.isLoading = true;
    createChatGenerations()
      .then((result) => {
        console.log(result);
        this.error = undefined;
      })
      .catch((error) => {
        this.error = error;
        this.housingData = [];
      })
      .finally(() => {
        this.isLoading = false;
      });
  }
  // Handle analyze button click
  handleSendMessage() {
    this.isLoading = true; // Show loading indicator
    // Call Apex method to fetch chat response
    createChatGenerations()
      .then((result) => {
        const assistantMessageObj = {
          id: this.messages.length + 1,
          text: result,
          role: "assistant",
          isUser: false,
        };
        this.messages = [...this.messages, assistantMessageObj]; // Add assistant message to messages array
      })
      .catch((error) => {
        console.error("Error fetching bot response", JSON.stringify(error));
      })
      .finally(() => {
        this.isLoading = false; // Hide loading indicator
      });
  }
}- Salve o arquivo pressionando Ctrl+S no Windows ou Cmd+S no macOS.
Vamos disponibilizar nosso componente em várias páginas do Lightning Experience, adicionando esses destinos ao arquivo de metadados.
- No arquivo XML,
modelsAPIDashboard.js-meta.xml, copie e cole o código a seguir.
<?xml version="1.0" encoding="UTF-8"?>
<LightningComponentBundle xmlns="http://soap.sforce.com/2006/04/metadata">
    <apiVersion>61.0</apiVersion>
    <isExposed>true</isExposed>
    <targets>
        <target>lightning__AppPage</target>
        <target>lightning__HomePage</target>
        <target>lightning__RecordPage</target>
    </targets>
</LightningComponentBundle>- Salve o arquivo pressionando Ctrl+S no Windows ou Cmd+S no macOS.
Implantar em seu Playground de IA
- Clique com o botão direito do mouse na pasta
modelsAPIDashboardemlwc.
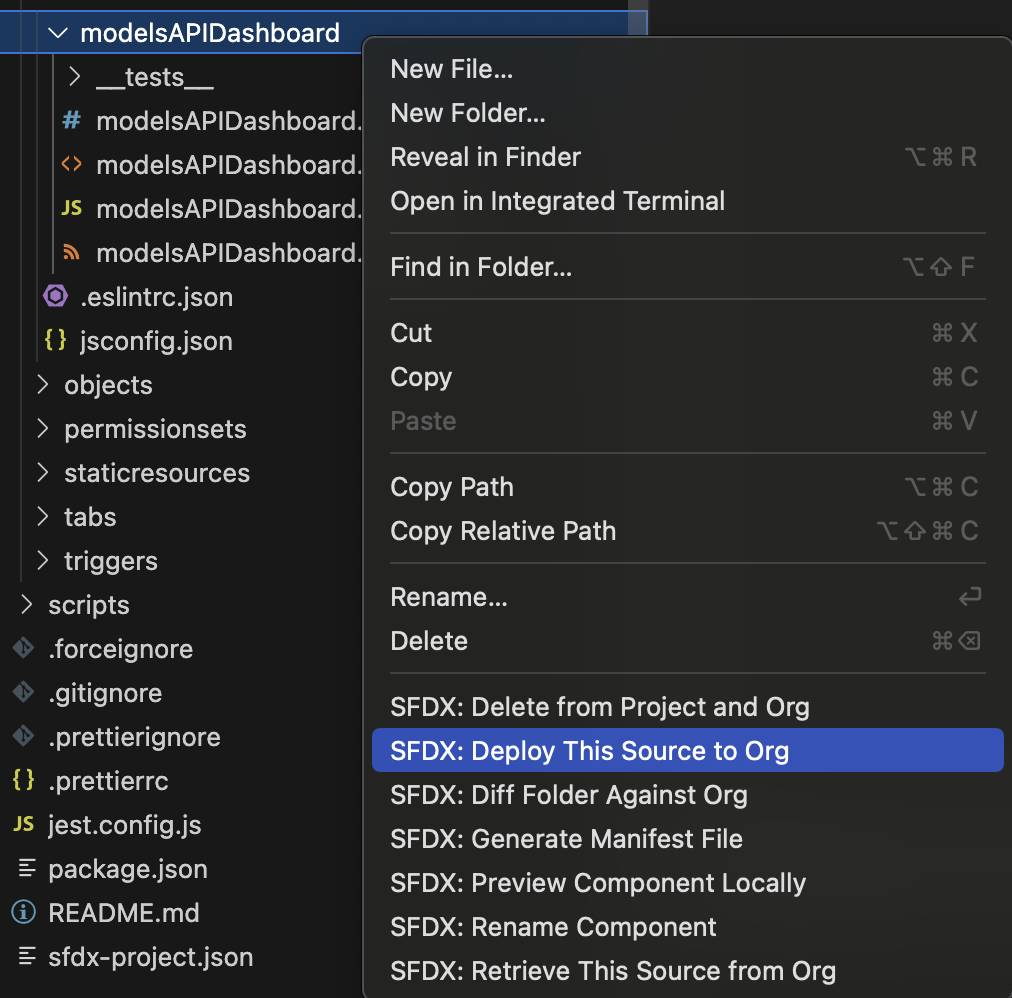
- Clique em SFDX: Deploy This Source to Org (SFDX: Implantar essa fonte na organização).
- Na guia Output (Saída) do terminal integrado, veja os resultados de sua implantação. Se o comando foi executado com sucesso, é exibida a mensagem Deployed Source (Fonte implantada) listando os quatro arquivos que foram carregados na organização.
Editar página no Criador de aplicativo Lightning
- No Visual Studio Code, abra a paleta de comandos ao pressionar Ctrl+Shift+P (Windows) ou Cmd+Shift+P (macOS).
- Digite
SFDX.
- Selecione SFDX: Open Default Org (Abrir organização padrão).
Seu AI Playground abre em um navegador separado.
- Clique no ícone de engrenagem (
 ) e selecione Setup (Configuração).
- Em Quick Find (Busca rápida), insira Home (Início) na seção Feature Settings (Configurações de recursos).
- Para Advanced Seller Home (Início avançado do vendedor), mude a configuração para Inactive (Inativo).
- No App Launcher (Iniciador de aplicativos) (
 ), pesquise e selecione Sales (Vendas).
- Clique no ícone de engrenagem (
 ) e selecione Edit Page (Editar página).
- Desça até a seção Custom (Personalizado) na parte inferior da lista de componentes.
- Arraste o componente Web do Lightning modelsAPIDashboard da área Custom (Personalizado) da lista Lightning Components (Componentes do Lightning) para a parte de cima da tela de página.
- Clique em Save (Salvar).
- Clique em Ativar.
- Clique em Assign as Org Default (Atribuir como padrão da organização).
- Clique em Save (Salvar).
- Clique em Save (Salvar) novamente e, em seguida, clique no botão de seta para trás (
 ) para retornar à página.
- Atualize a página para visualizar seu novo componente.
Parabéns por ter criado seu primeiro componente Web do Lightning para API de modelos!
Agora, a DreamHouse Realty tem um componente de painel diretamente na Página inicial de vendas. Com este painel, a equipe de vendas pode se manter a par das tendências atuais do mercado imobiliário e compreender melhor as necessidades dos compradores de imóveis. Esse exemplo de componente é muito simplista, mas com essa implementação você pode ver como é vantajoso usar a API de modelos para combinar seus casos de uso de negócios com IA generativa.