Create Transaction Security Policies
Learning Objectives
After completing this unit, you’ll be able to:
- Enable Transaction Security.
- Use Condition Builder to define, edit, enable, and disable your own policies.
Follow Along with Trail Together
Want to follow along with an expert as you work through this step? Take a look at this video, part of the Trail Together series.
(This clip starts at the 8:57 minute mark, in case you want to rewind and watch the beginning of the step again.)
Enable Transaction Security
Now that you know what Transaction Security is, let’s get started using it. First, you need to enable Transaction Security in your Trailhead playground.
From Setup, in the Quick Find box, type Transaction Security, and click Transaction Security Policies.
If you’ve never visited this page before, click Enable next to Get Started With Transaction Security.

Congratulations! Transaction Security is now ready to use in your org.
Create a Policy
Now that you’ve enabled Transaction Security, it’s time to learn how to use it. Policies can be built entirely with clicks, though Apex classes are needed for custom use cases. Let’s start with a simple example: preventing a large data export. For this use case, we’ll use Condition Builder to create the policy with just clicks.
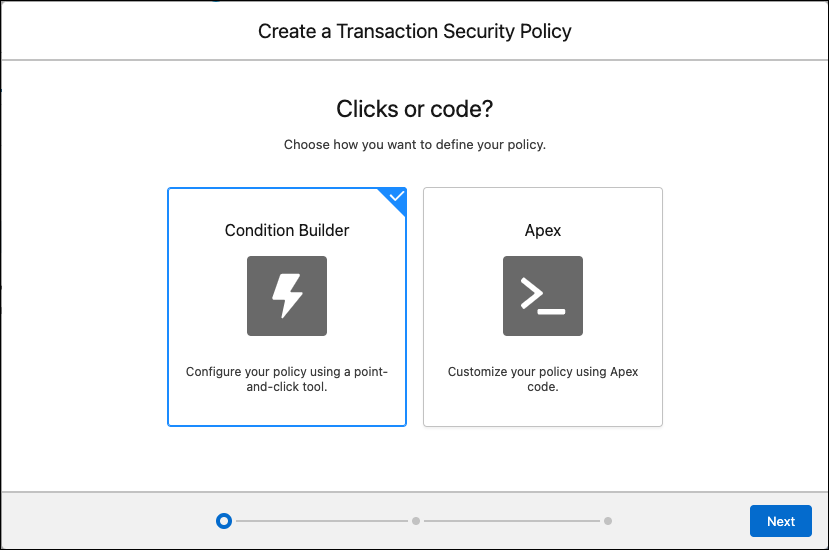
From the main Transaction Security Policies page, click New and then Condition Builder.

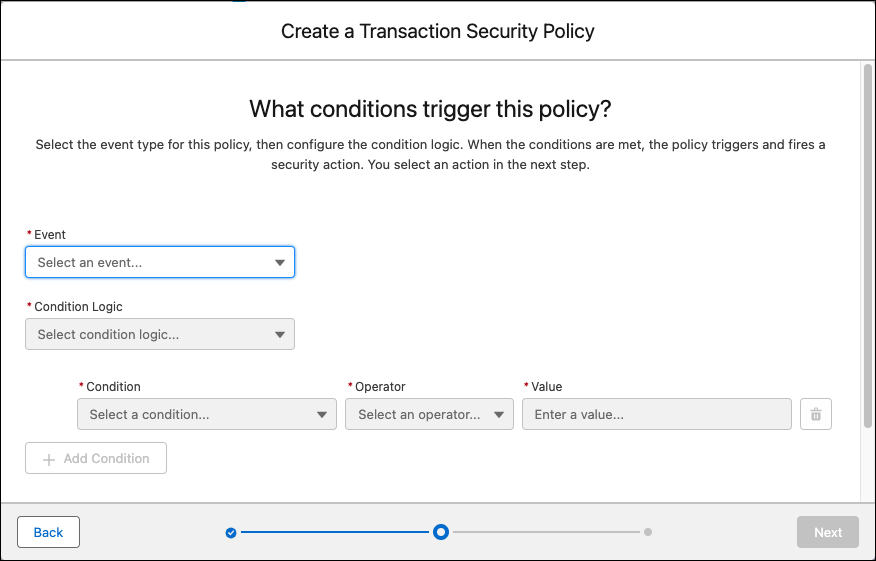
Then click Next. The page to define your policy conditions appears.

Let’s say you want to create a Transaction Security policy that limits the number of records someone can export from a report at one time.
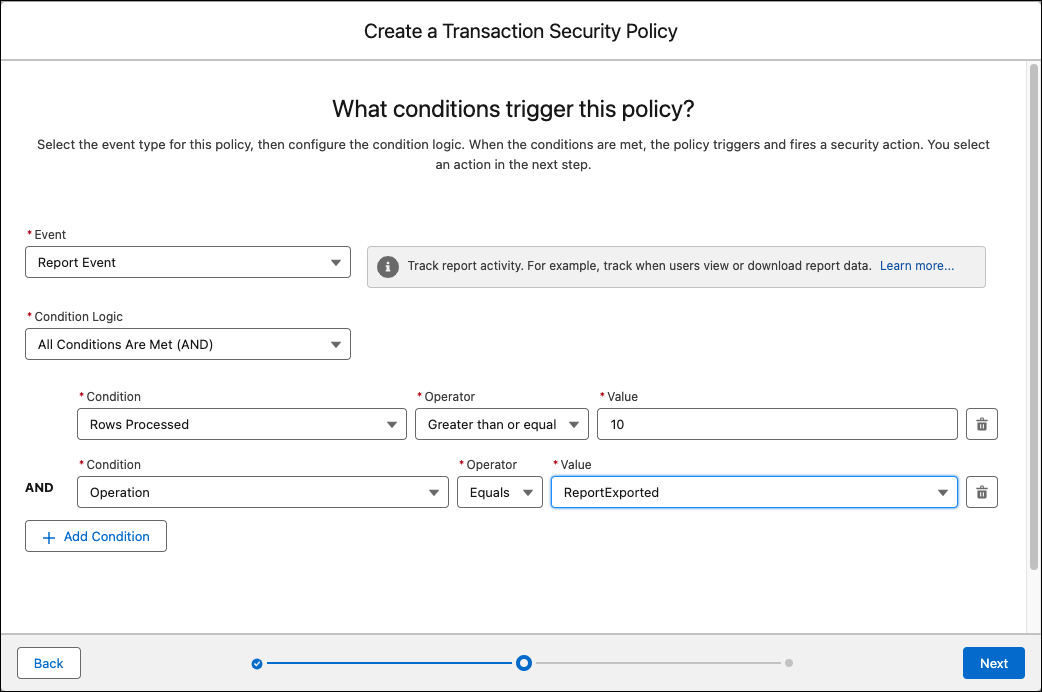
- In the Event field, select Report Event.
- In the Condition Logic field, select All Conditions Are Met.
- In the Condition field, select Rows Processed.
- In the Operator field, select Greater than or equal.
- In the Value field, type 10.
- Now add a second condition by clicking the Add Condition button.
- In the Condition field, select Operation.
- In the Operator field, select Equals.
- In the Value field, select ReportExported.

- Click Next.
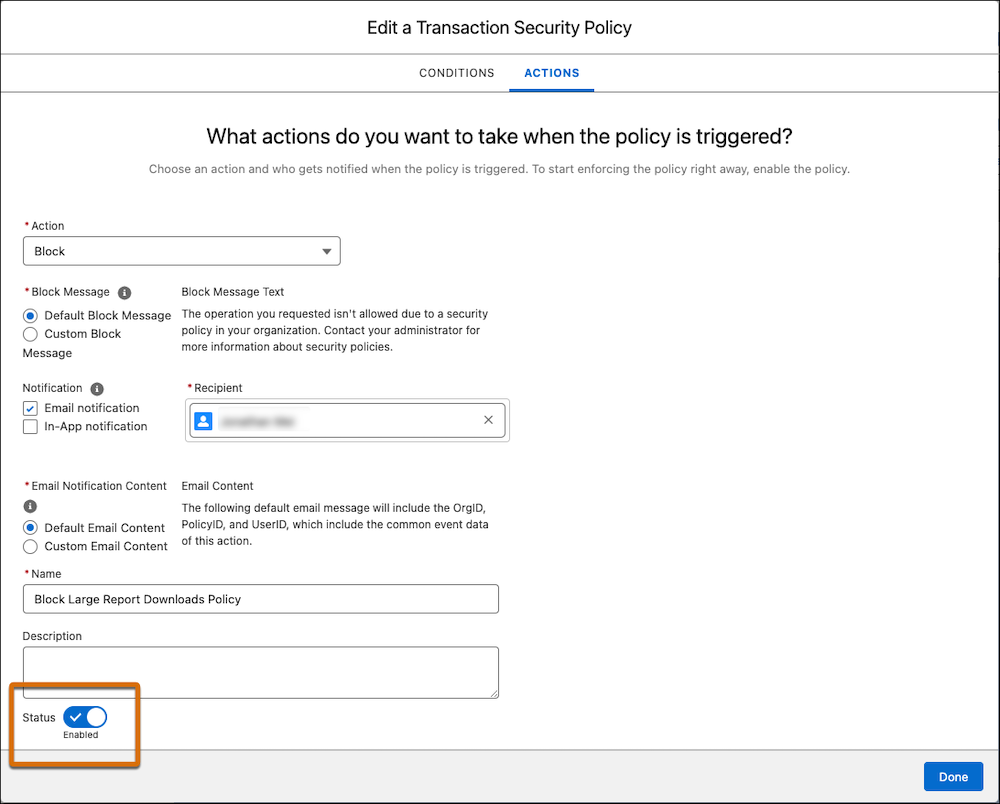
- For the real-time action, select Block, because you want to block users who try to download too many records at a time.
- In the Block Message section, leave Default Block Message selected.
- Select Email notification, and select a user as the recipient. The selected user will receive an email every time a user attempts to download too many records.
- In the Email Notification Content section, leave Default Email Content selected.
- Name the policy Block Large Report Downloads Policy.
- Don’t enable the policy just yet—you’ll do that later. Your page should now look like this:

- Click Finish.
Your policy has been added to the list of available policies.
Edit a Policy
Now let’s say you want to change the conditions in your Transaction Security policy. Editing a policy to change the conditions, notification, action, or most anything else is simple.
- From the dropdown next to the Block Large Report Downloads Policy, select Edit.
- Notice that the current conditions block a report download when 10 or more rows are exported.
IT has asked you to now block a report when 1,000 or more rows are exported, so let’s update this policy accordingly.
- Navigate to the Rows Processed condition. In the Value field, enter 1000.

- Click Save then Done.
Enable Your Policy
After you create your policy, you need to enable it so it works in your org.
- From the dropdown next to the Block Large Report Downloads Policy, select Edit. Notice that you can also enable a policy in this dropdown.
- Click the Actions tab.
- At the bottom of the page, click the Status toggle switch so that it’s enabled.

- Click Save then Done.
Nice work! Now the policy is enabled.
Resources
