Set Up the Customer Lifecycle Analytics App
Learning Objectives
After completing this unit, you’ll be able to:
- Understand the data requirements for the Customer Lifecycle Analytics app.
- Create and share the app.
- Decide data import frequency for the app.
- Understand how to configure scorecards.
Check Data Requirements
Before she can create apps using the Customer Lifecycle Analytics template, Maria must ensure that there are enough records in her org. She learns that the data requirements are minimal. With Ursa Major Solar already using Salesforce Survey to run all their surveys, their org already meets the data requirements.
To meet data requirements, each org must have at least one record of each of these objects.
- Survey
- SurveyQuestion
- SurveyQuestionChoice
- SurveyQuestionResponse
- SurveyVersion
- SurveyInvitation
- SurveySubject
- Account
Create the App
Maria is all set to create Ursa Major Solar’s first app using the Customer Lifecycle Analytics template.
- From the App Launcher, find and select Analytics Studio.
- Click Create, and select App.
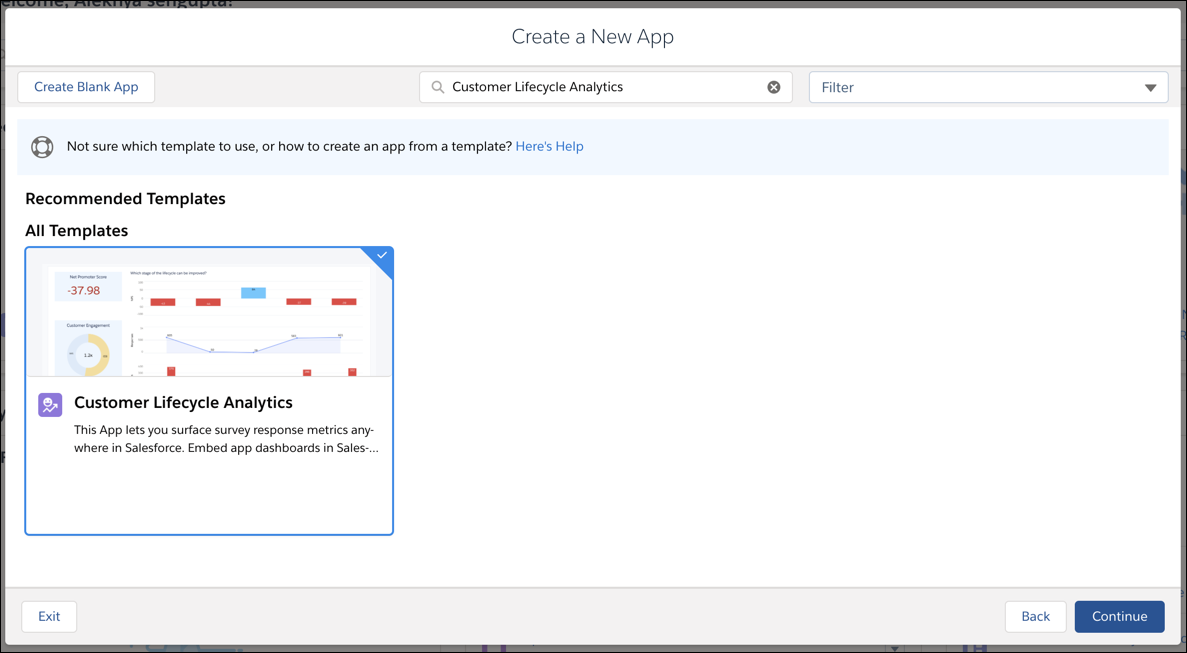
- Search and select Customer Lifecycle Analytics.
- Click Continue.
- Get an overview of what the app contains, and click Continue.
- Select Create a brand new app, and click Continue.
On the next page, a check ensures that there is sufficient data in the org to an app using Customer Lifecycle Analytics.
- Click Looks good, next.
- Select the following options:
- Would you like to add customer lifecycle maps to your app?: No
Maria doesn’t add customer lifecycle maps because Ursa Major Solar currently doesn’t use Customer Lifecycle Maps. To add Customer Lifecycle Maps to your app, your org needs the Salesforce Feedback Management license.
- Select objects associated with survey invitations.: None
Maria doesn’t select any of the objects because Ursa Major Solar wants to only use invitations associated with Cases, Contacts, and Users. These datasets are added to the app by default.
- Would you like to add the pre-configured Einstein Discovery story to your app?: Yes
This adds Einstein Discovery to the app. Einstein Discovery provides intelligent suggestions on how to improve survey response rates. A participant’s probability of responding to a survey depends on the context of the survey. Einstein uses data from records associated with the survey invitation to predict suggestions.
- Click Looks good, next.
- Name your app:
Survey Response Insights.
- Click Create.
Now Maria sits back and relaxes—it takes a few minutes to create the app. Once it’s created, she refreshes the page to view the shiny new app.
Share the App
Now that the Customer Lifecycle Analytics app is ready, Maria shares it with her teammates. She provides user access to Shinje.
- From the App Launcher, find and select Analytics Studio.
- Search for
Survey Response Insightsand select it.
- Click
 .
.
- On the Invite others section, add Shinje Tashi as Viewer.
- Click Save.
Keep Data Flowing In
Maria must also decide the frequency with which the org’s data is imported into the Customer Lifecycle App. Since Ursa Major Solar sends out invitations and receives responses every day, Maria decides to import data daily.
- From the App Launcher, find and select Analytics Studio.
- Click
 and select Data Manager.
- Click Dataflows & Recipes.
- Search for
Survey Response Insights Analytics for Customer Experience.
- Click
 beside Survey Response Insights Analytics for Customer Experience.
- Select Schedule.
- Make the following selections.
Field
Selection
Schedule Mode
Time-Based
Schedule by
Hour
Start at
12:00 am
Run every
24 hours
Days of the week
Every day
- The schedule should look like this:

- Click Save.
Add the Scorecard to Record Pages
Remember, Ursa Major Solar decided to use Customer Lifecycle Analytics because it would allow them to view customer satisfaction scores after a case is closed and the Net Promoter Score of each customer. They also wanted to review the satisfaction scores of its sales reps. Maria uses the Lightning App Builder to add the required scorecards to the Case record pages, Contact record pages, and the User record pages.
Add the Scorecard to Case Record Pages
Maria adds the scorecard on Case records. The scorecard displays the customer satisfaction score on the closure of a case to Case records.
- From the App Launcher, find and select Cases.
- Click on the Issues with Solar Panel Installation case.
- Click
 and select Edit Page.
- Drag the CRM Analytics Dashboard component on to the page.
- On the right panel, select the Case CSAT dashboard.
- Switch to the Filter String.
- Enter the following filter:
{'datasets':{'Cases':[{'fields':['Id'], 'filter':{'operator': 'matches', 'values':['$Id']}}], 'SurveyQuestionResponsewithDetails':[{'fields':['SurveyVersion.Survey.Name'],'filter':{'operator':'in','values':["Customer Satisfaction"]}},{'fields':['Question.Name'],'filter':{'operator':'in','values':["How would you rate our service"]}}]}}.
The filter contains the following details: the API name of the dataset version that contains the object details, the API name of the dataset version that contains the response details, the name and version of the survey that was sent to the customer after the case is closed, and the name of the question that gathers the customer’s satisfaction score.
- Complete the following for each field:
Fields |
Action |
|---|---|
Show Sharing Icon |
Deselect |
Show Title |
Deselect |
Show Header |
Deselect |
Open Links in New Windows |
Deselect |
Open Dashboard |
in Analytics Studio |
Hide on Error |
Select |
It should look like this:

- Click Save.
- Click Activate.
- On the Org Default tab, click Assign as Org Default.
- Select Desktop and Phone, and click Next.
- Click Save.
Add Scorecard to Contact Record Pages
Next Maria adds the scorecard that displays the NPS of each customer to Contact records.
- From the App Launcher, find and select Contacts.
- Click the record of Linda Rosenberg.
- Click
 and select Edit Page.
- Drag the CRM Analytics Dashboard component on to the page.
- On the right panel, select the Contact NPS dashboard.
- Switch to the Filter String.
- Enter the following filter:
{"datasets":{"Contacts ":[{"fields":["Id"],"filter":{"operator":"in","values":["$Id"]}}], "SurveyQuestionResponsewithDetails":[{"fields":["SurveyVersion.Survey.Name"],"filter":{"operator":"in","values":["Employee Satisfaction"]}},{"fields":["Question.Name"],"filter":{"operator":"in","values":["How satisfied are you at your current role?"]}}]}}.
- Complete the following for each field:
Fields
Action
Show Sharing Icon
Deselect
Show Title
Deselect
Show Header
Deselect
Open Links in New Windows
Deselect
Open Dashboard
in Analytics Studio
Hide on Error
Select
- Click Save.
- Click Activate.
- On the Org Default tab, click Move to the App Default tab, and select Assign as Org Default.
- Select Desktop and Phone, and click Next.
- Click Save.
Add Scorecard to User Record Pages
Users in a Salesforce org are listed as people. Each user has their own People record. All of Ursa Major Solar’s employees are users in Ursa Major Solar’s Salesforce org. Maria needs to add the scorecard to the People records.
- From the App Launcher, find and select People.
- Click the record of Maria Jimenez.
- Click
 and select Edit Page.
- Drag the CRM Analytics Dashboard component on to the page.
- On the right panel, select the User CSAT dashboard.
- Switch to the Filter String.
- Enter the following filter:
{"datasets":{"Users ":[{"fields":["Id"],"filter":{"operator":"in","values":["$Id"]}}], "SurveyResponseWithDetails":[{"fields":["SurveyVersion.Survey.Name"],"filter":{"operator":"in","values":["Net Promoter Score"]}},{"fields":["Question.Name"],"filter":{"operator":"in","values":["How likely are you to recommend our service to a friend or colleague?"]}}]}}.
- Complete the following for each field:
Fields
Action
Show Sharing Icon
Deselect
Show Title
Deselect
Show Header
Deselect
Open Dashboard
in Analytics Studio
Open Links in New Windows
Deselect
- Click Save.
- Click Activate.
- On the Org Default tab, click Move to the App Default tab, and select Assign as Org Default.
- Select Desktop and Phone, and click Next.
- Click Save.
Create and Set Up App: Check
That’s one more thing off Maria’s checklist. She created the Survey Response Insights app, including the scorecard for cases. Next, she walks Shinje through the app, the key dashboards that Ursa Major Solar will be using, and the Case scorecard.
Resources
- Trailhead: Lightning App Builder
- Trailhead: Embed a CRM Analytics Dashboard in Lightning Experience
- Salesforce Help: Create and Share an App from the Customer Lifecycle Analytics Template
- Salesforce Help: Schedule the Dataflow for the App
- Salesforce Help: Configure Feedback Scorecards
- Salesforce Help: Embed Customer Lifecycle Analytics Dashboards in Lightning Pages