Connect and Modify Your Sales Data
Learning Objectives
After completing this unit, you’ll be able to:
- Connect to data in a spreadsheet.
- Modify the metadata.
- Save the modified worksheet for future analysis.
Now that you have learned how to connect to, edit, and save a data source, you’re ready to go through these steps yourself. In the following simulation, you connect to your company’s data source, make some changes to the metadata, and save the data source for later use.
Trailhead Simulator
For the best experience, view the Trailhead Simulator on a computer, not a mobile device. Trailhead Simulator is different from a Trailhead Playground. The simulator doesn’t store your progress or any data you enter. If you close your browser, you start from the beginning of the simulation again. You can always use the navigation controls at the bottom of the simulator to get back to where you left off.
![]()
| Navigation Controls | Description |
| (1) Left Arrow | Go backward in the simulator. |
| (2) Right Arrow | Go forward in the simulator. |
| (3) Scrub Bar | View your progress, plus you can use the progress arrow to quickly move to a different location within the simulator. |
| (4) Close Button | Exit the simulator. Remember that if you close the simulator, you start from the beginning the next time you launch it. |
When you click in the wrong spot, highlighting shows you where to click.

Now you’re ready to practice what you’ve just learned.
Connect to a Data Source
Connect to your company data, which is stored in the Orders.xls file.
- Launch the Trailhead Simulator.
- Click Connect to a Data Source.
- Click Begin.
- In the Connect pane, under To a file, click Microsoft Excel.
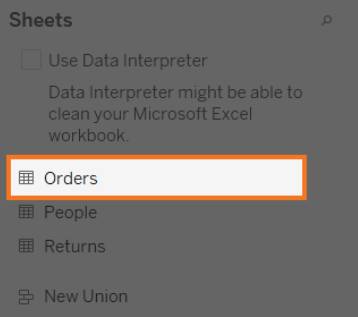
- In the Open dialog box, the Orders.xls file is already selected. Click Open.
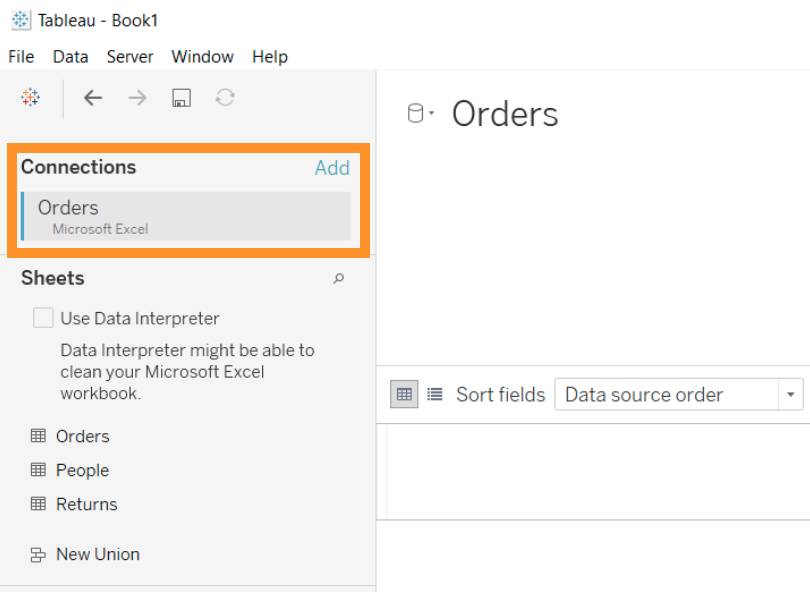
 The new data source now appears under Connections at the top of the worksheet.
 - Click Next Exercise to continue to the next exercise.
Rename and Load Data
Rename the data connection to My CompanyOrders Data and load the Orders worksheet data into Tableau.
- Ensure you’re in the Rename and Load Data simulation. If you’re not there yet, launch the Trailhead Simulator and click Rename and Load Data.
- Click Begin.
- In the top left of the data source page, right-click (PC) or control-click (Mac) the data connection Orders, and then select Rename.
- Type
MyCompanyOrders, and press enter (PC) or return (Mac) on your keyboard. - Under Sheets, double-click Orders to move the table to the area that says Drag tables here. You renamed the data connection and loaded the data in the Orders table. The data source area now displays the new name.
- Click Next Exercise to continue to the next exercise.
Edit a Data Source
Using the metadata grid, change field names to make the data more understandable.
- Ensure you’re in the Edit a Data Source simulation. If you’re not there yet, launch the Trailhead Simulator and click Edit a Data Source.
- Click Begin.
- Click
 to open the metadata grid. The Preview data source button also allows you to change field names, but the metadata grid uses a list view that is more helpful at this stage.
 - Click the dropdown arrow next to Row, and click Rename.
- Enter
Row ID, then press enter (PC) or return (Mac) on your keyboard. - Click the dropdown arrow next to Global Area and click Rename.
- Enter
Country, then press enter (PC) or return (Mac) on your keyboard. - Click Sheet 1 to see the new field names. You made several changes to the field names in your metadata. Next, you save the changes you made to the metadata.
- Click Next Exercise.
Save the Data Source
Now that you have made the necessary changes, the next step is to save the data source as a .tds file so that you can use it for future analysis work.
- Ensure you’re in the Save the Data Source simulation. If you’re not there yet, launch the Trailhead Simulator and click Save the Data Source.
- Click Begin.
- Within the worksheet, right-click or control-click the data connection Orders.
- Then click Add to Saved Data Sources.
- Enter
MyCompanyOrdersas the filename and press enter or return. - Click
 at the top right to close Tableau Desktop.
 - Click No when prompted to save changes.
- When you open Tableau again and look under Saved Data Sources, you see your saved data source MyCompanyOrders. Click to open it.
- Now, view the new field Country. Click the scroll bar to see the renamed field RowID.
- Click Home to restart the activity or Exit to continue.
Great job! You’ve walked through connecting to your company’s sales data, made changes to the fields to make them more meaningful for your analysis, and then saved it for future use. It is also ready for you to share with your colleagues so that they can dive right into analysis.