Configure Checkout
Learning Objectives
After completing this unit, you’ll be able to:
- Identify the high-level tasks required to set up Checkout.
- Describe coupon configuration options.
- Explain how Checkout supports value-added tax (VAT).
Set Up Checkout
We designed Checkout with simplicity in mind. In the Partner Console, you can:
- Upload managed packages that contains your solution on the Technologies tab.
- Start your listing on the Listings tab.
- Set up and maintain Checkout on your listing’s Set Pricing step.
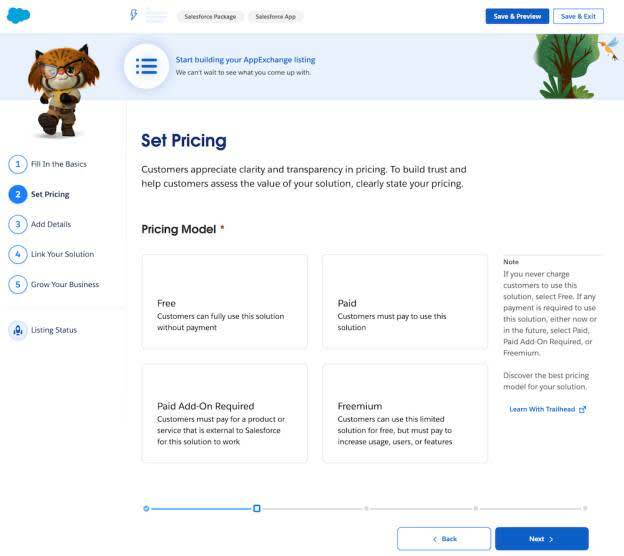
Winablement Corp. is ready to set up Checkout for its solution. Winablement's admin, Norman, logs in to the Partner Console to edit an existing listing. He created the listing several months ago, so he first confirms that he already uploaded the managed package. To enable Checkout on this listing, he navigates to the Set Pricing step. Then he completes the following steps.
-
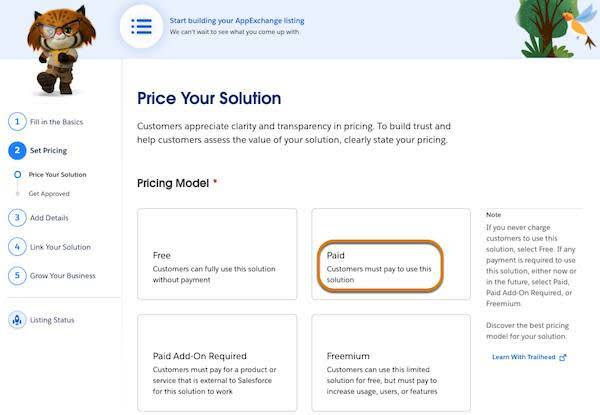
Select your Pricing Model. Click Paid.
-
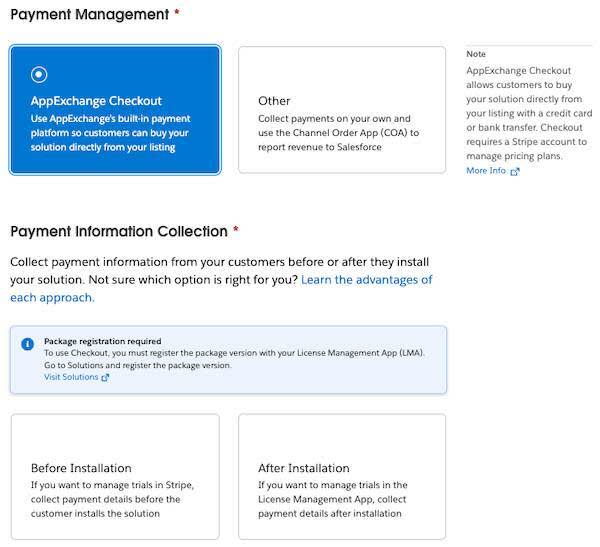
Choose your Payment Management system. Click AgentExchange Checkout.
-
Choose your Payment Information Collection type. How do you want to manage your listing’s trials?
- To manage trials using Stripe and have your customers enter payment information before they can install your app, select Before Installation.
- To manage trials using the License Management App (LMA) and have your customers enter payment information after they’ve had the chance to try your app for free, select After Installation.

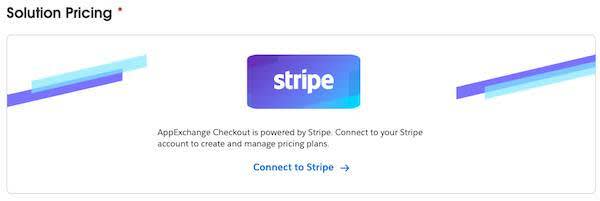
4. Connect to your Stripe account. Click Connect to Stripe. If you don’t already have a Stripe account, create one then connect it to the Partner Console. Don’t forget to add your business bank account to your Stripe account.
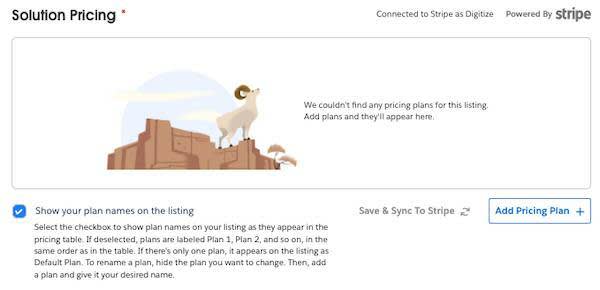
5. Create your listing’s pricing plans. Click Add Pricing Plan. Add as many as plans your listing needs. To prevent disruptions to existing solutions, pricing plans can’t be deleted. Instead, hide pricing plans that you don’t plan to use going forward.
6. Set Trial Lengths.
- If you selected Before Installation for your payment information collection method, you must set a Trial Length on each pricing plan you create. These trial periods are managed by Stripe.
- If selected After Installation, use the LMA to manage the pricing plan trial periods. The trial period is managed in LMA.

7. Connect your listing’s pricing plans to Stripe. If you’re using Stripe to manage payments, connect your plans with Stripe, by clicking Save & Sync to Stripe.
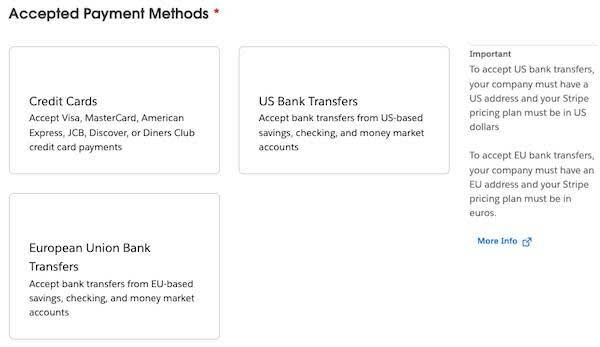
8. Select Accepted Payment Methods: Choose Credit Cards, US Bank Transfers, or European Union Bank Transfers.
That covers the high-level setup tasks. Next, let’s explore other important Checkout features.
Offer Flexible Pricing with Coupons
As you market and sell your AgentExchange solution, you sometimes discover that one price does not fit all customers or all occasions. You need a way to offer flexible pricing, such as a discount for customers buying 100 or more licenses. Coupons are a simple way to adjust the amount you charge your customers. You can set up coupons in Stripe and use them to custom-price your solutions.
Here are the kinds of coupons available.
-
Invoice: You can apply these coupons to every invoice or to only the ones you select.
-
Duration: These coupons are valid for a certain time period, such as 3 months, or you can set them up to expire on a specific date.
-
Amount: With these coupons, you can reduce a customer’s invoice by a percentage or by a flat amount.
-
Subscription: You can apply these coupons to every subscription a customer has or to a subset of subscriptions.
-
Customer: These coupons are valid for all of your customers or for a subset of customers.
-
Reuse: Customers can use these coupons more than once, up to a maximum number of times that you can set.
You can create a coupon based on one option or on a combination of options.
Winablement Corp. is about to launch a new version of its app. Daniela, the marketing director, wants a combo coupon in time for the launch to encourage existing customers to upgrade. She asks Norman, Winablement’s Salesforce admin, to create one. At Daniela’s request, Norman sets up the coupon so that existing customers who upgrade can redeem the coupon to get a 15% discount for the first 3 months of their subscription.

After 2 months, Winablement is ready to end the promotion. Norman logs in to Stripe and gets ready to delete the coupon. But then he has a moment of uncertainty. What happens to customers currently receiving the discount? What if a customer has 1 month left on its 3-month discount? Norman can breathe a sigh of relief: Deleting a coupon means it can’t be redeemed for future subscriptions or customers. But the discount remains in effect for customers who already redeemed the coupon.
Collect Taxes
Part of managing your online business is knowing how to properly handle taxes such as the value-added tax (VAT) and US sales tax.
VAT Collection
If your company is required to collect VAT, you can provide your VAT ID in the Partner Console.
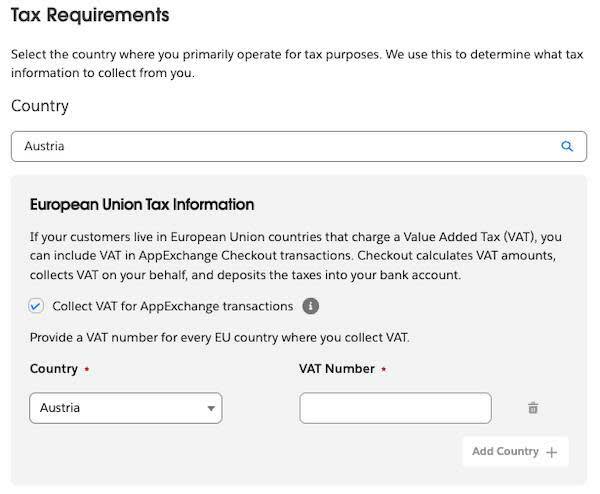
- In the Partner Console on your listing in Set Pricing, scroll to Tax Requirements.
- Choose your country.
- Click Collect VAT for AgentExchange transactions, and provide your VAT Number.
Checkout uses that information and your company’s location to calculate VAT amounts. Checkout adds those amounts to customer invoices for subscription plan payments. VAT isn’t supported for one-time payments.
Checkout collects VAT on your behalf and deposits the taxes into your bank account. Your company is still responsible for VAT registration, maintaining required data, and distributing the taxes to tax authorities. We can’t take any of those responsibilities off your plate, but Checkout makes VAT calculation and collection significantly easier.
US Sales Tax Collection
Checkout automatically collects US sales tax from customers whose shipping address is in a US state or local jurisdiction that imposes sales tax, and whose purchases aren’t tax exempt. Salesforce also remits the collected taxes to local authorities. Sales tax amounts appear on the Checkout screens and on invoices for one-time and subscription plan payments.
Payment Error Handling
Handling online payments is fast and easy—most of the time. Occasionally things go awry and customer payments fail. Checkout can help you enact your plan for gracefully handling payment errors.
That’s because Checkout alerts you when a payment fails. For credit card payments, notification is immediate. It can take up to 5 business days for ACH payments to fail, and up to 14 business days for SEPA payments. If you find out a payment failed, let your customer know immediately. The sooner they know, the sooner they can correct any issues on their end.
If you use the CMA, you can configure it to send an email notification to your customer when a payment fails. Make sure that the email includes a link to where the customer can update their payment information.
How Checkout Works with the LMA
Checkout is integrated with the LMA to fully automate licensing. You read that right—fully automated licensing. When customers purchase your Checkout-enabled AgentExchange solution, they get the license to run the solution. You never have to update license settings manually. Even when customers buy, upgrade, renew, or make other subscription changes, Checkout automatically updates their licenses in the LMA. Makes you want to do your happy dance, doesn’t it? Yeah, us too.
For new purchases, when a customer installs your solution, the LMA creates a license record in your partner business org. If the customer uses the My Account page in AgentExchange to update a subscription, the LMA updates the license record. You can view the update on the Stripe website or in the CMA.
What if you have a forgetful moment and inadvertently add a customer to a plan using the Stripe website? AgentExchange can’t associate the customer with your solution or provision licenses through the LMA.
To keep Checkout and the LMA in sync, customers must purchase your solution on AgentExchange, and your solution has to be Checkout enabled. That’s how AgentExchange knows to associate the customer with your solution. The customer must also submit changes, such as adding or removing seats, in AgentExchange.
Similarly, never modify your customers' licenses on the Stripe website because Stripe changes don’t sync to Checkout or the LMA. If you must edit licenses on behalf of your customer, and the license hasn’t been provisioned, make the updates in the LMA using the instructions in Modify a License Record. If the license is provisioned, only the customer can modify it using the instructions in Add or Remove Licenses from an AgentExchange Checkout Subscription.
There is one exception—switching customers to different subscription plans. To keep the LMA in sync with Checkout, you must switch customers’ subscriptions in Stripe. The switch takes effect at the start of the next billing period. If you want the switch to take effect immediately, cancel the current plan in Stripe and ask the customer to purchase the new plan from your AgentExchange listing.
So, stick to these rules and keep on dancing.